1.Configuring QT in Buildroot
1.Open the configuration interface.
./build.sh buildroot-config 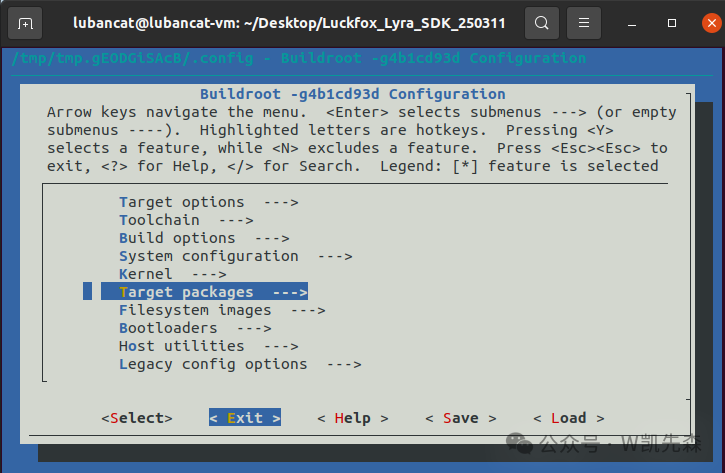
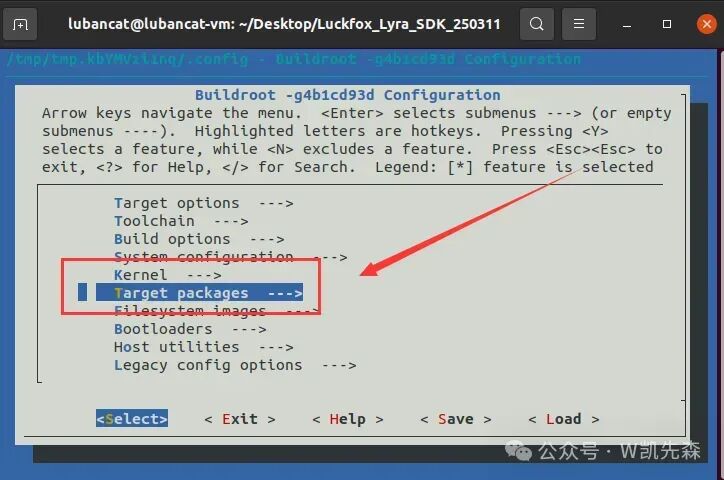
2.Use the arrow keys ↑↓ to navigate and select Target packages
Press Enter to enter
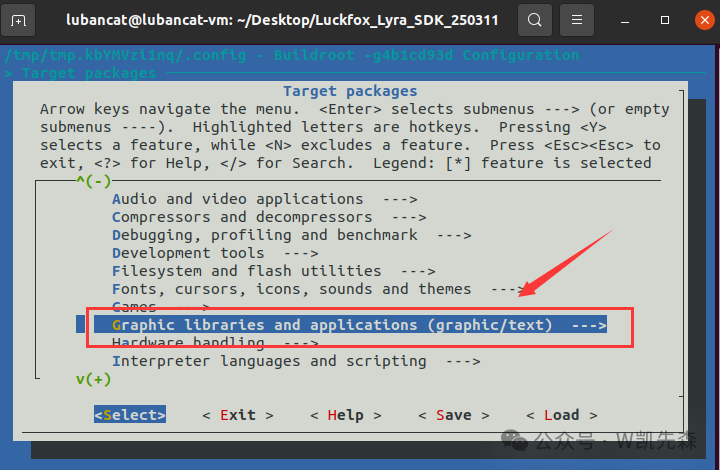
3.Use the arrow keys ↑↓ to navigate and select Graphic libraries and applications (graphic/text)
Press Enter to enter
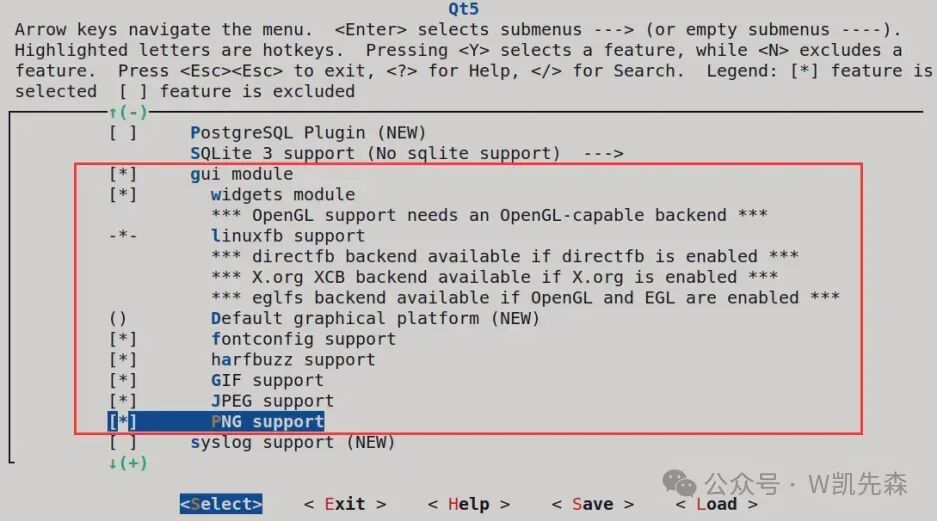
4.After entering, use the arrow keys ↑↓ to find Qt5, press the y key on the keyboard to select it, and when the [] symbol appears in front, you can press Enter to enter.

5.After entering, modify the contents to match the image below.
[*] Qt5 ---> [*] gui module [*] widgets module [*] fontconfig support [*] GIF support [*] JPEG support [*] PNG support [*] syslog support [*] Enable Tslib support [*] qt5serialport [*] qt5virtualkeyboard (en_GB) language layouts- Qt5: Select to compile the Qt5 library.
- gui module: Select to compile the GUI module of Qt5.
- widgets module: Select to compile the Widgets module of Qt5.
- fontconfig support: Fontconfig is a library for configuring and customizing fonts, providing a unified way to manage installed fonts on the system. Enabling this option allows the Qt5 library to use Fontconfig at runtime to manage fonts, improving font configuration and rendering support.
- GIF support: Enable support for the GIF image format.
- JPEG support: Enable support for the JPEG image format.
- PNG support: Enable support for the PNG image format.
- syslog support: Enable system log support.
- Enable Tslib support: Enable support for Tslib, an abstraction library for touchscreen devices.
- qt5serialport: Select to compile the serial communication module of Qt5.
- qt5virtualkeyboard: Select to compile the virtual keyboard module of Qt5.
- (en_GB) language layouts: Select British English as the default language layout.
Select save on the right to save
Recompile according to the tutorial, no further explanation here~. For flashing, I recommend using Linux directly, as I had issues using an image with flashing software, but it worked successfully with Linux~
2.Create a Qt Project for Testing (PC Ubuntu 22.04 Environment)
1. Install Related Qt
1. Download the Qt installation package:
- Official download:https://download.qt.io/archive/qt/5.12/5.12.9/
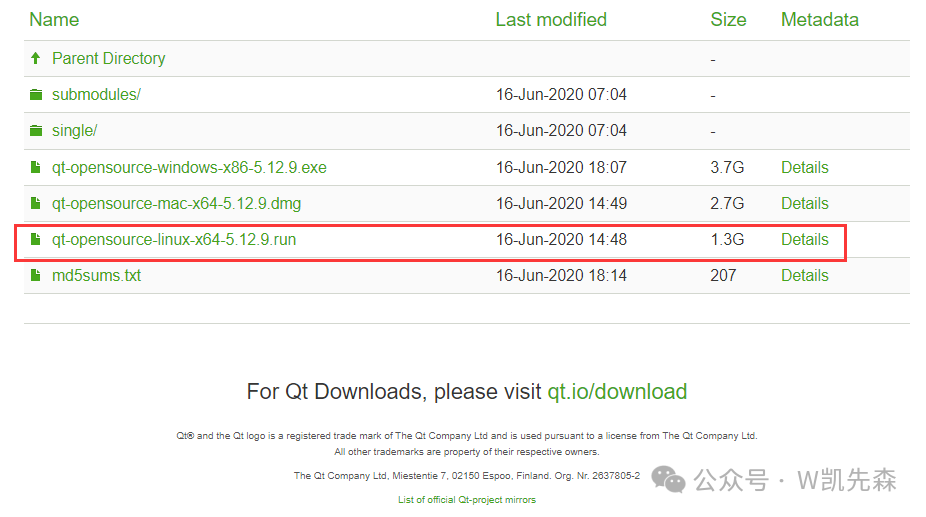
- If the official website is inaccessible, you can download from the cloud:
|
Baido Cloud |
Download |
|
Google Drive |
Download |
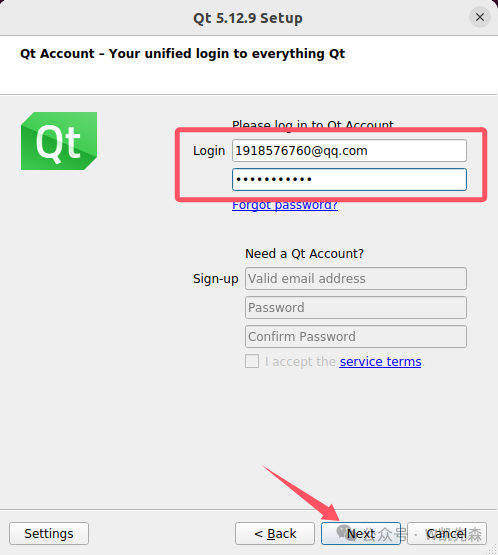
2. Registering a QT account is very simple, just log in to the QT official website and fill in your email to complete the registration, no further details here.
https://login.qt.io/login3. Transfer the downloaded installation package to the Ubuntu host or virtual machine. If you have not registered a Qt login account, you can disconnect the network to install and skip the account login.
chmod +x qt-opensource-linux-x64-5.12.9
./qt-opensource-linux-x64-5.12.9
4. Installation process:
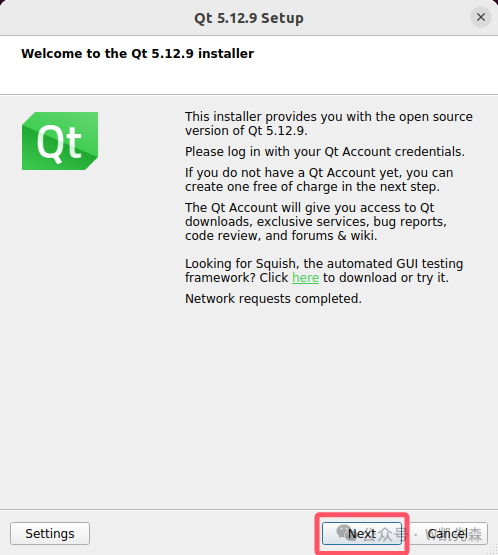
5. Complete installation process:
This is based on the official tutorial from luckfox
2. qmake Related Configuration
1. Create a file qt.conf in the qmake directory
cd /SDK目录/buildroot/output/rockchip_rk3506_luckfox/build/qt5base-da6e958319e95fe564d3b30c931492dd666bfaff/qmake
cp ~/Qt5.12.9/5.12.9/gcc_64/bin/qt.conf .

vim qt.conf
#只要下面两行即可
[Paths]
Prefix=..
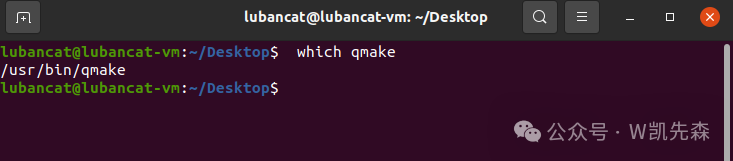
2. Regenerate the qmake soft link path
sudo apt install qtchooser -y
lubancat@lubancat-vm:~/Desktop$  which qmake
usr/bin/qmake

lubancat@lubancat-vm:~/Desktop$ sudo rm /usr/bin/qmake
lubancat@lubancat-vm:~/Desktop$ sudo ln -s /home/lubancat/Desktop/Luckfox_Lyra_SDK_250311/buildroot/output/rockchip_rk3506_luckfox/build/qt5base-da6e958319e95fe564d3b30c931492dd666bfaff/qmake/qmake /usr/bin/qmake
3. Configure environment variables
vim ~/.bashrc
#末尾加入
export PATH=/home/lubancat/Desktop/Luckfox_Lyra_SDK_250311/buildroot/output/rockchip_rk3506_luckfox/host/arm-buildroot-linux-gnueabihf/lib:$PATH

source ~/.bashrc4.Check the qmake version:
lubancat@lubancat-vm:~/Desktop$ qmake -v
QMake version 3.1
Using Qt version 5.15.11 in /home/lubancat/Desktop/Luckfox_Lyra_SDK_250311/buildroot/output/rockchip_rk3506_luckfox/host/arm-buildroot-linux-gnueabihf/sysroot/home/usr/lib
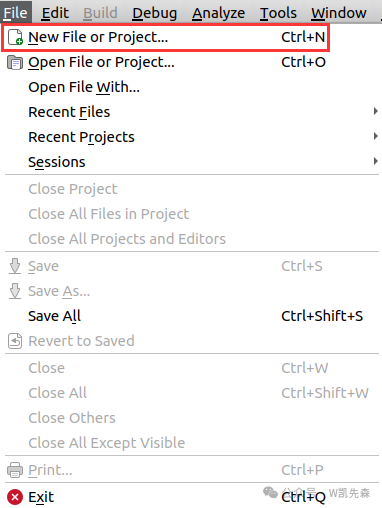
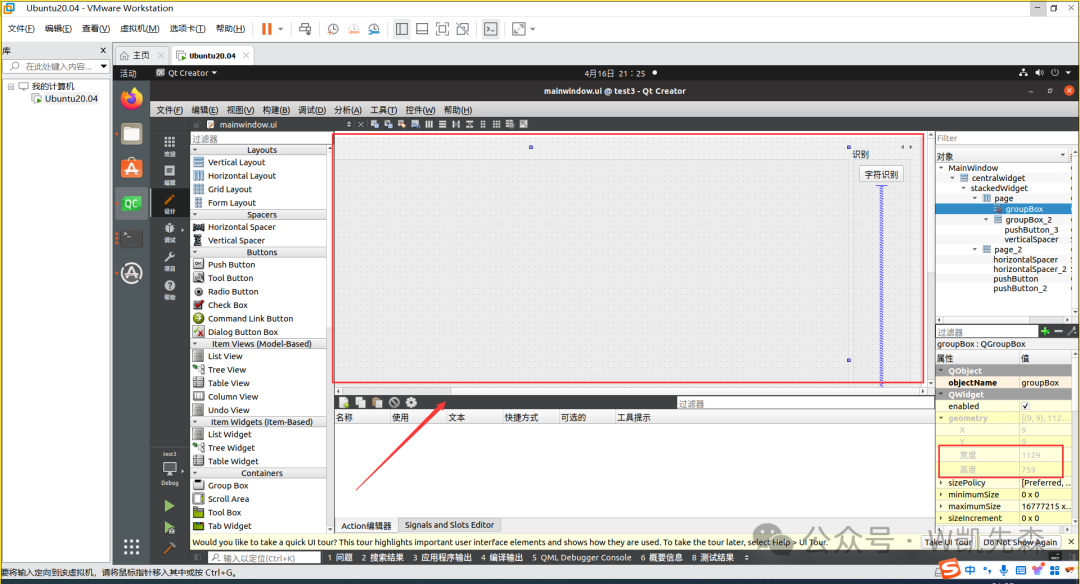
3. Create a Project
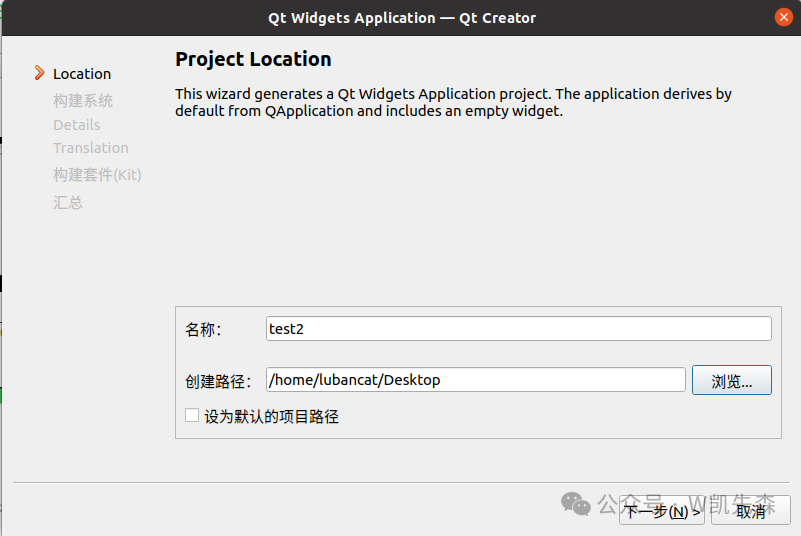
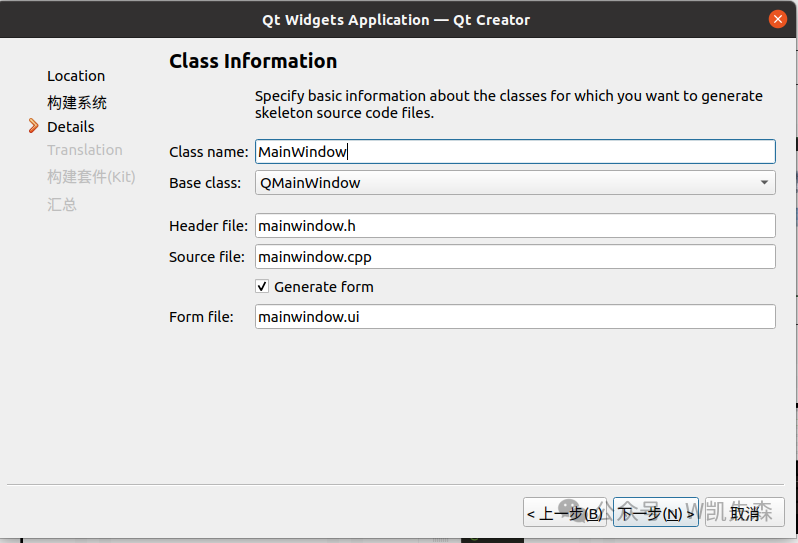
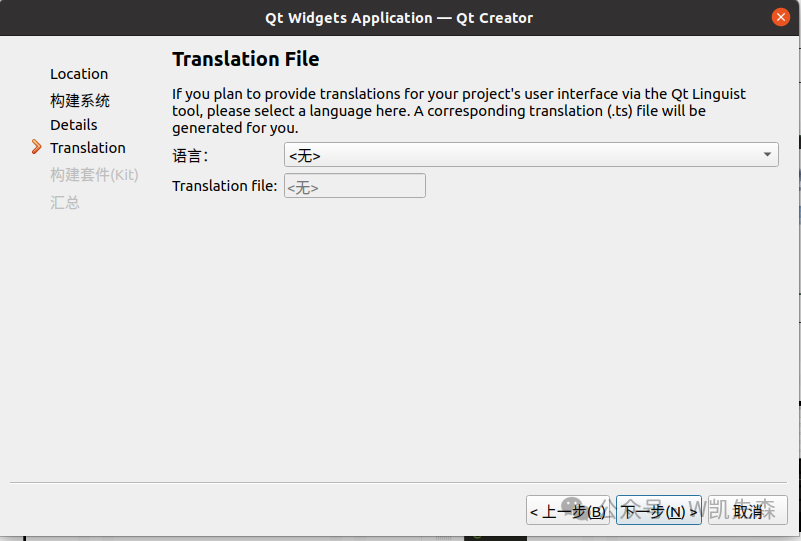
- Create a new Qt project
- Name the project and choose a storage path
- Select qmake


- After completing your Qt project, enter the project directory for cross-compilation.
qmake && make 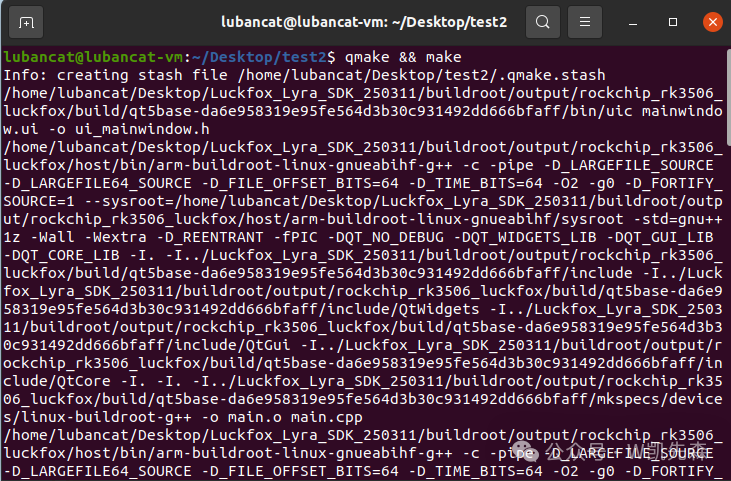
After successful compilation, an executable file will appear:
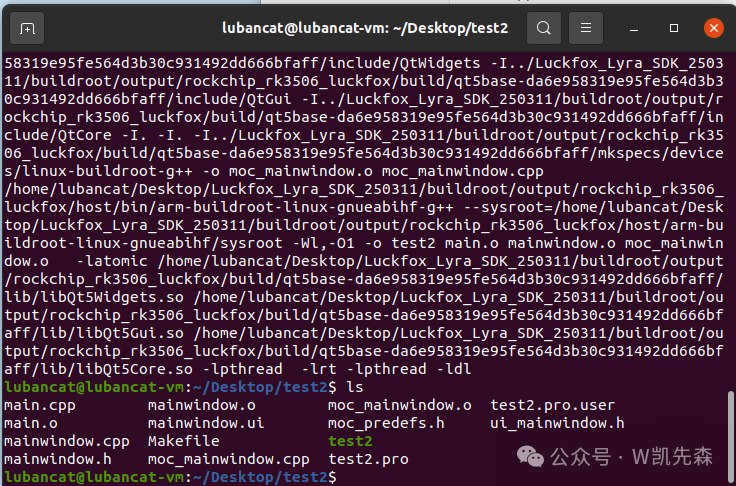
4. Upload the executable from the Ubuntu host (or virtual machine) to the development board.
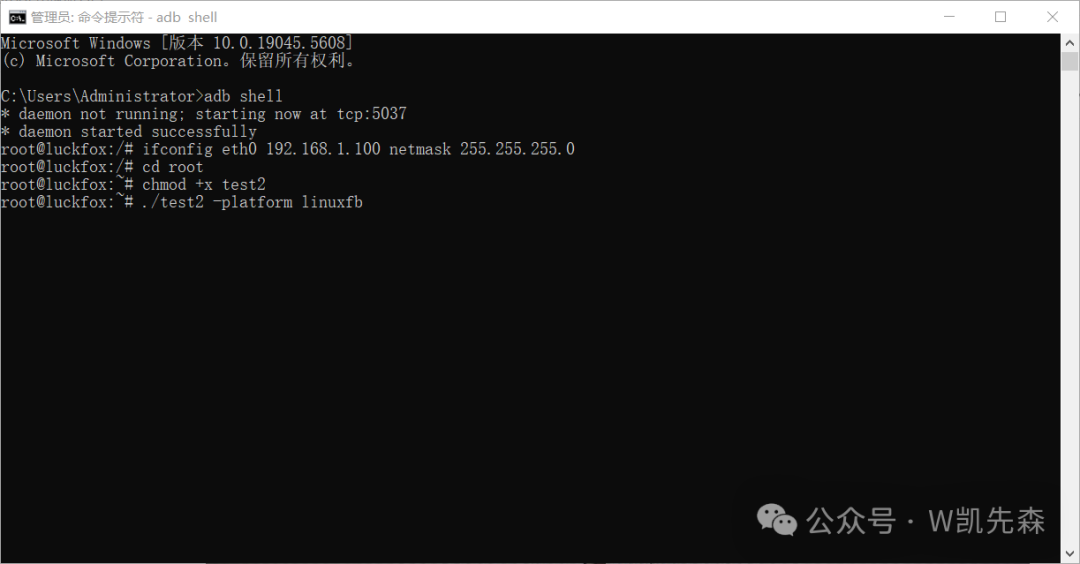
scp test2 [email protected]:/root5. Run the program on the development board.
chmod +x test2
./test2 -platform linuxfb
6. Achieved Effect
3.Landscape Display
I used the official screen package, which is 10.1-DSI-TOUCH-A,
Product link:https://www.waveshare.net/shop/10.1-DSI-TOUCH-A.htm
Since this is a portrait screen, the width is 800 and the height is 1280
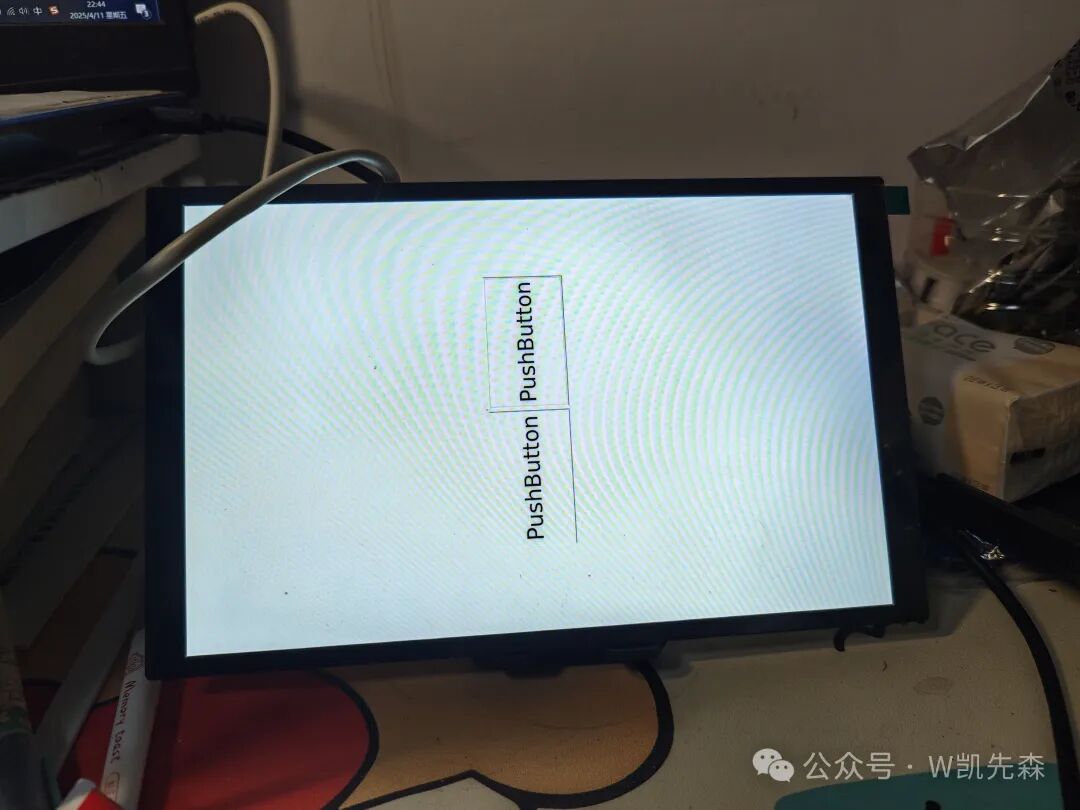
In QT, I tried to write it like this, we want it to display in portrait mode, which is equivalent to character recognition where the character is displayed vertically, and it is not fully displayed. So we rotate it 90 degrees when displaying, so that it displays correctly in landscape mode.
Just like this, it is actually displayed vertically.
main.cpp
#include <QApplication>
#include <QGraphicsView>
#include <QGraphicsProxyWidget>

int main(int argc, char *argv[])
{
    QApplication a(argc, argv);
    MainWindow *from = new MainWindow; // Main window of the project
    QGraphicsScene *scene = new QGraphicsScene;
    QGraphicsProxyWidget *w = scene->addWidget(from);
    w->setRotation(90);
    QGraphicsView *view = new QGraphicsView(scene);

    view->resize(750, 1275);
    view->show();

    return a.exec();
}
Implemented interface
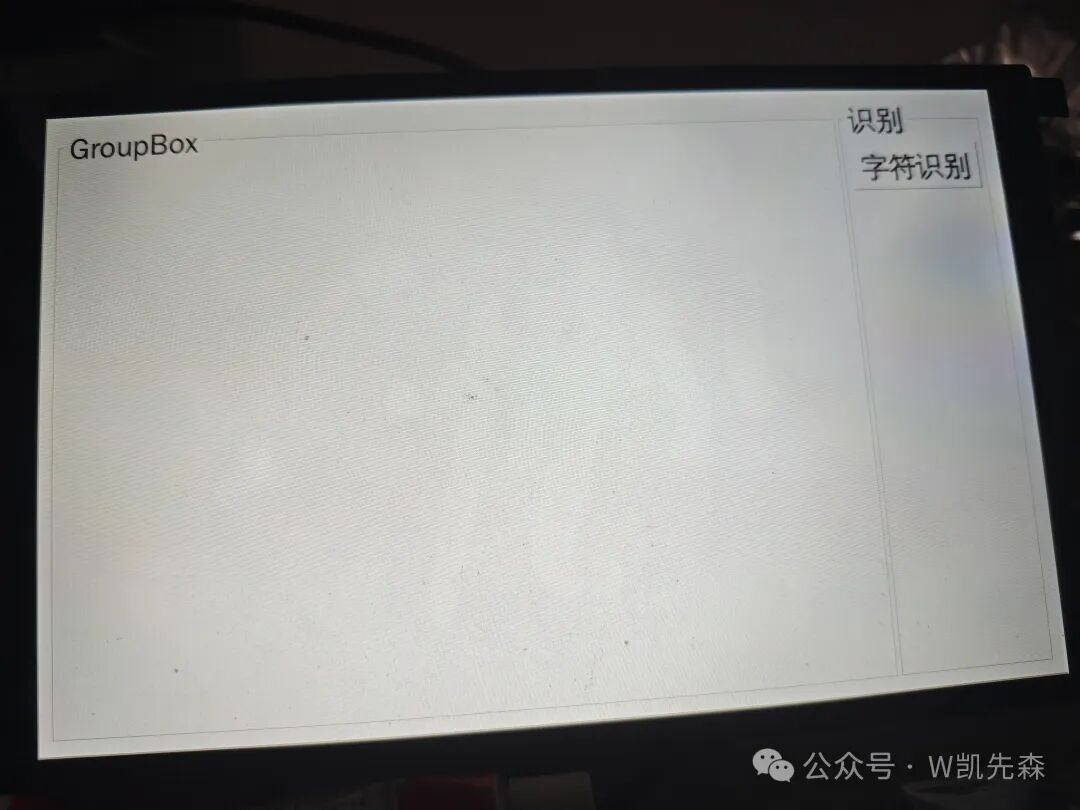
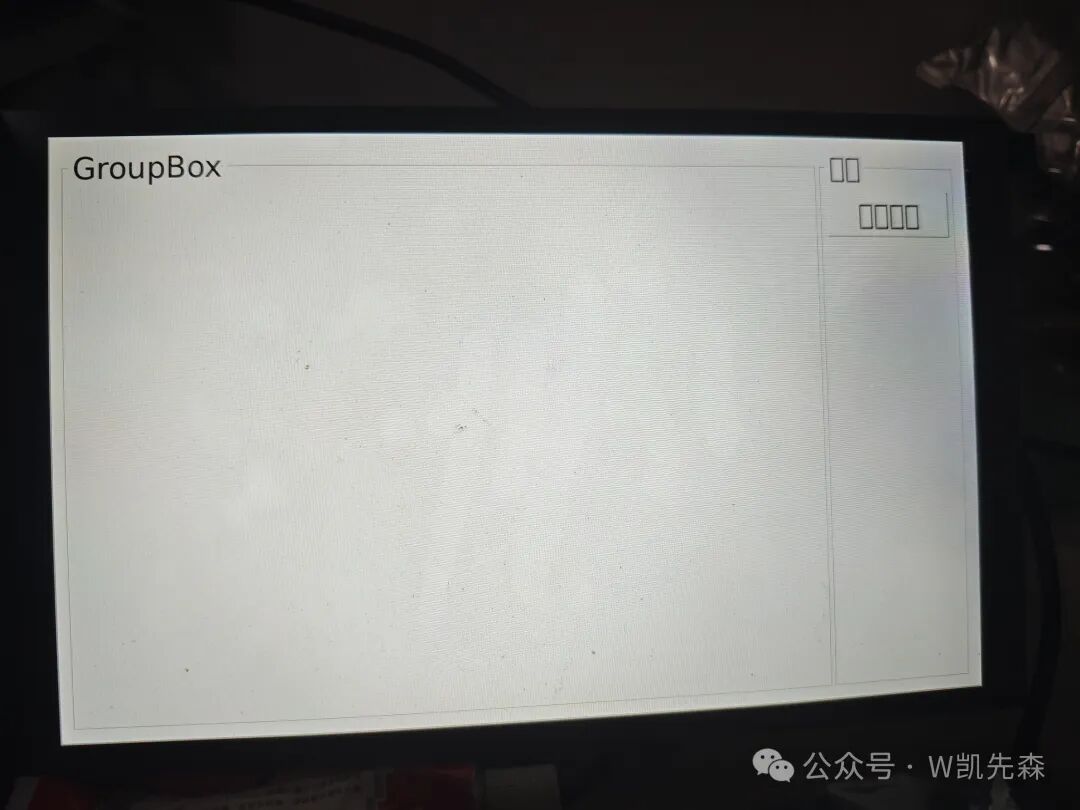 Here it is displayed in landscape mode, but I found that displaying Chinese characters turned into boxes, which is an issue.
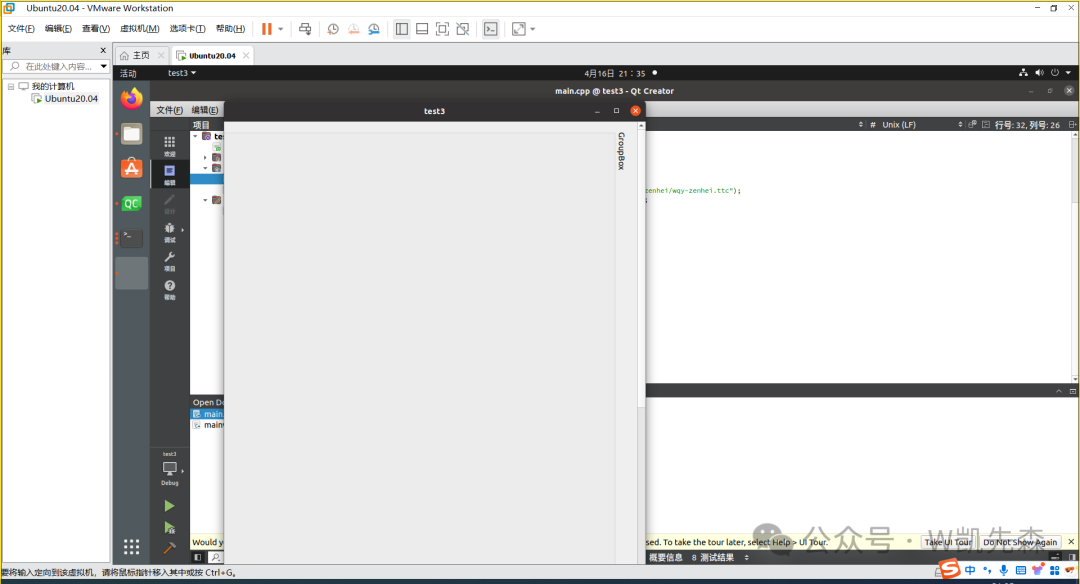
4.Embedded QT Chinese Display
Step 1: Download the font library supported by QT, which can be downloaded fromhttp://sourceforge.net/projects/wqy/files/wqy-zenhei/0.8.38%20(Pangu)/wqy-zenhei-0.8.38-1.tar.gz/download?use_mirror=nchc&use_mirror=nchc&18950117=
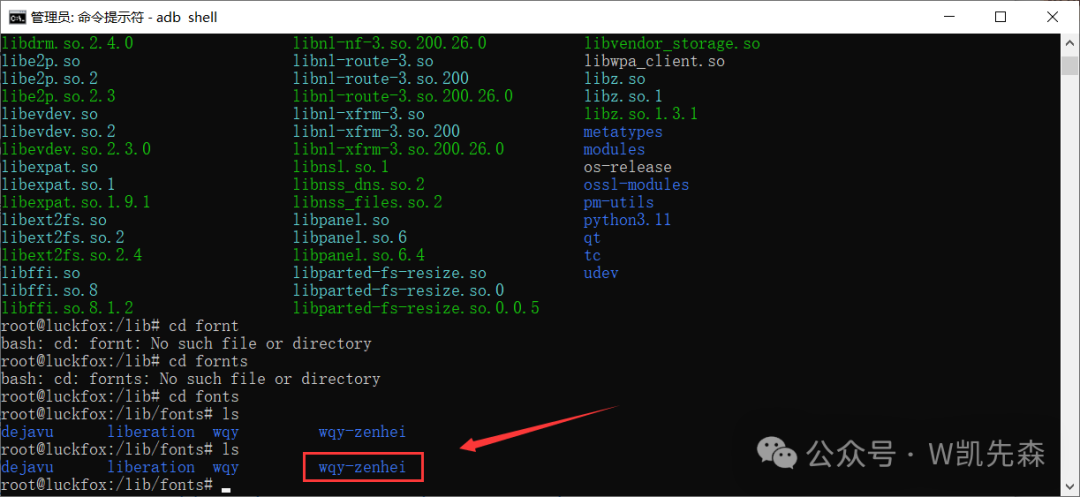
Step 2: After downloading the font library, unzip it and copy the ttc file to the lib/fonts directory under the embedded file system’s Qt directory
#include "mainwindow.h"
#include <QApplication>
#include <QGraphicsView>
#include <QGraphicsProxyWidget>
#include "./form.h"
#include <QFont>
#include <QFontDatabase>

int main(int argc, char *argv[])
{
    QApplication a(argc, argv);
    MainWindow *from = new MainWindow; // Main window of the project

    int nlndex = QFontDatabase::addApplicationFont("/usr/lib/fonts/wqy-zenhei/wqy-zenhei.ttc");
    QStringList strlist(QFontDatabase::applicationFontFamilies(nlndex));
    if(strlist.count()> 0)
    {
        QFont fontthis(strlist.at(0));
        a.setFont(fontthis);
    }

    QGraphicsScene *scene = new QGraphicsScene;
    QGraphicsProxyWidget *w = scene->addWidget(from);
    w->setRotation(90);
    QGraphicsView *view = new QGraphicsView(scene);

    view->resize(750, 1275);
    view->show();

    return a.exec();
}
The code implements this function, just load it
5.Qt Remote Deployment
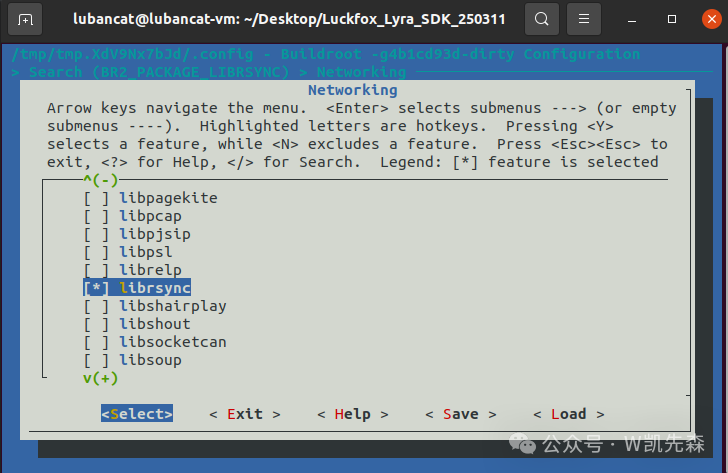
1. Add sync functionality when building the Buildroot file system
./build.sh buildroot-config Input /
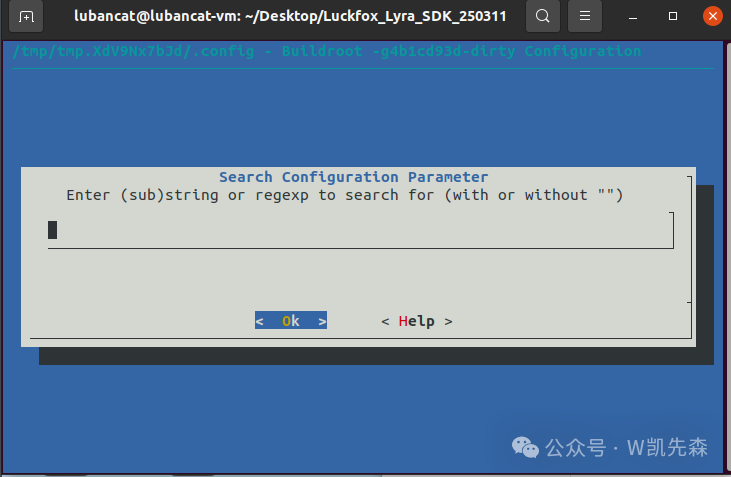
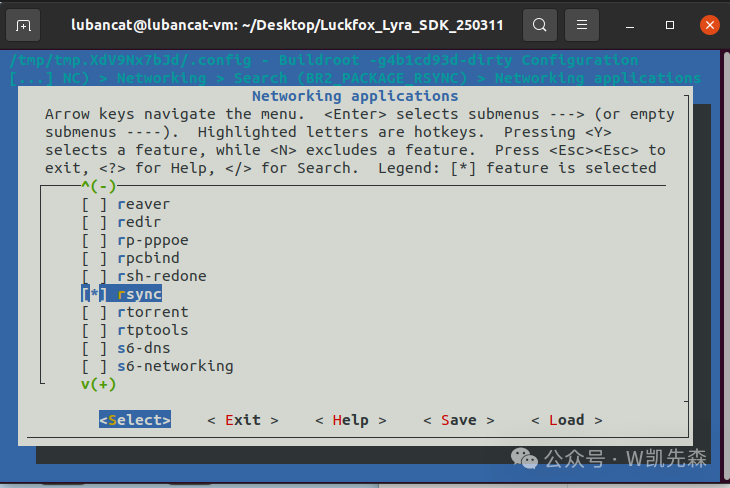
Directly inputrsync to search
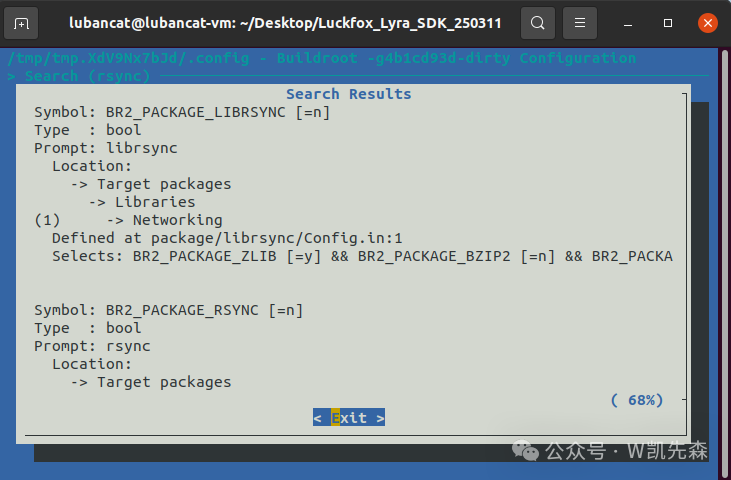
Find BR2_PACKAGE_LIBRSYNC and BR2_PACKAGE_RSYNC, search for each one and press Enter, then input “1” and press space
2. Add coreutils package when building the Buildroot file system
Input / to search for coreutils and press “1”.
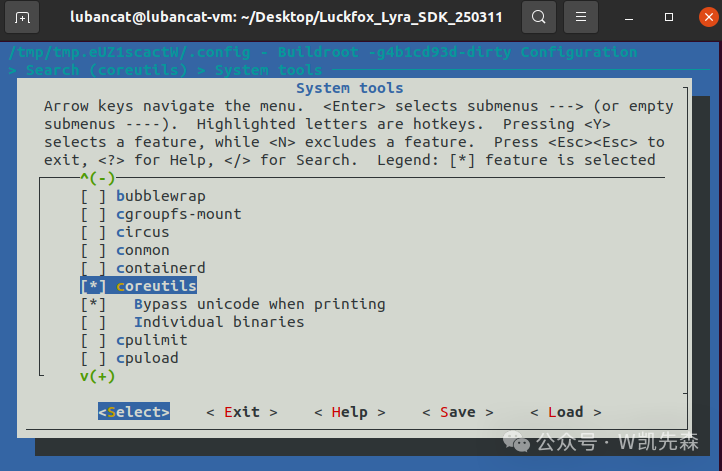
Select coreutils by pressing space, and select start-stop-daemon

Then save it, save.
Save these, add these packages, then recompile and flash the image.
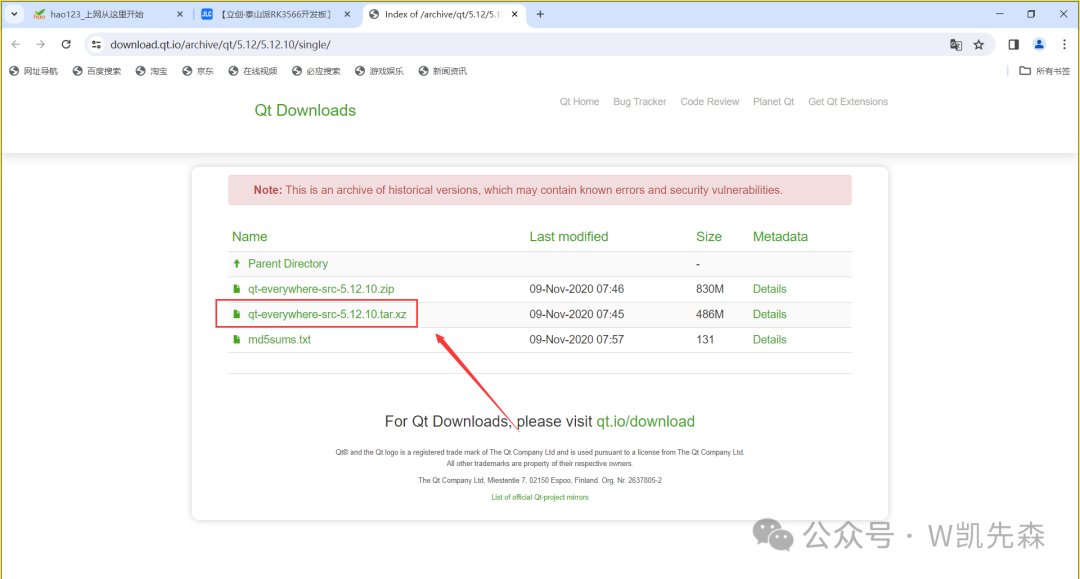
3. Cross-compile Qt
We need to download the source code of Qt5.12.10, then use the cross-compiler to compile the Qt source code and transfer the supporting libraries to the development board so that the Qt program can run. Download link:https://download.qt.io/archive/qt/5.12/5.12.10/single/
The md5sums.txt file below contains the checksum, we recommend checking it after downloading to ensure there were no errors during the download process.
Copy the downloaded compressed package to the /opt directory and unzip:
tar -xvf qt-everywhere-src-5.12.10.tar.xzAfter unzipping, you will get the file /opt/qt-everywhere-src-5.12.10, then we edit the qmake configuration file:
sudo gedit /opt/qt-everywhere-src-5.12.10/qtbase/mkspecs/linux-aarch64-gnu-g++/qmake.confChange the file to:
#
# qmake configuration for building with aarch64-linux-gnu-g++
#
MAKEFILE_GENERATOR      = UNIX
CONFIG                 += incremental
QMAKE_INCREMENTAL_STYLE = sublib

QT_QPA_DEFAULT_PLATFORM = linuxfb
QMAKE_CFLAGS_RELEASE += -O2 -march=armv7-a -mfpu=neon -mfloat-abi=hard
QMAKE_CXXFLAGS_RELEASE += -O2 -march=armv7-a -mfpu=neon -mfloat-abi=hard

include(../common/linux.conf)
include(../common/gcc-base-unix.conf)
include(../common/g++-unix.conf)

# modifications to g++.conf
QMAKE_CC                = /home/lubancat/Desktop/Luckfox_Lyra_SDK_250311/prebuilts/gcc/linux-x86/arm/gcc-arm-10.3-2021.07-x86_64-arm-none-linux-gnueabihf/bin/arm-none-linux-gnueabihf-gcc
QMAKE_CXX               = /home/lubancat/Desktop/Luckfox_Lyra_SDK_250311/prebuilts/gcc/linux-x86/arm/gcc-arm-10.3-2021.07-x86_64-arm-none-linux-gnueabihf/bin/arm-none-linux-gnueabihf-g++
QMAKE_LINK              = /home/lubancat/Desktop/Luckfox_Lyra_SDK_250311/prebuilts/gcc/linux-x86/arm/gcc-arm-10.3-2021.07-x86_64-arm-none-linux-gnueabihf/bin/arm-none-linux-gnueabihf-g++
QMAKE_LINK_SHLIB        = /home/lubancat/Desktop/Luckfox_Lyra_SDK_250311/prebuilts/gcc/linux-x86/arm/gcc-arm-10.3-2021.07-x86_64-arm-none-linux-gnueabihf/bin/arm-none-linux-gnueabihf-g++

# modifications to linux.conf
QMAKE_AR                = /home/lubancat/Desktop/Luckfox_Lyra_SDK_250311/prebuilts/gcc/linux-x86/arm/gcc-arm-10.3-2021.07-x86_64-arm-none-linux-gnueabihf/bin/arm-none-linux-gnueabihf-ar cqs
QMAKE_OBJCOPY           = /home/lubancat/Desktop/Luckfox_Lyra_SDK_250311/prebuilts/gcc/linux-x86/arm/gcc-arm-10.3-2021.07-x86_64-arm-none-linux-gnueabihf/bin/arm-none-linux-gnueabihf-objcopy
QMAKE_NM                = /home/lubancat/Desktop/Luckfox_Lyra_SDK_250311/prebuilts/gcc/linux-x86/arm/gcc-arm-10.3-2021.07-x86_64-arm-none-linux-gnueabihf/bin/arm-none-linux-gnueabihf-nm -P
QMAKE_STRIP             = /home/lubancat/Desktop/Luckfox_Lyra_SDK_250311/prebuilts/gcc/linux-x86/arm/gcc-arm-10.3-2021.07-x86_64-arm-none-linux-gnueabihf/bin/arm-none-linux-gnueabihf-strip
load(qt_config)
Mainly add these three lines:
QT_QPA_DEFAULT_PLATFORM = linuxfb
This line sets the default platform plugin for Qt Quick/QML applications. <span>linuxfb</span> is short for Linux Framebuffer, which is a method for directly controlling display devices on embedded systems. Setting it to <span>linuxfb</span> indicates that the Qt application will use the Linux Framebuffer as the default graphics platform, suitable for some embedded systems.
- QMAKE_CFLAGS_RELEASE += -O2 -march=armv7-a -mfpu=neon -mfloat-abi=hard
This line sets the compilation flags when compiling C code in Release mode. -O2 is a medium level of optimization suitable for release builds, -march=armv7-a enables NEON floating-point SIMD instruction set, suitable for image processing, audio, video acceleration, -mfloat-abi=hard uses hardware floating-point registers for parameter passing (suitable for Cortex-A7 with hardware floating-point unit).
- QMAKE_CXXFLAGS_RELEASE += -O2 -march=armv7-a -mfpu=neon -mfloat-abi=hard
This line sets the compilation flags when compiling C++ code in Release mode. -O2 is a medium level of optimization suitable for release builds, -march=armv7-a enables NEON floating-point SIMD instruction set, suitable for image processing, audio, video acceleration, -mfloat-abi=hard uses hardware floating-point registers for parameter passing (suitable for Cortex-A7 with hardware floating-point unit).
Then set the cross-compiler
Enter the qt library folder:
cd /opt/qt-everywhere-src-5.12.10/We input the following command to create an autoConfig.sh script:
sudo gedit autoConfig.shEnter the following content in the script:
#!/bin/sh
./configure \
-prefix /opt/qt5.12.10-arm \
-confirm-license \
-opensource \
-release \
-make libs \
-xplatform linux-aarch64-gnu-g++ \
-pch \
-qt-libjpeg \
-qt-libpng \
-qt-zlib \
-no-opengl \
-no-sse2 \
-no-openssl \
-no-cups \
-no-glib \
-no-dbus \
-no-separate-debug-info \
<span>QT_QPA_DEFAULT_PLATFORM = linuxfb</span>: This line sets the default platform plugin for Qt Quick/QML applications.<span>-confirm-license</span>: Confirm acceptance of the Qt license agreement.<span>-opensource</span>: Compile Qt with an open-source license.<span>-release</span>: Compile Qt as a release version, not a debug version.<span>-make libs</span>: Only compile the Qt libraries, not the example programs.<span>-xplatform linux-aarch64-gnu-g++</span>: Specify the target platform as Linux and use the aarch64 architecture for compilation.<span>-pch</span>: Enable precompiled header functionality to speed up compilation.<span>-qt-libjpeg</span>, -qt-libpng, -qt-zlib: Specify that Qt should use the installed libjpeg, libpng, and zlib libraries during compilation.<span>-no-opengl</span>: Do not compile the OpenGL module of Qt.<span>-no-sse2</span>: Disable SSE2 instruction set optimization.<span>-no-openssl</span>: Do not compile the OpenSSL module of Qt.<span>-no-cups</span>: Do not compile the CUPS module of Qt (for print support).<span>-no-glib</span>: Do not compile the GLib module of Qt.<span>-no-dbus</span>: Do not compile the D-Bus module of Qt.<span>-no-separate-debug-info</span>: Do not generate separate debug information files.
Give this .sh script run permissions:
sudo chmod 777 autoConfig.shThen run autoConfig.sh, it will automatically generate the Makefile file:
./autoConfig.shRun completion screenshot:

Next, we input make to compile (it takes a while):
sudo make -j12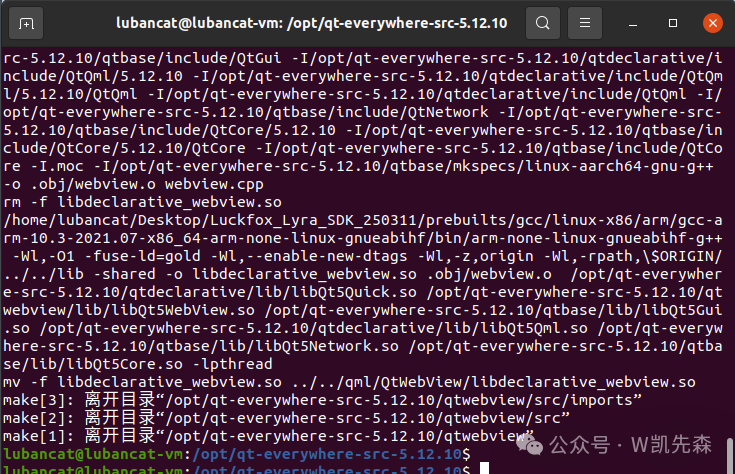
After compilation, input the following command to start installation:
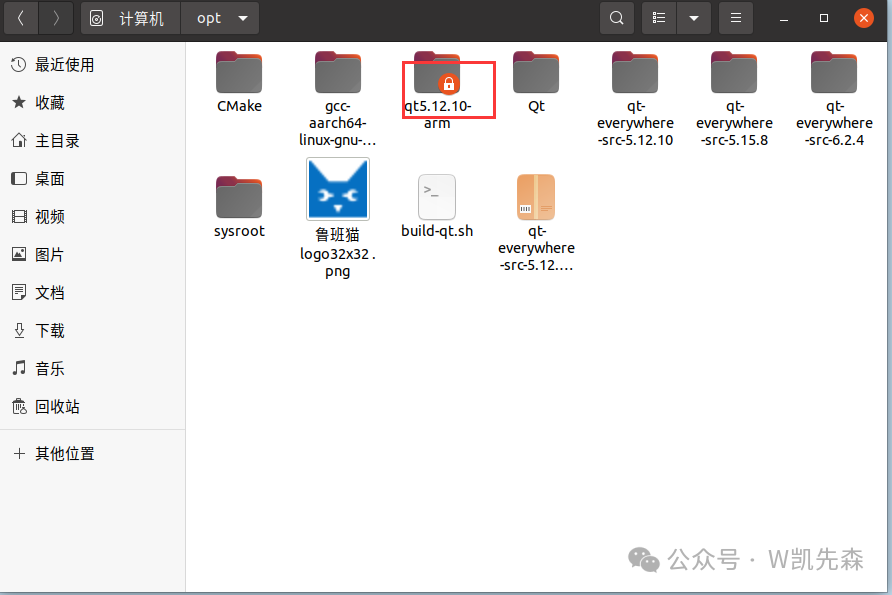
sudo make installAfter a while, you can see the specified installation directory /opt/qt5.12.10-arm appears in the /opt directory, indicating successful installation.
4. Qt Remote Deployment Configuration
1) Open Qt Creator, click Tools > External > Configure, click Devices:
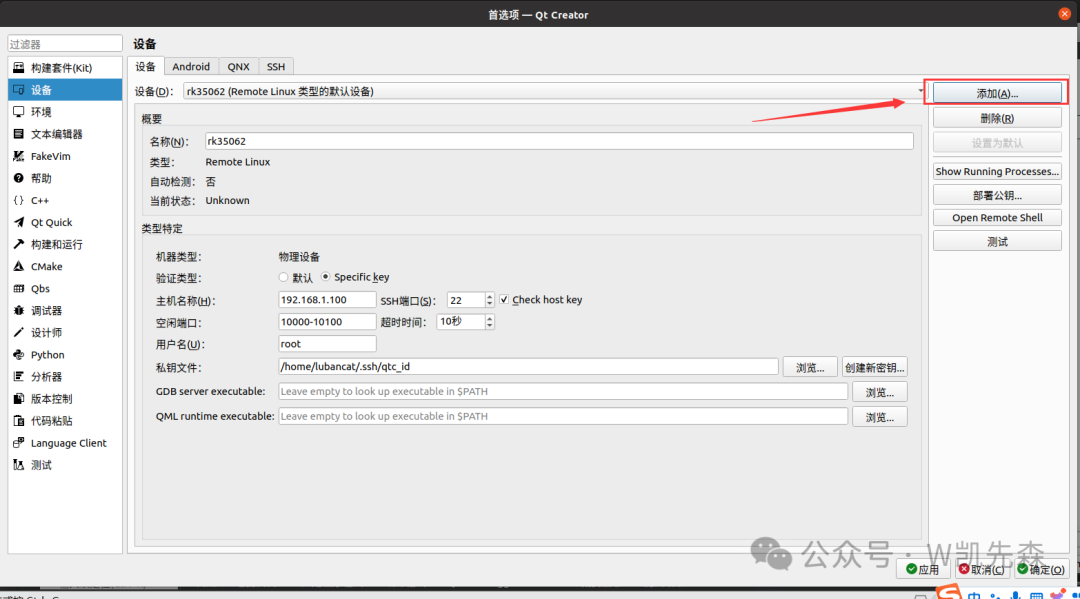
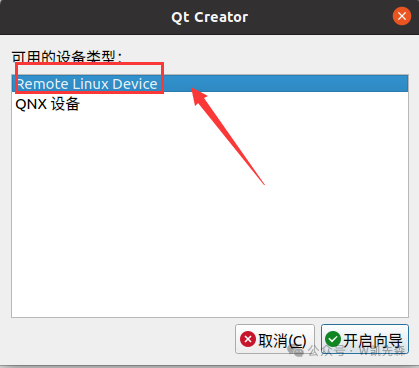
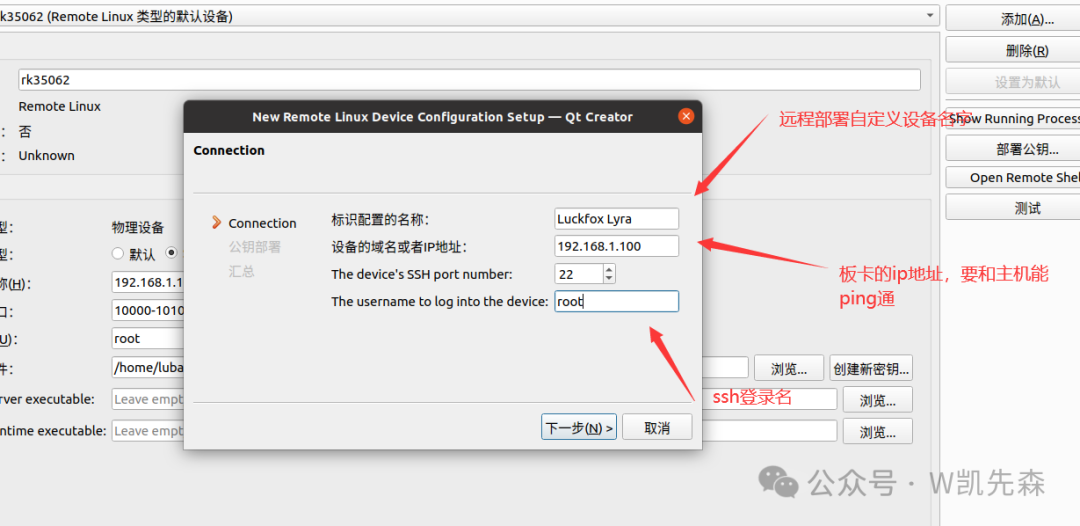
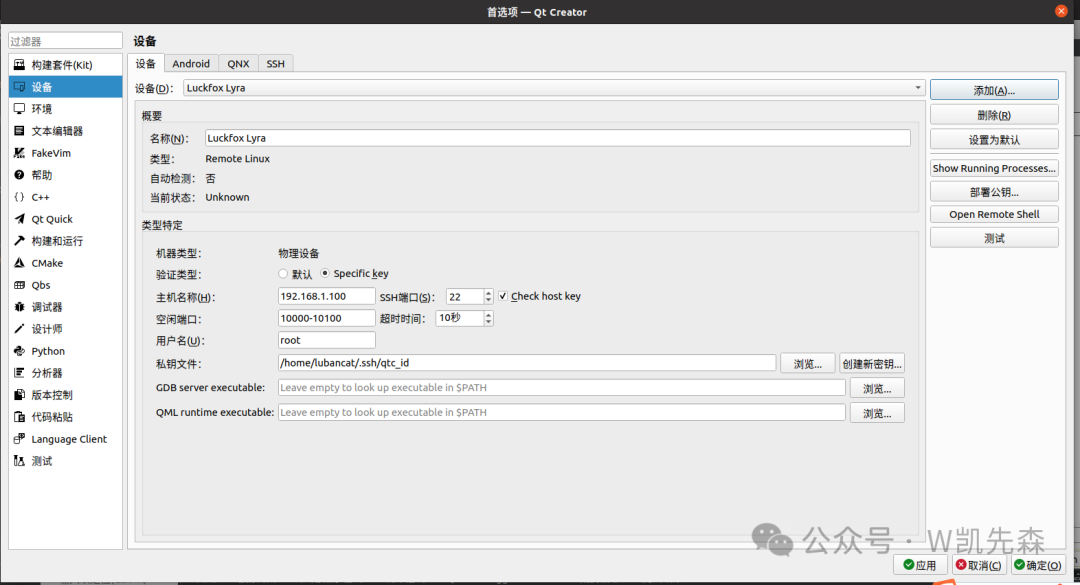
Click the add button in the upper right corner, select remote Linux device, and then choose to start the wizard.
Set the name, input the board’s IP, and the login username, then click <span>Next</span>:
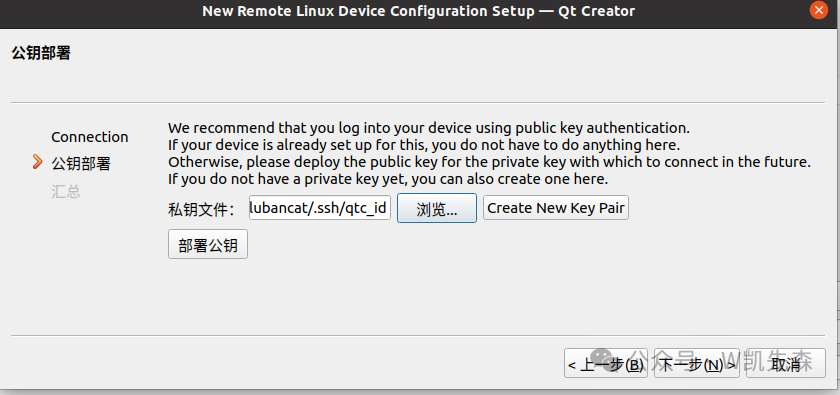
Enter key deployment, generally default is fine, finally click <span>Finish</span>
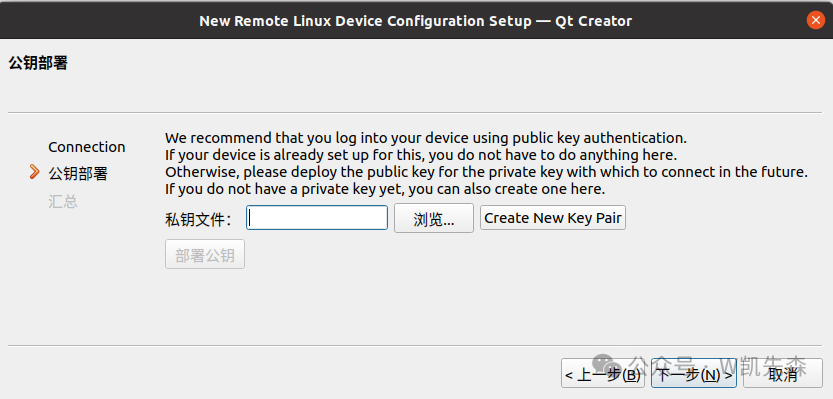
If you do not have this private key file, select create new pair

Click to create and save the key file pair
- Situation 1
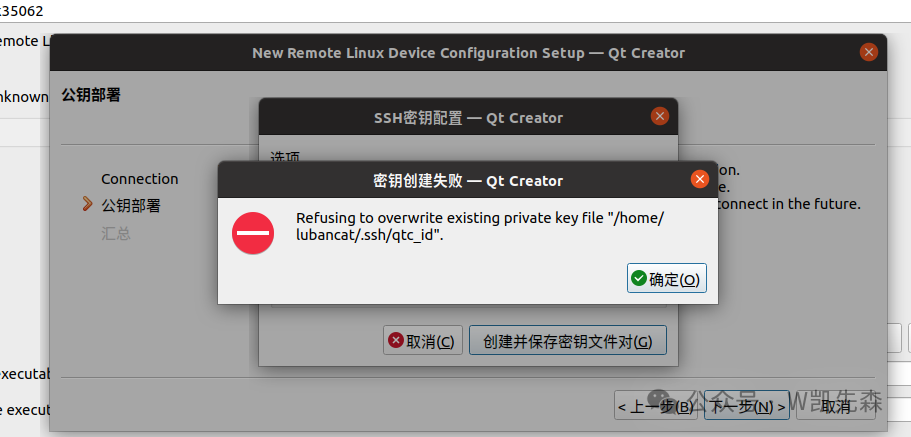
This indicates that there is a key, find this place
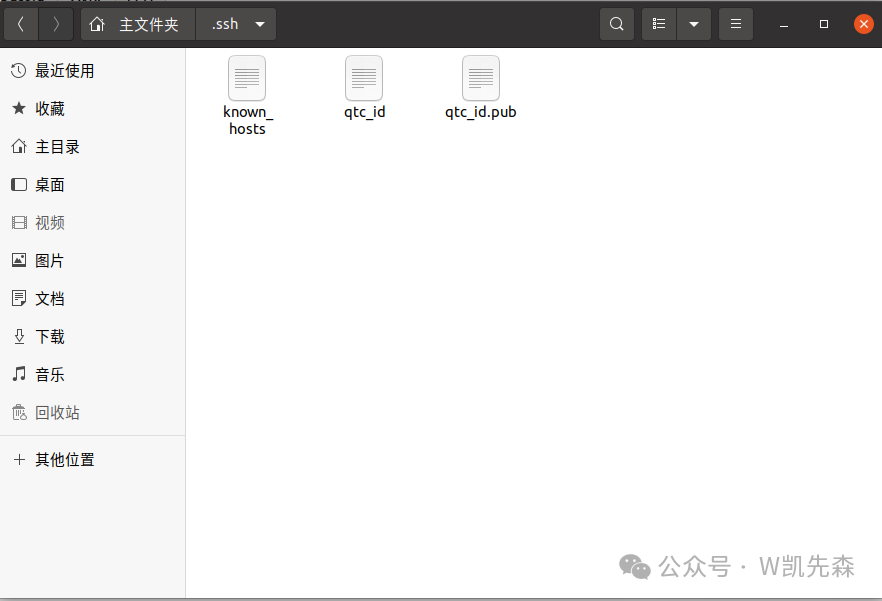
Click browse to select the location you just selected

Select the corresponding key file
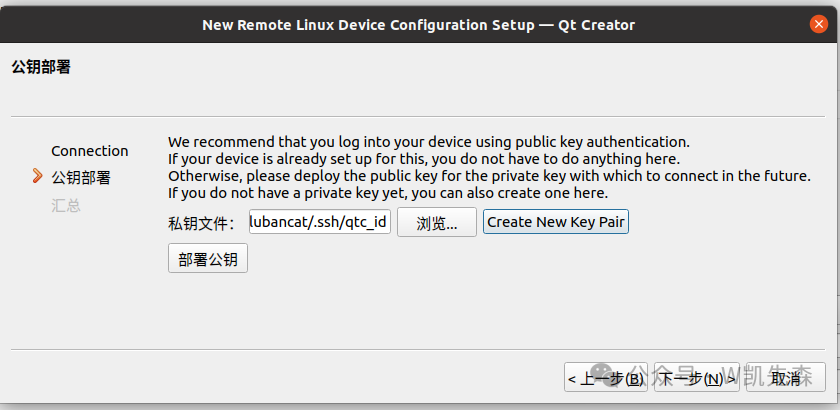
- Situation 2
If there is no key file, you can create it directly, then select the key file
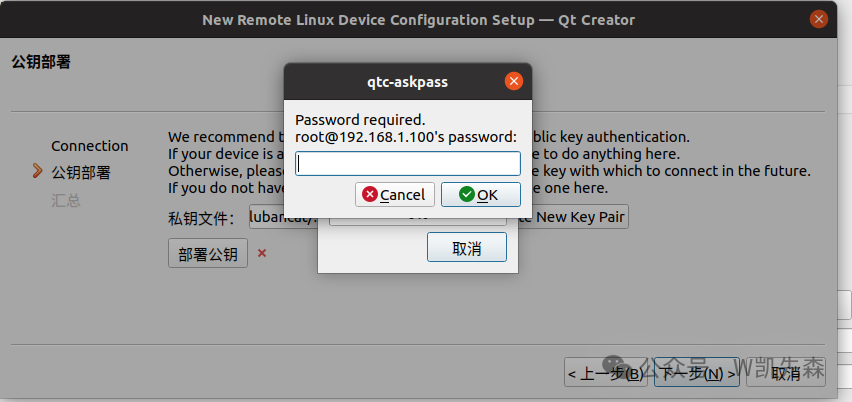
After selecting the key file, click deploy public key, enter the login password, and then click ok
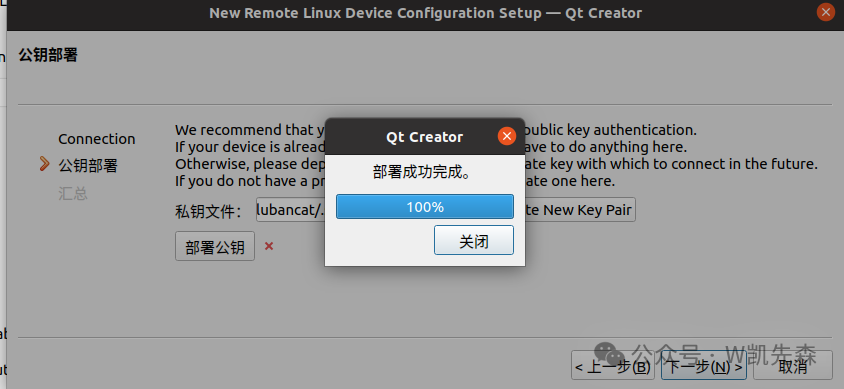
After successful deployment, click next, then click finish
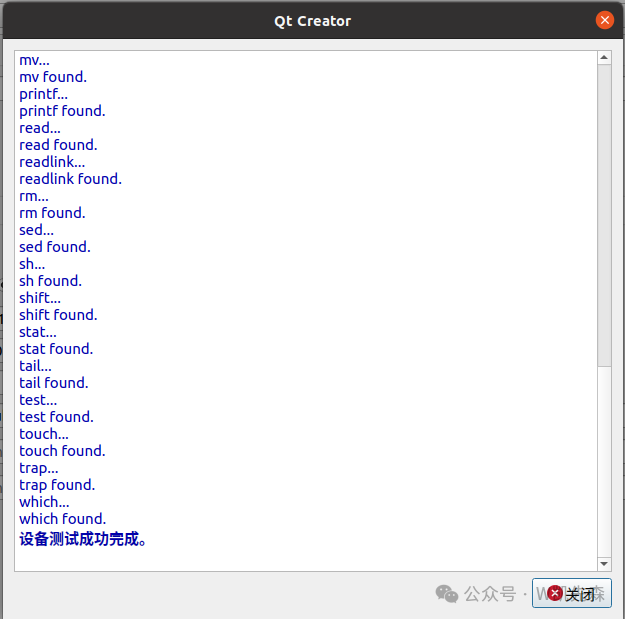
The above indicates that the board has been successfully deployed remotely, and the remote device has been set up successfully.
Click apply
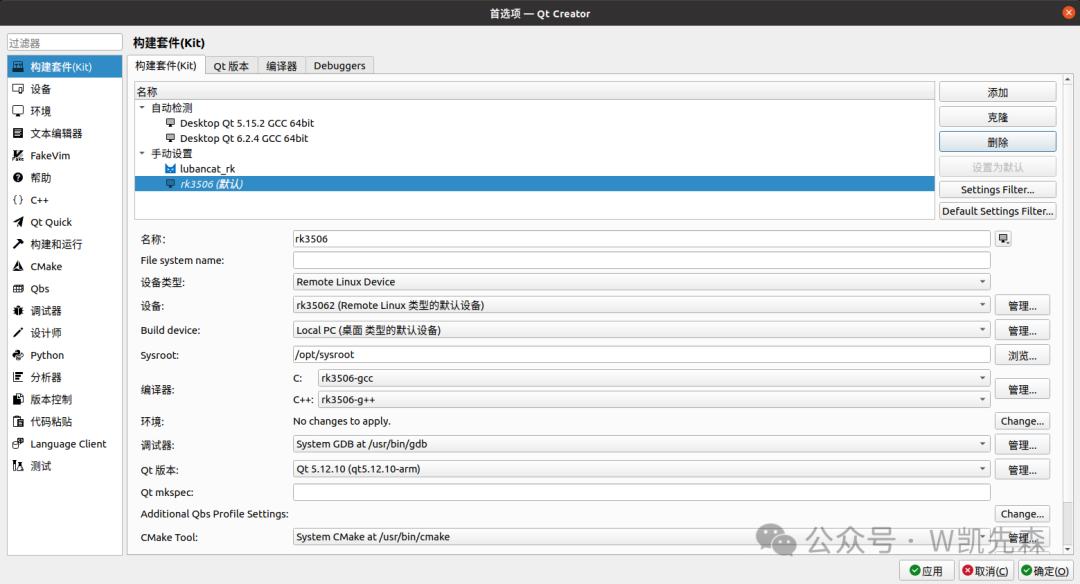
2) Set up the build kit
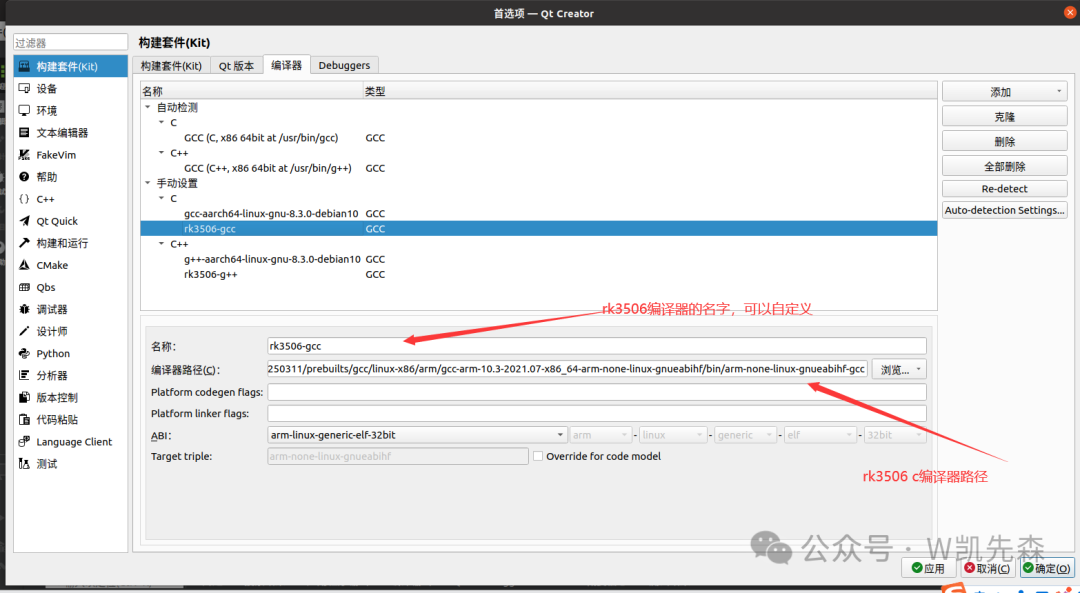
- Compiler
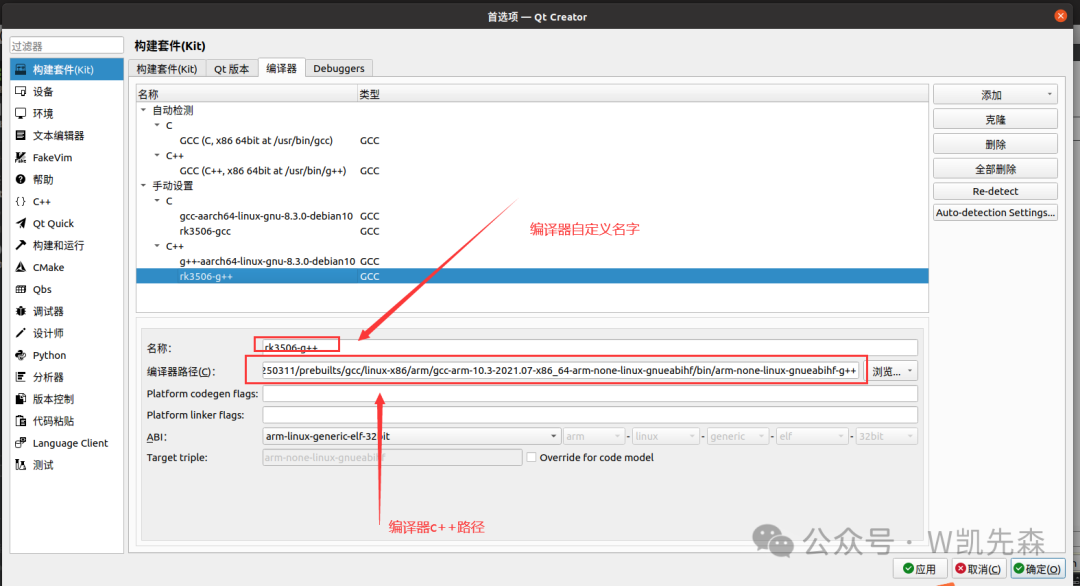
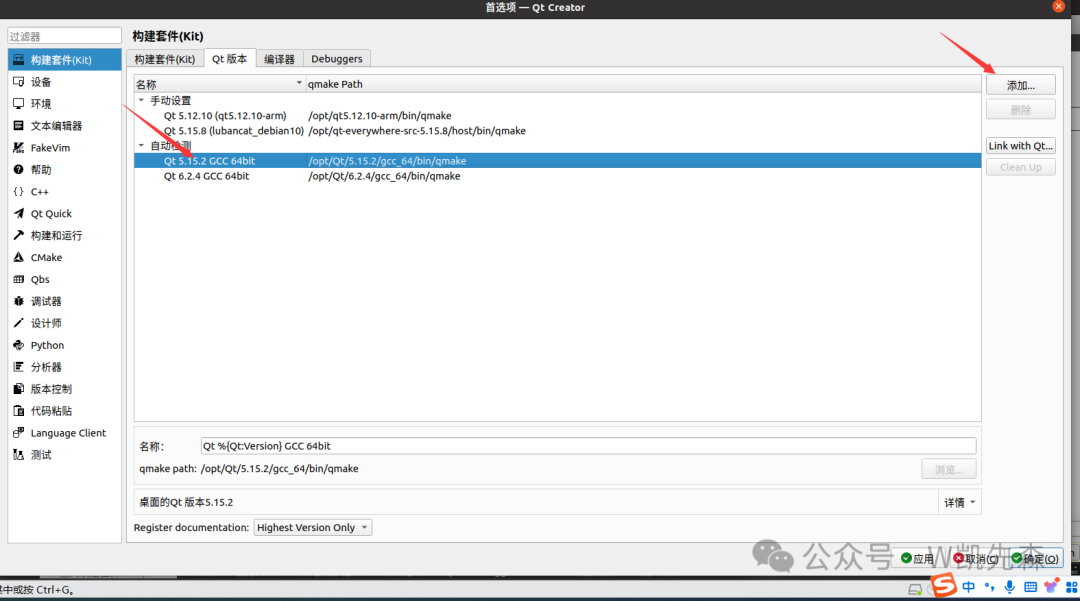
- Qt Version
Click add, select the compiled qmake of Qt, this is where you select the corresponding Qt library that you cross-compiled for use.

- Build Kit
Set the relevant information as prompted

5.Qt Remote Deployment Related Projects
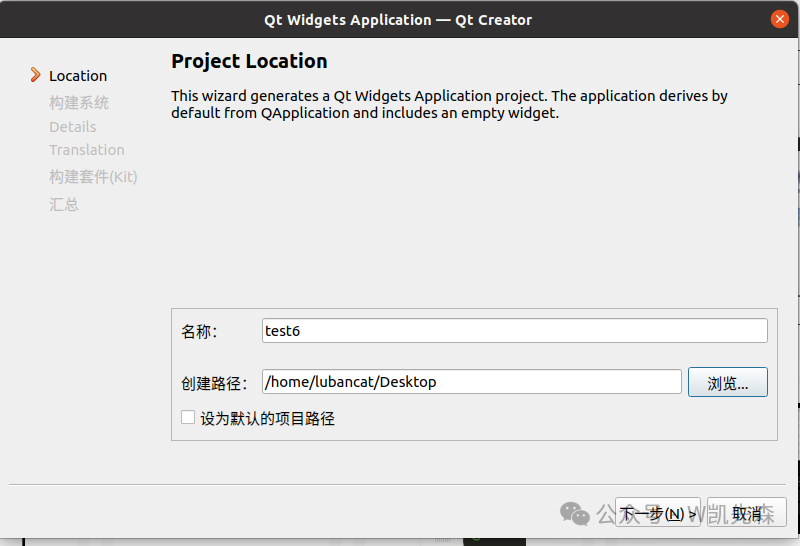
Create a new Qt project
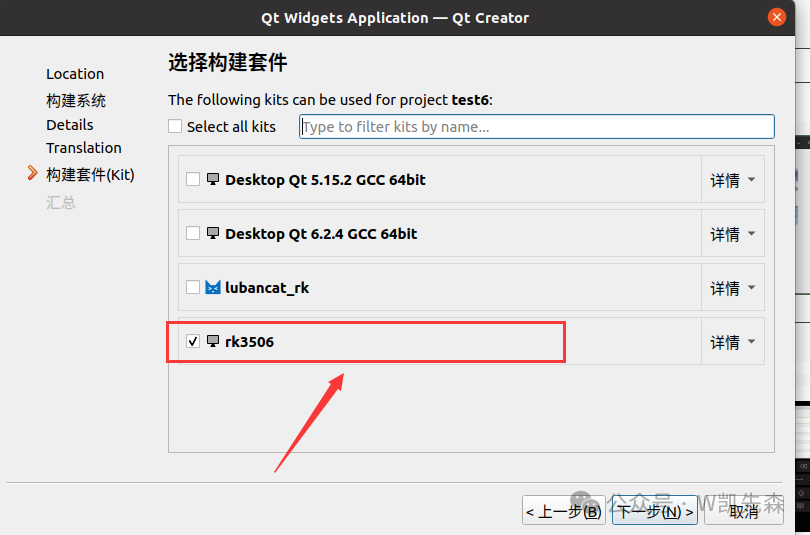
Select the previously set rk3506, proceed to the next step to complete,
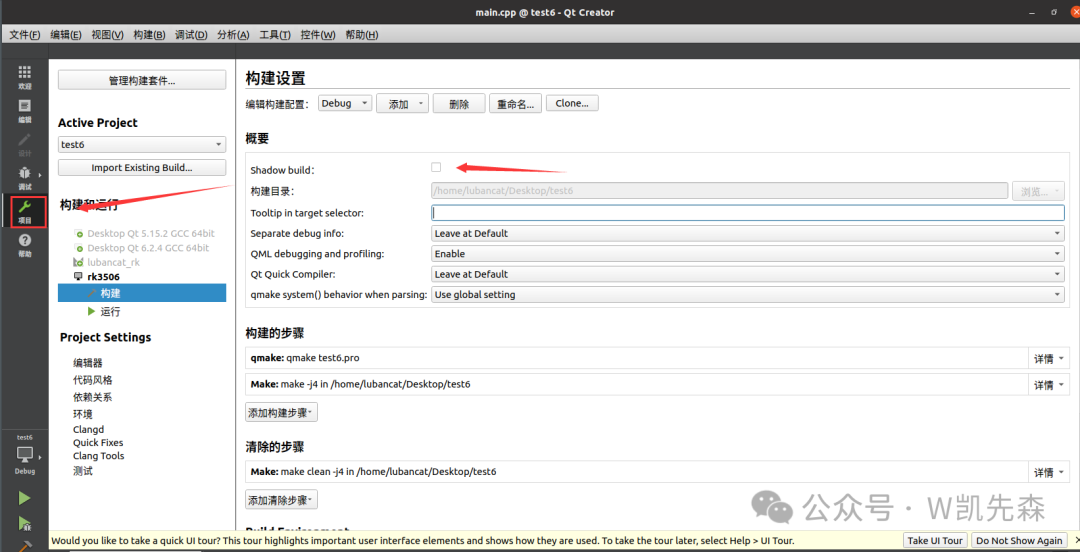
Select build in the upper left corner, then uncheck shadow build
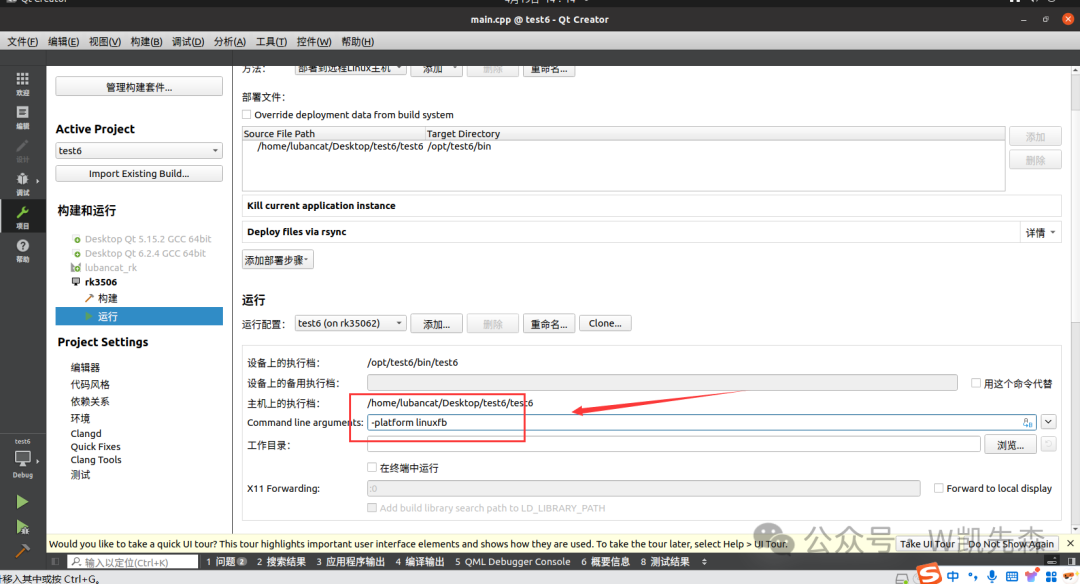
Click run on the left, then set the name to -platform linuxfb, this command is to display it on the screen
After setting up, click run
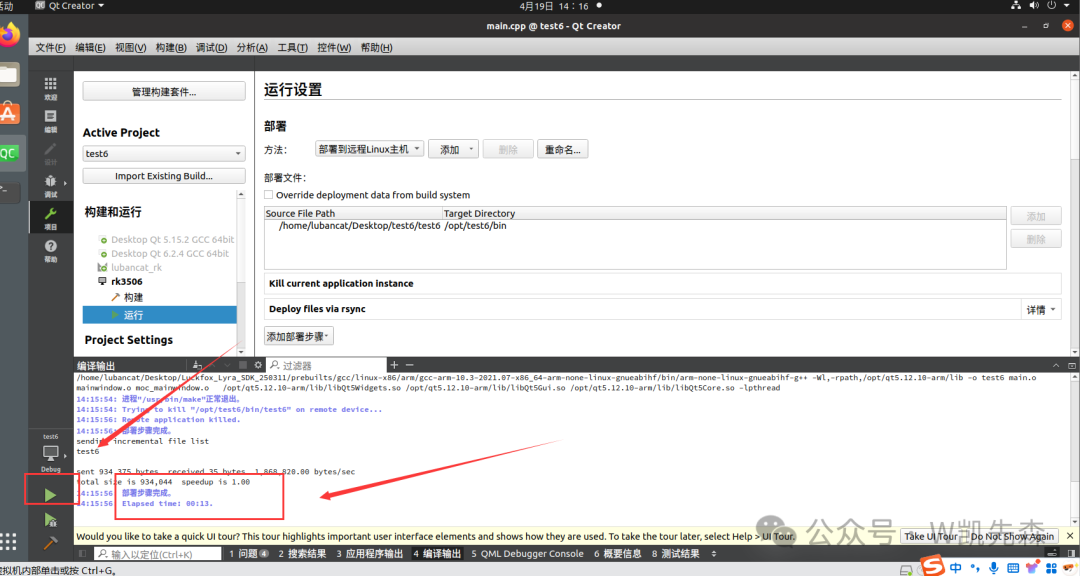
And it succeeded