01
All test programs in this section require the development board to have a Qt environment to run. The provided file system is derived from a Yocto build. We will later organize a separate ported Qt system to facilitate users in porting third-party software. If the user’s file system is not our factory version, please refer to the previous flashing section to re-flash the factory file system. The development board requires the login name: root, with no default password.
02
Using external storage devices (USB drives, TF cards)
When testing Qt programs, we often use USB drives and TF cards for copying programs. The Yocto system automatically mounts these devices, which is very convenient. Here we require the partition format to be FAT32.First, start the development board, and when we insert the USB drive into the USB port, the following print information will appear.Then use the command “df” to view the automatically mounted directory of the USB drive. As shown below: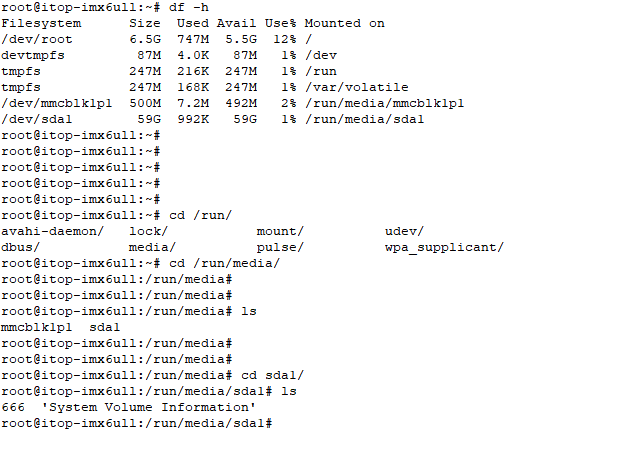 Similarly, inserting the TF card will also display corresponding print information. As shown below:
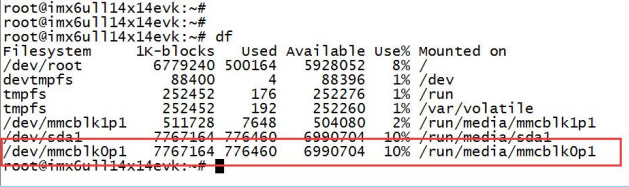
We use the command “df” to check the corresponding partition mount directory.
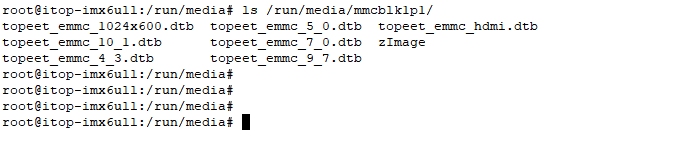
Here we note that the “/dev/mmcblk1p1” device of the commercial-grade core board is a separate partition provided by the eMMC for the kernel device tree. It is advisable not to use it. We can use the command “ls /run/media/mmcblk1p1” to see the kernel files in the device tree. As shown below:
 03 Network ConfigurationYocto automatically configures eth0 by default. We start the development board and connect the Ethernet cable to the Ethernet2 port, and the following print information will appear.
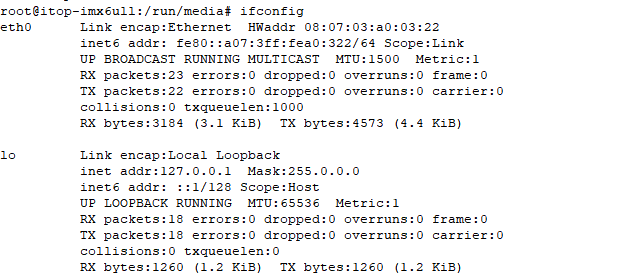
We use the command “ifconfig” to view the configuration of eth0. As shown below:
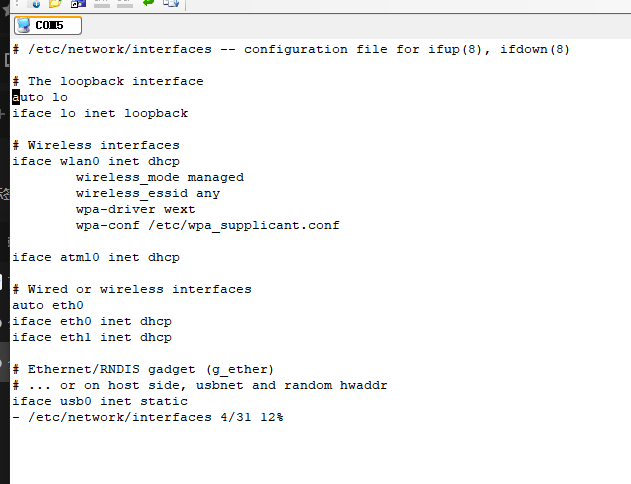
The configuration file is /etc/network/interfaces, we use the command “vi /etc/network/interfaces” to open the configuration file. As shown below:
We can see that eth0 is dynamically assigned an IP, which may cause the IP to change every time the device is started, as shown below:
 Here we will modify eth1 to a static IP, adding the following code.
auto eth1 # (eth1 is the Ethernet card) iface eth1 inet static address 192.168.1.120 # (IP address) gateway 192.168.1.1 # (default gateway, same as the physical machine) netmask 255.255.255.0 # (subnet mask, same as the physical machine)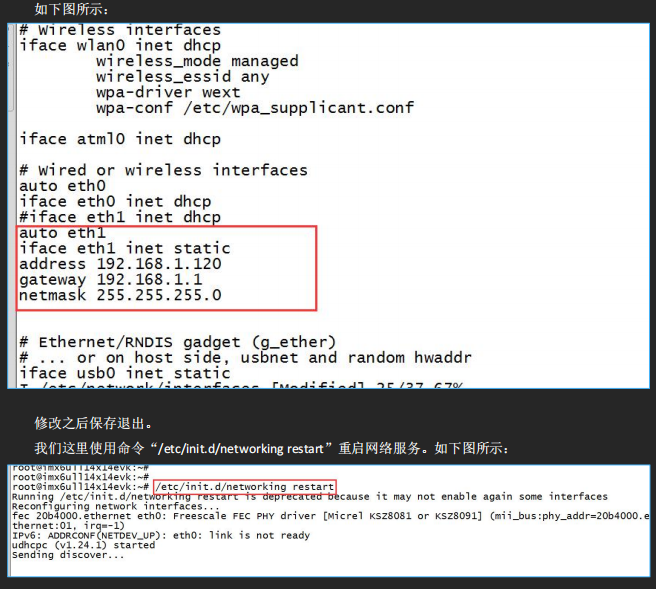
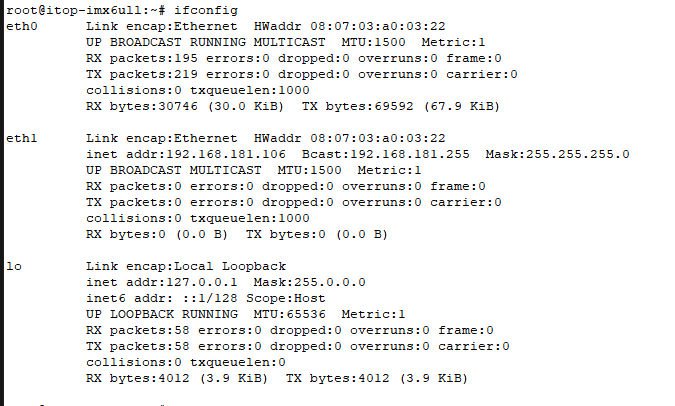
After it takes effect, use the command “ifconfig” to check the configuration of eth1.
Then we use the command “ping -I 192.168.1.120 www.baidu.com” to specify eth1 to ping Baidu. As shown below:
 04
04
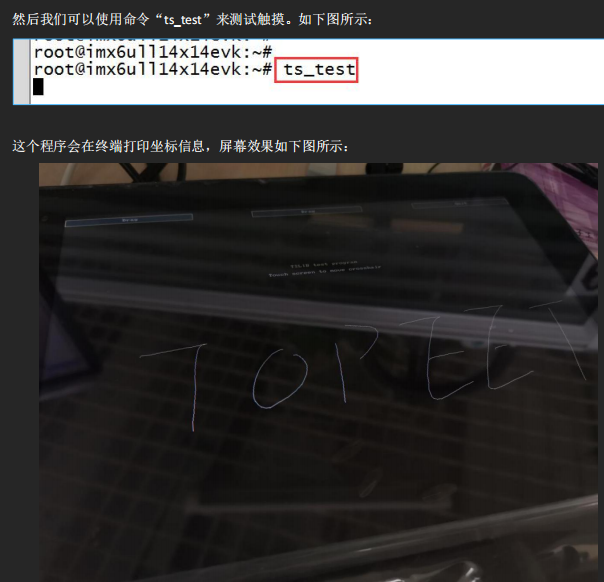
Touch Test
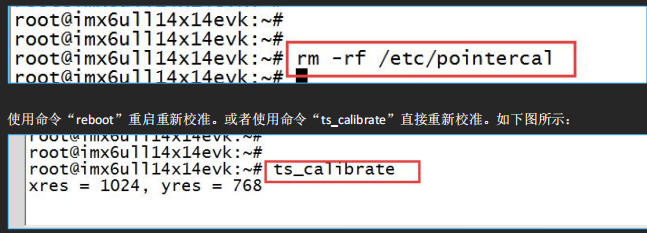
After the first boot of the flashed file system, we will first run the five-point touch calibration program “ts_calibrate”. If a test point is accidentally clicked incorrectly during the calibration process, the command “rm -rf /etc/pointercal” can be used to delete the coordinate file. As shown below:
 05
05
Screen Brightness (Backlight)
Users can adjust the backlight through console commands after the file system starts, with reference commands as follows.
(1) Turn off the screen backlight:
echo 0 > /sys/devices/platform/backlight/backlight/backlight/brightness
(2) Enable screen backlight:
echo 6 > /sys/devices/platform/backlight/backlight/backlight/brightness
(3) Set screen brightness to maximum:
echo 7 > /sys/devices/platform/backlight/backlight/backlight/brightness
By modifying the value of the screen backlight brightness file, the screen brightness can be adjusted, with a maximum value of 7. Users can change the specific value according to their needs.
06 07 08 09
Therefore, I am here
Click the card below to follow me
↓↓↓

If you find it good, please click
Collect
Like
View
+1
❤❤❤