Project Showcase
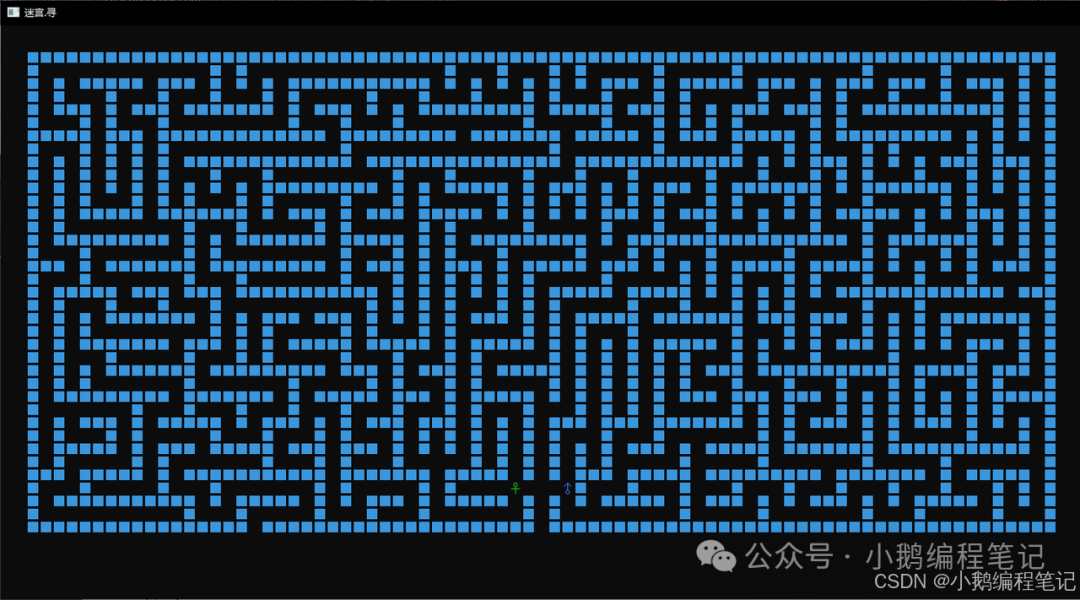
[Two-Person Maze Game]:
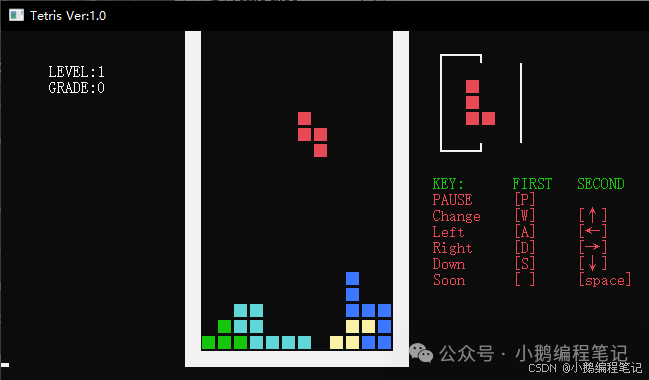
[Tetris]:
[Complete Notes Link]:
https://mp.weixin.qq.com/s/J5bTlJdA613DB9cCb94eag
1. Software Introduction
2. Download and Installation Package
3. Installation Steps
4. Settings
5. User Instructions
6. Post-Installation Settings
1. Software Introduction
1.1 Software History
Dev C++ is an integrated development environment for C and C++ programming on Windows. It uses the mingw32/gcc compiler and adheres to C/C++ standards. The development environment includes multi-page windows, project editors, and debuggers, integrating editors, compilers, linkers, and executables in the project editor, providing syntax highlighting to reduce editing errors, along with comprehensive debugging features suitable for both beginners and advanced programmers. Many universities also use Dev C++ as a foundational teaching tool for C language and as a tool for practical experiments.
2. Download and Installation Package
2.1 Download Link 1 (Official Website)
Download from the SourceForge official website, it is recommended to prioritize this version.
Dev-C++ download | SourceForge.net
As shown in the figure below:
After clicking download, wait a few seconds for the download prompt to appear. Once the download is complete, follow the installation steps in section three to install the software.
2.2 Download Link 2 (Baidu Cloud Download)
The DevC++ installation program has been stored in Baidu Cloud, you can choose to download the installation program from Baidu Cloud for installation. After downloading, follow the installation steps in section three to install the software.
Link:https://pan.baidu.com/s/1O3JOGgx9c2trmDPd9qg54Q Extraction Code: 6666
3. Installation Steps
3.1 Double-click “Dev-*** Setup.exe” to run the installation program.
Note: (The version does not affect the detail of this installation tutorial, all are applicable)
3.2 Select English by default, click OK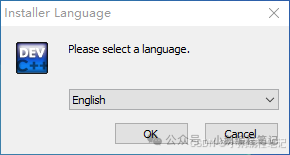
3.3 Click I Agree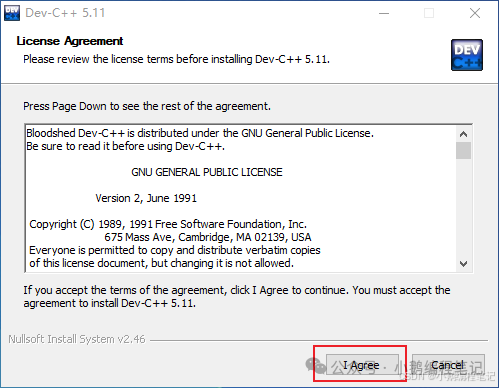
3.4 Click Next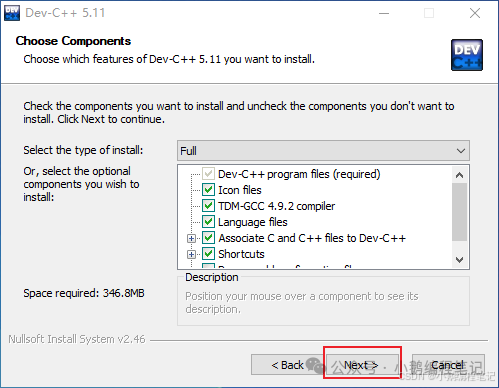
3.5 Choose the software installation path
If installing to the default path on drive C, simply click Install. If changing the installation path, click Browser to select the appropriate installation path. For example, if the installation path is on drive D, click Install afterwards.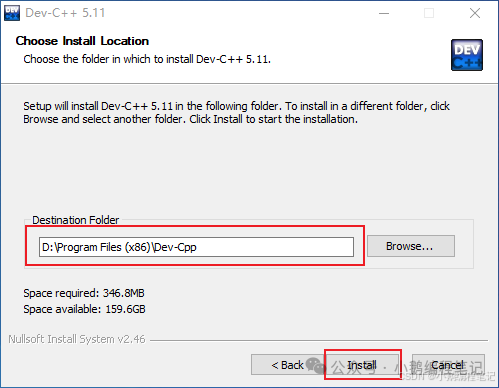
3.6 Software installation completed
Wait a moment for the software installation to complete, and enter the following interface.
Follow the steps to check “Run ***”, then click Finish.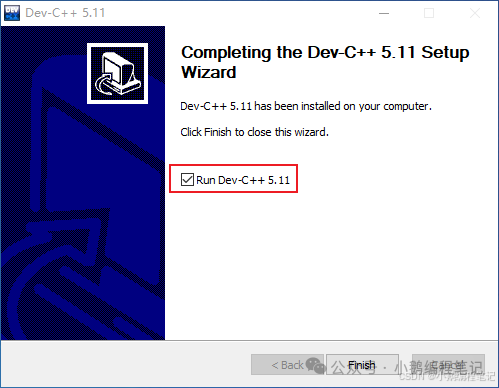
4. Settings
4.1 Open Dev-C++ Software
Follow the steps, select Simplified Chinese, then click Next.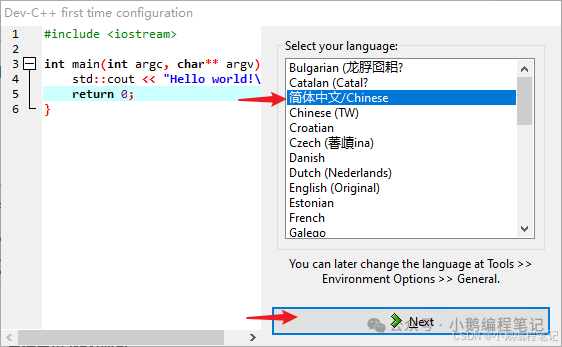
4.2 Custom Settings
Set the software font, color, icon, and other properties. If you choose to use the default settings, simply click Next.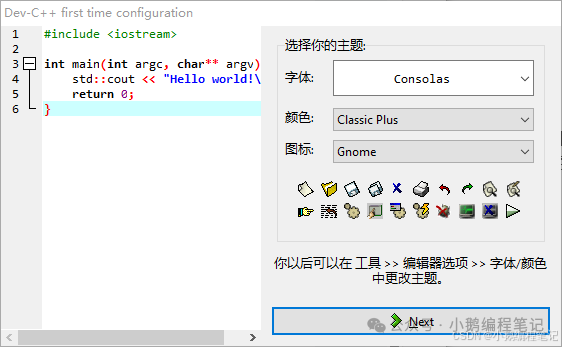
4.3 Notification that Dev-C++ has been successfully set up, click OK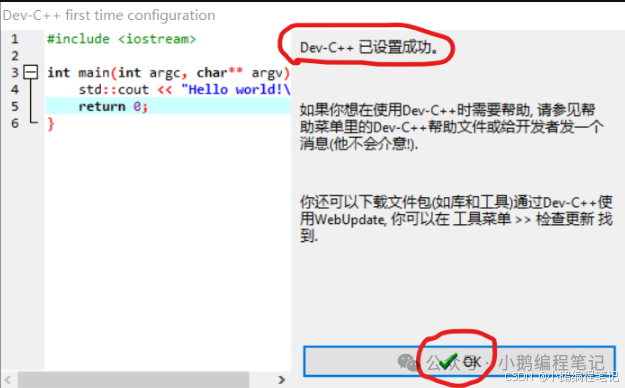
4.4 You will then enter the software interface, installation complete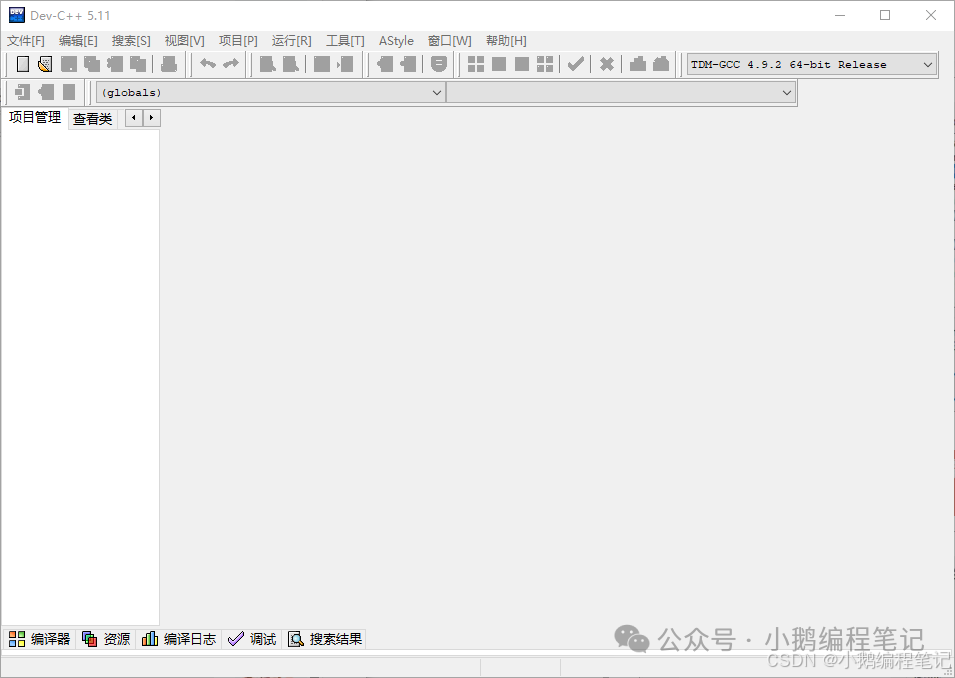
5. User Instructions
5.1 Create a C Language File
In – New – Source Code, create a new one directly.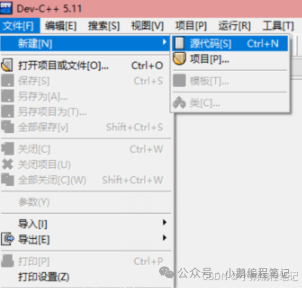
5.2 Then select: Save As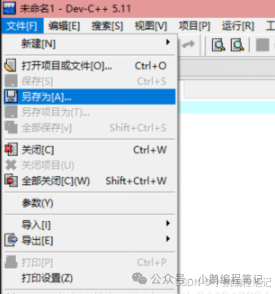
5.3 Save as .C File
In an appropriate location, save it as a .C file (C source files), not .cpp (C++ source files).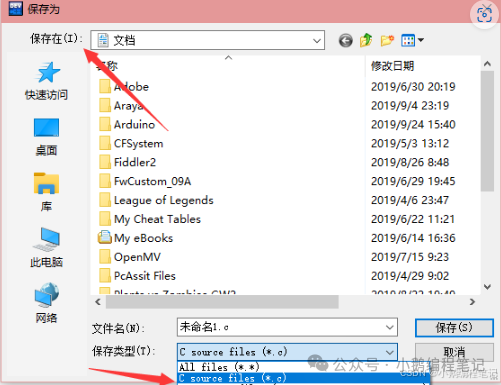
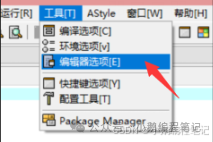
5.4 Compiler Type
Then, set our compiler type to: 64-bit Release, which helps speed up compilation, but cannot debug. When debugging is needed, switch to Debug mode.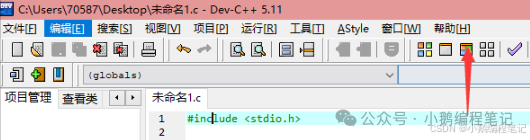
5.5 Compile and Run:
-
Compile – only compiles the file, does not run (to check for errors);
-
Run – runs the last compiled file, even if you modified the code, it will run the last compiled program;
-
Compile and Run – compiles this code and then runs it.
6. Post-Installation Settings
Set font size
Text color settings
Set Dev C++ as the default C language editing tool
<span>Daily updates!</span>
<span>Official account, CSDN and other blogs: Little Goose Programming Notes</span>
<span>Daily updates may be slow, if you need complete notes, please contact me. C/C++/Data Structures-Algorithms/Microcontroller 51-STM32-GD32-ESP32/Embedded/Linux Operating System/U-Boot/Linux Kernel-Driver-Application/Hardware Basics-PCB Layout/Python/Post-Program and Machine Learning!</span>