Introduction
1. What is a Digital Image
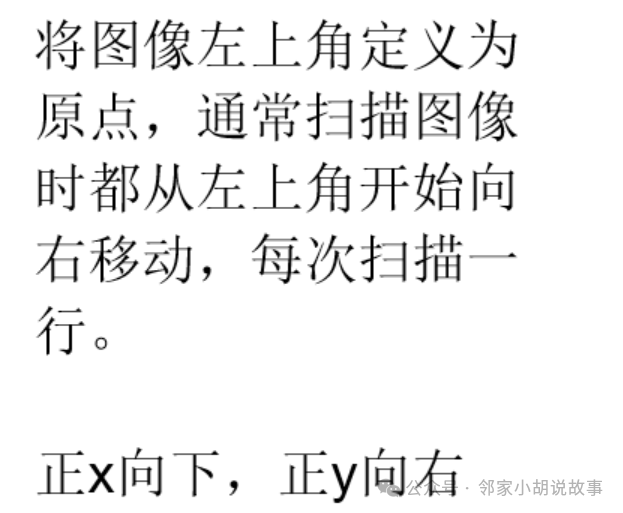
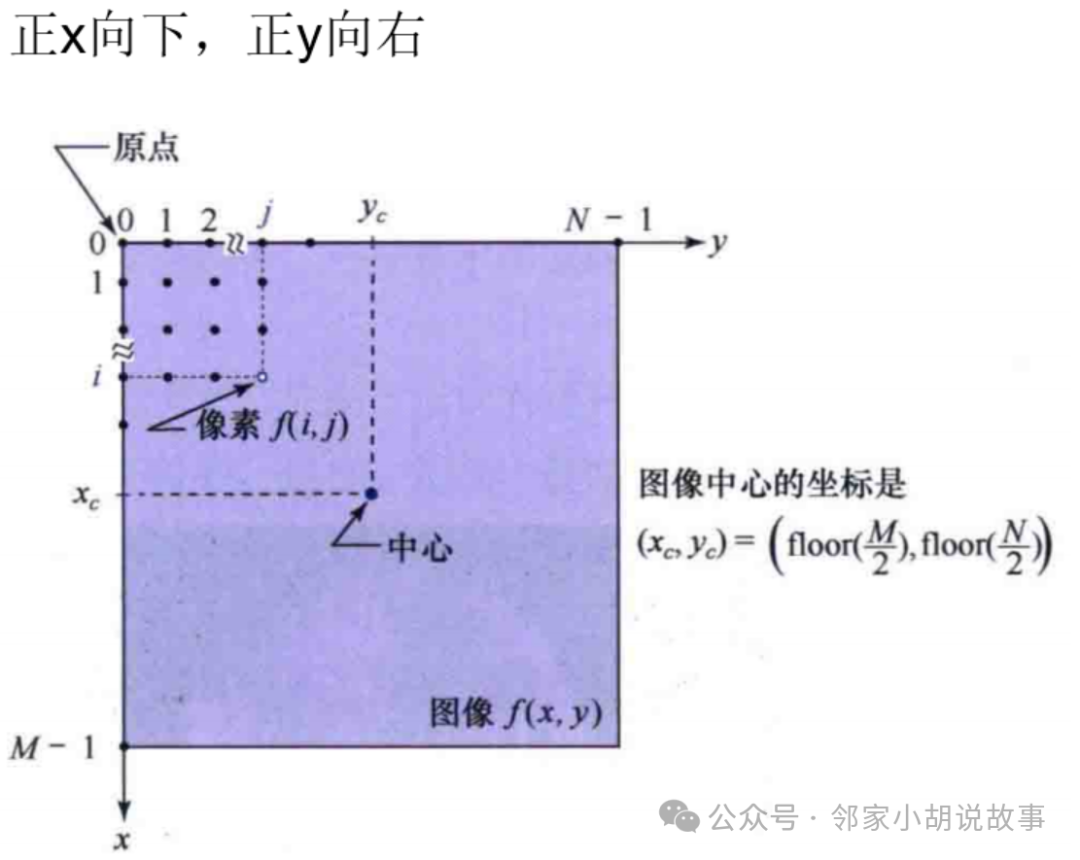
An image can be defined as a two-dimensional function f(x,y), where x and y are spatial (plane) coordinates, and the amplitude of f at any coordinate (x,y) is referred to as the brightness or grayscale of the image at that point. When the values of x, y, and f are all finite discrete values, the image is called a digital image.
A digital image consists of a finite number of elements, each with a specific position and value. These elements are called picture elements, image elements, or pixels.
2. Representation of Digital Images
An array (matrix) composed of the values f(x,y) can be represented by the formula for an M×N matrix as follows:
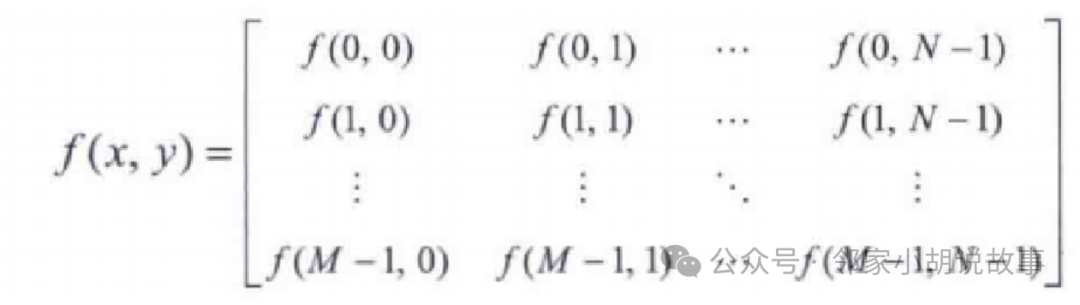
The real matrix on the right represents the digital image, with each element referred to as a pixel.
The digitization of an image requires determining the values of M, N, and the number of discrete grayscale levels L. For M and N, there are no other restrictions except that they must be positive integers. However, for storage and quantization hardware considerations, the number of grayscale levels is usually taken as a power of 2, i.e.,
where k is an integer. Assuming the discrete grayscale levels are evenly spaced and they are integers within the interval [0,L-1].
Special Section: How to Access Pixels
Accessing pixel at (j,i)
For an 8-bit (0~255) grayscale image and a BGR color image, you can access the image pixels using at:
// Grayscale image
image.at<uchar>(j, i) // j is the row number, i is the column number
// BGR color image   Vec3f or Vec3b
image.at<Vec3b>(j, i)[0] // B component
image.at<Vec3b>(j, i)[1] // G component
image.at<Vec3b>(j, i)[2] // R component
The higher the grayscale level, the more the image color leans towards white; the lower the grayscale level, the more the image color leans towards black.
Basic Operations
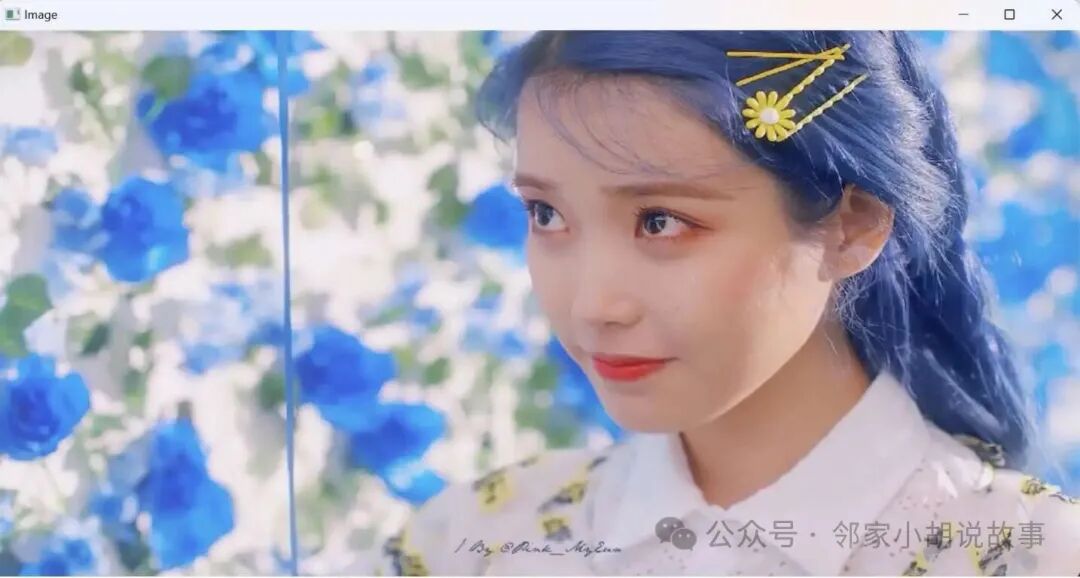
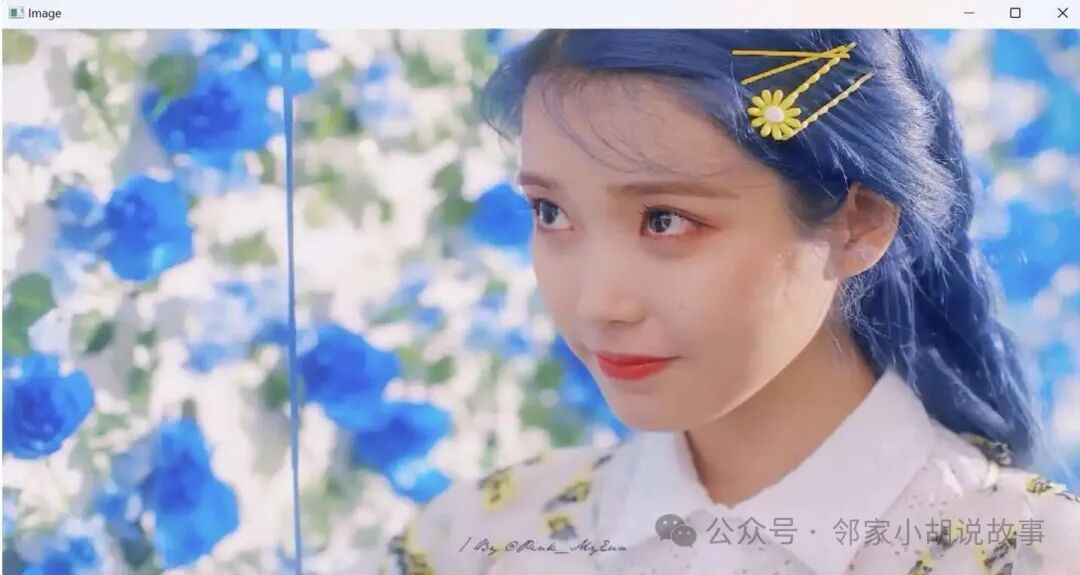
1. Image Reading and Display
#include <iostream>
#include <opencv2/opencv.hpp> // Includes all header files related to image processing (15 in total), just this one is enough

using namespace cv;
using namespace std;

int main()
{
//D:\New Desktop\Comic Character Wallpaper\1648229235164_1648228777745.jpg
//string path = R"(A005.png)"; // Image path R"(Relative path, if the file is pasted in the main file directory, it is the file name or absolute path\ or /)"
string path = "A005.png";
 Mat img = imread(path);  // Load the image and assign it to the image variable img

// The Mat class is a core data structure in the OpenCV library used to represent images or matrices. The imread function returns an empty Mat object if the image fails to load correctly, so you should check img.empty() instead of path.empty().
// Check if the file is opened, print a statement if not opened
if (img.empty()) {
cout << "file not loaded" << endl;
return -1;  // End program execution
 }

 namedWindow("Image", WINDOW_FREERATIO);// Create a resizable window named Image to avoid incomplete image display
 imshow("Image", img);// Create a window to display the image img
 waitKey(0);// Continuously refresh the image
return 0;
}

/*
1. The waitKey() function continuously refreshes the image at a frequency of delay, measured in ms.
2. When delay is 0, it will continuously display this frame.
3. When delay is not 0, the program waits for "delay" ms after displaying one frame before displaying the next frame.
*/
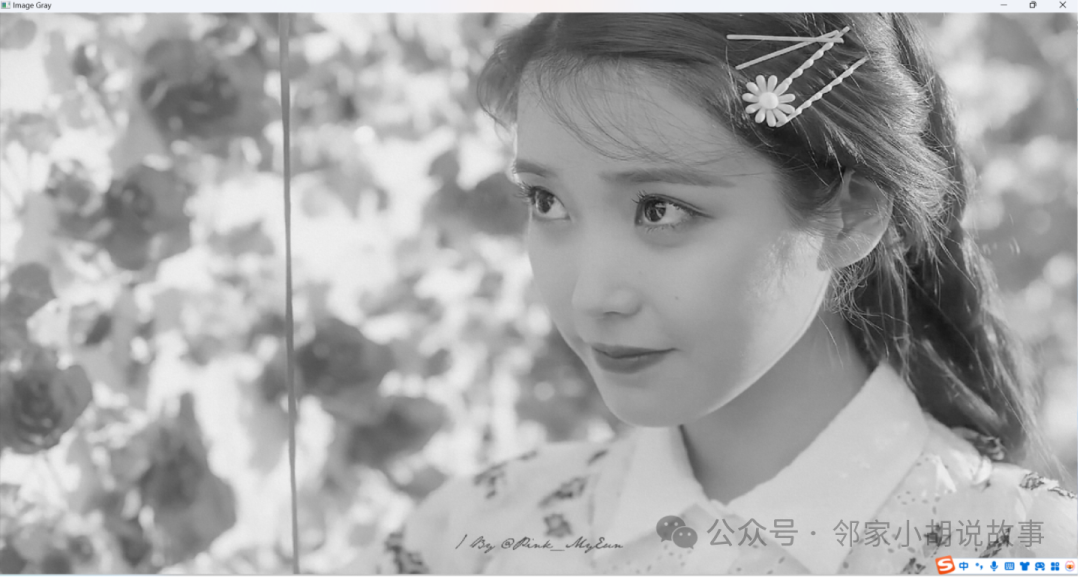
2. Image Preprocessing
#include <iostream>
#include <opencv2/opencv.hpp> // Includes all header files related to image processing (15 in total), just this one is enough
//#include <vector> // std::vector is a dynamic array that can automatically resize
using namespace cv;
using namespace std;
int main() {
string path = "A005.png";
Mat img = imread(path);
Mat imgGray, imgBlur, imgCanny, imgDil, imgErode; // Create empty data matrices
// Convert the photo to grayscale
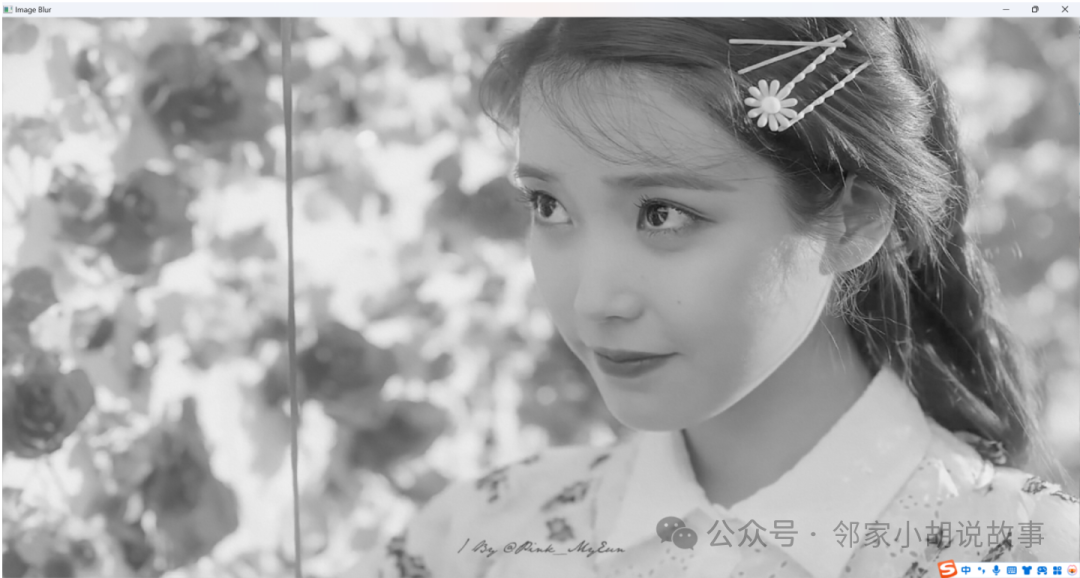
cvtColor(img, imgGray, COLOR_BGR2GRAY);
// Gaussian blur (Input image, output image, Gaussian kernel (width, height) [can be different, must be odd positive], x-direction deviation, y-direction deviation (if y is 0, the function will automatically make y equal to x, if both x and y are 0, xy will be calculated from the two values of the Gaussian kernel))
GaussianBlur(imgGray, imgBlur, Size(3, 3), 3, 0);
// Canny edge detector Generally, some blurring is done before using the Canny edge detector. The 3rd and 4th parameters represent the low and high thresholds, where the low threshold is often taken as 1/2 or 1/3 of the high threshold.
Canny(imgBlur, imgCanny, 25, 75);
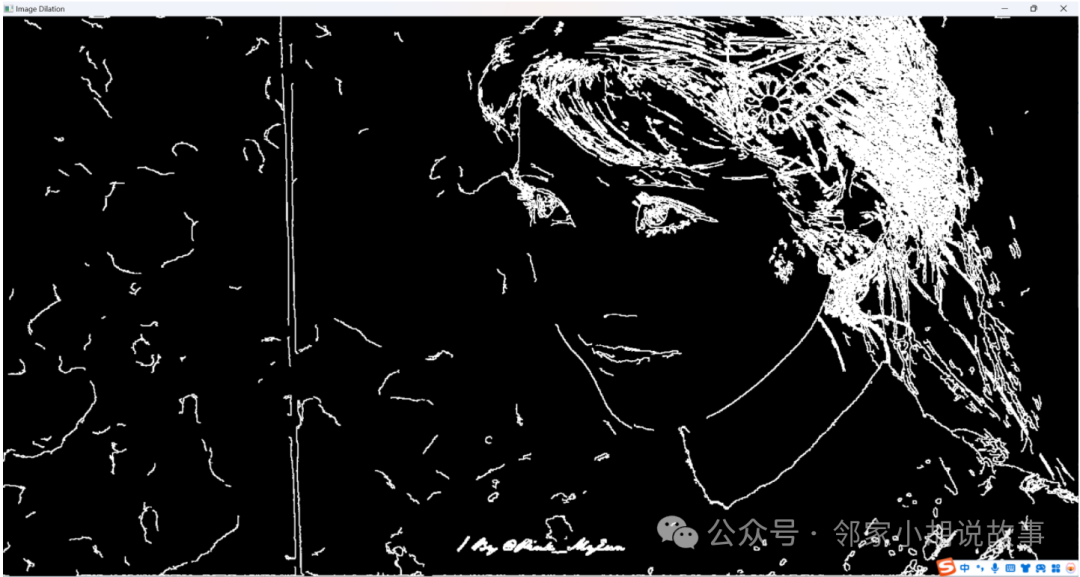
// Create a kernel for dilation
Mat kernel = getStructuringElement(MORPH_RECT, Size(3, 3));
// Image dilation
dilate(imgCanny, imgDil, kernel);
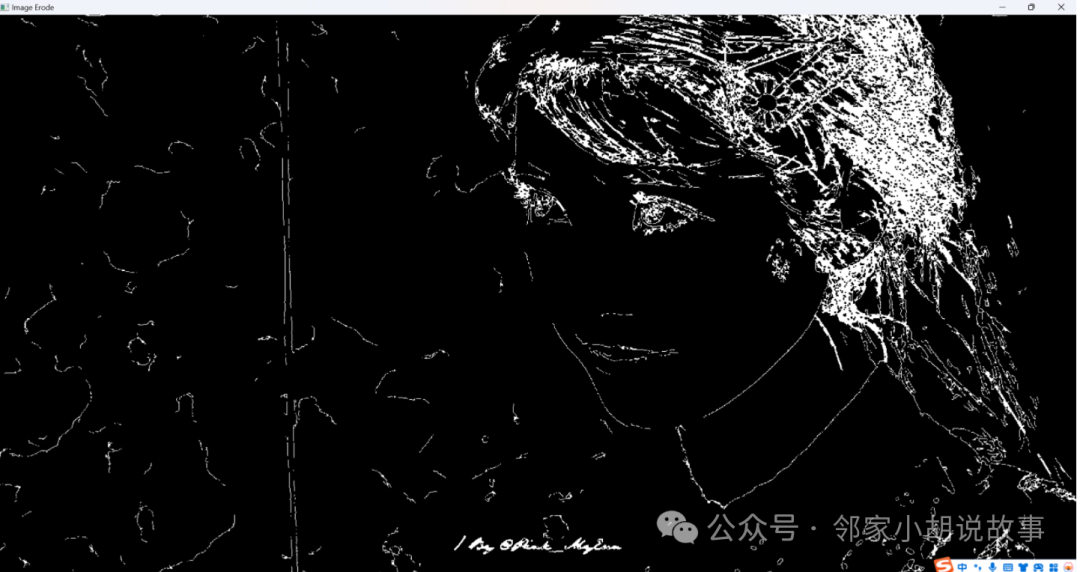
// Image erosion
erode(imgDil, imgErode, kernel);
// Result presentation WINDOW_FREERATIO and WINDOW_NORMAL are two modes used for window display in OpenCV
namedWindow("Image", WINDOW_FREERATIO);// Create a resizable window named Image to avoid incomplete image display
imshow("Image", img);
namedWindow("Image Gray", WINDOW_FREERATIO);// Create a resizable window named Image Gray to avoid incomplete image display
imshow("Image Gray", imgGray);
namedWindow("Image Blur", WINDOW_FREERATIO);// Create a resizable window named Image Blur to avoid incomplete image display
imshow("Image Blur", imgBlur);
namedWindow("Image Canny", WINDOW_FREERATIO);// Create a resizable window named Image Canny to avoid incomplete image display
imshow("Image Canny", imgCanny);
namedWindow("Image Dilation", WINDOW_FREERATIO);// Create a resizable window named Image Dilation to avoid incomplete image display
imshow("Image Dilation", imgDil);
namedWindow("Image Erode", WINDOW_FREERATIO);// Create a resizable window named Image Erode to avoid incomplete image display
imshow("Image Erode", imgErode);
waitKey(0);
return 0;
}
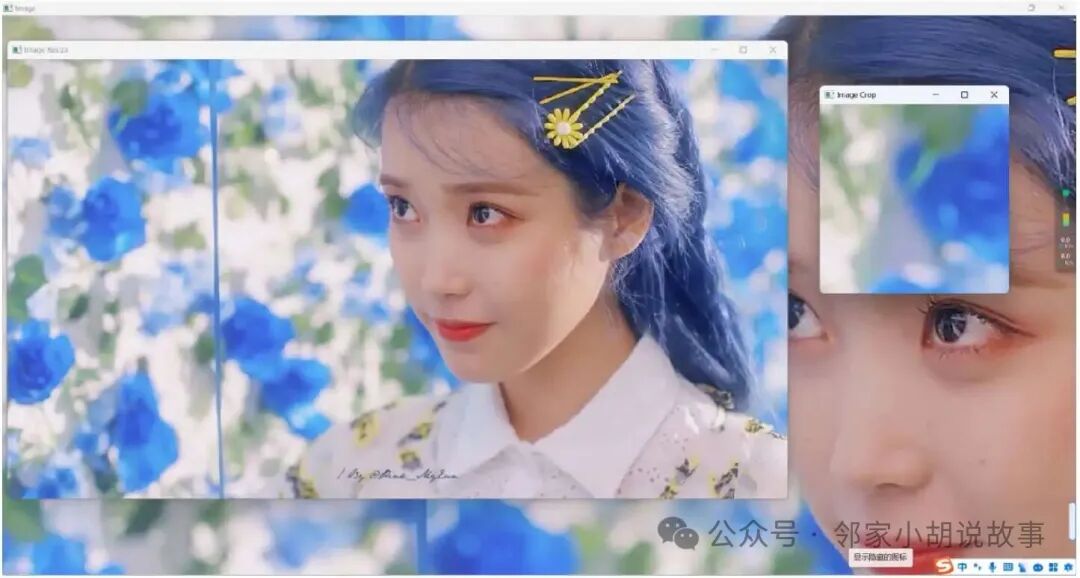
3. Image Cropping
#include <iostream>
#include <opencv2/opencv.hpp>  // Includes all header files related to image processing (15 in total), just this one is enough

using namespace cv;
using namespace std;

void main() {

string path = "A005.png";
 Mat img = imread(path);
 Mat imgResize, imgCrop;

// Check the size of the original image
cout << img.size() << endl;   // View the size of the original image
//resize(img, imgResize, Size(640, 480));   // Scale according to custom width and height
 resize(img, imgResize, Size(), 0.5, 0.5); // Scale by proportion

// Image cropping
Rect roi(200, 100, 300, 300);
// The first two parameters are the distances in the x and y directions from the top left origin, the last two parameters are the lengths in the x and y directions
 imgCrop = img(roi);

 imshow("Image", img);
 imshow("Image Resize", imgResize);
 imshow("Image Crop", imgCrop);

 waitKey(0);
}
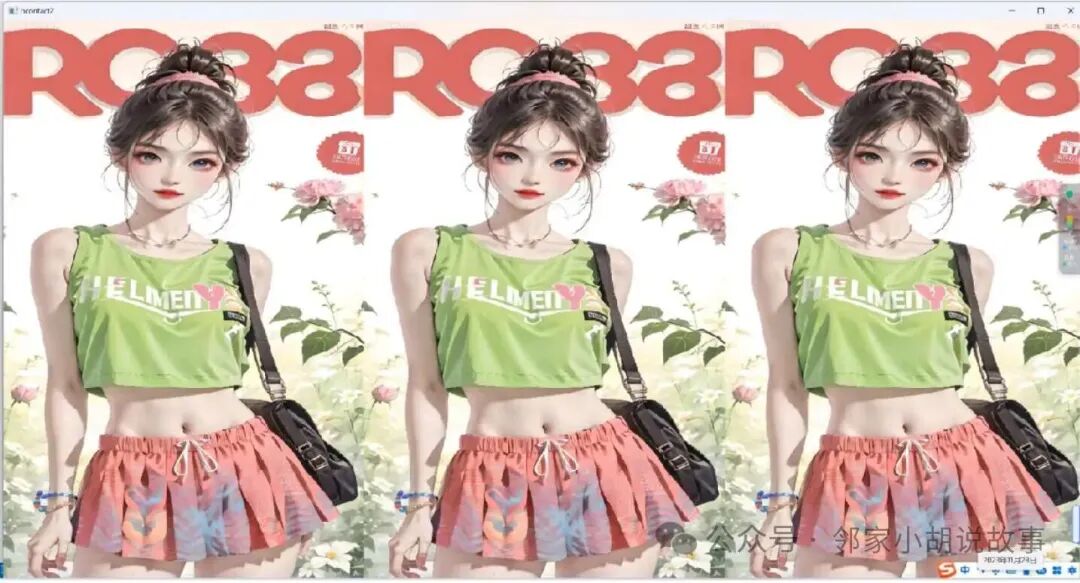
4. Image Stacking and Stitching
/*
#include <iostream>
#include <opencv2/opencv.hpp>
#include <vector>

int main()
{
 // The image depth must be the same
 cv::Mat image = cv::imread("B1.png");
 cv::Mat image2 = cv::imread("B2.png");

 cv::Mat output;
 cv::hconcat(image, image2, output);

 // Create a window and display the image    WINDOW_FREERATIO and WINDOW_NORMAL are two modes used for window display in OpenCV
 cv::namedWindow("hcontact", cv::WindowFlags::WINDOW_NORMAL);

 cv::imshow("hcontact", output);

 cv::waitKey(0);

 return 0;
}
*/
// Horizontally concatenate multiple images

#include <iostream>
#include <opencv2/opencv.hpp>
#include <vector>

int main()
{
    #if 0
    // Not sure why the concatenation is black and the image is not visible
    cv::Mat image = cv::imread("tubiao/setting.png");
    cv::Mat image2 = cv::imread("tubiao/save.png");
    cv::Mat image3 = cv::imread("tubiao/picture.png");
    #else
    cv::Mat image = cv::imread("B1.png");
    cv::Mat image2 = cv::imread("B1.png");
    cv::Mat image3 = cv::imread("B1.png");
    #endif
    std::vector<cv::Mat> images;
    images.push_back(image);
    images.push_back(image2);
    images.push_back(image3);

    cv::Mat output2;
    cv::hconcat(images, output2);

    // Create a window and display the image    WINDOW_FREERATIO and WINDOW_NORMAL are two modes used for window display in OpenCV
    cv::namedWindow("hcontact2", cv::WindowFlags::WINDOW_NORMAL);

    cv::imshow("hcontact2", output2);
    cv::waitKey(0);

    return 0;
}
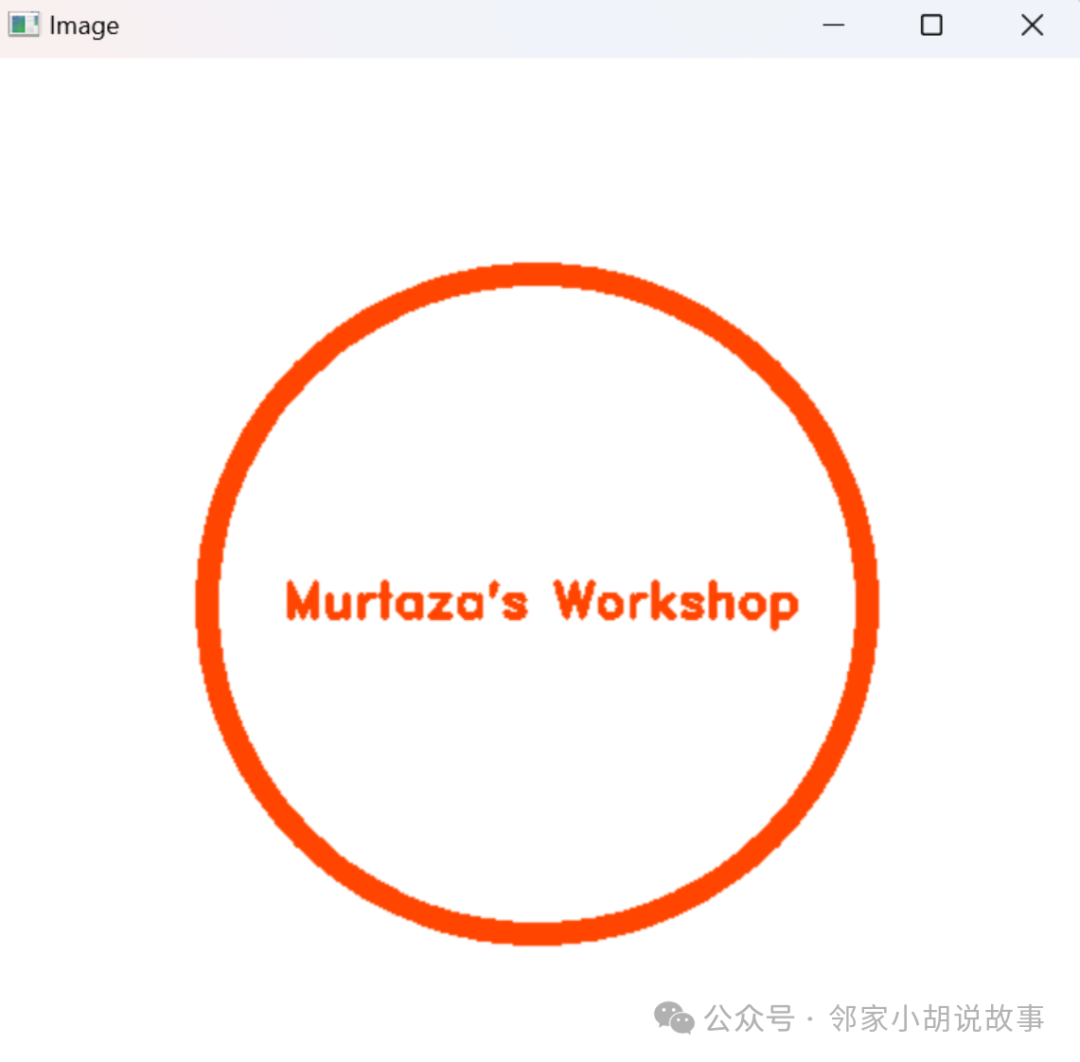
5. Drawing Shapes and Adding Text
#include <iostream>
#include <opencv2/opencv.hpp>  // Includes all header files related to image processing (15 in total), just this one is enough
using namespace cv;
using namespace std;
// Drawing shapes and adding text
void main() {
// Create a blank image  img(width, height, BGR color image, initialize each pixel value (white))  Black (0,0,0)
Mat img(512, 512, CV_8UC3, Scalar(255, 255, 255));

// Draw a circle with a line width of 10
 circle(img, Point(256, 256), 155, Scalar(0, 69, 255), 10);
//circle(img, Point(256, 256), 155, Scalar(0, 69, 255), FILLED, 10);
// Function parameters are output to image img, center of the circle, radius, color, thickness (FILLED means filled)

// Draw a rectangle
 rectangle(img, Point(130, 226), Point(382, 286), Scalar(255, 255, 255), FILLED);
// Function parameters are output to image img, top left vertex coordinates of the rectangle, bottom right vertex coordinates, color, thickness

// Draw a line segment
 line(img, Point(130, 296), Point(382, 296), Scalar(255, 255, 255), 2);
// Function parameters are output to image img, two endpoint coordinates, color, thickness

// Add text  OpenCV supports various Hershey fonts, such as FONT_HERSHEY_SIMPLEX, FONT_HERSHEY_PLAIN, FONT_HERSHEY_DUPLEX, etc.
 putText(img, "Murtaza's Workshop", Point(137, 262), FONT_HERSHEY_DUPLEX, 0.75, Scalar(0, 69, 255), 2);
// Function parameters are output to image img, text content, starting point from the bottom left, font, size, color, thickness

 imshow("Image", img);

 waitKey(0);
}
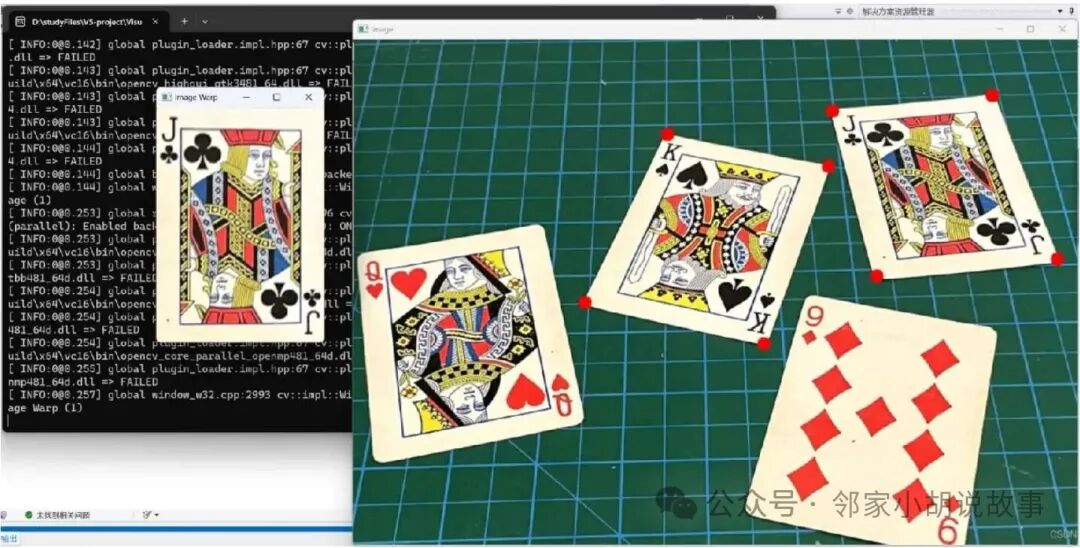
6. Perspective Transformation
#include <iostream>
#include <opencv2/opencv.hpp>  // Includes all header files related to image processing (15 in total), just this one is enough
using namespace cv;
using namespace std;

float w = 250, h = 350;
Mat matrix, imgWarp;   // matrix will be used to store the perspective transformation matrix, imgWarp will be used to store the transformed image.
// Perspective transformation
void main() {

string path = "card.png";
 Mat img = imread(path);

// An array containing 4 Point2f type elements representing four points on the source image. Point2f is a two-dimensional point represented by two floating-point numbers, here are the coordinates of the four points
//Point2f src[4] = { {529,142},{771,190},{405,395},{674,457} };

/*
 * You can use Halcon magnifier to read the pixel positions
*   Q's coordinates
*  (322,9)          (276,279)
*  (628,35)         (567,342)

*   J's coordinates
*   (106,715)   (83,953)
*   (352,781)   (327,1050)

*   9's coordinates
*   (383,677)      (434,957)
*   (700,586)      (753,912)
 */

// Use Halcon magnifier to find the four point positions of Q (row, column) (322,9)          (276,279)     (628, 35)         (567, 342)
//Point2f src[4] = { {9,322},{279,276},{35,628},{342,567} };
// J's four point positions
 Point2f src[4] = { {715,106},{953,83},{781,352},{1050,327} };
// 9's four point positions
//Point2f src[4] = { {677,383},{957,434},{586,700},{912,753} };

 Point2f dst[4] = { {0.0f,0.0f},{w,0.0f},{0.0f,h},{w,h} };   // These four points define the coordinates of the new image after perspective transformation

 matrix = getPerspectiveTransform(src, dst);// Get the perspective transformation matrix from the quadrilateral of the original image to the quadrilateral of the target image
// src is the vertex coordinates of the source image quadrilateral, dst is the corresponding vertex coordinates of the target image quadrilateral
 warpPerspective(img, imgWarp, matrix, Point(w, h));
// Parameters are input image, output image, perspective transformation matrix, image size (width, height)

for (int i = 0; i < 4; i++)
 {
  circle(img, src[i], 10, Scalar(0, 0, 255), FILLED);
 }// Mark the target vertices in the original image

 imshow("Image", img);
 imshow("Image Warp", imgWarp);

 waitKey(0);
}
7. Color Transformation
#include <iostream>
#include <opencv2/opencv.hpp> // Includes all header files related to image processing (15 in total), just this one is enough
using namespace cv;
using namespace std;
Mat imgHSV, mask;
int hmin = 0, smin = 0, vmin = 0;
int hmax = 179, smax = 255, vmax = 255;
void main() {
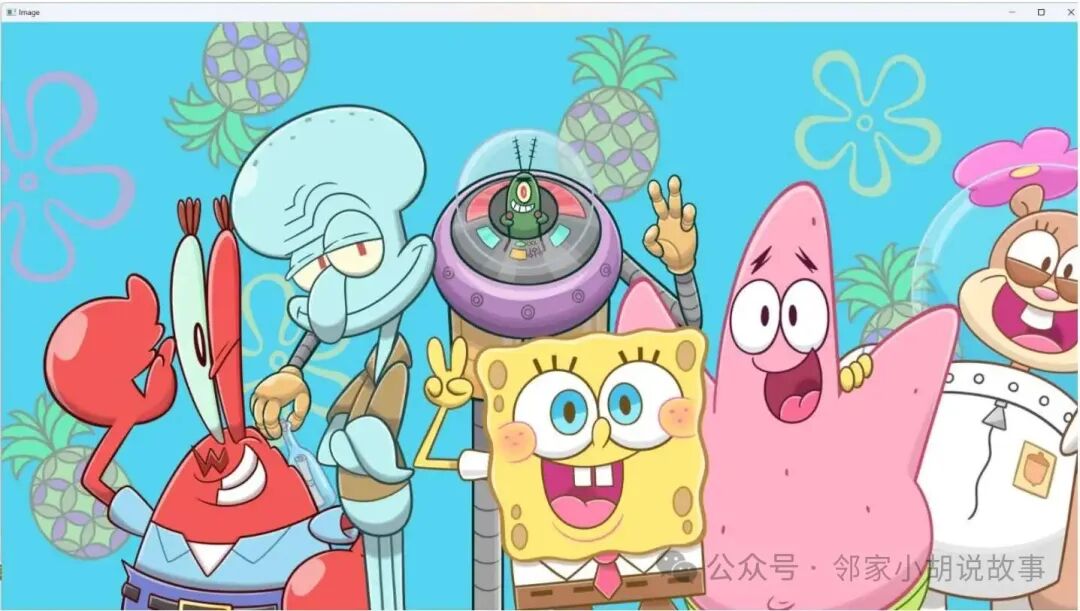
string path = "SpongeBob01.jpg";
Mat img = imread(path);
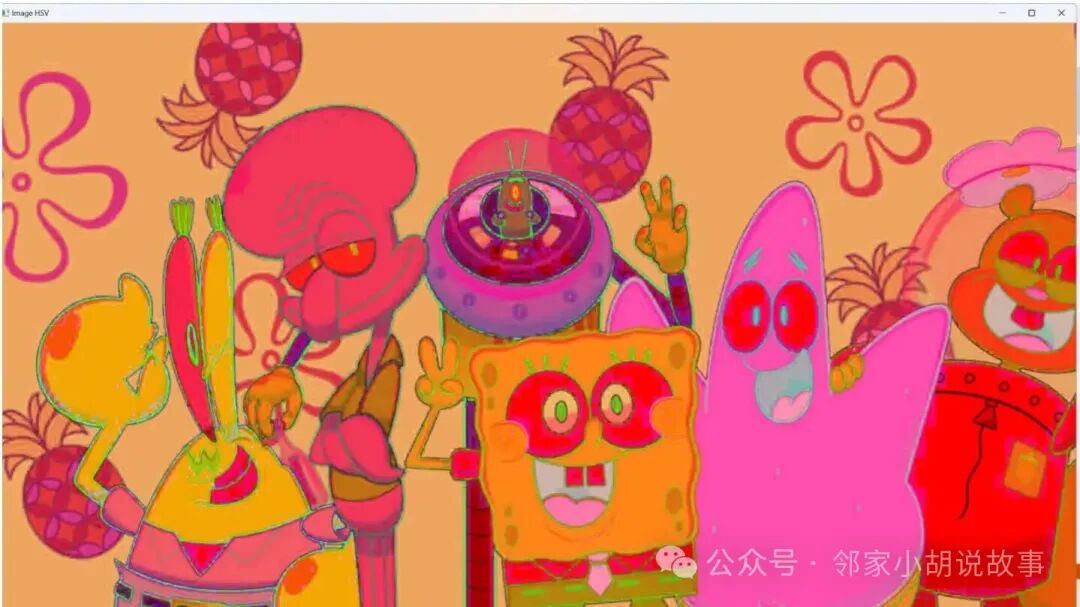
// Color space conversion function - cvtColor
cvtColor(img, imgHSV, COLOR_BGR2HSV);
// HSV color space H (Hue): 0~180 S (Saturation): 0~255 V (Brightness): 0~255
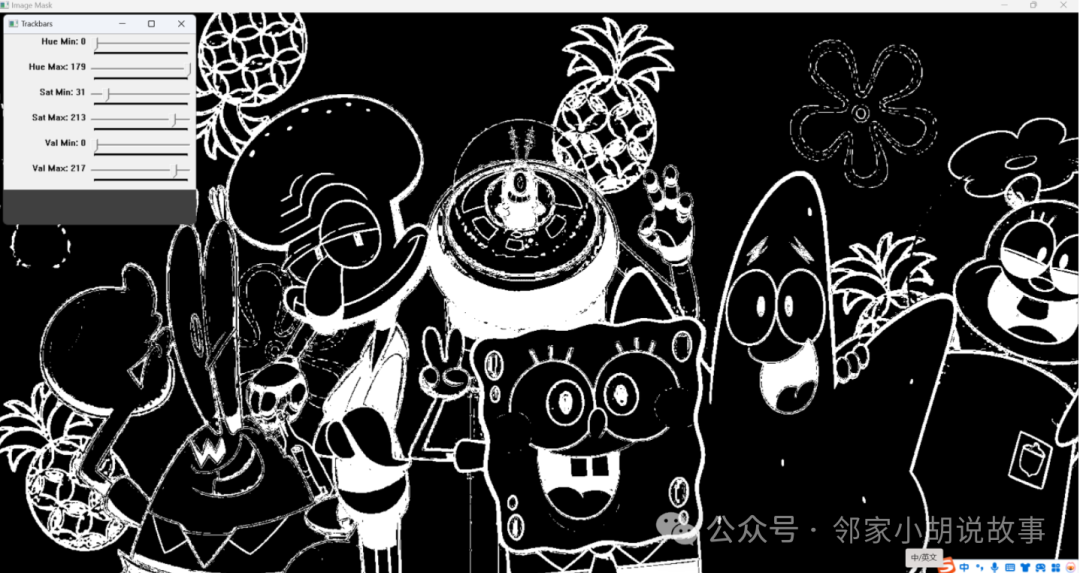
namedWindow("Trackbars", (640, 200));// Create a window named Trackbars, size 640*200
createTrackbar("Hue Min", "Trackbars", &hmin, 179);
createTrackbar("Hue Max", "Trackbars", &hmax, 179);
createTrackbar("Sat Min", "Trackbars", &smin, 255);
createTrackbar("Sat Max", "Trackbars", &smax, 255);
createTrackbar("Val Min", "Trackbars", &vmin, 255);
createTrackbar("Val Max", "Trackbars", &vmax, 255);
// createTrackbar function creates a trackbar,
// The 4 parameters are the trackbar name, output window, a pointer to an integer representing the current value, and the maximum value reachable
while (true)
{
// Detect the color we want to set a mask for the colors within the range
Scalar lower(hmin, smin, vmin);// Minimum value of HSV range
Scalar upper(hmax, smax, vmax);// Maximum value of HSV range
inRange(imgHSV, lower, upper, mask);// Input, low value, high value, output
// inRange sets the pixel values within the threshold range to white (255), and those outside the threshold range to black (0)
imshow("Image", img);
imshow("Image HSV", imgHSV);
imshow("Image Mask", mask);
waitKey(1);
}
}
8. Shape Detection and Contour Detection
#include <iostream>
#include <opencv2/opencv.hpp> // Includes all header files related to image processing (15 in total), just this one is enough
using namespace cv;
using namespace std;
Mat imgGray, imgBlur, imgCanny, imgDil, imgErode;
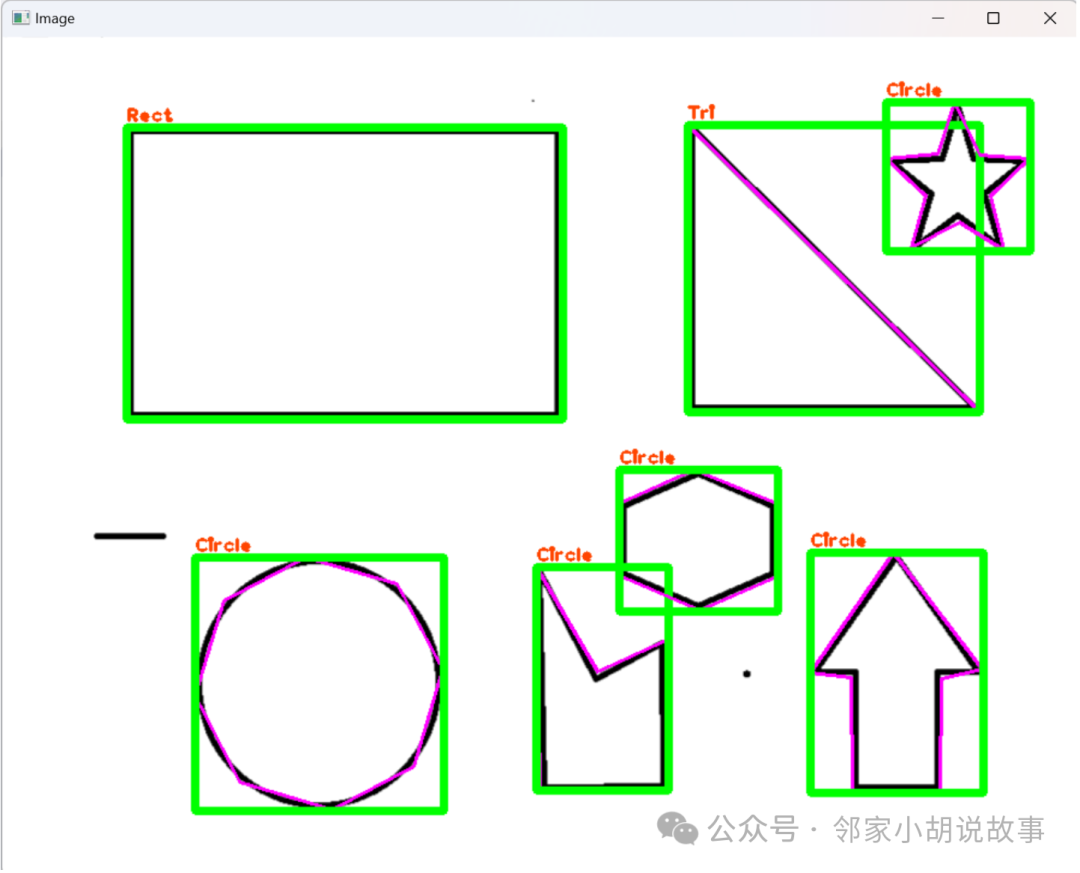
// Define a contour processing function whose purpose is to extract contours from the preprocessed binary image and classify and label them based on their characteristics
void getContours(Mat imgDil, Mat img) {
// Define a two-dimensional vector contours to store the extracted contour information. Each inner vector represents a contour, and each contour is composed of a series of Points.
vector<vector<Point>> contours; // For example { {Point(20,30),Point(50,60)},{}, {}} three contours, the first contour has two points, the second and third are empty
// Define a vector hierarchy that contains multiple Vec4i type elements. Vec4i is a vector containing 4 integers. This hierarchy vector is used to store the hierarchical information between contours, such as which contour is the outer contour and which is the inner contour
vector<Vec4i> hierarchy;
// Use OpenCV's findContours function to extract contours from the dilated image. RETR_EXTERNAL indicates only the outermost contours are detected, CHAIN_APPROX_SIMPLE compresses the contours, keeping only the endpoints.
findContours(imgDil, contours, hierarchy, RETR_EXTERNAL, CHAIN_APPROX_SIMPLE);
// Use drawContours function to draw all detected contours on the image img. The contours will be drawn in magenta (specified by Scalar(255, 0, 255)) with a thickness of 2 pixels
//drawContours(img, contours, -1, Scalar(255, 0, 255), 2);
// Define a new two-dimensional vector conPoly with the same size as the number of detected contours. This vector will be used to store the approximate polygon of each contour
vector<vector<Point>> conPoly(contours.size());
// Define a new vector boundRect with the same size as the number of detected contours. This vector will be used to store the bounding rectangle of each contour
vector<Rect> boundRect(contours.size());
for (int i = 0; i < contours.size(); i++)
{
// Calculate the area of the contour and filter based on the area to remove possible noise
int area = contourArea(contours[i]);
cout << area << endl;// Area that needs to be filtered correctly (filter noise)
// Define a string variable objectType to store the name of the detected shape
string objectType;
// Classify the shape based on the area and number of vertices of the contour (e.g., triangle, rectangle, square, and circle). For rectangles and squares, the aspect ratio is also calculated to determine its exact shape.
if (area > 1000) // Filter out smaller contours, which may represent noise or unimportant details
{
float peri = arcLength(contours[i], true); // Calculate the perimeter of the current contour and store the result in the variable peri
// Find an approximate polygon of the current contour, which will be used for subsequent shape classification. The accuracy of the polygon is controlled by the parameter 0.02 * peri
approxPolyDP(contours[i], conPoly[i], 0.02 * peri, true);
cout << conPoly[i].size() << endl; // Output the number of vertices of the approximate polygon, which helps to understand the general shape of the polygon
boundRect[i] = boundingRect(conPoly[i]);// Calculate the bounding rectangle of the approximate polygon and store it in the boundRect vector
int objCor = (int)conPoly[i].size(); // Convert the number of vertices of the approximate polygon to an integer and store it in the variable objCor
// If the polygon has 3 vertices, classify it as a triangle and set objectType to "Tri"
if (objCor == 3) { objectType = "Tri"; }
// If the polygon has 4 vertices, further check its aspect ratio to determine if it is a square or rectangle
if (objCor == 4) {
float aspRatio = (float)boundRect[i].width / (float)boundRect[i].height;
cout << aspRatio << endl;
if (aspRatio > 0.95 && aspRatio < 1.05) { objectType = "Square"; }
else {
objectType = "Rect";
}
}
// If the polygon has more than 4 vertices, classify it as a circle and set objectType to "Circle"
if (objCor > 4) { objectType = "Circle"; }
// Use drawContours function to draw the contour on the original image img. It draws the i-th contour in conPoly (i.e., the currently processed contour).
drawContours(img, conPoly, i, Scalar(255, 0, 255), 2);// Draw the counted contour. The contour will be drawn in magenta (RGB value (255, 0, 255)) with a thickness of 2 pixels
// Use rectangle function to draw a rectangle on the original image img, which is the bounding rectangle around the currently processed contour. boundRect[i].tl() returns the top left point of the bounding rectangle, while boundRect[i].br() returns the bottom right point.
rectangle(img, boundRect[i].tl(), boundRect[i].br(), Scalar(0, 255, 0), 5);// Draw the bounding rectangle. The rectangle will be drawn in green (RGB value (0, 255, 0)) with a thickness of 5 pixels
// Print the name of the shape. Label the name of the shape (e.g., "Tri", "Square", "Rect", or "Circle") above the bounding rectangle on the original image.
// The text will be labeled at the top left corner of the bounding rectangle, specifically at the x-coordinate of the rectangle unchanged, and the y-coordinate reduced by 5 pixels.
// The font used is FONT_HERSHEY_PLAIN, font size is 1, text color is blue-violet (RGB value (0, 69, 255)), and text line thickness is 2 pixels.
putText(img, objectType, { boundRect[i].x,boundRect[i].y - 5 }, FONT_HERSHEY_PLAIN, 1, Scalar(0, 69, 255), 2);
}
}
}
void main() {
// Read an image named "contours.png" from the specified path
//string path = "contours.png";
string path = "xz.png";
Mat img = imread(path);
// Image preprocessing
//1. Convert the photo to grayscale, which helps to simplify the image processing process since grayscale images have only one channel
cvtColor(img, imgGray, COLOR_BGR2GRAY);
//2. Gaussian blur to reduce noise in the image
GaussianBlur(imgGray, imgBlur, Size(3, 3), 3, 0);
//3. Canny edge detection, using the Canny algorithm to detect edges in the image
Canny(imgBlur, imgCanny, 25, 75);
//4. Create a kernel for dilation. A 3x3 structuring element is defined (for morphological operations), and then this element is used to dilate the result of Canny edge detection.
Mat kernel = getStructuringElement(MORPH_RECT, Size(3, 3));
//5. Image dilation. Before contour detection, the result of Canny edge detection is dilated to enhance contours and remove noise.
dilate(imgCanny, imgDil, kernel);
// Get and display contours
getContours(imgDil, img);
// Display the processed image
imshow("Image", img);
//imshow("Image Gray", imgGray);
//imshow("Image Blur", imgBlur);
//imshow("Image Canny", imgCanny);
//imshow("Image Dilation", imgDil);
waitKey(0);
}
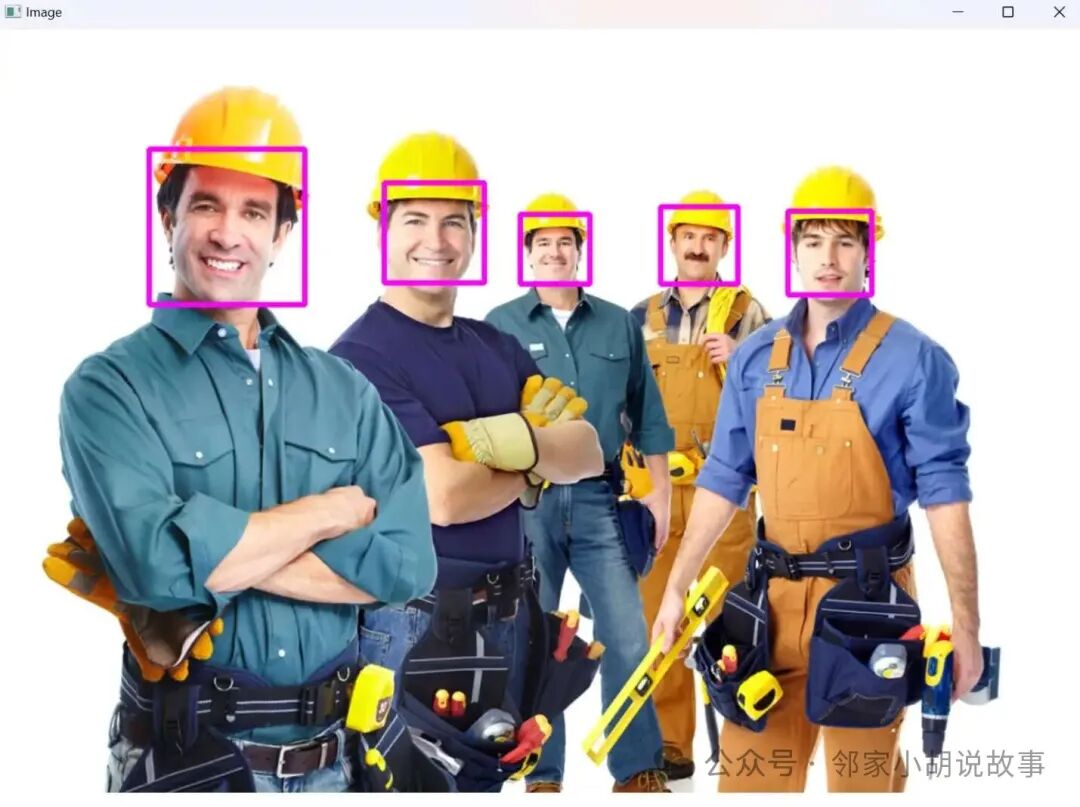
9. Face Recognition
#include <iostream>
#include <opencv2/opencv.hpp>  // Includes all header files related to image processing (15 in total), just this one is enough

using namespace cv;
using namespace std;

void main() {

//string path = "B3.jpg";
string path = "person.jpg";
 Mat img = imread(path);

 CascadeClassifier faceCascade;// Create a cascade classifier
// Load the training model. This is a commonly used model for face detection in the OpenCV library, located in the sources/data/haarcascades_cuda folder D:/OpenCV - 4.8.1/opencv/sources/data/haarcascades_cuda/haarcascade_frontalface_default.xml
 faceCascade.load("haarcascade_frontalface_default.xml");

if (faceCascade.empty()) { cout << "XML file not loaded" << endl; }
// Check if the file is opened, print a statement if not opened

vector<Rect> faces;// Create a vector to store faces
// faceCascade.detectMultiScale(img, faces, scaleFactor, minNeighbors);
// faces: This is an output vector used to store the rectangular areas of detected faces. scaleFactor: usually set to 1.1 minNeighbors: specifies how many times each target must be detected to be considered a true target. Usually set to 3-6.
 faceCascade.detectMultiScale(img, faces, 1.1, 10);
// detectMultiScale function can detect all faces in the image and save the coordinates and sizes of each face in the vector

// Use try-catch statement to catch exceptions and print more detailed error information
try {
  faceCascade.detectMultiScale(img, faces, 1.1, 10);
 }
catch (cv::Exception& e) {
std::cerr << e.what() << std::endl;
 }

// Draw rectangular borders around detected faces in the original image
for (int i = 0; i < faces.size(); i++)
 {
  rectangle(img, faces[i].tl(), faces[i].br(), Scalar(255, 0, 255), 3);
 }

 imshow("Image", img);

 waitKey(0);
}