Today, I will build a numeric keypad based on the Raspberry Pi Pico. I will create a simple orthogonal numeric keypad with 20 switches. Then, I will introduce how to install KMK firmware on it.
KMK can be installed on Python-based microcontrollers. It is used for some simple projects, from numeric keypads to full-sized keyboards.
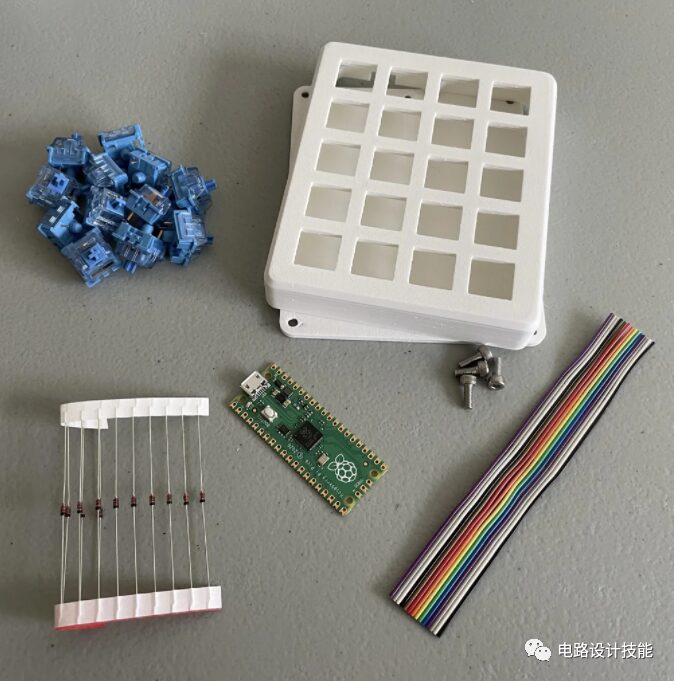
Supplies
-
Raspberry Pi Pico x1
-
Key switches x 20
-
Diodes x 20
-
Keycaps x 20
-
Metal wire
-
Case and hardware
-
Soldering
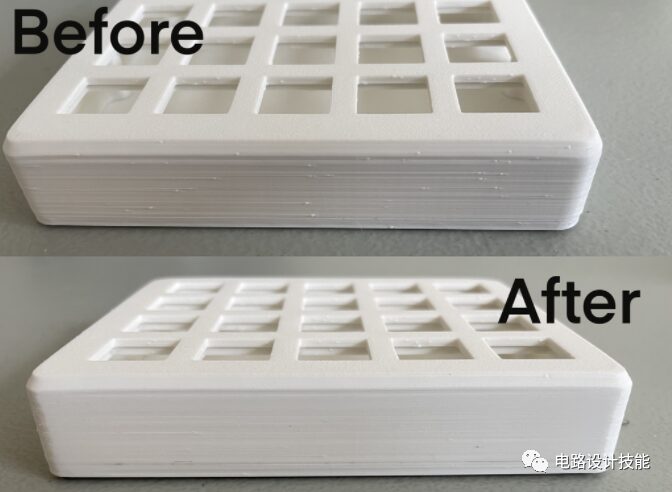
I designed and printed this case using PLA on the Ender 3 Pro. (Click to download)
The case is designed to use up to 6 M3 screws, but for the numeric keypad, I will only use 4 of them.
The edges are a bit rough, so I twisted the base to the top and wet-sanded the edges to make them smooth. In just a few minutes, I was able to get rid of the bumps and give the case a nice matte finish.
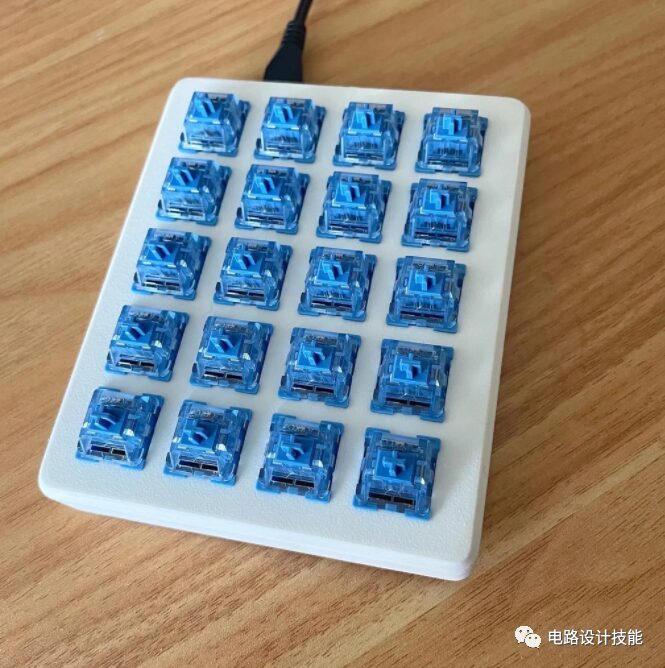
Step 2: Install Hardware Components:

I will consolidate all the hardware into one step. As I mentioned in the video for Part 1, I have some tips here that I hope will make it easier for you than it was for me.
I have included the circuit diagram above.
-
Place all switches in the same direction. This makes it easier to install the diodes in the next step.
-
-
Bend one leg of the diode at a 45-degree angle to the rest of the diode. Set this angle on the pin so that the diode flows down along one side of the switch.
-
Bend the other leg at a 90-degree angle. This can be used to connect to the rest of the diode row.
-
Check another diagram in this step for a better understanding of what I mean.
-
Place the diodes in position, then solder the diodes to the switches first.
-
Solder the 90-degree leg to the rest of the diode row.
-
Check the orientation of the diodes carefully each time; the direction is not important, but they all need to be the same.
-
Trim off the excess leads.
-
I used a solid wire and cut the insulation every 14 mm, then you can slide the insulation to leave a small gap for another pin on the switch.
-
I also removed about 1 inch (25 mm) of insulation from one end to free up enough space to move the insulation.
-
When placing the wire, I bent it between the pins to be connected. This helps to hold it in place while I solder.
-
Trim off the excess wire.
Connect Rows and Columns to Pico
-
I used some long stranded wires to connect to each row and each column.
-
Then connect them to the Pico. The pin numbers are not super important, just keep track of them for later use in the code.

“KMK is a feature-rich and beginner-friendly firmware for computer keyboards written and configured in CircuitPython.”
This is their GitHub link, which contains more information.
I use it because I find it much easier to use than QMK (the standard for most keyboards). It can be done in plain text on any computer.
Step 4: Install Software on Pico
With all the hardware, we need to install some software on the Pico. This can all be done without installing any additional software.
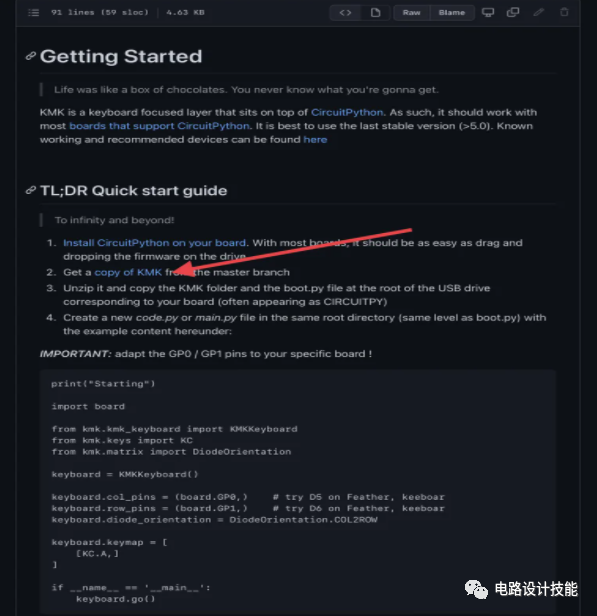
I learned how to do all of this from the KMK GitHub getting started page. If you want more information or features, there is a wealth of useful information there.
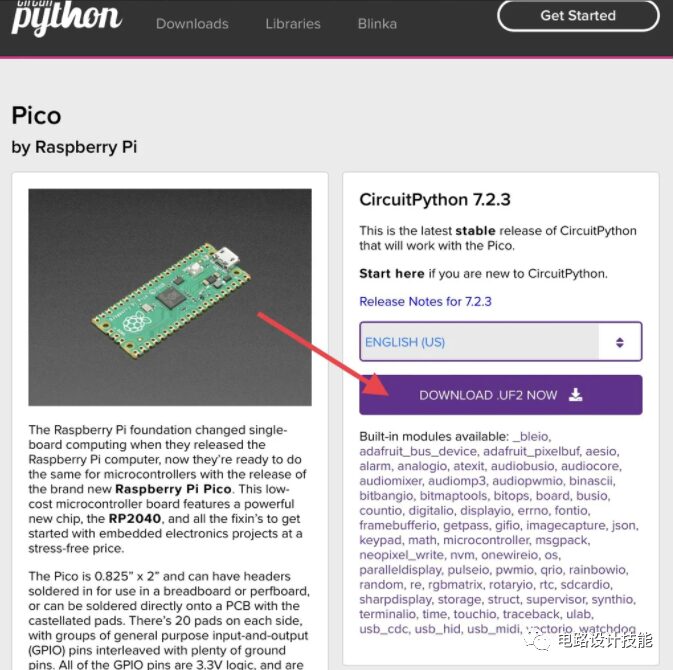
The first software needed is the latest CircuitPython UF2 from Adafruit.
Hold down the boot button on the Pico and plug it into the computer (if it keeps prompting an error, try plugging it in without holding the boot button).
The Pico should show up as an external storage device.
Drag the downloaded UF2 file onto the Pico. It should eject itself and then reconnect with a new name after a few minutes.
Next is the KMK firmware “installation.”
Get the latest version of KMK from their GitHub (get this link from the getting started page).
It will download a .zip file. Extract all the files.
Find the KMK folder and the boot.py file in the folder.
Copy these items from the folder and paste them onto the Pico.
So far, the KMK stage is just ready, and now I need to tell it what to actually do.
This is done using the code.py file. There should be one on the Pico, if not just create a new file named code.py.
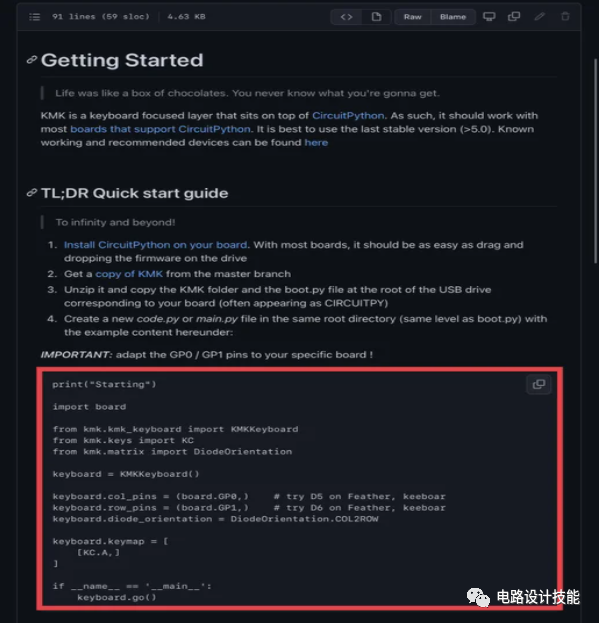
Fortunately, most of the hard work is already done. I just need to copy the example code from the GitHub page and paste it into the code.py file. I use NotePad++ to edit this file, but this can also be done in NotePad.
I need to provide all the details of my numeric keypad in this file.
To do this, I first need to provide the pin numbers for the rows and columns in lines 11 and 12 of the code.
Next, I need to change the diode orientation because the code needs to know how everything is set up. I will change it from COL2ROW to ROW2COL.
Now that most of the methods are complete, I just need to add key mappings. Or which keys should be where. I referred to this webpage to find all the key codes I could use. I won’t go into detail on this, but take a look at what I used and make any changes you want.
from kmk.kmk_keyboard import KMKKeyboardfrom kmk.keys import KCfrom kmk.matrix import DiodeOrientation
keyboard.col_pins = (board.GP0,board.GP1, board.GP2, board.GP3) # try D5 on Feather, keyboardkeyboard.row_pins = (board.GP4, board.GP5, board.GP6, board.GP7, board.GP8) # try D6 on Feather, keyboardkeyboard.diode_orientation = DiodeOrientation.ROW2COL
keyboard.keymap = [ [KC.A, KC.LSHIFT, KC.TAB, KC.KP_PLUS, KC.N7, KC.N8, KC.N9, KC.KP_ASTERISK, KC.N4, KC.N5, KC.N6, KC.KP_MINUS, KC.N1, KC.N2, KC.N3, KC.KP_SLASH, KC.BSPC, KC.N0, KC.KP_DOT, KC.KP_ENTER, ]]
if __name__ == ‘__main__’: keyboard.go()
Scan to follow the official new media matrix platform of the Sharing Academy
The publicity department of the student union of the Artificial Intelligence College
Text and image editor | Zhou Fei
Initial review | Zhang Hao
Review | Wu Zewei
Final review | Zhang Changyou
Produced by | Publicity Department of the Student Union
Welcome to provide | Original campus text | Photography | Video etc.
Please contact us in the background for submissions