This article continues to discuss the tinkering process of using the EliteDesk 800G6 SFF as a home storage server.
Introduction
Recently, to organize data and models, I have been working on home storage devices, and also reset this EliteDesk 800G6 SFF that I assembled earlier this year. Currently, I am enhancing this device with various “hardware” that has been phased out from other devices and cheap hardware purchased from the second-hand market.
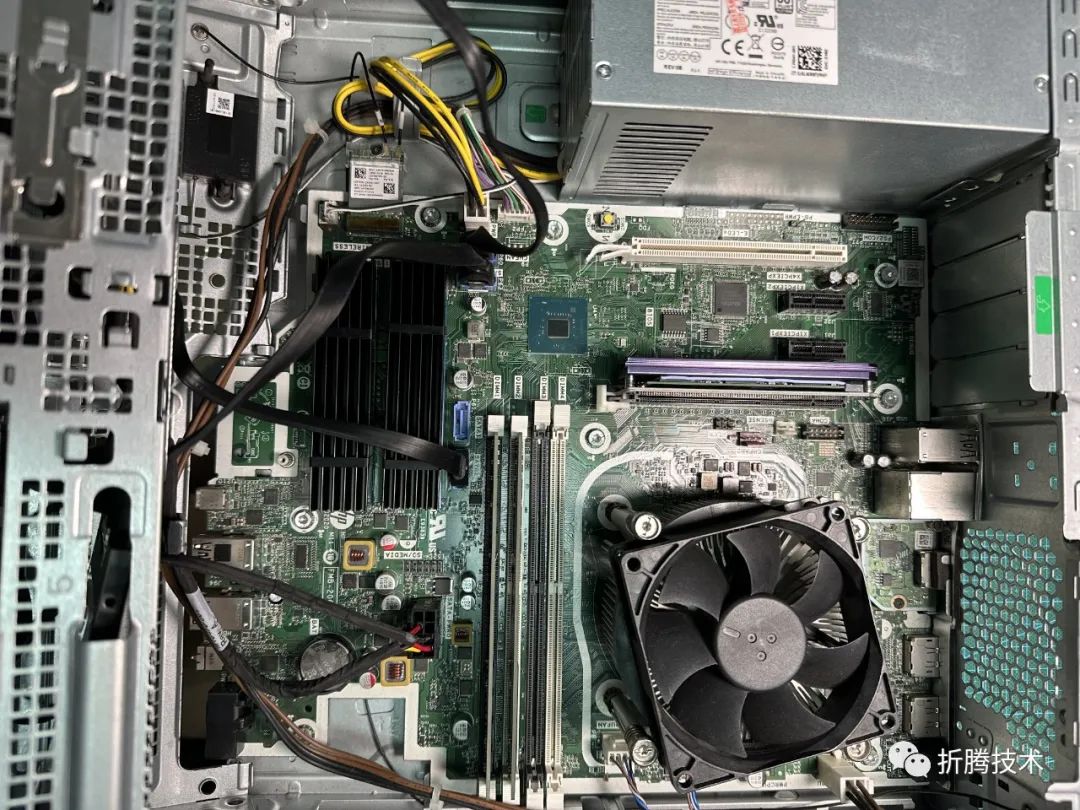
Compared to the device conditions described in the previous two articles “Building a Low-Cost Home Storage Server: Part One[1]” and “Building a Low-Cost Unraid Home Storage Server: Part Two[2]“, there have been many changes in both software and hardware.
Considering that there is already a Thunderbolt all-flash NAS used purely for storage, and the hard drives in this NAS are all old components that have been “battle-tested,” I thought about making the device run more aggressively and have more fun.
If you are interested in the Thunderbolt all-flash NAS, you can refer to the previous two articles: “Cheap All-Flash Thunderbolt NAS Tinkering Notes: Choosing a Networking Solution[3]” and “Cheap All-Flash Thunderbolt NAS Tinkering Notes: NUC9 Operating System Pitfalls[4]“. This topic will not be elaborated on in this article.
Alright, let’s talk about the hardware and software adjustments of this device.
System Adjustment: Switching from Unraid to ESXi
Since I found that the device can run ESXi 7 / 8 directly without much tinkering, and the CPU (i3-10105T[5]) has a sufficient number of cores (4C8T), I decided to switch to a virtualization system to make better use of the device’s resources.
Moreover, Unraid does not require specific hardware, as long as you keep the purchased serial number, even if you unplug the Unraid system USB drive initialized on this EliteDesk and plug it into another device, it will run normally. The previous licensed Unraid system will not be lost due to switching to a new system, so the concerns about switching systems have been greatly reduced.
Additionally, considering that most devices in the local area network are gigabit or 2.5G networks, even if the disk of the virtualization system (whether passed through or not) is switched, it can maximize the use of bandwidth. Plus, it adds another “lower-level” hardware maintenance system, which is a win-win situation.
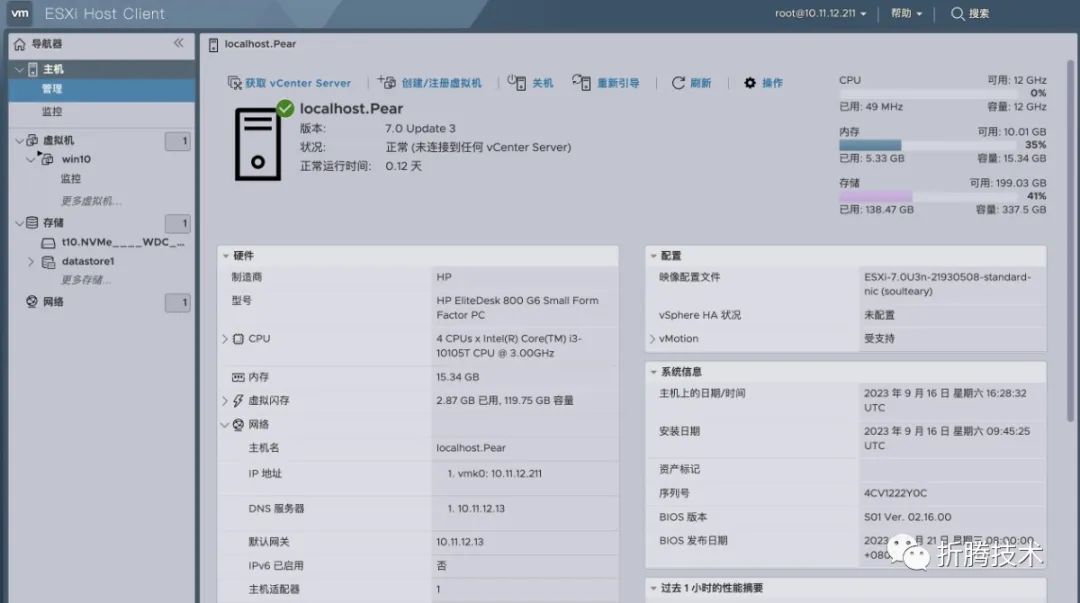
However, as of now, ESXi 8 does not directly support the older domestic Zhiyu PC005 hard drives, and I do not want to use the compatible drivers from ESXi 7 to replace the drivers in ESXi 8, as it could increase system instability. Therefore, I decisively chose the ESXi 7 version.
Considering a long-term solution, I injected community drivers into ESXi 7, which carries much less risk than directly replacing drivers that have undergone software delivery integrated testing.
Using ESXi also allows for smoother “upgrades” (replacements) of the currently used outdated hardware in the future: the virtualization layer can shield hardware differences at the system level.
Building the ESXi System Installation Image
I verified that the ESXi version used by the EliteDesk is VMware-ESXi-7.0U3n-21930508-depot.zip. If you want to customize or build your own clean and transparent image, you can refer to a previous article titled “Quickly Build and Install a Clean ESXi 8 Image Guide[6]” for tinkering.
The key operation records are as follows, and you can adjust them according to your actual situation.
Download and enter the interactive Shell for building the ESXi Docker image:
docker run --rm -it -v `pwd`:/data soulteary/easy-esxi-builder:2023.01.29Then download the ESXi installation package and suitable community drivers, using commands to add them to the build environment:
# Add ESXi base software package
Add-EsxSoftwareDepot /data/VMware-ESXi-7.0U3n-21930508-depot.zip
# Add the software packages you need, for example:
Add-EsxSoftwareDepot /data/nvme-community-driver_1.0.1.0-3vmw.700.1.0.15843807-component-18902434.zip
Add-EsxSoftwareDepot /data/Net-Community-Driver_1.2.7.0-1vmw.700.1.0.15843807_19480755.zip
...
Create a convenient ESXi image configuration:
New-EsxImageProfile -CloneProfile "ESXi-7.0U3n-21930508-standard" -name "ESXi-7.0U3n-21930508-standard-nic" -vendor "soulteary"Add the software packages you added to the build environment to the configuration, for example, including NVMe drivers, USB network cards, and PCIe network card drivers in the new configuration for convenient “plug-and-play” when expanding hardware later:
Add-EsxSoftwarePackage -ImageProfile "ESXi-7.0U3n-21930508-standard-nic" -SoftwarePackage "nvme-community"
Add-EsxSoftwarePackage -ImageProfile "ESXi-7.0U3n-21930508-standard-nic" -SoftwarePackage "net-community"
Add-EsxSoftwarePackage -ImageProfile "ESXi-7.0U3n-21930508-standard-nic" -SoftwarePackage "vmkusb-nic-fling"
Make and generate the installation image we need:
Export-EsxImageProfile -ImageProfile "ESXi-7.0U3n-21930508-standard-nic" -ExportToIso -FilePath /data/ESXi-7.0U3n-21930508.isoHardware Update: Replacing Memory
Since the device’s CPU cannot effectively use ECC memory, and I purchased and modified the “Cheap Home Workstation Device Transformation Record: Mac Pro 2013[7]” mentioned earlier, I now have usable 128GB ECC memory.
Therefore, I sold the 128GB memory from the device at a discount earlier this year and then replaced it with the original 8GB “original memory” (Micron DDR4 memory) that came with the purchase for a while.
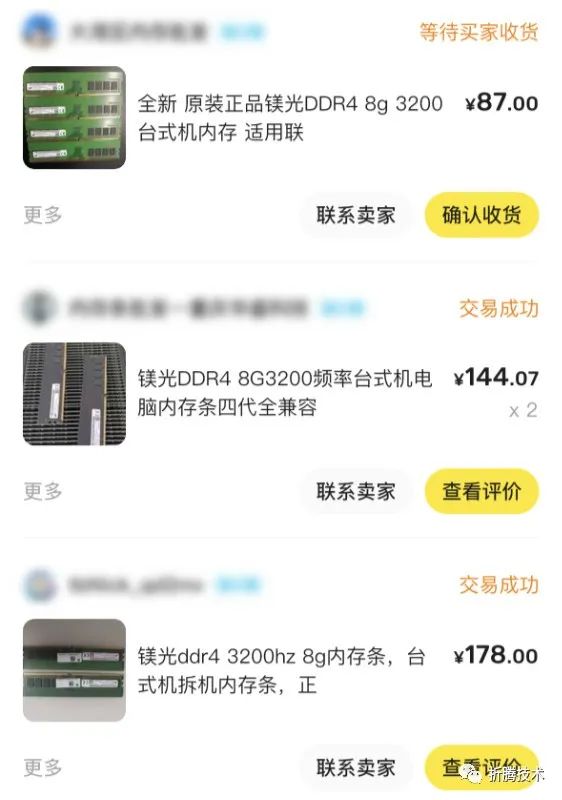
Because I want to run ESXi and maximize resource utilization, I purchased the same brand and timing memory from the second-hand market, and one more is on the way, expected to arrive by the end of the month. The planned complete setup is dual-channel 32G memory, which should handle two to three large OSs without any issues.
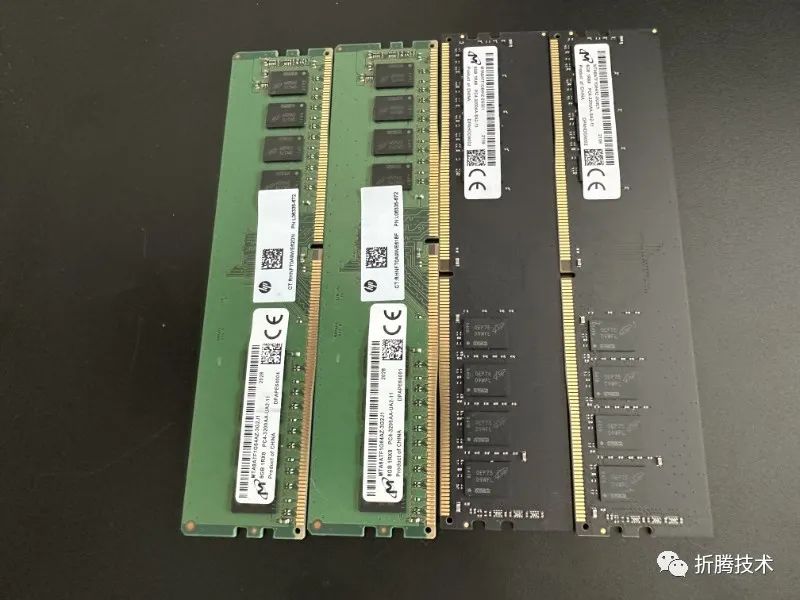
Speaking of replacing memory, I encountered a small pitfall here. To avoid mistakes during the purchase, I bought memory from two different sellers, but these two sets of memory types are actually different: XMP memory and regular memory.
Although they can be directly used together, mixing XMP memory and regular memory cannot pass long-term memory tests. Considering the stability of ESXi running for a long time and that I still had a regular 8G memory that was fine previously.
So I purchased a new memory stick. Although the cost of memory increased from an average of 80 yuan per stick to 100 yuan, the system stability gained from this is worth it, and even so, it is still much cheaper than buying brand new memory directly.
Hardware Update: Adjusting and Expanding Hard Drives

In previous articles, I mentioned that I installed two SSDs on the device, one for the system disk and one for the cache disk, along with two brand new purple disks, forming an array as the data disk.
For some considerations, these two purple disks were moved to a new well-designed DAS and connected to my Synology at home, configured for regular data overlay synchronization. I will write a separate article about the working modes of these two devices when I have the opportunity.
Returning to this EliteDesk 800G6 SFF device, I did not remove the two SSDs because they were originally old hardware phased out from other devices, and replacing them before the data volume is completely filled is very uneconomical. Since there is no operating system on the hard drives, after the new ESXi system is installed and initialized, we can simply reformat the hard drives.
However, considering the stability of the continuously running system, I added a cheap heatsink to each onboard solid-state drive.

Due to the large chassis space, I directly bought 2280 heatsinks, and also purchased larger 22110 heatsinks with more heat dissipation materials, ultimately choosing the latter. Moreover, they were also cheaper.
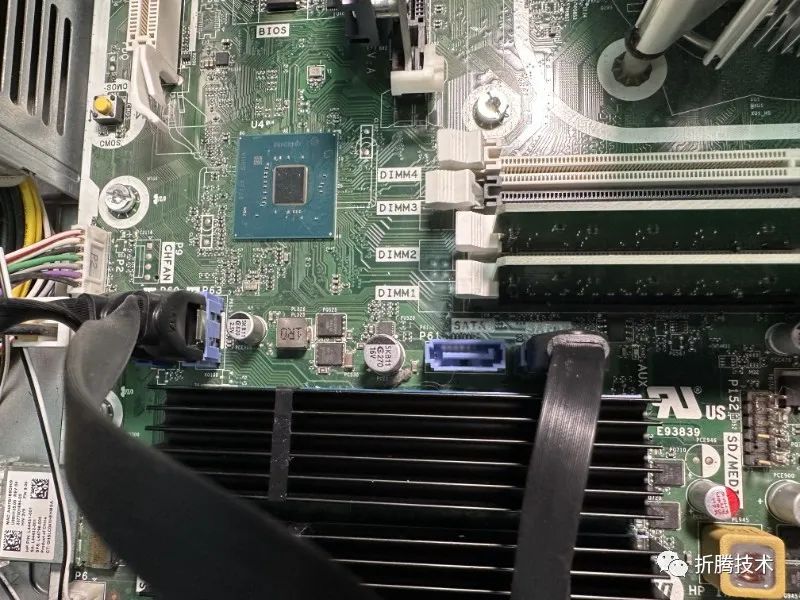
Since I also had some idle SATA SSDs, I added a SATA line to allow three drive bays for the SATA-connected hard drives.

Although I recommend double-headed data cables, I still bought the already verified cables to avoid hassle.
In addition, I purchased a cheap solid-state drive adapter card. Since the BIOS of this device does not have channel splitting functionality, I had to choose either an expensive chip-splitting card or this single-slot card. Since I am aiming for low cost, I naturally chose the latter first.

In this adapter card, I placed a four-year-old Intel 660P 2TB solid-state drive, which is quite suitable as a read-heavy, write-light storage drive, especially paired with this card that has a heavy heat dissipation armor.
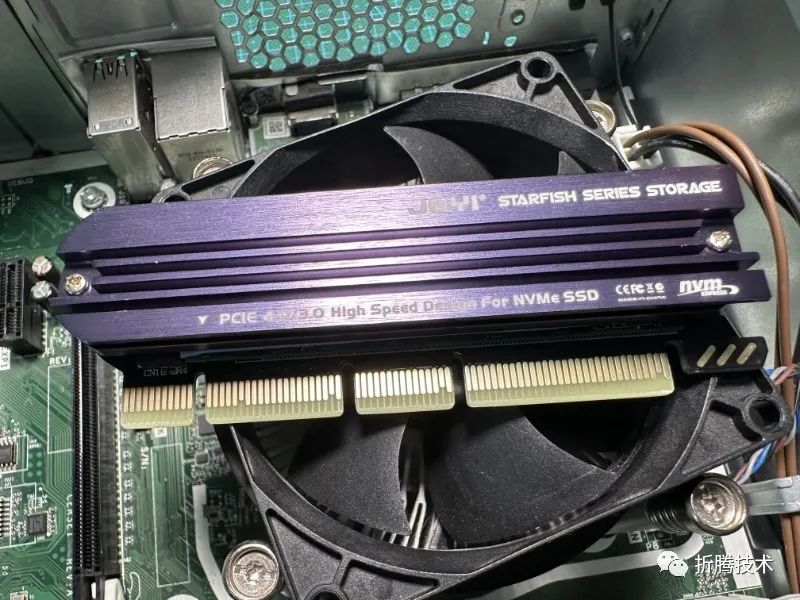
The machine currently has two free PCIe slots and one free SATA slot, so we can discuss future upgrades when new obsolete hardware becomes available.
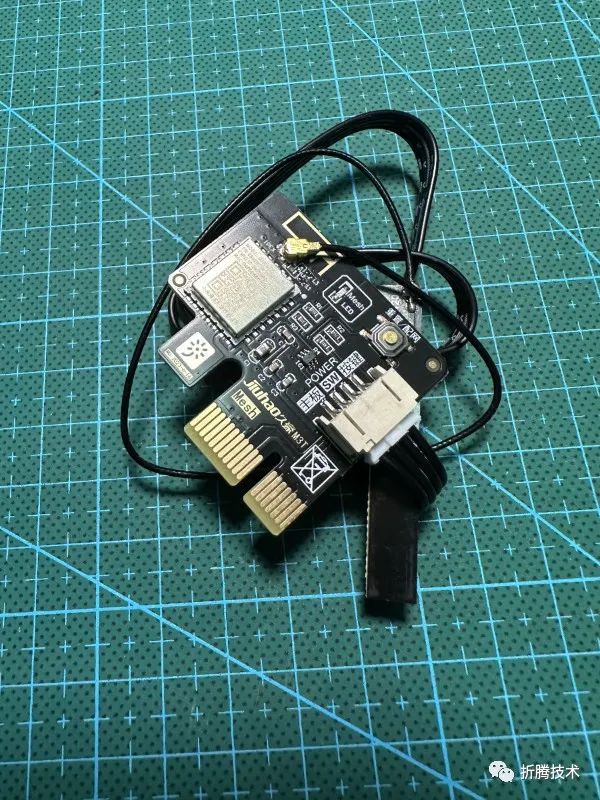
Hardware Addition: Adding a “Xiaomi Ecosystem Power-On Card”
For two reasons, I added a “remote power-on card” to this machine:
1. The machine in the shutdown state (standby) only requires slightly over 1 watt of power consumption, which is much lower than the 10 watts in standby.2. These obsolete hardware components might encounter more abnormal situations than other brand new hardware. If the machine hangs and no one is home, having a forced power on/power off and forced restart solution is ultimately more reliable than waiting for someone to come home to resolve the issue.

The power-on card is quite compact, with two wires on the card, which are the power control wires supporting two different power interfaces and a MESH antenna.
When actually running on the device, it does not generate much heat, and I am quite satisfied. If I had to express any expectations, it would be that if this card could work using USB power without occupying a PCIe data port, that would be even better, as it likely does not use the PCIe data port at all and using PCIe for power alone is quite extravagant.
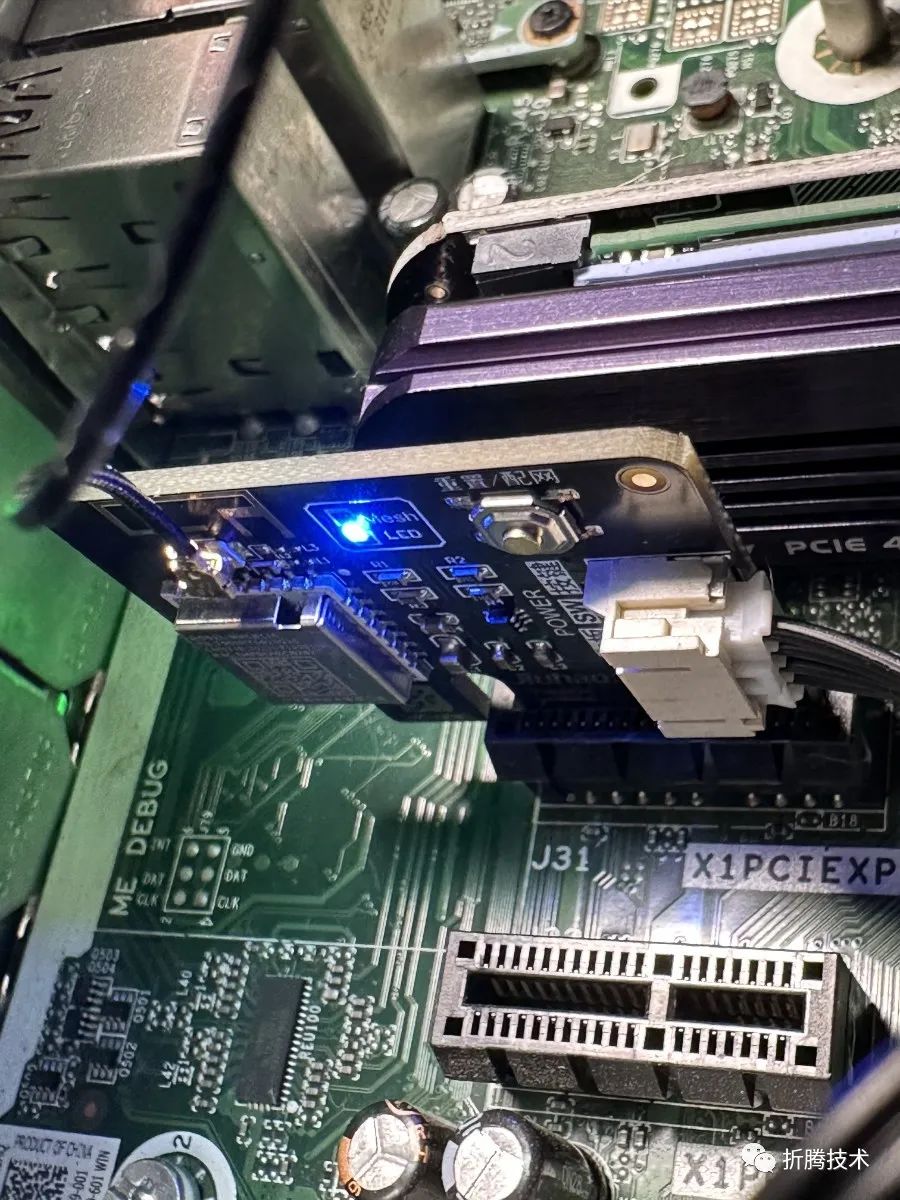
This card is very easy to use; as long as the device is connected to power, the card will automatically power on, allowing users to add it to the local MESH gateway in the Mijia APP for remote control.

Several friends who saw my posts asked what the difference is compared to WOL. My personal view is that this is a good backup operation host solution and provides “forced” actions that WOL cannot achieve.

Conclusion
This article will end here for now. Once the last memory arrives at the end of the month, I will continue tinkering with the real operating system of this device.
Let’s look forward to this fun all-flash device.
–EOF
Reference Links
[1] Building a Low-Cost Home Storage Server: Part One: https://soulteary.com/2023/01/15/building-a-home-storage-server-at-low-cost-part-one.html[2] Building a Low-Cost Unraid Home Storage Server: Part Two: https://soulteary.com/2023/01/21/building-a-home-unraid-storage-server-at-low-cost-part-two.html[3] Cheap All-Flash Thunderbolt NAS Tinkering Notes: Choosing a Networking Solution: https://soulteary.com/2023/08/31/cheap-pure-flash-thunderbolt-nas-tossing-notes-the-choice-of-networking-solutions.html[4] Cheap All-Flash Thunderbolt NAS Tinkering Notes: NUC9 Operating System Pitfalls: https://soulteary.com/2023/09/12/cheap-pure-flash-thunderbolt-nas-tossing-notes-nuc9-operating-system-pitfalls.html[5] i3-10105T: https://ark.intel.com/content/www/cn/zh/ark/products/201890/intel-core-i310105t-processor-6m-cache-up-to-3-90-ghz.html[6] Quickly Build and Install a Clean ESXi 8 Image Guide: https://soulteary.com/2023/01/29/how-to-easily-create-and-install-a-custom-esxi-image.html[7] Cheap Home Workstation Device Transformation Record: Mac Pro 2013: https://soulteary.com/2023/02/04/cheap-home-workstation-solution-mac-pro-2013.html.html
If you find the content useful, feel free to like and share it with your friends, thank you.
If you want to see updates on subsequent content faster, please hit “like,” “share,” “follow”. These free encouragements will influence the speed of future content updates.