This article documents the process of building a backup server.
Introduction
This year, I considered building a dedicated machine for data backup. Firstly, due to increased travel demands this year, the historical devices have been used for several years, and I need a newer device to take over; secondly, I want to verify the reliability of the solution to address some production environment needs I have encountered and my friends’ issues.
Since I have already purchased several Synology devices, and this year the new Synology products have a very “smart” CPU upgrade, I decided to build one myself.
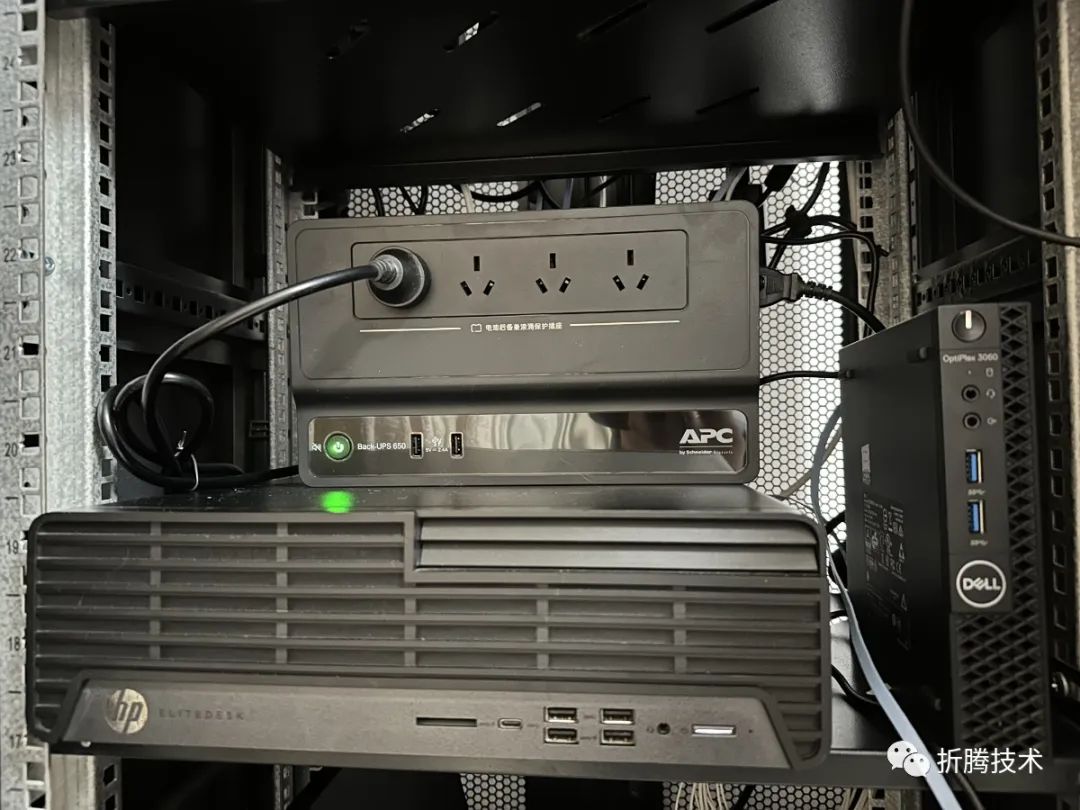
Excluding the cost of hard drives and memory upgrades, the whole machine along with the UPS costs about 2000 yuan. Besides serving as a file server, it can also run virtual machines and Docker containers, making it more cost-effective compared to Synology.
Clear Requirements
I hope this device can meet the following requirements:
1. Must support data backup for macOS (Time Machine); it would be even better if it supports Windows (as there will be production environments).2. At least one reliable solution to ensure data writing is correct and reliable.3. The system must be stable and reliable, requiring no extra maintenance for three to five years.4. Relatively compact in size, with no noise during operation.5. Excluding storage device costs (hard drives, memory), it should be relatively low-cost and support quick hardware replacements to solve availability issues.
Any additional capabilities provided are just “bonus points”.
Since the core demand is actually software-related, let’s take a look at the software solutions.
Operating System and Software Selection
I prefer a solution that can run continuously and stably without arbitrary reboots, either a Linux system or a NAS system packaged based on Linux. The minimum requirement is that I can know the program versions of “samba” and “afp (netatalk)” so that I can complete migration in the future.
In this article, we will first use Ubuntu to complete the basic service setup.
Why Not Choose “Hackintosh” or “Black Apple”?
Previously, I used both Mac devices and Mac-compatible hardware (including this Elite Desk) to run macOS, enabling file sharing and conducting “Time Machine” tests.
Compared to the open-source software netatalk, which is compatible with Linux protocols, it is indeed much more stable. However, if I choose to use a Hackintosh, to limit costs, the capacity cannot meet actual usage; if I choose a Black Apple, even if optimized to 99% usability, there is always a 1% instability factor, and we do not know when this 1% issue will “trigger” and how severe the impact will be. Moreover, it is very likely that the uncertainty is far greater than 1%.
Why Not Choose Windows?
In recent years, I have not primarily used Windows, and my familiarity with Windows is insufficient. Furthermore, in my most recent experiment, I discovered that Windows non-server versions have some issues with long-term operation (I purchased a professional version license).
At the end of November, I acquired a machine (Dell Optiplex) and bought a genuine Windows 11. I ran a program under low load on the system. Over the past two months, I encountered issues such as cross-system “remote desktop” failures, unexpected “automatic” upgrades and reboots, indicating that reliability as a file server still needs further verification.
Hardware Solution Selection
Based on the above requirements, I narrowed down the hardware selection to the HP EliteDesk and Dell Optiplex series. After comparison, I chose a second-hand Elite Desk, which has abundant supply in the second-hand market, instead of a brand new device. Ultimately, I selected a second-hand machine: EliteDesk 800G6 SFF, activated in 2021 and retired due to “environmental changes” in 2022.
Aside from the case having some paint covering from violent bumps during transport, when wiping the exterior with alcohol, one can see that the spray paint evaporates quickly, which can be a bit pungent; otherwise, there are basically no complaints. (If not disinfected, this issue will not arise, and the machine itself has no odor.)
I took a shortcut and chose a machine equipped with an i3-10105T, costing around 1600 yuan. If you have an idle CPU, you can get a quasi-system for around 700-800 yuan.
Why Not Choose the New Synology?
I have consecutively purchased the previous two generations of Synology products, DS918+ and DS920+, but I am not interested in the DS923+, which “upgraded to” AMD Ryzen 1600.
The relatively inexpensive i3-10105T CPU specifications mentioned above can be found on Intel’s official website, and the cost-performance ratio is evidently much better.
Why Not Choose Apple Time Capsule?
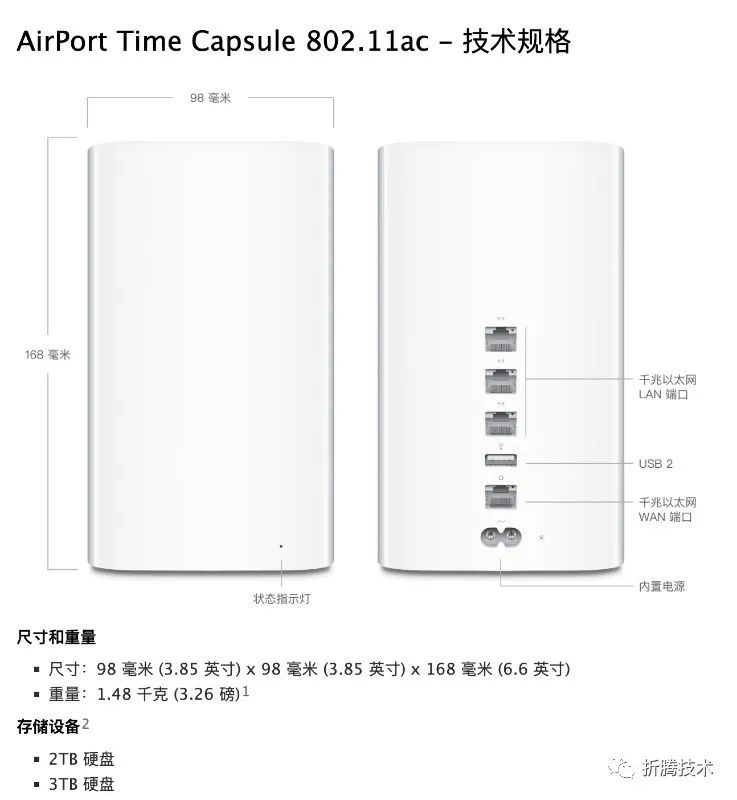
From an appearance standpoint, Apple’s Time Capsule is still quite attractive. However, the product was discontinued in 2018, and if hardware issues arise, restoring service through the acquisition of the same hardware can be a bit troublesome. Additionally, even though the product is discontinued, the current price is still somewhat expensive, making replacements painful.
More critically, the device can only accommodate one disk, and its computing power is also very limited.
Why Not Choose a RAID Hard Disk Box?
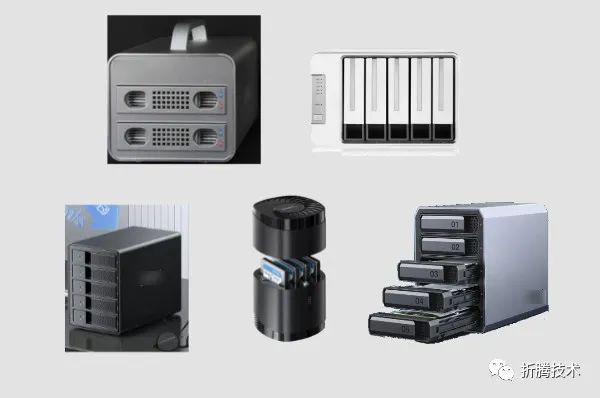
If we already have a device and do not mind using USB or Thunderbolt cables for data exchange, using an external RAID hard disk box may not be a bad solution. The best aspect of this solution is that there are many options for the appearance of hard disk boxes in the consumer market.
However, most hard disk array boxes cannot provide services directly and require a “host machine” to provide services, and they cannot run some software we want to run. Moreover, since we chose to build a device that can use more reliable SATA cables directly connected to the motherboard and a more reliable power supply, the cost-performance ratio of the hard disk box solution is not very high. Furthermore, the “premium” for such devices is very high.
Since the article’s introduction has already “declined” Synology, Synology’s “Expansion Unit” is naturally not under discussion either. (Moreover, it is more expensive.)
Why Not Choose a Network Hard Disk Box?
Whether using ARMbian or OpenWRT “boxes”, as long as the hardware is reliable, stability is generally assured, and the cost is usually low, with high energy efficiency.
The reason for not choosing this solution mainly concerns hardware reliability, including three parts: heat dissipation, IO capability, and power supply.
Box-type devices generally use passive heat dissipation, so if they are in the same room as the hard drives, it is challenging to ensure reasonable temperatures. I do not want this backup server to appear in a “loose style”; box-type products consider energy consumption and cost, so the CPU is relatively weak, and naturally, the IO capability is also weak, making it almost impossible to fully utilize the hard disk IO bandwidth; box-type products cannot power multiple hard drives, so they need independent power supply or need to be used in conjunction with hard disk array boxes that can independently power, leading to potential “small horse pulling big cart” situations.
I purchased WD My Cloud and earlier ARM products from Synology a few years ago, and in terms of transmission efficiency experience, my personal experience has not been very good.
Preparation Work
Theory is over; it’s time for practice.

I purchased the following hardware materials:
1. A “quasi-system” equipped with a CPU for testing “out of the box” motherboard and CPU.2. A new APC UPS.3. 4 pieces of domestic 32G DDR4 memory.4. 2 4T Western Digital purple drives for data storage and verification.5. A domestic hard disk for storing the operating system and preventing mechanical hard drives from not being able to sleep due to running programs.6. Some accessories: data cables and hard disk screws.
The total cost is just over 5000 yuan, with a working power consumption of about 27 watts. Overall, it’s quite pleasant. Of course, you can skip the memory upgrade and solid-state drive part, purchasing only the hardware and UPS, which would only cost just over 2000 yuan.
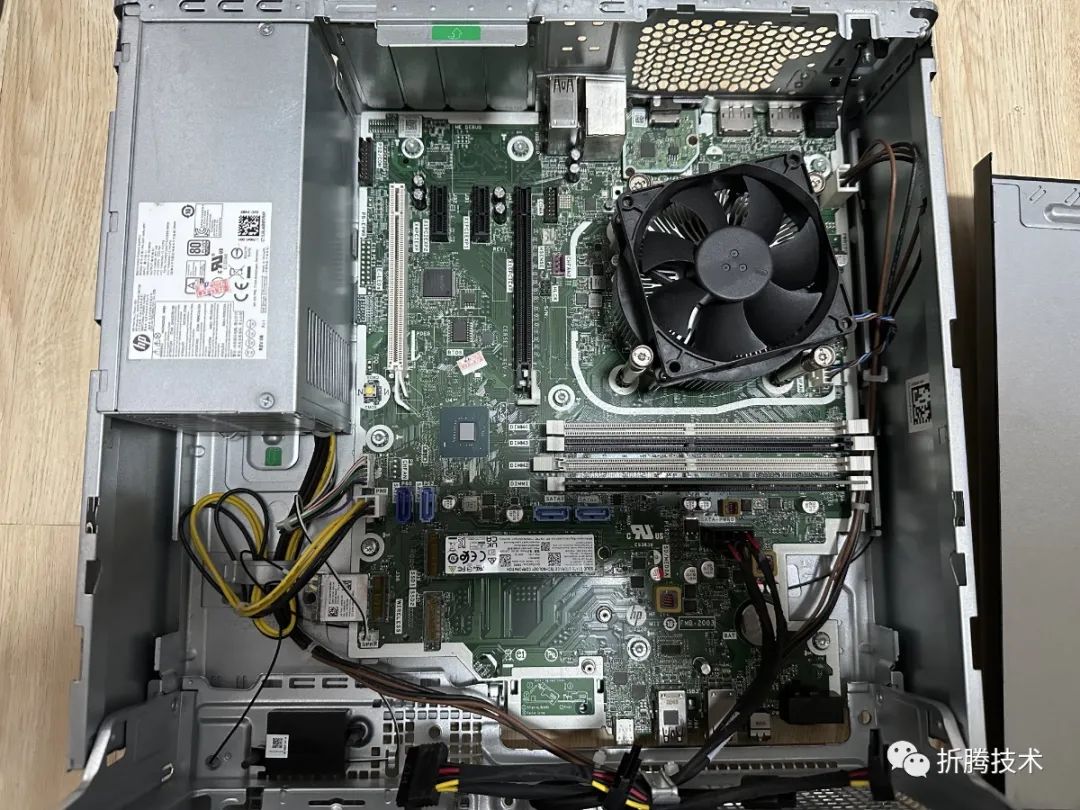
The mainboard has decent expandability, supporting 3 SATA hard disks and 2 NVMe hard disks by default, 4 memory slots, and two PCI-e slots. For complete expansion capabilities, refer to the “specifications” mentioned above.
BIOS Upgrade
Once the machine arrives, it is recommended to do two things: the first is to enter the BIOS and reset the options to defaults. The second is to connect the machine to the internet and use the BIOS’s software upgrade tool to update the BIOS to the latest version to avoid software bugs and compatibility issues.
During the process, there is one point to note: do not power off to avoid damaging the BIOS.
Fill Up Memory
Considering that I want to run some “space-for-time” programs and virtual machines on the server later, I purchased 4 pieces of 32G memory to reduce unnecessary “caution” when allocating resources.
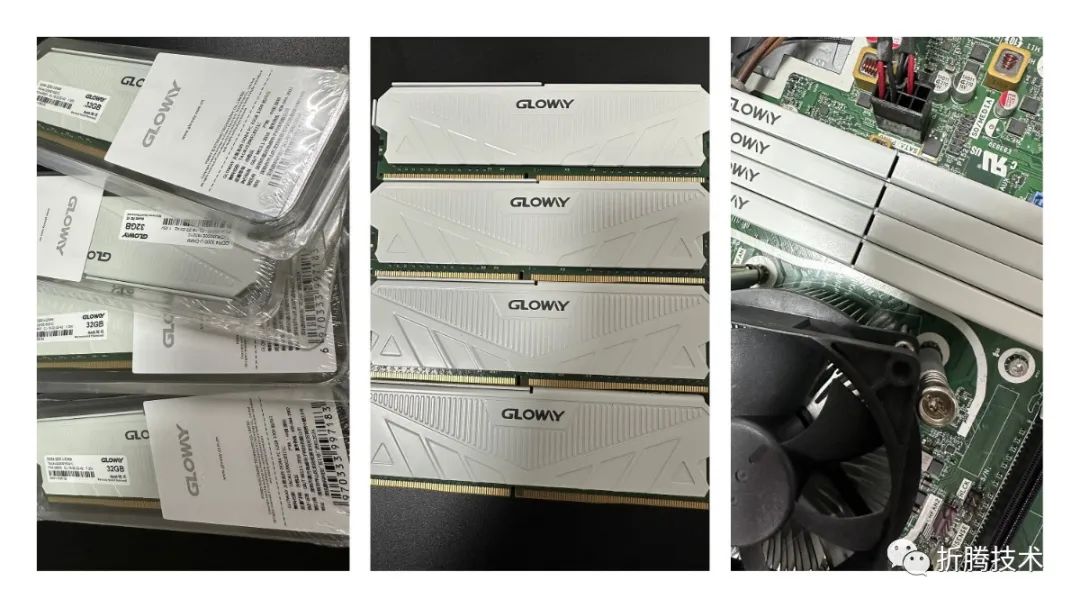
After installation, I entered the BIOS to check if it was recognized correctly. However, just checking the information is not enough; hardware testing is also needed.
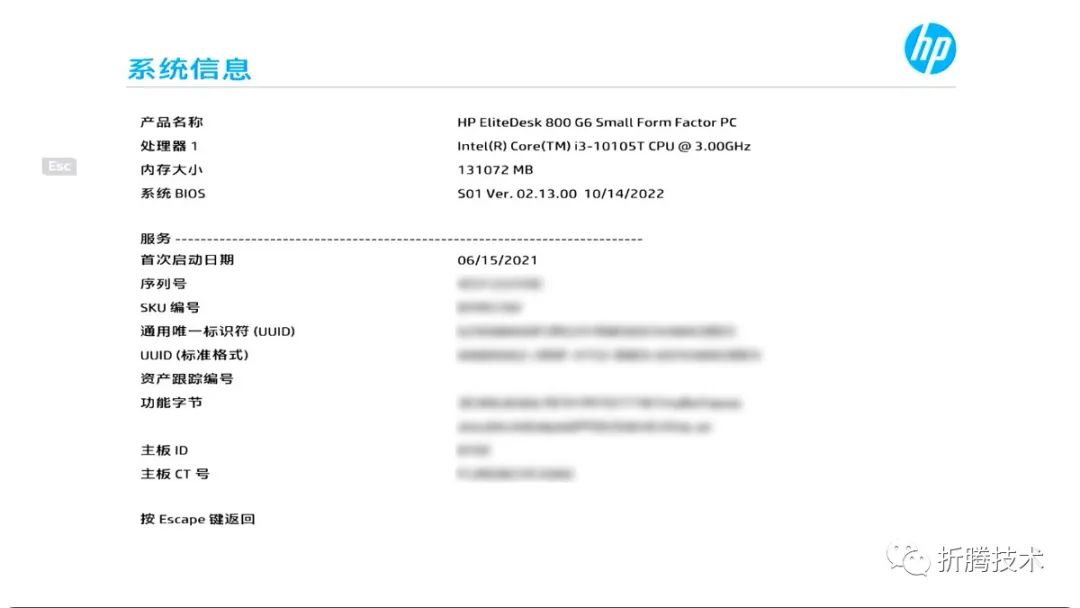
Hardware Testing
Testing hardware requires multiple methods; if your BIOS has a testing tool, it will save a lot of trouble.
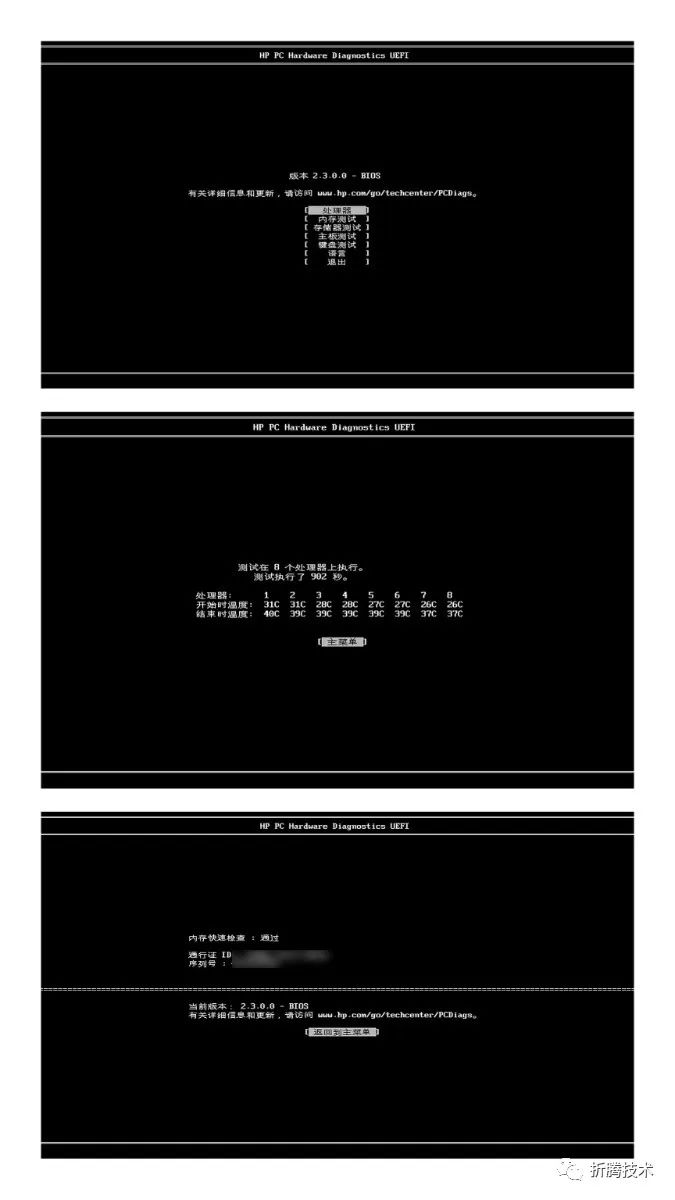
If you are not at ease, you can test multiple times and use PE or testing tools after completing the system installation for more sustained testing.
Of course, apart from one-time testing, some necessary stability tests must be performed before use. Before actual use, I powered on the device for a week without any unexpected anomalies.
System Installation and Configuration
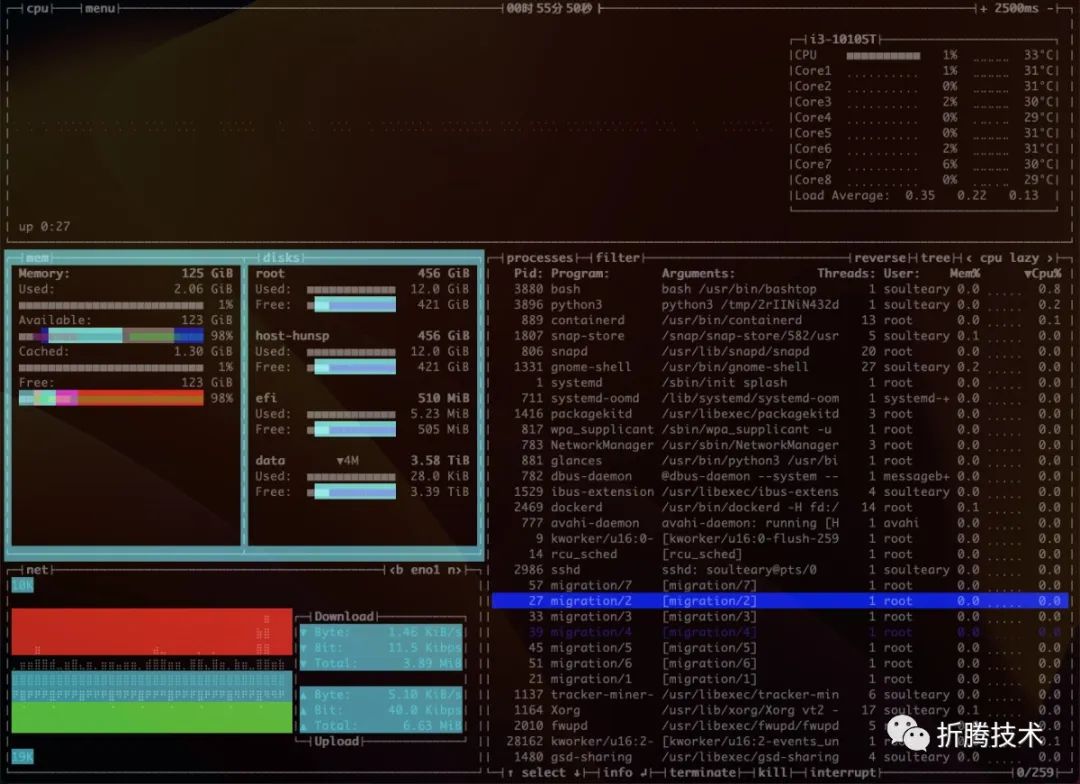
For basic system installation and configuration, you can refer to this article “Building a Cost-Effective Linux Learning Environment on a Laptop: Basics”.
After completing the system installation, we need some additional configurations to enhance system performance.
Disable Swap
To completely disable and clean Swap in Ubuntu, three steps are needed. The first is to turn off Swap:
sudo swapoff -aNext, edit the partition table file /etc/fstab to remove Swap-related records.
Then, after rebooting the machine, delete the “residual” files:
rm -rf /swapfileOnce you complete the above actions, you can check the system resources using free -g and see that the Swap available amount is zero:
# free -g
               total        used        free      shared  buff/cache   available
Mem:             125           1         123           0           1         123
Swap:              0           0           0
Create a RAID 1 Mirror Array
First, use mdadm --examine to check the status of the mechanical hard drives and ensure both target hard drives have the same capacity.
# sudo mdadm --examine /dev/sda /dev/sdb

/dev/sda:
   MBR Magic : aa55
Partition[0] :   4294967295 sectors at            1 (type ee)

/dev/sdb:
   MBR Magic : aa55
Partition[0] :   4294967295 sectors at            1 (type ee)
Next, use sgdisk -R to synchronize the partition tables of the two disks:
sudo sgdisk /dev/sda -R /dev/sdbAfter copying the partition table, refresh the partition UUID of one disk to avoid issues during OS usage.
sudo sgdisk /dev/sdb -GThen, create the secondary disk array using mdadm --create --level=mirror:
# sudo mdadm --create /dev/md0 --level=mirror --raid-devices=2 /dev/sda /dev/sdb

mdadm: /dev/sda appears to be part of a raid array:
       level=raid1 devices=2 ctime=Thu Jan  5 20:47:30 2023
mdadm: partition table exists on /dev/sda but will be lost or
       meaningless after creating array
mdadm: Note: this array has metadata at the start and
    may not be suitable as a boot device.  If you plan to
    store '/boot' on this device please ensure that
    your boot-loader understands md/v1.x metadata, or use
    --metadata=0.90
mdadm: partition table exists on /dev/sdb
Continue creating array?
Continue creating array? (y/n) y
mdadm: Defaulting to version 1.2 metadata
mdadm: array /dev/md0 started.
Creating the disk array requires some time, and the completion time depends on the capacity of the disks you purchased, the data transmission protocol between the disks and the motherboard, as well as the computing power of your device’s CPU.
You can check the array construction progress at any time using cat /proc/mdstat:
# cat /proc/mdstat

HP-EliteDesk-800-G6-Small-Form-Factor-PC: Thu Jan  5 21:50:56 2023

Personalities : [raid1] [linear] [multipath] [raid0] [raid6] [raid5] [raid4] [raid10]
md0 : active raid1 sdb[1] sda[0]
      3906886464 blocks super 1.2 [2/2] [UU]
      [=>...................]  resync =  9.6% (375538432/3906886464) finish=325.5min speed=180783K/sec
      bitmap: 28/30 pages [112KB], 65536KB chunk

unused devices: <none>
When the array construction is complete, you can see similar log outputs when checking mdstat again:
# sudo cat /proc/mdstat

Personalities : [raid1] [linear] [multipath] [raid0] [raid6] [raid5] [raid4] [raid10]
md0 : active raid1 sdb[1] sda[0]
      3906886464 blocks super 1.2 [2/2] [UU]
      bitmap: 0/30 pages [0KB], 65536KB chunk

unused devices: <none>
You can also use mdadm --detail to view detailed information about the array:
# sudo mdadm --detail /dev/md0

/dev/md0:
           Version : 1.2
     Creation Time : Thu Jan  5 21:15:24 2023
        Raid Level : raid1
        Array Size : 3906886464 (3.64 TiB 4.00 TB)
     Used Dev Size : 3906886464 (3.64 TiB 4.00 TB)
      Raid Devices : 2
     Total Devices : 2
       Persistence : Superblock is persistent

     Intent Bitmap : Internal

       Update Time : Fri Jan  6 23:29:38 2023
             State : clean
    Active Devices : 2
   Working Devices : 2
    Failed Devices : 0
     Spare Devices : 0

Consistency Policy : bitmap

              Name : 0
              UUID : bd87e586:257740d3:5fd50282:ccc8b145
            Events : 6144

    Number   Major   Minor   RaidDevice State
       0       8        0        0      active sync   /dev/sda
       1       8       16        1      active sync   /dev/sdb
Abort Array Creation Process
If you want to stop the construction for some reason during the process, you can use idle to abort the construction or frozen to temporarily pause the task.
echo idle > /sys/block/md0/md/sync_action
echo frozen > /sys/block/md0/md/sync_action
If you wish to completely re-establish the array, you can use the following commands to restore it to the state before the array:
sudo mdadm -Esv
sudo mdadm --stop /dev/md*
Using Disk Arrays in the System
After completing the array construction, to use the disk array, you must first complete the disk mounting and initialization (formatting).
# sudo mkfs.ext4 /dev/md0

mke2fs 1.46.5 (30-Dec-2021)
Discarding device blocks: done
Creating filesystem with 976721616 4k blocks and 244187136 inodes
Filesystem UUID: f7014dd5-b7b1-466c-ae42-2b49c43cbb57
Superblock backups stored on blocks:
    32768, 98304, 163840, 229376, 294912, 819200, 884736, 1605632, 2654208,
    4096000, 7962624, 11239424, 20480000, 23887872, 71663616, 78675968,
    102400000, 214990848, 512000000, 550731776, 644972544

Allocating group tables: done
Writing inode tables: done
Creating journal (262144 blocks): done
Writing superblocks and filesystem accounting information: done
To manually mount the disk to the path /data, we can do it like this:
sudo mkdir /data
sudo mount /dev/md0 /data
Then use df to check if the disk is ready:
# df -h /data

Filesystem      Size  Used Avail Use% Mounted on
/dev/md0        3.6T   28K  3.4T   1% /data
In actual use, for example, if we create a file in this partition, the disk will automatically complete the mirroring action, enhancing the reliability of file access.
# touch /data/test.go
# sudo mdadm --examine /dev/sda /dev/sdb

/dev/sda:
          Magic : a92b4efc
        Version : 1.2
    Feature Map : 0x1
     Array UUID : bd87e586:257740d3:5fd50282:ccc8b145
           Name : 0
  Creation Time : Thu Jan  5 21:15:24 2023
     Raid Level : raid1
   Raid Devices : 2

 Avail Dev Size : 7813772976 sectors (3.64 TiB 4.00 TB)
     Array Size : 3906886464 KiB (3.64 TiB 4.00 TB)
  Used Dev Size : 7813772928 sectors (3.64 TiB 4.00 TB)
    Data Offset : 264192 sectors
   Super Offset : 8 sectors
   Unused Space : before=264112 sectors, after=48 sectors
          State : clean
    Device UUID : da33683e:54478a8b:cd6fd10e:1a19114c

Internal Bitmap : 8 sectors from superblock
    Update Time : Fri Jan  6 23:29:14 2023
  Bad Block Log : 512 entries available at offset 24 sectors
       Checksum : 5ad089e9 - correct
         Events : 6144


   Device Role : Active device 0
   Array State : AA ('A' == active, '.' == missing, 'R' == replacing)/dev/sdb:
          Magic : a92b4efc
        Version : 1.2
    Feature Map : 0x1
     Array UUID : bd87e586:257740d3:5fd50282:ccc8b145
           Name : 0
  Creation Time : Thu Jan  5 21:15:24 2023
     Raid Level : raid1
   Raid Devices : 2

 Avail Dev Size : 7813772976 sectors (3.64 TiB 4.00 TB)
     Array Size : 3906886464 KiB (3.64 TiB 4.00 TB)
  Used Dev Size : 7813772928 sectors (3.64 TiB 4.00 TB)
    Data Offset : 264192 sectors
   Super Offset : 8 sectors
   Unused Space : before=264112 sectors, after=48 sectors
          State : clean
    Device UUID : 577ef05f:fa66ff02:8e4085c0:03d798ec

Internal Bitmap : 8 sectors from superblock
    Update Time : Fri Jan  6 23:29:14 2023
  Bad Block Log : 512 entries available at offset 24 sectors
       Checksum : 460982b8 - correct
         Events : 6144


   Device Role : Active device 1
   Array State : AA ('A' == active, '.' == missing, 'R' == replacing)
However, the manually mounted disk will be released automatically if the device is restarted. We need to mount the device manually again.
To solve this problem, we need to adjust the content in fstab, and fstab requires us to first obtain the “UUID” of the array and update the mdadm configuration:
# sudo mdadm --detail --scan --verbose | sudo tee -a /etc/mdadm/mdadm.conf

ARRAY /dev/md0 level=raid1 num-devices=2 metadata=1.2 name=0 UUID=bd87e586:257740d3:5fd50282:ccc8b145
   devices=/dev/sda,/dev/sdb
To obtain the UUID, use the following command instead of directly using the ID output from mdadm:
# sudo dumpe2fs /dev/md0 |grep UUID

dumpe2fs 1.46.5 (30-Dec-2021)
Filesystem UUID:          f7014dd5-b7b1-466c-ae42-2b49c43cbb57
Then add the following content to /etc/fstab:
UUID=f7014dd5-b7b1-466c-ae42-2b49c43cbb57 /dev/md0 /mnt/mirror ext4 defaults 0 0After completing this, update initramfs, then restart the device and check if the system can mount the array partition to the /data path during startup.
# sudo update-initramfs -u

update-initramfs: Generating /boot/initrd.img-5.15.0-57-generic
Install File Service
There are many ways to install file services, such as the S3 alternative MinIO or Syncthing, NextCloud mentioned in previous articles.
However, to allow Mac and Windows devices to directly “natively” use the service and complete backups, we can consider using samba or netatalk to provide smb or afp protocol file access capabilities. If you wish to use the local samba or netatalk programs directly, simply use apt install:
sudo apt-get install samba -yIf you think this approach is not environmentally friendly, using the docker version of samba or netatalk is also a viable option. For example, Stanback/alpine-samba.
Of course, user management (adding, disabling, deleting, changing passwords) may be a bit cumbersome, but it is mostly a one-time cost, so it may be acceptable. (It might be more appropriate to expand this into a separate article.)
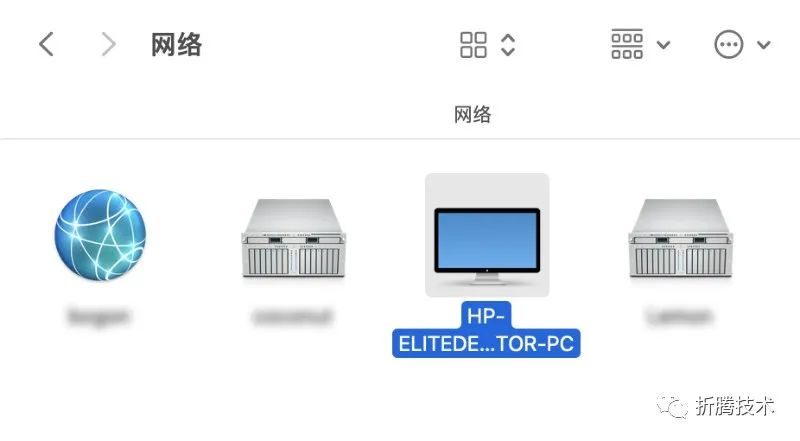
Once we start the service, we can find this “storage server” on the network.
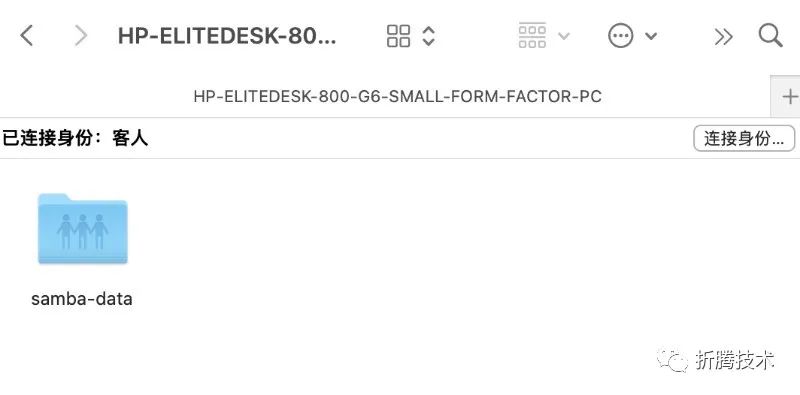
And connect to the server using the Samba protocol.
Next, if you wish, you can directly use the built-in “Time Machine” to back up your device data.
Conclusion
Due to being quite busy recently, this article “stretched out” over approximately two weeks, and there may have been some oversights during the process. If you have any questions or suggestions, feel free to provide feedback.
In the next article, we will discuss how to address the inconvenience of “resource management”.
–EOF
Reference Links
[1] Open-source software netatalk: https://netatalk.sourceforge.io/[2] Hardware specifications: https://h20195.www2.hp.com/v2/getpdf.aspx/4aa7-7943enuc.pdf[3] i3-10105t CPU specifications: https://www.intel.com/content/www/us/en/products/sku/201890/intel-core-i310105t-processor-6m-cache-up-to-3-90-ghz/specifications.html[4] Technical specifications: https://support.apple.com/kb/SP679?viewlocale=zh_CN&locale=zh_HK[5] “Building a Cost-Effective Linux Learning Environment on a Laptop: Basics”: https://soulteary.com/2022/06/21/building-a-cost-effective-linux-learning-environment-on-a-laptop-the-basics.html[6] “Private Cloud Environment Installed in a Notebook: Network Storage Part (2)”: https://soulteary.com/2021/11/09/private-cloud-environment-installed-in-a-notebook-storage-part-2.html[7] Stanback/alpine-samba: https://github.com/Stanback/alpine-samba
If you find the content useful, feel free to like and share with your friends, thank you in advance.
If you want to see updates on subsequent content faster, please click “Like”, “Share”, “Follow”. These free encouragements will influence the speed of updates on related content.