
Our Arduino WiFi introduction generally uses the ESP8266 WiFi module chip. Nowadays, people like me who go online every day without knowing about WiFi are already OUT, so let’s quickly catch up:
ESP8266 can boot directly from external flash memory when equipped and used as the only application processor in a device. The built-in high-speed cache helps to improve system performance and reduce memory requirements.
Another situation is when the wireless connection takes on the task of a Wi-Fi adapter, it can be added to any microcontroller-based design, with simple connections via SPI/SDIO interface or CPU AHB bridge.
The powerful on-chip processing and storage capabilities of ESP8266 allow it to integrate sensors and other specific devices through GPIO ports, achieving minimal initial development and minimal system resource usage during operation. The high level of on-chip integration of ESP8266 includes antenna switch balun, power management converter, thus requiring very few external circuits, and the entire solution including the front-end module minimizes PCB space during design.
Leading features displayed by systems equipped with ESP8266 include energy-efficient VoIP with fast switching between sleep/wake modes, adaptive radio bias for low power operation, front-end signal processing capabilities, troubleshooting, and coexistence features for eliminating cellular/Bluetooth/DDR/LVDS/LCD interference.
For more information, please see the attachment (ESP8266-User Manual-V0.3.pdf)
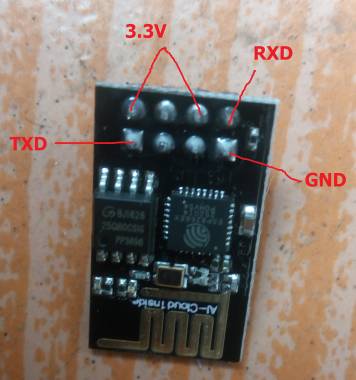
Then, start wiring
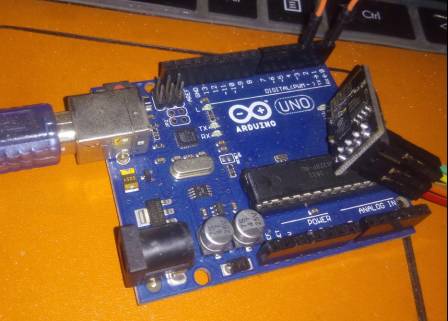
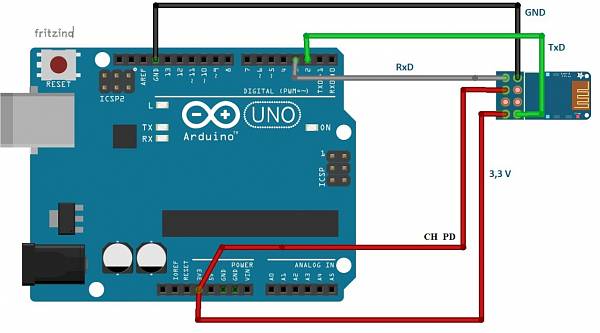
Once connected to a 3.3V power supply, I immediately felt the module heating up, and the heat dissipation is not easy to handle. Burn the Arduino program and test it.
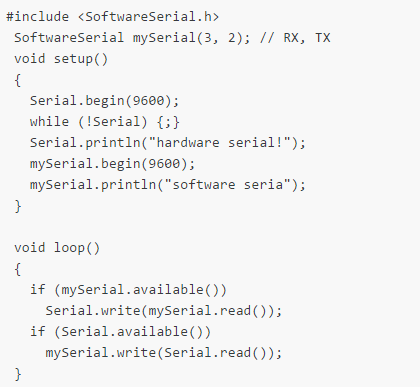
I didn’t save the test pictures at that time, so I won’t post them here.
I originally wanted to take some time to write this carefully, but later, of course, there were other things (coming to learn at Cree is definitely not a joke; there’s a lot of homework. Without hard work, where does that come from, whatever that is).

Another big shot has emerged, can everyone recognize him? He is

If you want to know what the big shots are doing, please click the link http://bbs.pediy.com/showthread.php?t=51839. Later, when I had time to prepare to do it again, I found it still a bit troublesome (getting burned a few times is one aspect, and on the other hand, I didn’t want to set up the microcontroller environment, and I didn’t want to buy a soldering iron to solder it), so I bought another board online, which feels more convenient to use; the key is that this board is not very expensive.
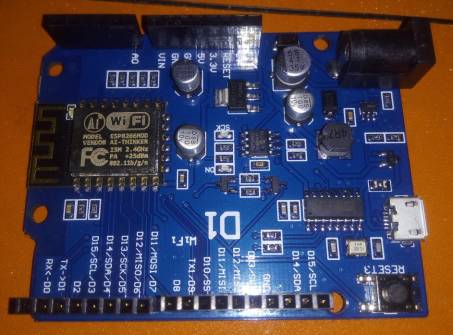
The board’s interface is the same as my phone, saving me a data cable.
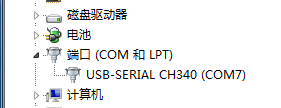
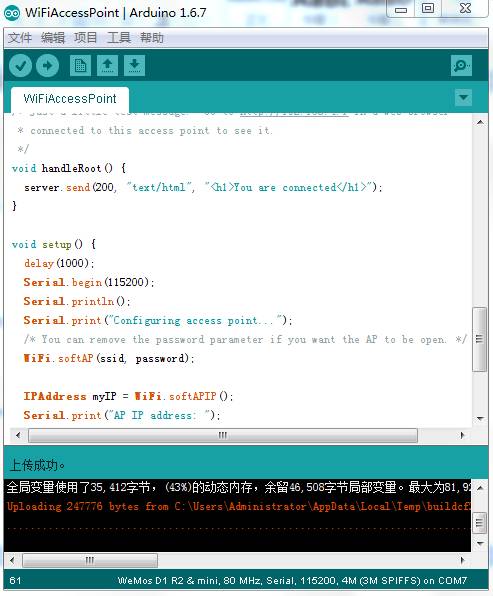
If a COM port appears on the computer, it indicates that the driver has been successfully installed. Otherwise, the driver needs to be installed; I won’t elaborate on that here. This is also very convenient to use, please see the picture below.
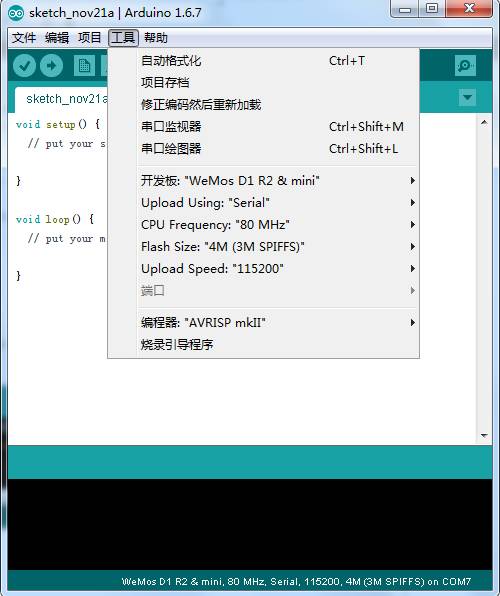
Of course, the Arduino IDE downloaded from the official website will not be like this. If you purchased it, the seller will generally tell you how to do it; if not, you can search online, and you will definitely find it. Then I randomly found a piece of code to try and found it successful.
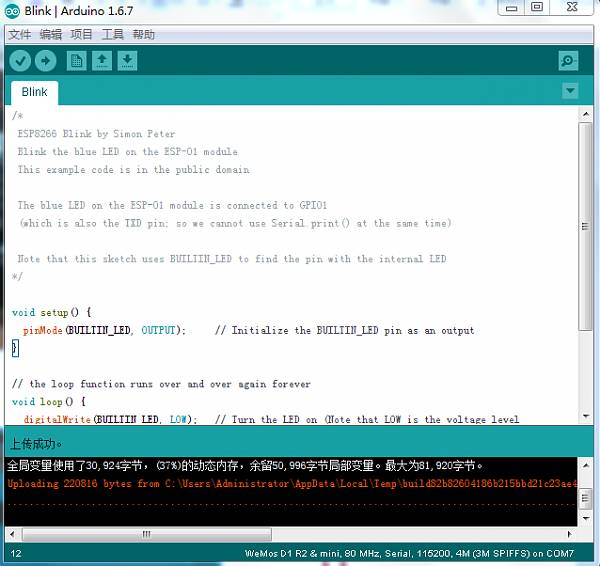
Of course, this is just a simple start. The real wireless WiFi is just about to begin. It should be noted that the program compilation and upload process is a bit slow.
Test program source code:
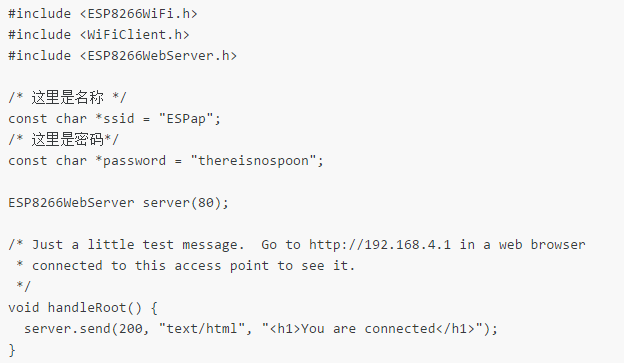
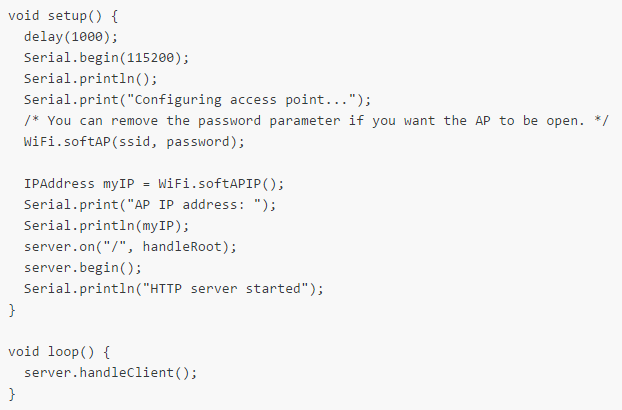
After successful upload, you will see the ESPap wireless hotspot. Doesn’t it feel very convenient?
It is important to note that the password is: thereisnospoon
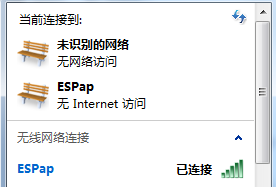
If you are connected but cannot open the webpage, just restart it.
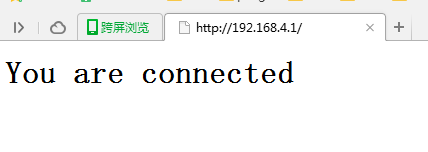
Of course, the webpage content can be changed. If you want to switch to something else, just modify the code slightly in the above source code. I won’t do more testing here. void handleRoot() { server.send(200, “text/html”, “<h1>You are connected</h1>”); // Just modify the content here.} Let’s do a Get webpage example. Test program source code:
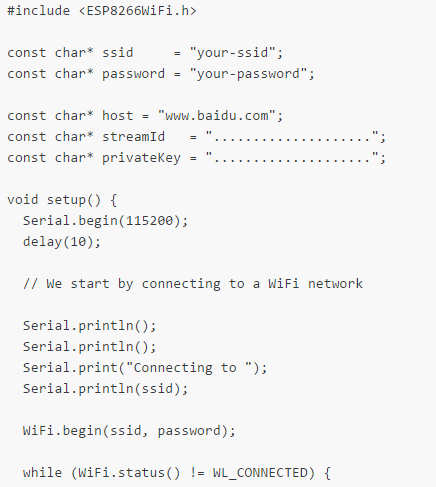
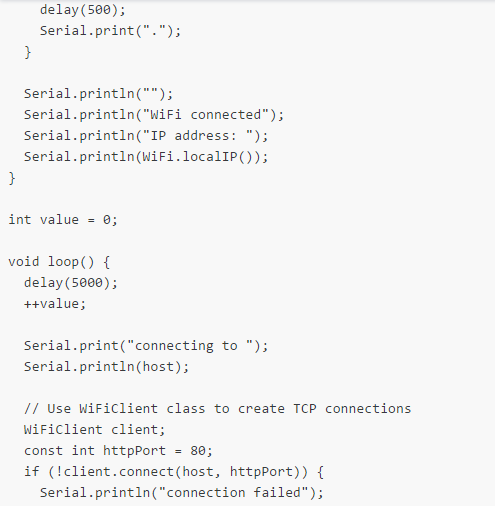
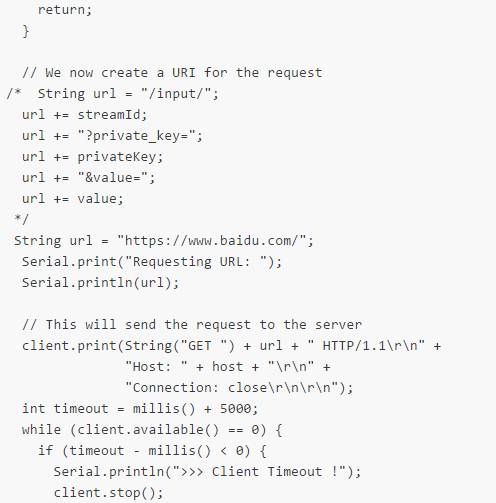
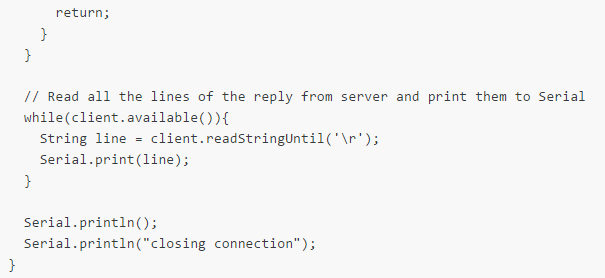
After uploading the program, if it keeps printing ‘.’ (hexadecimal 2E) without showing a situation similar to the image below, restart it (press the button on the development board, not restart the computer). The serial monitor tool that comes with Arduino still has some shortcomings; the received content looks like garbled text, making it impossible to read.

I tried using another tool and found that hexadecimal looks better. Of course, having a hexadecimal editor would be even better. The data part should be: 73 24 00 6C 9C 9F 3C 00 84 6C E0 7C 03 0C 04 0C 84 04 6C E4 0C 23 7C 8F 83 03 EC 13 9B 73 9B 23 84 04 63 84 FB 27 6F DF 64 6F 27 9C E2 E4 04 63 1C 70 C4 C7 64 73 64 72 64 38 FB 67 E0 10 03 0C 04 82 04 24 0C 84 9C 04 04 0C 62 0C 27 E3 7C 03 64 8C 84 8F C7 62 8C F3 6F 67 E7 00 6C 84 8F 6C 60 03 90 1B 13 6F 67 04 6C 20 03 0F 03 6E 7B 87 93 DB 67 04 0C 83 C4 6C 60 03 07 73 DB 93 6E 0C 04 C3 8C 64 60 03 FC 83 6F DC 03 0D 0A 0D 0A 43 6F 6E 6E 65 63 74 69 6E 67 20 74 6F 20 79 6F 75 72 2D 73 73 69 64 0D 0A
I only remember that 0D 0A seems to be a carriage return and line feed, but I’m not too clear about the specifics, and I don’t want to care. When I need this aspect, I’ll do experiments again. Program development is the basis of reverse engineering. I don’t know if you agree with this view. Let’s do a WiFi scan again and first look at the effect picture.
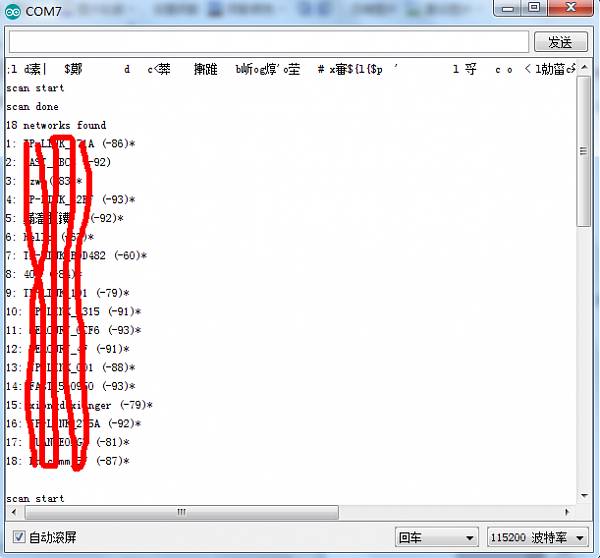
Test program source code:
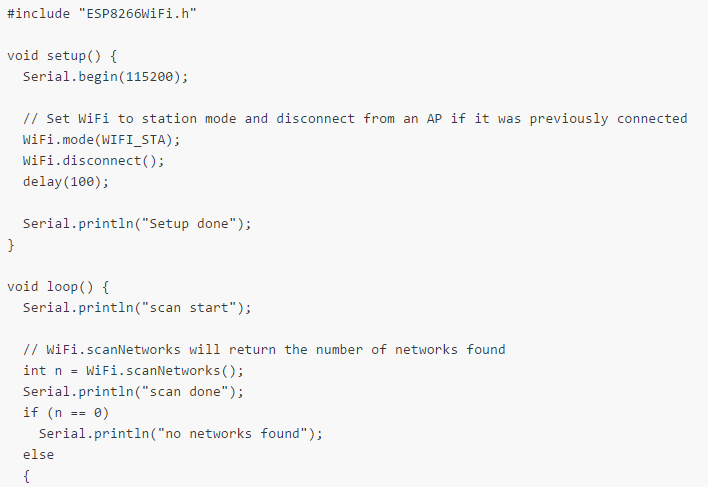
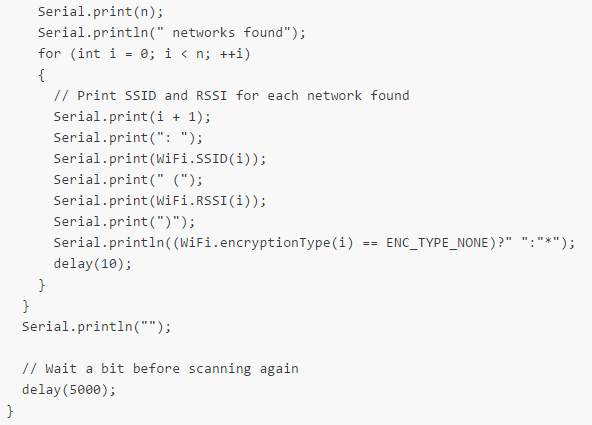
Reference materials:
http://bbs.pediy.com/showthread.php?t=51839 https://en.wikipedia.org/wiki/ESP8266
*Please indicate that it is from the Kanxue Forum @PEdiy.com


Weibo: Kanxue Security
Quickly follow this public account and let’s learn together~