More than 430 friends have joined Er Ge’s programming community. If you also need a good learning environment, click the link to join our big family! This is a private group for Java learning guides + practical programming + LeetCode problem-solving, where you can ask Er Ge questions, get help in creating a learning plan, and work on practical projects together. Let’s go!
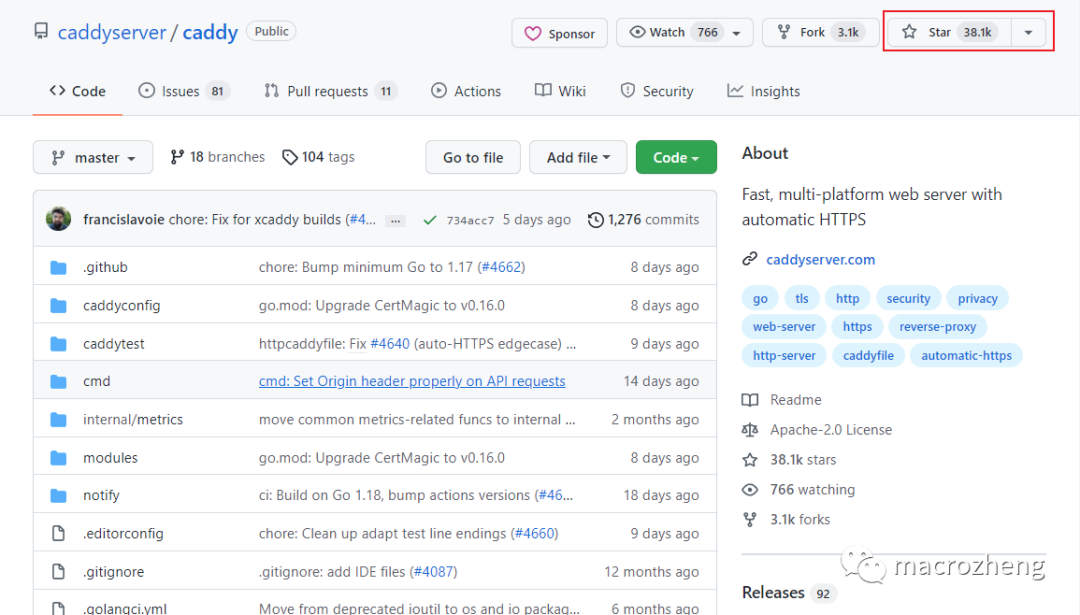
Hello everyone, I am Er Ge. Today I want to share an article by my good friend macrozheng. Nginx is a very popular web server with over 16K+ Stars on GitHub, and we often use it for static resource hosting or reverse proxying. Recently, I discovered a brand new web server called Caddy, which has surpassed Nginx with over 38K+ Stars. After trying Caddy, I found it to be much more elegant than Nginx, and it has powerful features, so I recommend it to everyone!
Introduction to Caddy
Caddy is a powerful and highly extensible web server, currently boasting over 38K+ Stars on GitHub. It is written in Go and can be used for static resource hosting and reverse proxying.
Caddy has the following main features:
- Compared to Nginx’s complex configuration, its unique
Caddyfileconfiguration is very simple; - Dynamic configuration changes can be made through its provided
Admin API; - It supports automated HTTPS configuration by default, automatically obtaining and configuring HTTPS certificates;
- It can scale to thousands of sites;
- It can run anywhere without additional dependencies;
- Written in Go, it guarantees memory safety.
Installation
First, we will install Caddy directly on CentOS 8. Using the DNF tool is undoubtedly the simplest method, and the Docker installation method will be introduced later.
- Use the following command to install Caddy via the DNF tool. After successful installation, Caddy will be registered as a system service;
dnf install 'dnf-command(copr)'
dnf copr enable @caddy/caddy
dnf install caddy
- Use
systemctl status caddyto check the status of Caddy. You will find that Caddy has been registered as a system service but is not yet started.

Usage
Next, let’s experience the basic usage of Caddy. These are common operations for web servers that you will definitely find useful!
Basic Usage
First, let’s start with a basic usage of Caddy, running it on port
2015and returningHello, world!.
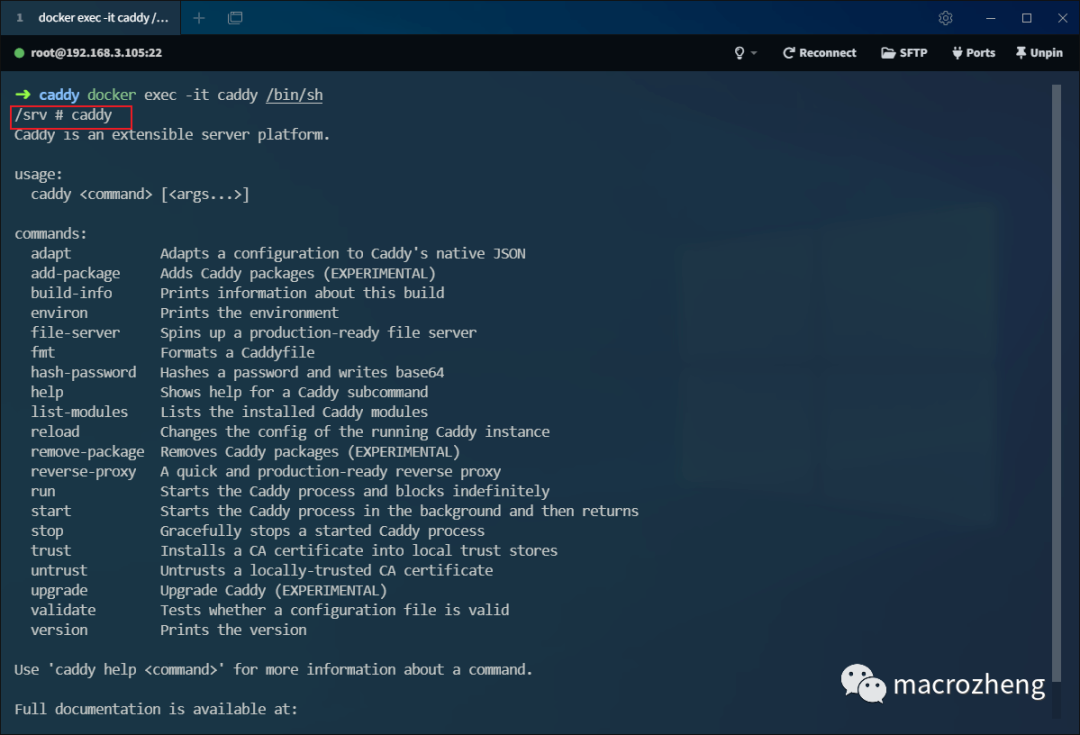
- Directly use the
caddycommand to output Caddy’s common commands. You can see how to use them from the descriptions, with the commonly used commands highlighted;
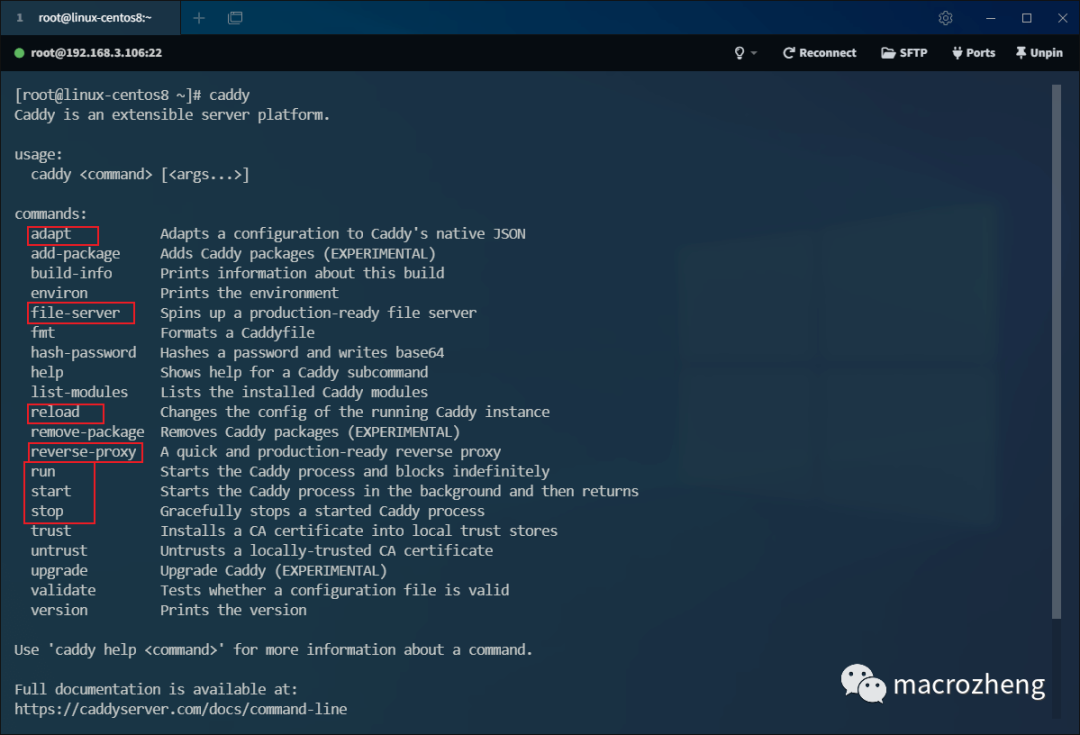
- Use the
caddy startcommand to run the Caddy service in the background;

- Caddy uses a JSON format configuration file by default, but since writing JSON format configurations can be cumbersome, it also provides a simpler configuration format called
Caddyfile. The following command can automatically convertCaddyfileto JSON configuration;
caddy adapter
- We can first create a file named
Caddyfilewith the following content, then usecaddy adapterto convert it to JSON configuration, and finally usecaddy reloadto apply the configuration. This configuration will listen on port2015and returnHello, world!;
:2015

respond "Hello, world!"
- Then we can use the curl command to access
localhost:2015, which will return the specified information;

- Of course, we can also use the
Admin APIprovided by Caddy to view configuration information with the following command;
curl localhost:2019/config/
- The current JSON configuration is as follows. If you were to use JSON configuration directly, you would need to write the following configuration, so using
Caddyfileis indeed much more convenient!
{
 "apps": {
  "http": {
   "servers": {
    "srv0": {
     "listen": [":2015"],
     "routes": [{
      "handle": [{
       "body": "Hello, world!",
       "handler": "static_response"
      }]
     }]
    }
   }
  }
 }
}
Caddyfile Basic Syntax
- The following example will use
Caddyfilefor configuration, and it is necessary to understand its syntax. The specific syntax rules forCaddyfileare as follows.
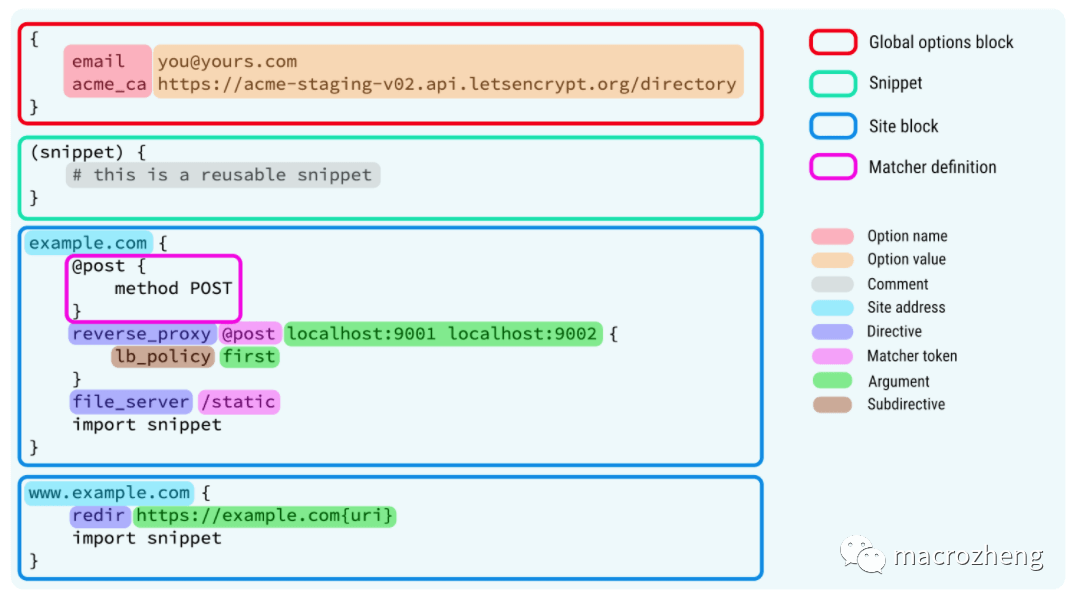
- Here are the keywords in the above image, which will help in understanding.
| Keyword | Explanation | Usage |
|---|---|---|
| Global options block | Global server configuration | Can be used to configure whether to enable HTTPS and Admin API, etc. |
| Snippet | Reusable configuration snippets | Once defined, they can be referenced using the import keyword. |
| Site Block | Configuration for a single site | Static proxy can be configured using file_server, and dynamic proxy can be configured using reverse_proxy. |
| Matcher definition | Definition of matching | By default, directives have a global effect, and this can specify the scope of influence. |
| Comment | Comments | Start with the # symbol. |
| Site address | Website address | Defaults to using HTTPS; if HTTP is needed, it must start with http://. |
| Directive | Directives | Directives give Caddy powerful functionality. |
Reverse Proxy
A reverse proxy forwards requests made to your proxy server. It can forward to static resource paths or dynamic service interfaces. Below, we will discuss how to perform static and dynamic proxying using domain names as examples.
Static Proxy
A static proxy forwards requests to different static resource paths. Here, we will proxy requests to
docs.macrozheng.comto my documentation project and requests tomall.macrozheng.comto the mall’s frontend project.
- First, we modify the local host file:
192.168.3.106 docs.macrozheng.com
192.168.3.106 mall.macrozheng.com
- Then we upload our documentation project and mall frontend project to Caddy’s HTML directory and extract them;
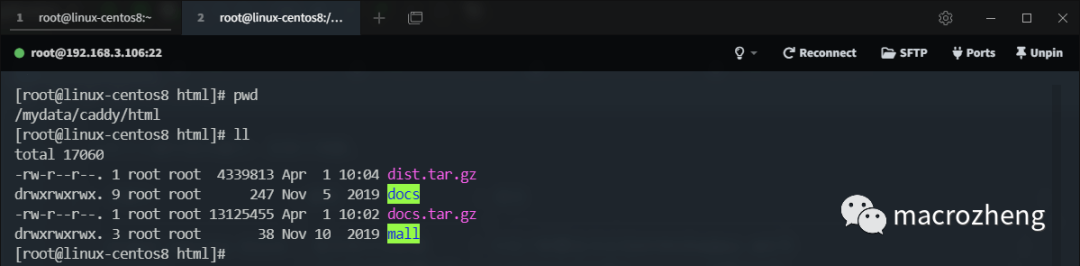
- Modify the
Caddyfilewith the following configuration, and after completing the modification, use thecaddy reloadcommand to refresh the configuration;
http://docs.macrozheng.com {
        root * /mydata/caddy/html/docs
        file_server browse
}

http://mall.macrozheng.com {
        root * /mydata/caddy/html/mall
        file_server browse
}
- If your
Caddyfileformat is not quite correct, you will see a warning like the following. Simply usecaddy fmt --overwriteto format and rewrite the configuration to resolve it;

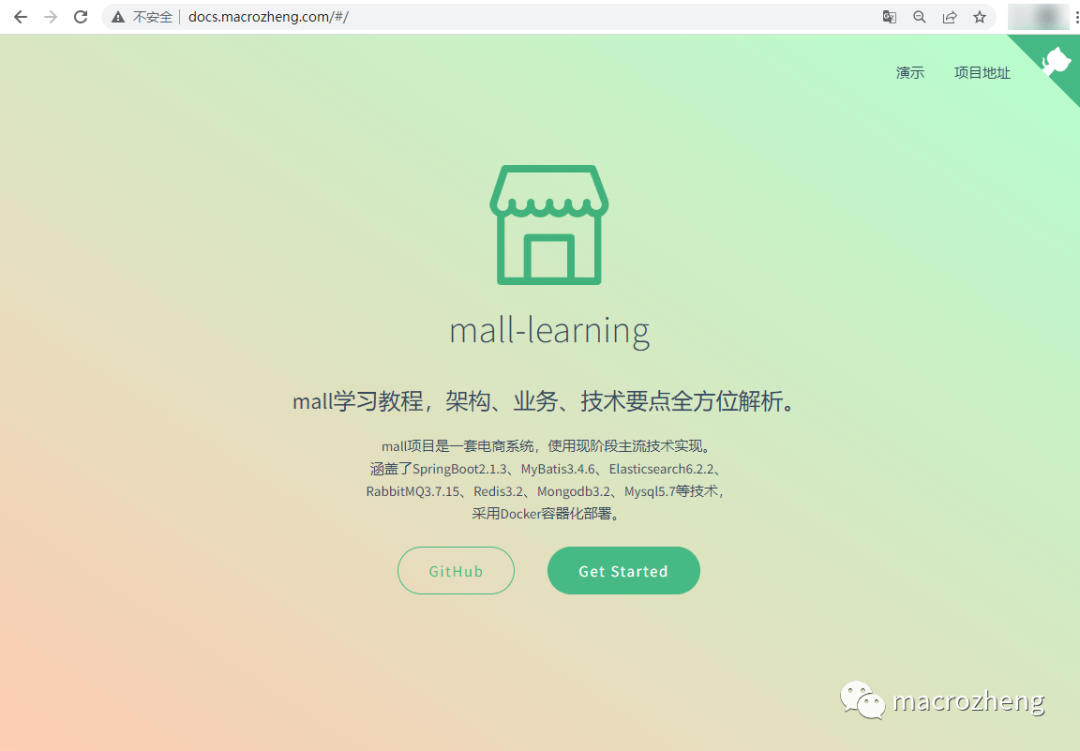
- You can access the deployed documentation project via
docs.macrozheng.com:
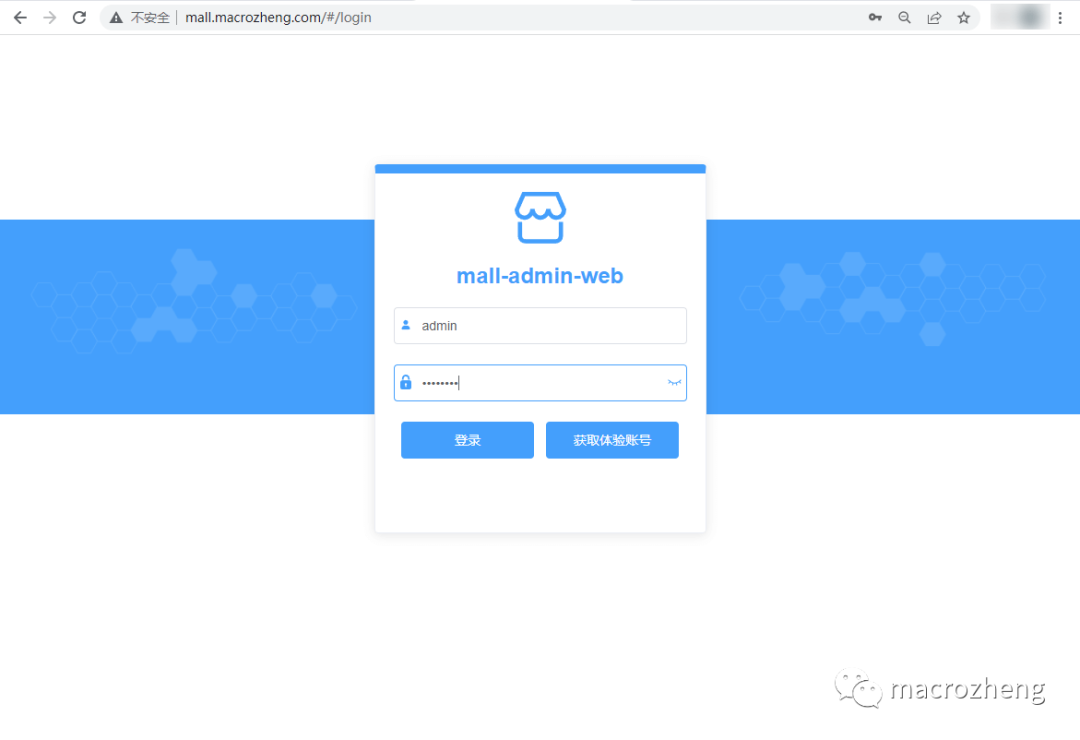
- You can access the deployed frontend project via
mall.macrozheng.com.
Dynamic Proxy
A dynamic proxy forwards requests from the proxy server to another service. Here, we will proxy requests to
api.macrozheng.comto the API service in the demo environment.
- First, we modify the local host file, adding the following rule:
192.168.3.106 api.macrozheng.com
- Modify the
Caddyfilewith the following configuration, and after completing the modification, use thecaddy reloadcommand to refresh the configuration;
http://api.macrozheng.com {
        reverse_proxy http://admin-api.macrozheng.com
}
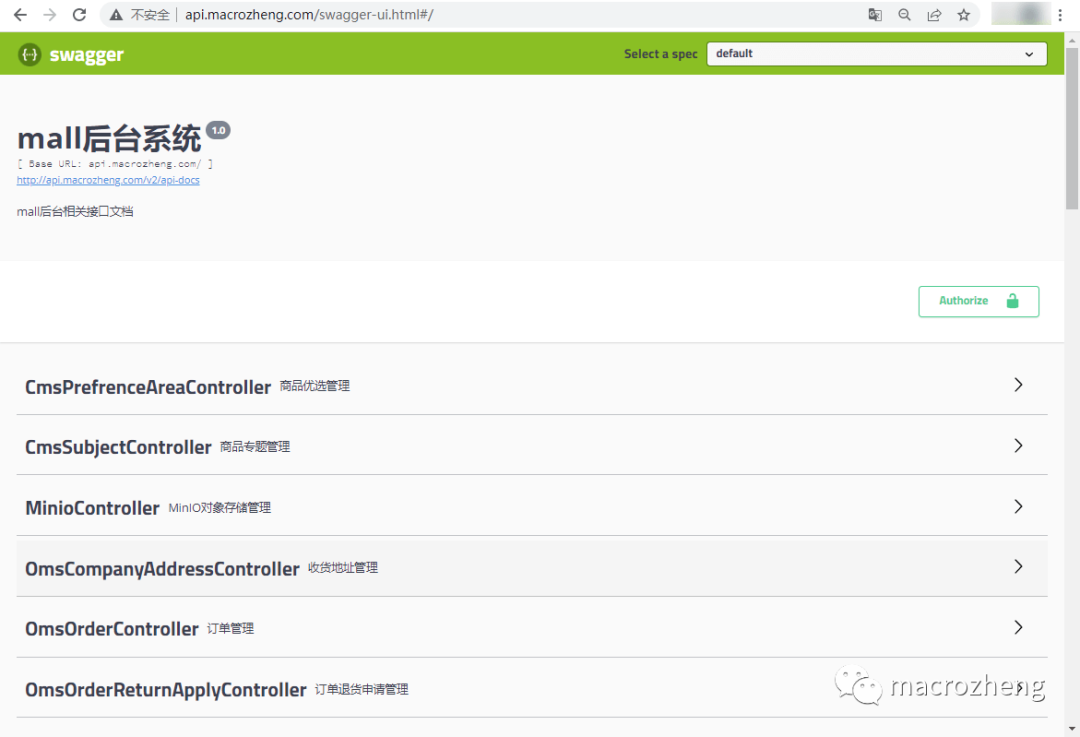
- Then you can access the
mall-adminAPI documentation page viaapi.macrozheng.com/swagger-ui.html.
File Compression
If our server has low bandwidth, the website access speed will be slow. In this case, we can enable Gzip compression in Caddy to improve website access speed. Here, we will demonstrate its speed-up effect using the mall frontend project as an example.
- We need to modify the
Caddyfile, using theencodedirective to enable Gzip compression. After modifying, use thecaddy reloadcommand to refresh the configuration;
http://mall.macrozheng.com {
        root * /mydata/caddy/html/mall
        encode {
            gzip
        }
        file_server browse
}
- There is a relatively large JS file that is
1.7Mbefore compression;
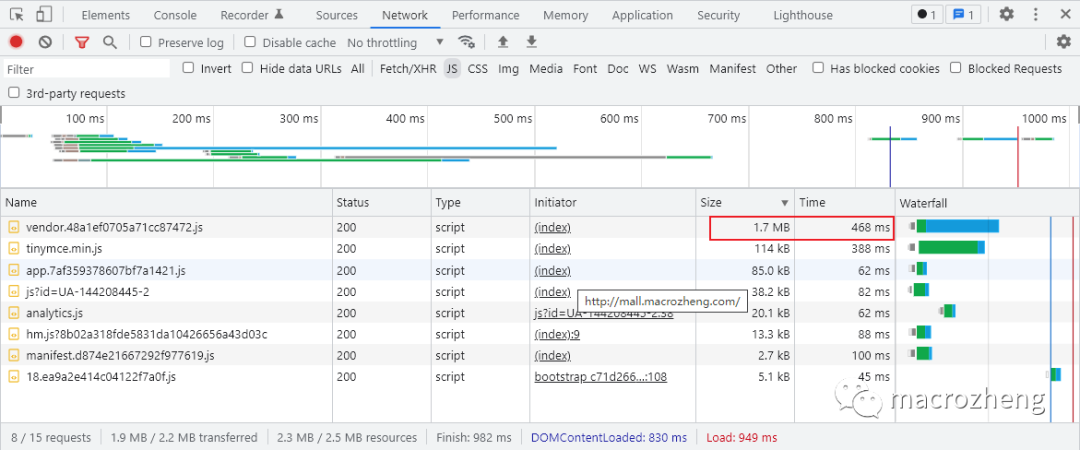
- After compression, it is
544K, and the access speed has significantly improved;

- Additionally, we can check the response information. If there is a
Content-Encoding: gzipresponse header, it indicates that Gzip compression has been enabled.

Address Rewriting
Sometimes, when our website changes its domain name, users may still be accessing the old domain. In this case, we can use Caddy’s address rewriting feature to redirect users to the new domain.
- We need to modify the
Caddyfile, using theredirdirective to rewrite the address. After modifying, use thecaddy reloadcommand to refresh the configuration;
http://docs.macrozheng.com {
        redir http://www.macrozheng.com
}
- At this point, accessing the old domain
docs.macrozheng.comwill directly redirect towww.macrozheng.com.
Directory Segmentation
Sometimes we need to use the same domain to access different frontend projects, and in this case, we need to distinguish the frontend projects by subdirectories.
- For example, we need to access various frontend projects via the following paths;
www.macrozheng.com # Access documentation project
www.macrozheng.com/admin # Access backend project
www.macrozheng.com/app # Access mobile project
- We need to modify the
Caddyfile, using theroutedirective to define the routing, and after modifying, use thecaddy reloadcommand to refresh the configuration.
http://www.macrozheng.com {
        route /admin/* {
                uri strip_prefix /admin
                file_server {
                        root /mydata/caddy/html/admin
                }
        }
        route /app/* {
                uri strip_prefix /app
                file_server {
                        root /mydata/caddy/html/app
                }
        }
        file_server * {
                root /mydata/caddy/html/www
        }
}
HTTPS
Caddy automatically supports HTTPS without the need for manual certificate configuration. This is why we needed to use
http://at the beginning of the domain configuration. To use Caddy’s default HTTPS functionality, follow these steps.
- First, we need to modify the DNS resolution of the domain, which can be set directly on the website where the domain was purchased. Here, we take
docs.macrozheng.comas an example; - Then use the following command to verify that the DNS resolution record is correct. Note that the configured server’s
80and443ports must be accessible from the external network;
curl "https://cloudflare-dns.com/dns-query?name=docs.macrozheng.com&type=A" \
  -H "accept: application/dns-json"
- Modify the
Caddyfileconfiguration file as follows;
docs.macrozheng.com {
        root * /mydata/caddy/html/docs
        file_server browse
}
- Then use the
caddy runcommand to start the Caddy server. Isn’t it very convenient!
caddy run
Docker Support
Caddy also supports installation and usage via Docker, which is basically the same as installing directly on CentOS.
- First, use the following command to download the Caddy Docker image;
docker pull caddy
- Then create a
Caddyfileconfiguration file in the/mydata/caddy/directory with the following content;
http://192.168.3.105:80

respond "Hello, world!"
- After that, use the following command to start the Caddy service, where we mount the host’s
Caddyfileconfiguration file, Caddy’s data directory, and website directory into the container;
docker run -p 80:80 -p 443:443 --name caddy \
    -v /mydata/caddy/Caddyfile:/etc/caddy/Caddyfile \
    -v /mydata/caddy/data:/data \
    -v /mydata/caddy/html:/usr/share/caddy \
    -d caddy
- Then use
docker execto enter the Caddy container and execute commands;
docker exec -it caddy /bin/sh
- Input Caddy commands to operate, and subsequent operations will be the same as if we installed it directly on CentOS.
Conclusion
Today, I experienced Caddy, and its powerful directive functionality allows us to achieve various features without excessive configuration, making it truly elegant to use! Especially its ability to automatically configure HTTPS is excellent! Caddy can achieve almost all the functionalities that Nginx can, so you can compare it with the Nginx usage tutorial I wrote earlier, and you will find how elegant it is to use Caddy!
References
- Project address: https://github.com/caddyserver/caddy
- Official documentation: https://caddyserver.com/
Nothing keeps me anchored—except for my purpose. Even though there are roses, shade, and tranquil harbors by the shore, I am a boat without a tether.
Recommended Reading:
- Is it too much to play Gobang in IDEA?
- Successfully joined the company
- Discrimination in outsourcing
- Let’s cheer everyone up!