Introduction
Have you ever thought that rainwater can not only wet your shoes but also trigger smart devices? Imagine, as soon as a drop of rain falls, your window “intelligently” closes to prevent your sofa from turning into a “wet sponge”; or your Arduino suddenly pops up to remind you: “Don’t go out, you’re not a lotus leaf, getting wet won’t turn you into a seed pod!”
The Arduino rainwater sensor is not just about “watching the sky for food”; it can accurately sense raindrops and quickly relay information to your smart system. Like a weather forecaster, it can not only tell you to “bring in the laundry” but also link with your smart home devices, allowing you to prepare in advance rather than being caught off guard by the rain. This article will delve into the working principle of the Arduino rainwater sensor and guide you through an interesting example to easily master its usage, making your Arduino smarter and more fun!
How Does the Rainwater Sensor Work?
The working principle of the rainwater sensor is quite simple, like a clever little detective responsible for detecting the arrival of rain. Its sensing plate has a row of exposed copper wires, which work together like a group of little friends, acting as an adjustable resistor (similar to a volume control potentiometer). This resistance changes based on the amount of water detected.
In simple terms, the more water there is, the lower the resistance and the stronger the conductivity; the less water there is, the higher the resistance and the poorer the conductivity. Therefore, when raindrops fall, the increase in moisture reduces the resistance and enhances conductivity; conversely, when moisture decreases, the resistance increases and conductivity decreases. The sensor outputs a voltage based on the change in resistance, and the Arduino can determine whether it is raining by measuring this voltage.
Just like when you step in a puddle while it is raining, the more water there is, the stronger the contact between your shoe and the water, resulting in lower resistance. The sensor works similarly, recognizing whether it is actually raining through this “contact” to provide accurate weather forecasts.
Hardware Overview
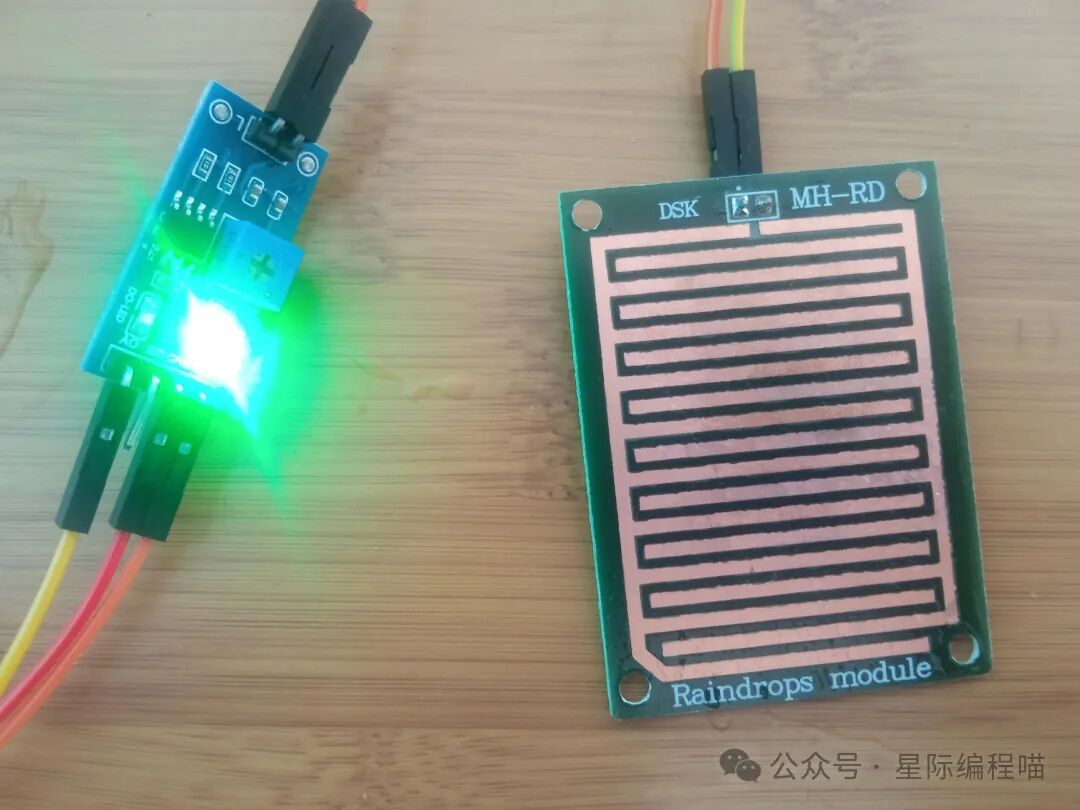
A typical rainwater sensor consists of two main parts:
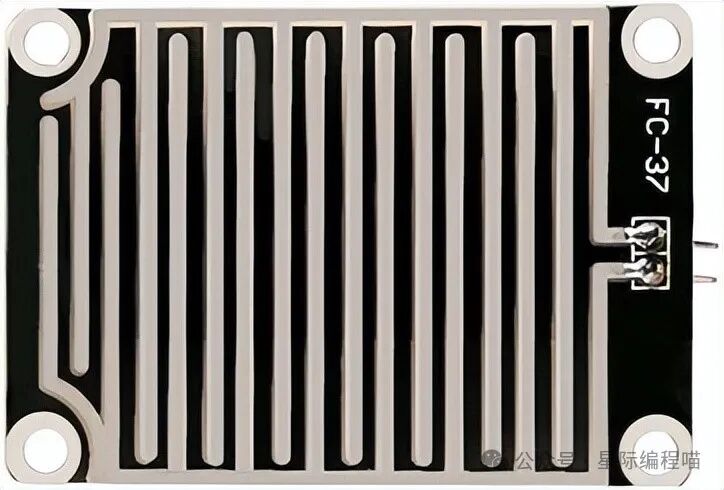
Sensing Plate
The rainwater sensor has a sensing plate covered with a series of exposed copper wires, which are usually placed outdoors, possibly installed on a roof or anywhere that can be directly affected by rain.
These wires are not connected under normal conditions but conduct current through the bridging effect of water. When water droplets fall on the surface of the wires, the presence of water creates a conductive path between the wires. The more water there is, the stronger the conductivity and the lower the resistance.
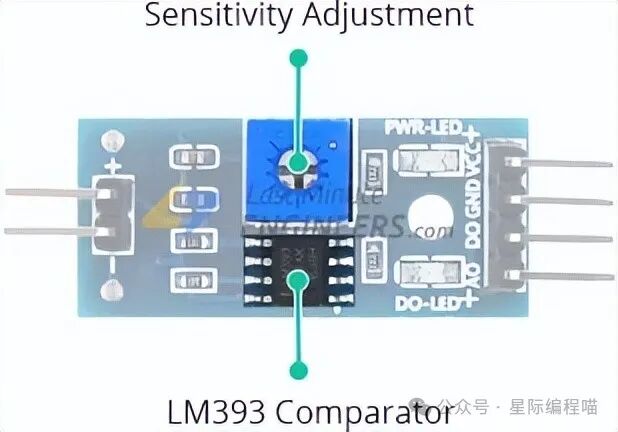
Module
The sensor also has an electronic module that connects the sensing plate to the Arduino. This module generates an output voltage based on the resistance changes of the sensing plate and provides it to the Arduino through the analog output (AO) pin.
Additionally, this signal is sent to an LM393 high-precision comparator for digital processing, and the output result is sent to the Arduino through the digital output (DO) pin. The module has a built-in potentiometer that can adjust the sensitivity of the digital output, simply by rotating the knob to set a water threshold: when the water level exceeds the threshold, the module outputs a low level (LOW); otherwise, it outputs a high level (HIGH).
In simple terms, this sensor acts like a clever little detective, measuring the water level while indicating whether it is raining outside through its “lights”!
Rainwater Sensor Pin Description
The rainwater sensor is super simple, with only 4 pins that need to be connected.

AO (Analog Output) Pin:The AO pin outputs an analog signal ranging from 5V to 0V, representing the sensed water level. Like a tuner, the more water there is, the lower the signal value; the less water there is, the higher the signal value.
DO (Digital Output) Pin:The DO pin provides a digital output from the internal comparator circuit. It can be connected to any digital pin on the Arduino or directly to devices like a 5V relay. It acts like a switch, outputting a low level (LOW) when the water level reaches the threshold; otherwise, it outputs a high level (HIGH).
GND:GND is the ground connection, connected to the Arduino’s ground.
VCC:The VCC pin provides power to the sensor, and it is recommended to use a voltage supply of 3.3V to 5V. Note that the analog output may vary depending on the voltage supplied to the sensor. Therefore, providing voltage to the sensor is like giving it “power”; different voltages will yield different sensing results.
Connecting the Rainwater Sensor to Arduino
Let’s connect the rainwater sensor to the Arduino!
First, you need to provide power to the sensor. To do this, you can connect the module’s VCC pin to the Arduino’s 5V pin.
However, a common issue with the sensor is that when exposed to a humid environment for a long time, its lifespan can be shortened. Continuous power to the sensing plate accelerates the corrosion process. To avoid this problem, it is recommended not to power the sensor continuously but only when data needs to be read.
A simple solution is to connect the VCC pin to a digital pin on the Arduino and set that pin to high (HIGH) or low (LOW) as needed.
Additionally, the total power consumption of the module (when both LEDs are on) is about 8mA, so powering the module directly through the Arduino’s digital pin is perfectly fine.
Next, connect the module’s VCC pin to Arduino’s digital pin #7, the GND pin to ground, and finally, connect the module’s DO pin to Arduino’s digital pin #8.
Here is the connection diagram; follow the diagram to get your “rainwater detector” up and running!

If you want the source code, please contact me privately, and we can discuss purchasing options.
Calibrating the Rainwater Sensor
To obtain accurate readings, it is recommended to calibrate the rainwater sensor first.
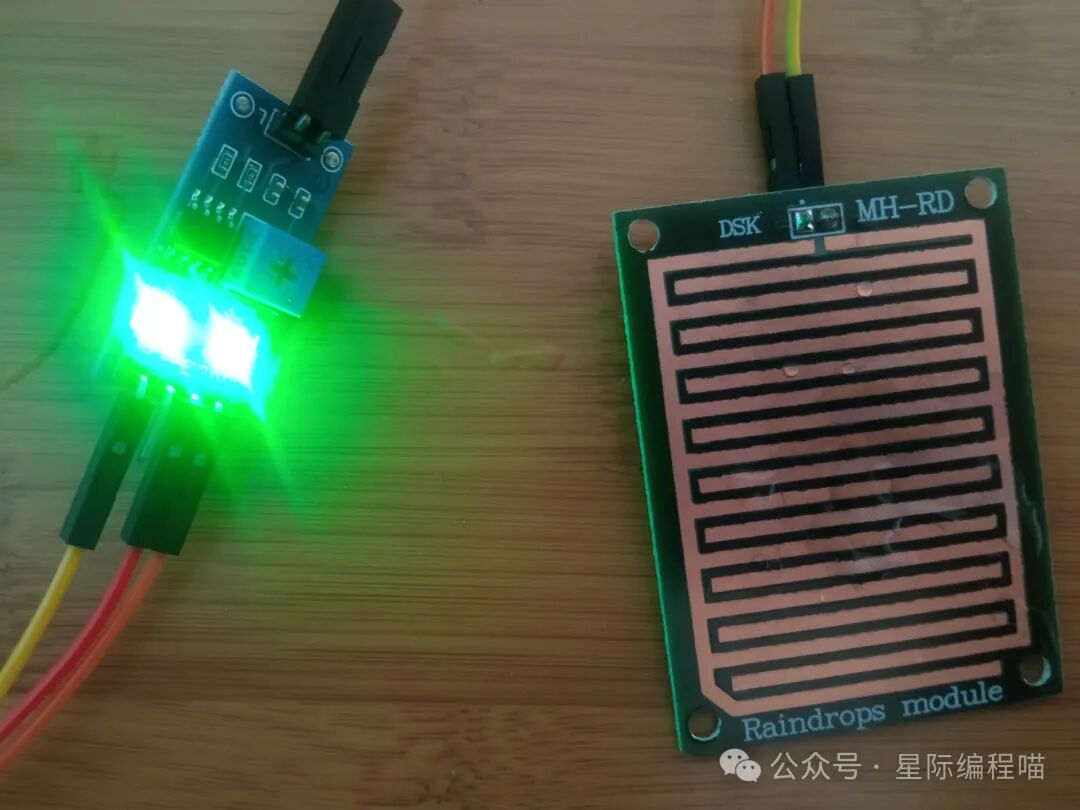
The module has a built-in potentiometer for calibrating the digital output (DO). By rotating the potentiometer knob, you can set a water threshold. When it rains, if the water level exceeds the threshold, the status LED will light up, and the digital output (DO) will change to low level (LOW).
Now, let’s calibrate the sensor! Sprinkle some water on the sensing plate, rotate the potentiometer clockwise until the status LED lights up, then rotate it counterclockwise until the LED turns off.
And that’s it, calibration is complete! Your sensor is now “ready” to face every “rain”. Whenever you enter “rainy mode”, it will accurately tell you whether you need to bring an umbrella!
Example Code
Once the circuit is built, upload the following code to the Arduino.
Next, place the rainwater sensor in a location that can directly receive precipitation, such as on the roof. Also, tilt the sensor slightly (about 20°) to help water flow smoothly over the sensing plate.
Note that the electronic module is not waterproof, so be careful during installation to ensure that only the sensing plate comes into contact with water. You can place the module in a protective casing to prevent rainwater from entering the circuit part. This way, the rainwater sensor can work normally without worrying about “soaking”! Let it act like an “adventurer” in the rain, focusing only on the rainwater and staying away from humid environments!
If you want the source code, please contact me privately, and we can discuss purchasing options.
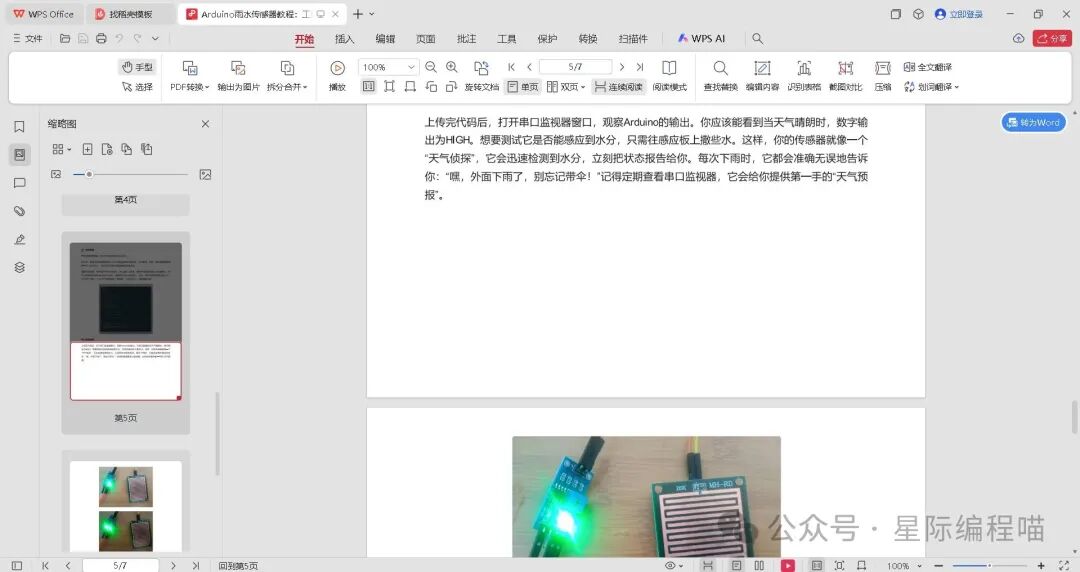
Running Results
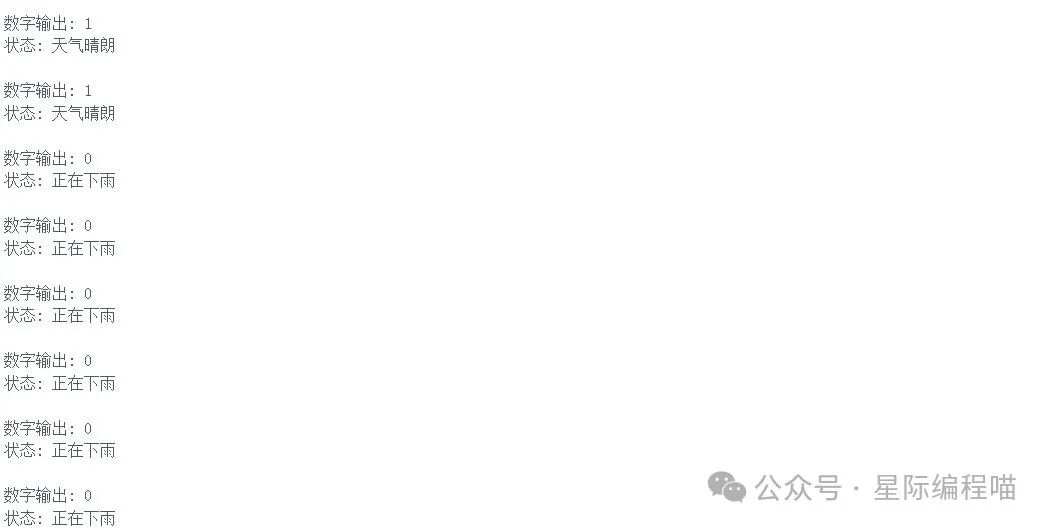
After uploading the code, open the serial monitor window to observe the Arduino’s output. You should see that when the weather is clear, the digital output is HIGH. To test whether it can sense moisture, simply sprinkle some water on the sensing plate. Your sensor will act like a “weather detective”, quickly detecting moisture and immediately reporting the status to you. Every time it rains, it will accurately tell you: “Hey, it’s raining outside, don’t forget to bring an umbrella!” Remember to check the serial monitor regularly; it will provide you with first-hand “weather forecasts”.
Funny Story
Recently, Xiao Ming has become fascinated with Arduino, especially in the area of smart home technology. He thinks having a “smart” rainwater sensor at home that can tell him about the weather changes outside is really cool! So, he excitedly installed a rainwater sensor on his Arduino and set up a smart message push: “Rainwater detected, please close the window in time!”
Everything was ready, and Xiao Ming felt happy, as if he had become the deputy director of the meteorological bureau. Time flew by, and soon, a “smart weather forecast” function appeared in his daily work routine, with his little Arduino acting like a “personal meteorologist” on standby.
One day, while Xiao Ming was working diligently in the office, suddenly, his phone rang: “Rainwater detected! Please close the window in time!” Xiao Ming was taken aback, quickly opened the remote control, and swiftly closed the window at home. He thought to himself: “This time, it’s foolproof; closing the window in time will ensure that the sofa and floor won’t get wet.”
However, ten minutes later, his phone received another message: “Meow~ Meow~ Meow~” Xiao Ming was startled; could it be that his cat was causing trouble again? He quickly opened the remote monitoring, and the camera showed the cat desperately scratching at the window. Xiao Ming panicked and hurriedly opened the window again, only to see outside—sunshine and lazy clouds floating in the sky, with no rain at all!
Xiao Ming was instantly dumbfounded, embarrassed like a groundhog. What happened? Why did his smart weather forecast turn into a “false alarm”? He hurried home, opened the sensor’s detection function, and found that it hadn’t rained at all. Suddenly, his brother walked over, looking guilty, and said: “Oh no, I accidentally spilled water on the sensor, causing it to mistakenly think it was raining.”
Xiao Ming then realized that his “smart” Arduino had misinterpreted the water spilled by his brother as “rain” and sent out the wrong message. So, Xiao Ming sighed silently, feeling that he almost became the “most embarrassing home technology user in the world”. But at that moment, he understood a profound truth: although sensors are smart, they also have their quirks and need proper calibration to avoid “false alarms”!
To prevent similar blunders in the future, Xiao Ming decided to add more parameters to the push notifications, such as temperature and humidity. He also set stricter conditions to ensure that the Arduino’s “weather forecast” would not fail again. Thus, his smart home system became increasingly intelligent, more considerate, and precise, and his cat no longer felt troubled by the frequent opening and closing of the windows.
From then on, whenever it rained, Xiao Ming would proudly say to his Arduino at home: “Looks like you didn’t have a ‘misstep’ today, bringing ‘accurate forecasts’ to the family.”
Conclusion
Whether for smart homes or fun DIY projects, the Arduino rainwater sensor can make your projects smarter. It acts like a weather detective, constantly capturing the traces of raindrops and determining whether it is time to “sound the alarm”. As soon as the first drop of rain falls, it springs into action, reminding you to close the window, bring in the laundry, and even link with awnings or control motors to prevent your living room from turning into a “water curtain cave”.
Compared to staring out the window to guess the weather, Arduino’s “rain sensing radar” is more reliable; it won’t be fooled by the sun and won’t ignore light rain due to “laziness”. With a little improvement, it can also be combined with temperature and humidity sensors for more accurate judgments, avoiding “water spilled sensor” incidents. So next time the sky is overcast, don’t rely on intuition; let Arduino “taste” the rainwater first and make a professional judgment, while you can relax and binge-watch, waiting for it to give you the most reliable weather alerts!