Introduction to Digital Tubes
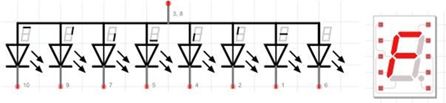
A digital tube is a type of semiconductor light-emitting device, with its basic unit being a light-emitting diode. Digital tubes are categorized into seven-segment and eight-segment types, with the eight-segment tube having an additional light-emitting diode unit (for displaying a decimal point). The connection method for light-emitting diode units is divided into common anode and common cathode digital tubes. A common anode digital tube is one where all anodes of the light-emitting diodes are connected together to form a common anode (COM). In application, the common terminalPWR should be connected to the power inputPWR. When the cathode of a particular segment is low, the corresponding segment lights up. When the cathode is high, the corresponding segment does not light up.
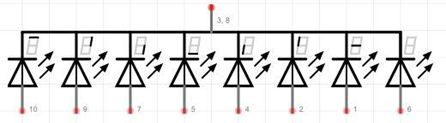
The common cathode digital tube, on the other hand, has its cathodes connected together to form a common cathode, while the anodes are independently separated.
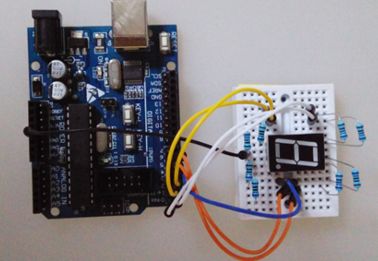
First, let’s take a look at the digital tube used in this experiment. By checking the modelSM41056, we find that it is a0.5″ single common anode digital tube, and below is its pin diagram. On the back, there are two dots and the markings5 and10, which indicate pins1, 6, 5, 10. Like light-emitting diodes, digital tubes require a current-limiting resistor, as there is no information online about the breakdown voltage of this digital tube. Therefore, the supply voltage should be kept lower, so a1k current-limiting resistor is chosen, along with a3.3V power supply.
The circuit connection method only requires connecting the pins of the digital tube sequentially through a resistor to theArduino development board.
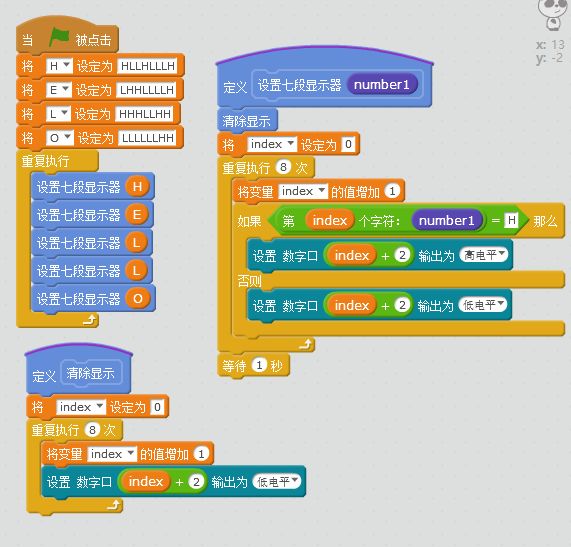
Scratch The code is as follows
Since it is a common anode digital tube, simply setting the corresponding pins to low will light up the respective segments. However, setting the pins one by one in the program is inefficient. If we can set the corresponding pins as a list (array) and then use a loop, the program will be shorter and more flexible. The code is as follows: