We previously introduced how to configure OpenWrt to operate in a one-armed routing mode (OpenWrt Configuration One-Armed Routing Mode), and later discussed iStoreOS based on OpenWrt (Deploying iStoreOS on VMware ESXi to Turn It into a Router), which we flashed onto the VMware Edge 620 (VMware Edge 620 Magic Operation: Flashing iStoreOS to Become a Versatile Enterprise Gateway, Easily Handling Multiple SSIDs), thus creating a feature-rich enterprise-grade router gateway.
As a gateway device, it often encounters situations where it needs to interface with switches. We just introduced how to configure Panabit and VLAN intercommunication with Layer 3 switches (Panabit VLAN Efficiency: Practical Guide from Transparent Bridge to Gateway Mode), and today we will take a brief look at how iStoreOS can be configured for VLAN intercommunication with Layer 3 switches.
First, we configure the link type of the interconnection interface on the switch to Trunk and allow all VLANs.
#interface GigabitEthernet0/2 port link-mode bridge port link-type trunk port trunk permit vlan allNext, we add several VLANs and create corresponding VLAN virtual interfaces.
#vlan 10 to 20#interface Vlan-interface10 ip address 172.17.10.1 255.255.255.0#interface Vlan-interface11 ip address 172.17.11.1 255.255.255.0#interface Vlan-interface12 ip address 172.17.12.1 255.255.255.0#interface Vlan-interface13 ip address 172.17.13.1 255.255.255.0#interface Vlan-interface14 ip address 172.17.14.1 255.255.255.0#interface Vlan-interface15 ip address 172.17.15.1 255.255.255.0#interface Vlan-interface16 ip address 172.17.16.1 255.255.255.0#interface Vlan-interface17 ip address 172.17.17.1 255.255.255.0#interface Vlan-interface18 ip address 172.17.18.1 255.255.255.0#interface Vlan-interface19 ip address 172.17.19.1 255.255.255.0#interface Vlan-interface20 ip address 172.17.20.1 255.255.255.0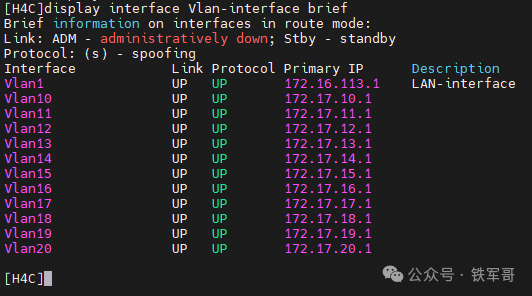
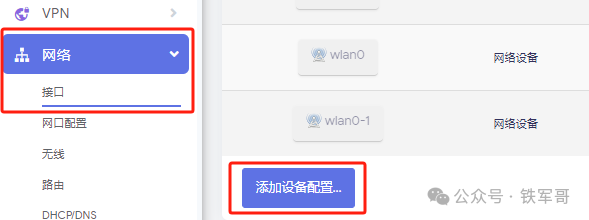
Then we go to iStoreOS for configuration. Under the Network section on the Interfaces page, switch to the Devices tab and click Add Device Configuration at the bottom of the page.
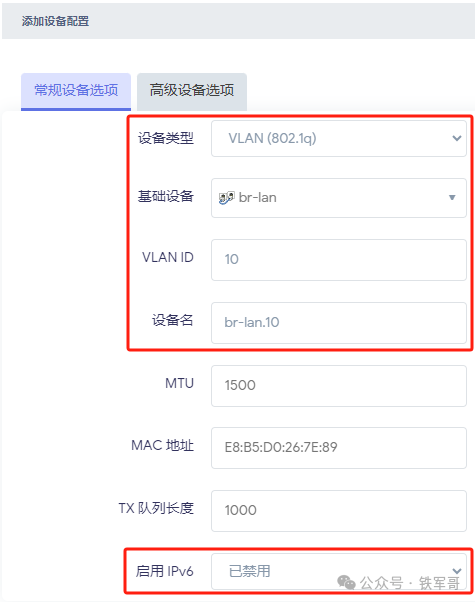
On the Add Device Configuration page, select VLAN (802.1q) as the device type, noting the distinction from VLAN (802.1ad). 802.1q is the basic VLAN, while 802.1ad is QinQ, used for multi-layer tagging scenarios. For the base device, I found two options: one is to use the default br-lan virtual device, and the other is to select a physical interface. We will first use the br-lan virtual device; input the VLAN ID we intend to configure as VLAN 10, and the automatically generated device name will be br-lan.10, which can be adjusted as needed. Since I do not want to use IPv6, I set Enable IPv6 to Disabled. Finally, click Save to complete the addition.
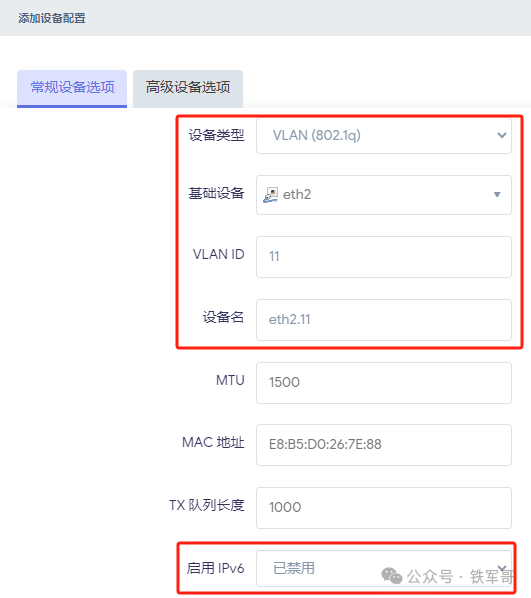
Repeat the device configuration addition step, but this time select the physical interface eth2 as the base device, configure the VLAN ID as 11, and the device name will automatically be set to eth2.11. Again, set Enable IPv6 to Disabled. Finally, click Save to complete the addition.
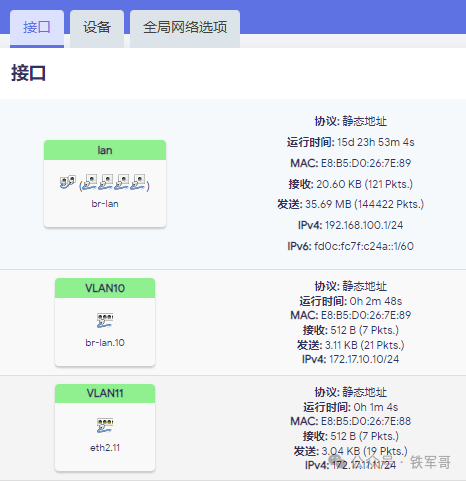
The two added devices are shown below:

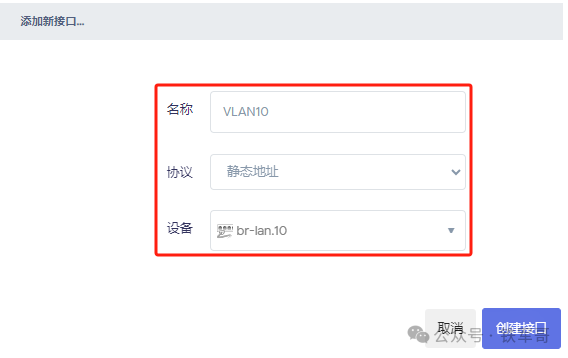
Next, we switch to the Interfaces tab and click the Add New Interface button. In the dialog box, set the name to VLAN10, select Static Address for the protocol, and choose the recently added br-lan.10 as the device; click Create Interface.
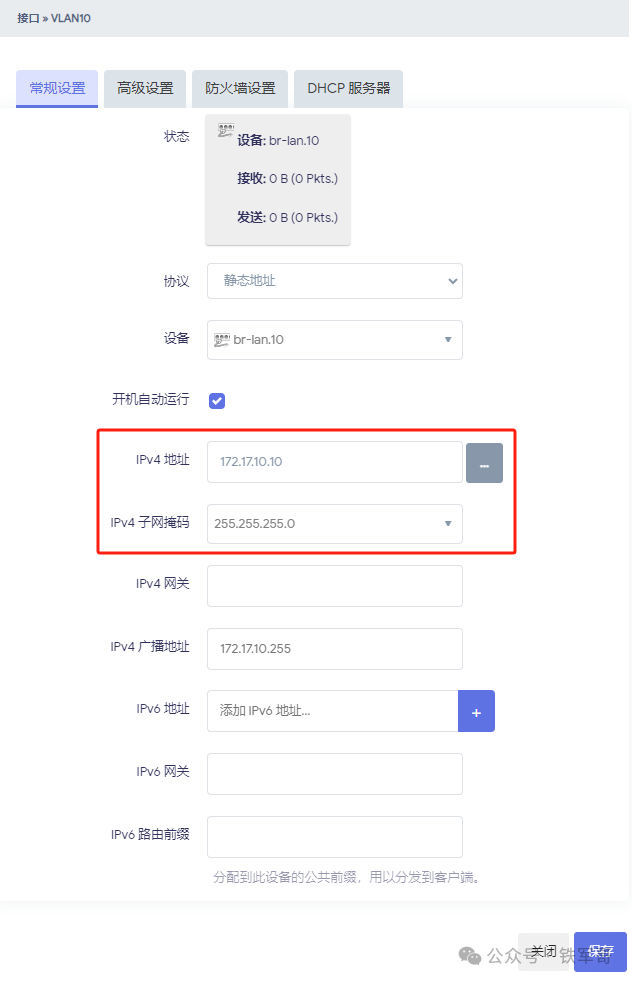
Then, on the General Settings tab, configure an IPv4 address and subnet mask for the interface.
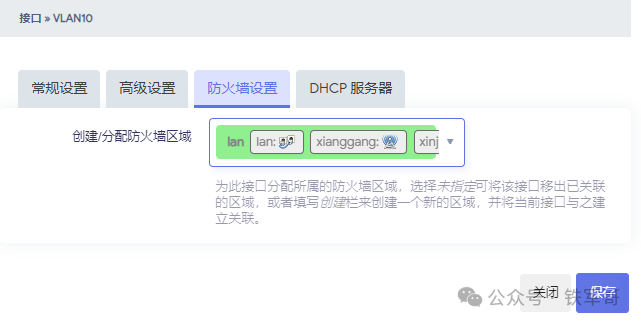
Switch to the Firewall Settings tab and assign the interface to the LAN firewall zone; click Save.
Repeat the process of adding a new interface to add another VLAN 11 interface, configuring the IP address as 172.17.11.11.
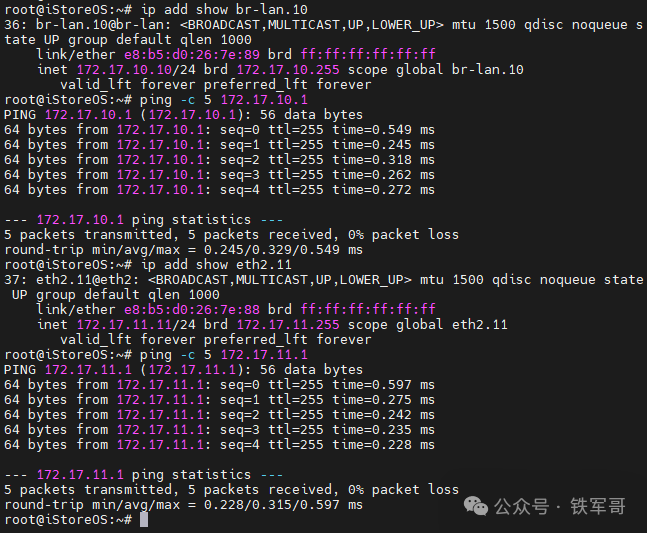
After adding, we will test the intercommunication situation on the switch.
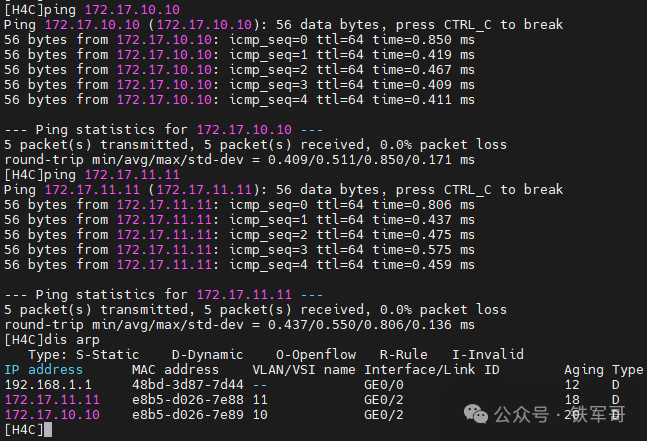
After testing, the communication between VLAN 10 and VLAN 11 is normal, with a ping packet loss rate of 0%, confirming the configuration is successful. So what is the difference between selecting a physical interface for the base device and a virtual device like br-lan? I tested it and found that when the base device is the virtual device br-lan, the firewall zone does not need to be configured when setting up the interface; however, when selecting a physical interface, the firewall zone must be configured for intercommunication.
Of course, if you prefer to use command line configuration, you can modify the configuration file /etc/config/network and add the following configurations:
config device option type '8021q' option ifname 'br-lan' option vid '10' option name 'br-lan.10' option ipv6 '0'config device option type '8021q' option ifname 'eth2' option vid '11' option name 'eth2.11' option ipv6 '0'config interface 'VLAN10' option proto 'static' option device 'br-lan.10' option ipaddr '172.17.10.10' option netmask '255.255.255.0'config interface 'VLAN11' option proto 'static' option device 'eth2.11' option ipaddr '172.17.11.11' option netmask '255.255.255.0'Also, remember to add the new interfaces in the firewall configuration file /etc/config/firewall.
config zone option name 'lan' option input 'ACCEPT' option output 'ACCEPT' option forward 'ACCEPT' option masq '1' list network 'lan' list network 'VLAN10' list network 'VLAN11'Finally, restart the network service to apply the changes.
In summary, the VLAN configuration is successfully completed.
Recommended Reading
From Bricking to Rebirth: My RK3588 Development Board’s Journey to Custom Ubuntu16GB Laptop Running 10 Android Instances? Redroid Cloud Phone Performance Test!Gigabit Network Not Fully Utilized? Decoding the Secrets of SCP Encryption Algorithm Selection to Easily Break 1400Mbps16-Core CPU Running at 100%! Testing Six Vulnerability Scanning Modes Across 21 Nodes, This Mode Makes the Server Go WildRunning Docker on Windows, Can 8GB of Memory Not Satisfy the Vulnerability Scanning Tool?Tencent App Treasure Conquers Windows! Major Changes in Installing Android Apps on Windows by 2025, Easily Set Up Xiaohongshu/King of Glory in 5 MinutesTwo Commands to Solve It! Kali Natively Integrates GVM Vulnerability Scanner, Saving 5GB of Space Compared to DockerWindows Can Also Handle Docker! A Step-by-Step Guide to Deploying Redroid Cloud PhoneHigh-Performance Game Cloud Phone Revolution! GPU Acceleration Makes Redroid Performance Comparable to Xiaomi 15Automatically Install System by Plugging in USB? Mastering Ubuntu Server Edition Automatic Installation Image Creation in One ArticleConnect to WiFi and Change IP! Revealing the Black Technology of Multi-VPN Exit in Enterprise Routers!Global Deployment of Cloud Phones: Achieving Docker Container Network Switching with Policy RoutingFrom CentOS to Ubuntu: Zero-Cost Migration of L2TP VPN, Practical Experience in Enterprise Intranet Penetration!WireGuard Too Complicated? Teach You to Use Netmaker to Achieve Global Networking in Ten MinutesCloud Phone Technology Revealed! Low-Cost Implementation of One Computer as Hundreds of “Virtual Phones” in Practice