Click the above “Mushroom Cloud Creation” to follow us!
1. Overview
A button switch, also known as a push button switch, was previously called a sensitive switch and is widely used in lights, socket switches, doorbells, and car central consoles. The introduction of button switches adds a layer of protection for electrical safety, making it easier to control electrical appliances while further protecting components.
During the learning process of Arduino, we will encounter various input devices, among which the button switch is the simplest and most widely used. Here, we will use Arduino to control an LED light, achieving the effect of turning it on when the button is pressed and off when pressed again.

2. Project Implementation
(1) Using a Button to Light Up a Small Lamp
Hardware Preparation:
Controller: Arduino UNO, IO Sensor Expansion Board V7.1
Modules: LED Light Module, Button Module
Connection Cable: Type A to B USB Cable
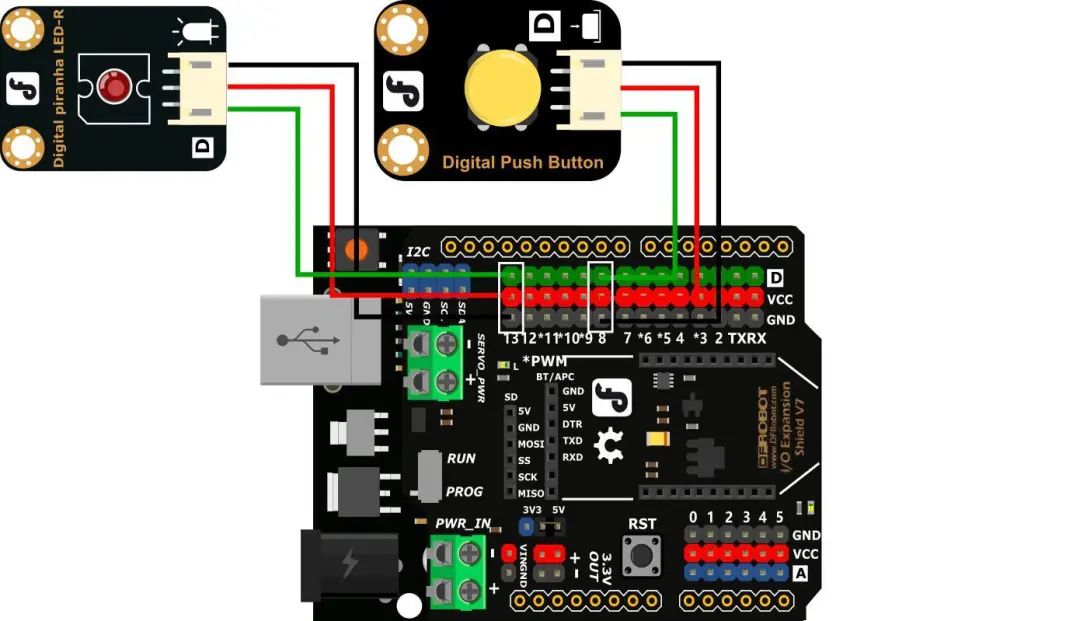
Program Writing:
1. Find button.py digital input in the example program and open it with IDLE.
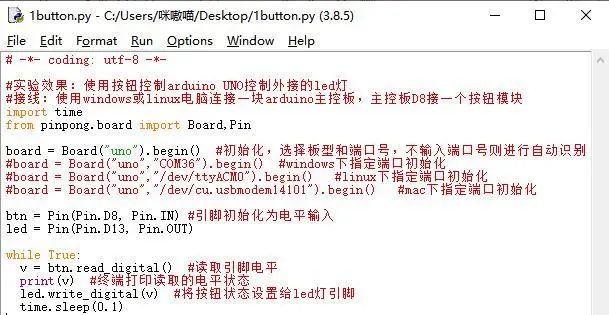
2. Press F5 to run the program and check the effect. When the button is pressed, the onboard LED light will turn on (and print 1), and it will turn off (print 0) when released.
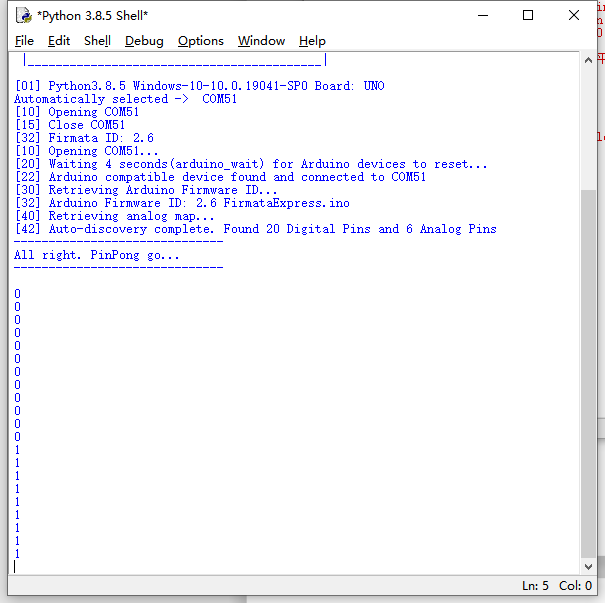
(2) Button Switch Light
In the previous step’s functionality, we can achieve “press the button – LED on”, “release the button – LED off”, but the actual switch is “first press to turn on, press again to turn off”. We will implement this functionality in this step.
Hardware Preparation:
Controller: Arduino UNO, IO Sensor Expansion Board V7.1
Modules: LED Light Module, Button Module
Connection Cable: Type A to B USB Cable
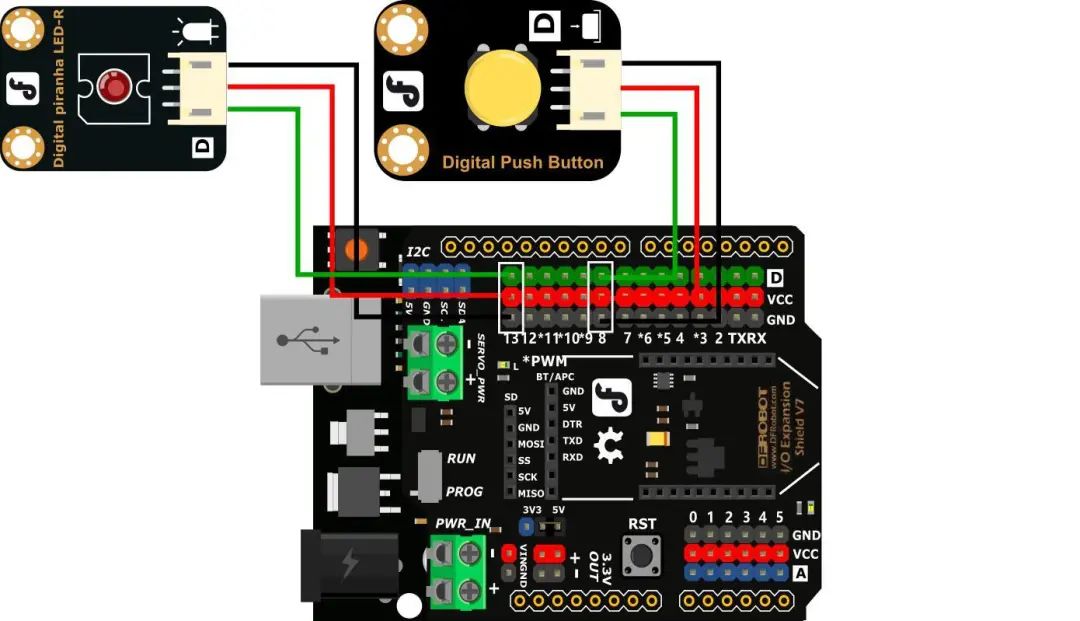
Program Writing
import time
from pinpong.board import Board,Pin
board = Board(“uno”).begin() # Initialize, select board type and port number, if the port number is not entered, it will automatically identify
#board = Board(“uno”,”COM36″).begin() # Windows specified port initialization
#board = Board(“uno”,”/dev/ttyACM0″).begin() # Linux specified port initialization
#board = Board(“uno”,”/dev/cu.usbmodem14101″).begin() # Mac specified port initialization
btn = Pin(Pin.D8, Pin.IN) # Initialize pin as digital input
led = Pin(Pin.D13, Pin.OUT)
i=0 # Set variable i=0
while True:
v = btn.read_digital() # Read pin level
#print(v) # Print the read level state in the terminal
if (v == 1):
if (i == 1):
i=0
led.write_digital(0) # Set the button state to the led pin
print(“LED off”)
else:
i=1
led.write_digital(1) # Set the button state to the led pin
print(“LED on”)
time.sleep(0.5) # Add delay to eliminate bounce
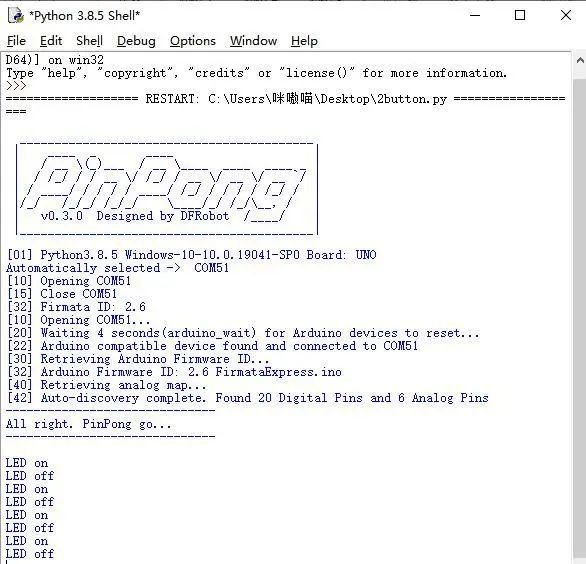
Run the code, pressing the button can toggle the LED light on and off.
3. Code Analysis
1. Import necessary packages and initialize settings.
import time
from pinpong.board import Board,Pin
board = Board(“uno”).begin() # Initialize, select board type and port number, if the port number is not entered, it will automatically identify
#board = Board(“uno”,”COM36″).begin() # Windows specified port initialization
#board = Board(“uno”,”/dev/ttyACM0″).begin() # Linux specified port initialization
#board = Board(“uno”,”/dev/cu.usbmodem14101″).begin() # Mac specified port initialization
btn = Pin(Pin.D8, Pin.IN) # Initialize pin as digital input
led = Pin(Pin.D13, Pin.OUT)# Initialize pin as digital output
2. We need a button to get two different results, so we need to set an intermediate value to implement the switching state. Therefore, we first set a variable i=0.
i=0 # Set variable i=0
3. Next, add a judgment to determine the button press state. For convenience, define variable v as the button state.
while True:
v = btn.read_digital() # Read pin level
#print(v) # Print the read level state in the terminal
if (v == 1):
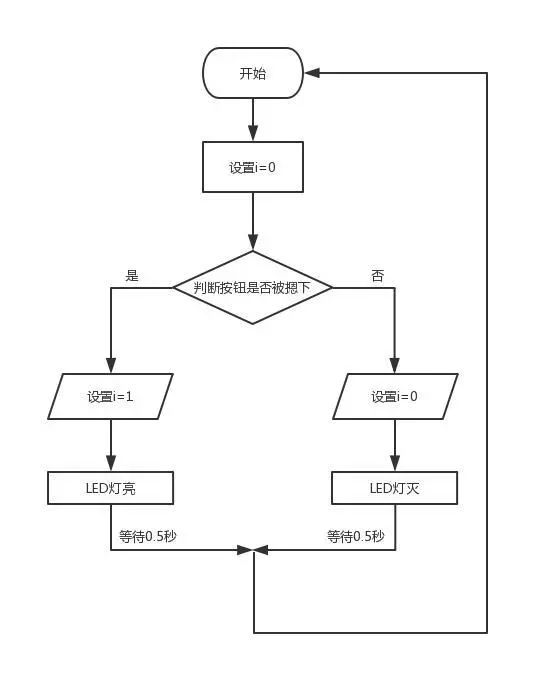
4. Then add a judgment, using i to distinguish the state. As shown in the logic diagram, each time the button is pressed, the value of i will toggle between 0 and 1, and based on the change of i’s value, we can determine the LED light’s on and off state according to the logic to complete the code.
if (i == 1):
i=0
led.write_digital(0) # Set the button state to the led pin
print(“LED off”)
else:
i=1
led.write_digital(1) # Set the button state to the led pin
print(“LED on”)
time.sleep(0.5)
What is button bounce?
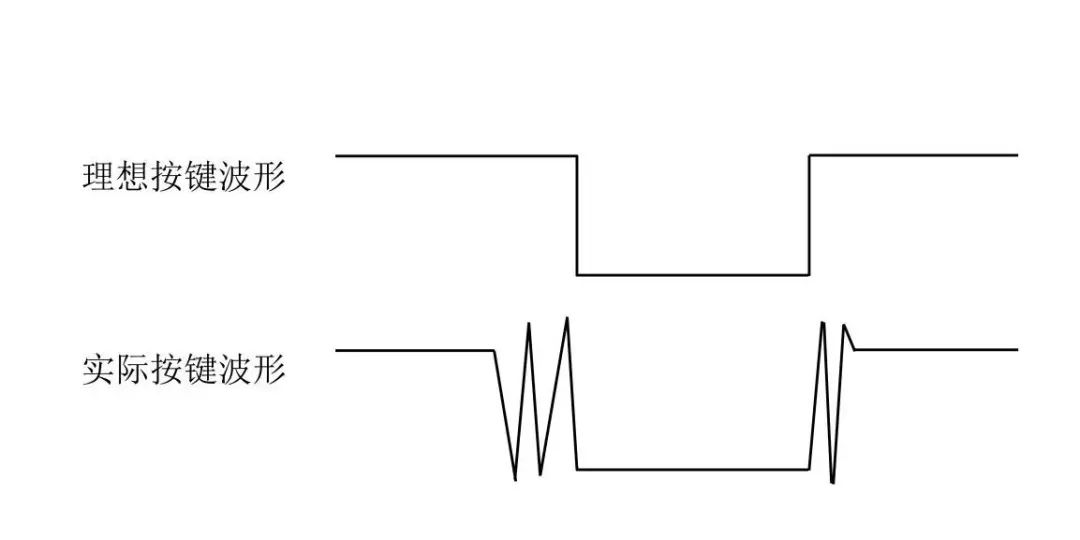
We imagine the switch circuit as “press the button – immediately conduct” “press again – immediately disconnect”, but this is not the case.
Buttons usually use mechanical elastic switches, and during the moment when the mechanical contacts open and close (usually around 10ms), due to elastic action, a series of bounces occur, causing the button switch to not immediately stabilize the circuit when closed, nor to completely disconnect instantly when opened.
So how do we eliminate button bounce?
Common methods to eliminate bounce are divided into two types: software methods and hardware methods. Here, we will focus on the simple software method.
We already know that the bounce time caused by elastic inertia is around 10ms. By delaying the command execution time with a delay command, we can achieve the effect of eliminating bounce.
Therefore, we added a 0.5-second delay in the code to achieve the button debounce function.

