Introduction
In modern development processes, testing API interfaces has become a daily necessity. The built-in HTTP client feature in JetBrains IDE allows you to initiate requests and debug responses directly in the editor without switching to external tools like Postman or Insomnia. This feature is lightweight and efficient, supporting a range of scenarios from simple GET requests to complex GraphQL queries, significantly enhancing development efficiency.
Core Overview of the HTTP Client
The HTTP client from JetBrains is an embedded tool designed for developers. It allows you to write HTTP request scripts in files with the <span>.http</span> or <span>.rest</span> extensions and execute them with a single click through the IDE’s graphical interface. Whether you are testing RESTful services, WebSocket real-time communication, or GraphQL queries, it can handle them seamlessly.
Key Advantages
- Scripting Requests: Define and run requests in plain text files, supporting comments and grouping.
- Multi-Protocol Support: Covers HTTP/HTTPS, GraphQL, and WebSocket.
- Flexible Configuration: Customize headers, query parameters, body data, and even file uploads.
- Authentication and Security: Built-in mechanisms for Bearer Token, Basic Auth, etc.
- Environment Management: Switch between multiple environments (e.g., dev/prod) using variables and environment files.
- History Tracking: Automatically saves execution records for reuse and troubleshooting.
Syntax Basics
The script syntax for the HTTP client is concise and clear, similar to cURL but more readable. The core structure is as follows:
### [Open Source Tech Stack] Optional Comment
METHOD URL?query=params
Header: Value
Another Header: Value

Empty line separates

Optional request body content
<span>METHOD</span>: Such as GET, POST, etc.<span>URL</span>: Target endpoint, can include query strings.<span>Header</span>: Key-value pairs, followed by the body after an empty line.
Practical Examples
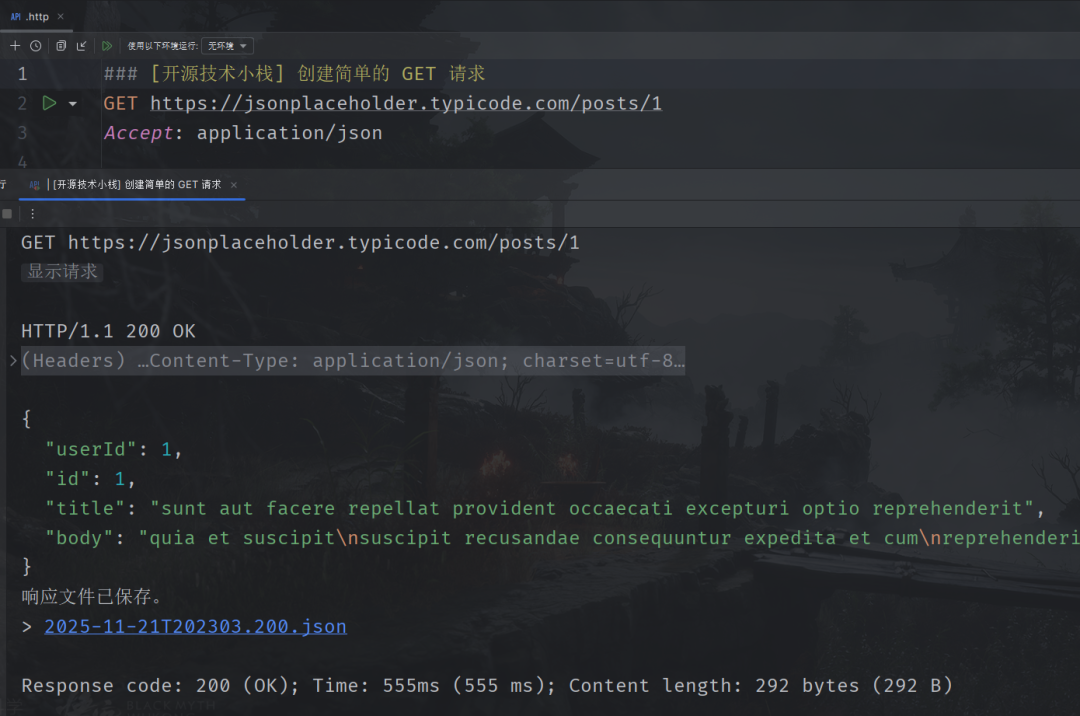
Basic GET Request: Fetching Resources
### [Open Source Tech Stack] Pulling post data from a public API
GET https://jsonplaceholder.typicode.com/posts/42
Accept: application/json
Here, the GET method retrieves the post with ID 42 from the example API. The <span>Accept</span> header specifies the expected JSON format response. After execution, the IDE will display the response body, status code, and time taken.
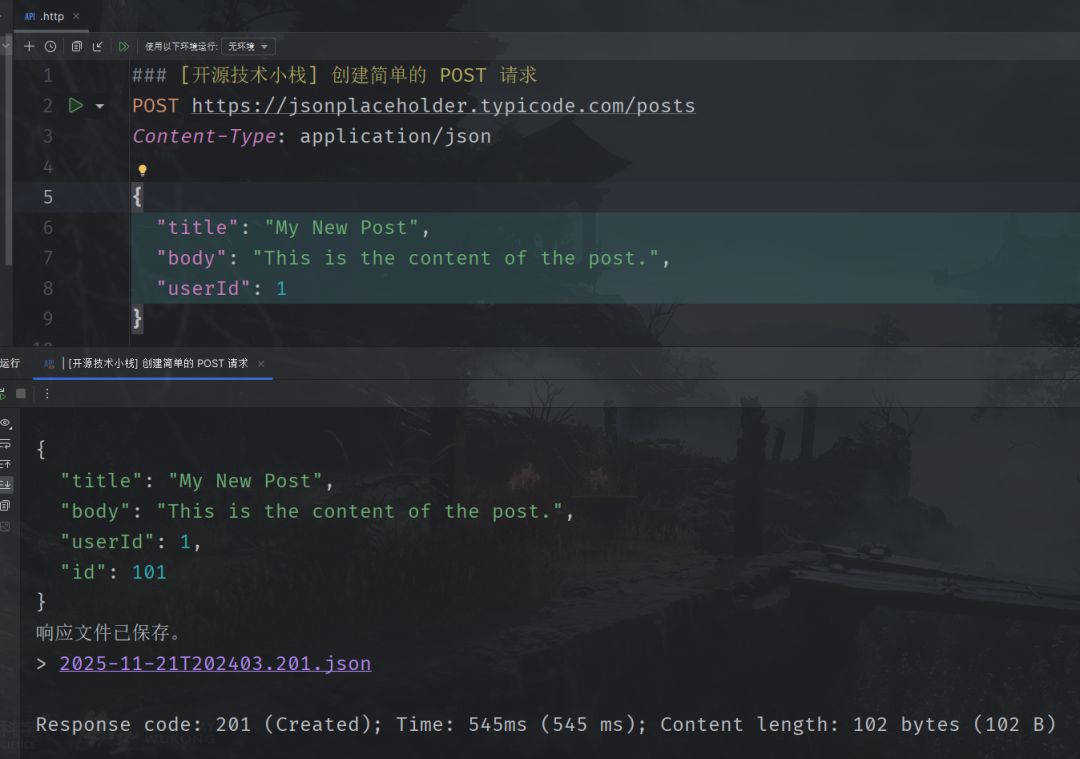
POST Request: Submitting JSON Data
### [Open Source Tech Stack] Adding a new post
POST https://jsonplaceholder.typicode.com/posts
Content-Type: application/json

{
  "title": "Testing New Article",
  "body": "Content of the article",
  "userId": 999
}
POST is used to create resources. Note that the <span>Content-Type</span> header declares the JSON format, and the body contains structured data. The IDE will highlight the JSON and validate the syntax.
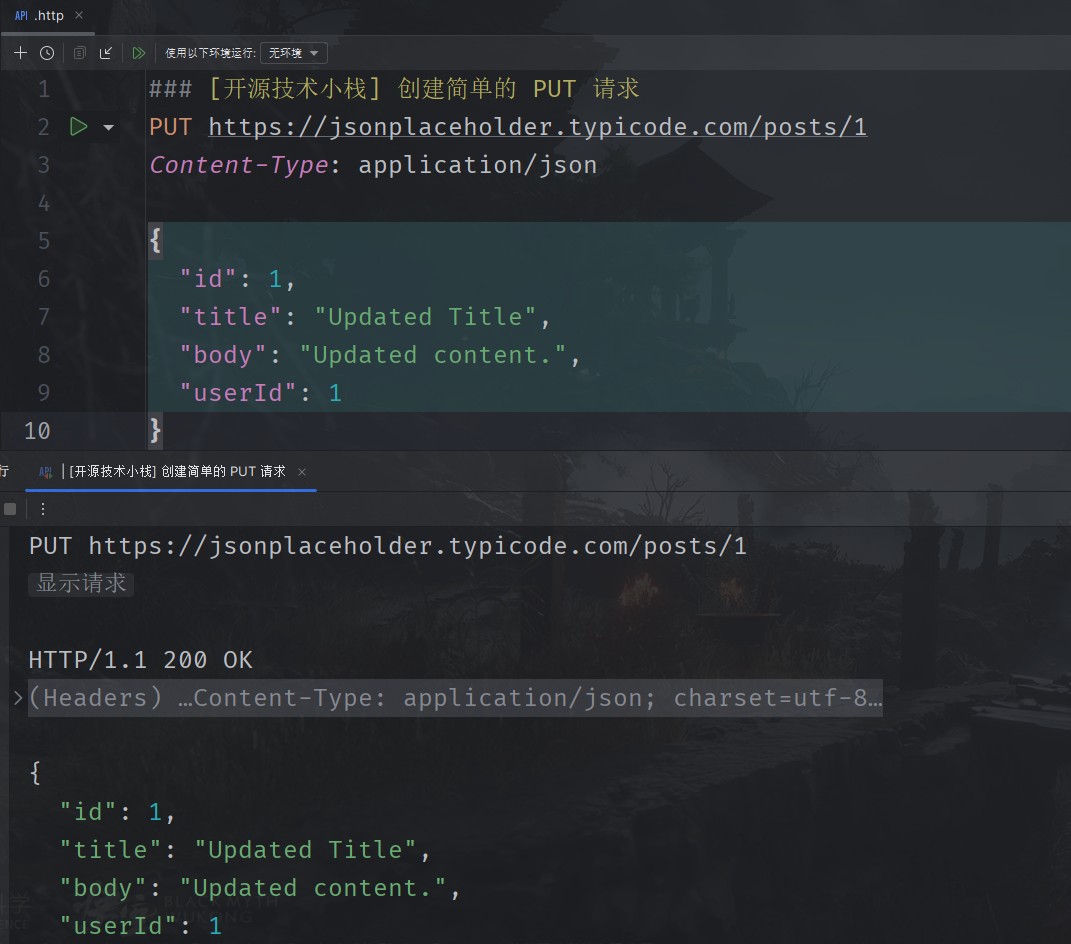
PUT Request: Modifying Existing Resources
### [Open Source Tech Stack] Updating post information
PUT https://jsonplaceholder.typicode.com/posts/42
Content-Type: application/json

{
  "id": 42,
  "title": "Updated Title",
  "body": "Updated Content",
  "userId": 999
}
PUT is suitable for partial or full updates. Ensure the ID matches the URL to avoid conflicts.
DELETE Request: Removing Resources
### Deleting a specified post
DELETE https://jsonplaceholder.typicode.com/posts/42
DELETE does not require a body; simply specify the endpoint. The response is usually empty, but the IDE will report the success status.
Variable Injection: Avoiding Hardcoding
Embed variables in scripts to enhance maintainability:
### Dynamically building URL with variables
GET {{host}}/posts/42
Accept: application/json

###

@baseUrl = https://jsonplaceholder.typicode.com
Use <span>@</span> to define variables (like <span>baseUrl</span>), and then reference them with <span>{{ }}</span>. The IDE supports auto-completion and replacement.
Environment Variable Management
Prepare configurations for different deployment environments by creating a <span>http-client.env.json</span> file (placed in the project root):
{
  "dev": {
    "host": "https://dev-api.example.com",
    "token": "dev-bearer-token-xyz"
  },
  "prod": {
    "host": "https://api.example.com",
    "token": "prod-bearer-token-abc"
  }
}
Apply in the <span>.http</span> file:
### Environment-driven request
GET {{host}}/posts
Authorization: Bearer {{token}}
Switch environments using the dropdown menu in the IDE toolbar, and the variables will update instantly.
Authentication Example: Bearer Token
GET https://secure-api.example.com/user/profile
Authorization: Bearer eyJhbGciOiJIUzI1NiIsInR5cCI6IkpXVCJ9...
Add the <span>Authorization</span> line directly in the header; the IDE can store tokens to prevent leaks.
Basic Authentication (Basic Auth)
GET https://private-api.example.com/data
Authorization: Basic dXNlcm5hbWU6cGFzc3dvcmQ=  # Base64 encoded username:password
Embed the encoded username and password in the header for simple scenarios.
Form Submission
POST https://api.example.com/auth/login
Content-Type: application/x-www-form-urlencoded

username=testuser&password=secret123
Send key-value pairs using URL-encoded format to simulate browser forms.
File Upload
POST https://upload-api.example.com/files
Content-Type: multipart/form-data; boundary=----formdata

------formdata
Content-Disposition: form-data; name="document"; filename="report.pdf"
Content-Type: application/pdf

< ./path/to/report.pdf
------formdata--
Reference local file paths using <span><</span>; the IDE will automatically handle multipart boundaries.
GraphQL Queries
### Executing GraphQL operations
POST https://graphql.example.com
Content-Type: application/json

{
  "query": "query GetUser($id: ID!) { user(id: $id) { name email posts } }",
  "variables": { "id": "42" }
}
Package the query string and variables into JSON, supporting introspection and mutation.
WebSocket Connection
CONNECT ws://ws.example.com/chat
Sec-WebSocket-Key: random-key
Use <span>CONNECT</span> to initiate a WebSocket; the IDE will open a real-time console to display the message stream.
Advanced Tips
- Request Grouping: Use
<span>###</span>to separate multiple requests for better organization. - Response Handling: View JSON beautification, XML parsing, or image previews after execution.
- Scripting Automation: Integrate into Run Configurations for CI/CD testing.
- Debugging Tips: Enable “Response Filter” to view slow queries or error logs.
This tool, while simple, can cover 90% of API development needs. It is recommended to combine it with the IDE’s code completion for a quick start. If you have specific scenario questions, feel free to provide more details!