Knowledge Points for This Session:
Understand how to achieve a two-line display effect on the LCD (the last learning session of microcontrollers this semester)
Learning Tools:
Computer, Keil uVision4 software, Proteus software

After several weeks of studying microcontrollers, I believe everyone has a good understanding of how microcontrollers operate.
Once we understand the operating structure of microcontrollers, we will find that all these problems have been modularized and batched; they become small programming issues. At this point, we only need to use the code we know to make the tools we need controllable and connectable.
As this semester’s final microcontroller lesson, I hope students can understand and appreciate how the internal effects of a microcontroller are ultimately presented, and then carry this way of thinking into future self-study courses on microcontrollers.
To achieve the effect of displaying two different statements on the LCD, we first need to consider whether to create an array or establish two different programs?
Thus, this program should involve at least two different coding methods; we need to exclude one of the options and proceed with coding.
The advantage of using an array is that the displayed content can be divided into 0 and 1 in the array, and then we can assign the same output to 0 and 1, with input and output in the same place, but with different content, while the internal structure remains the same.
Two different programs would have different inputs and outputs, requiring at least two inputs to display different content for a and b, while the internal structure is also the same, and then displayed in two outputs.
It all depends on our components; the structure of the components can help us find the right method.
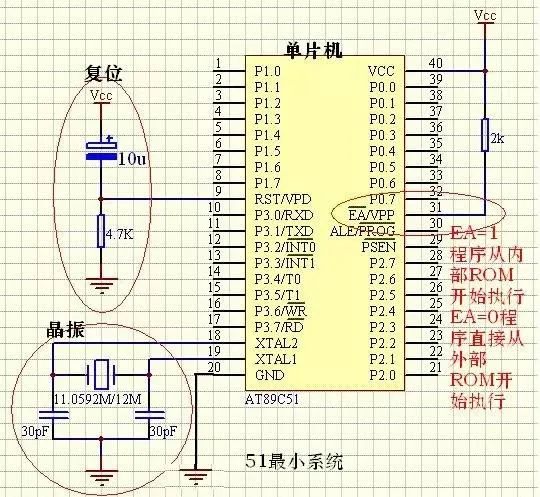
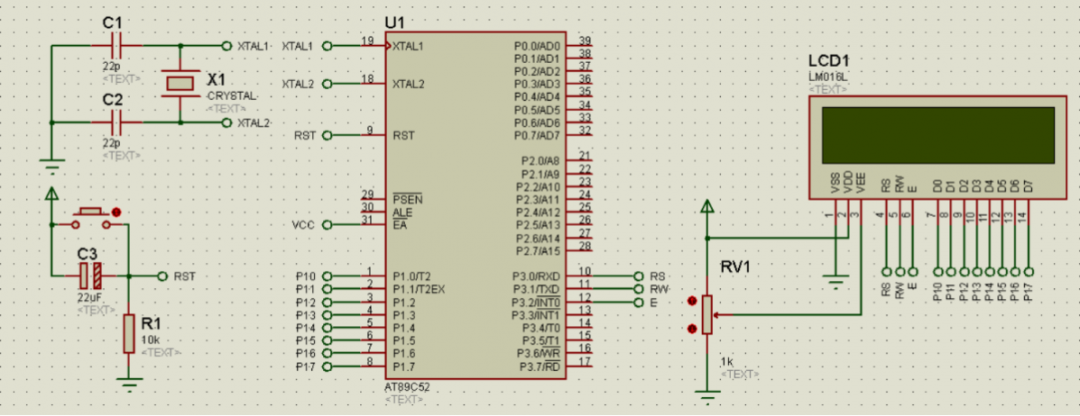
Therefore, as shown in the figure, our components look like this:
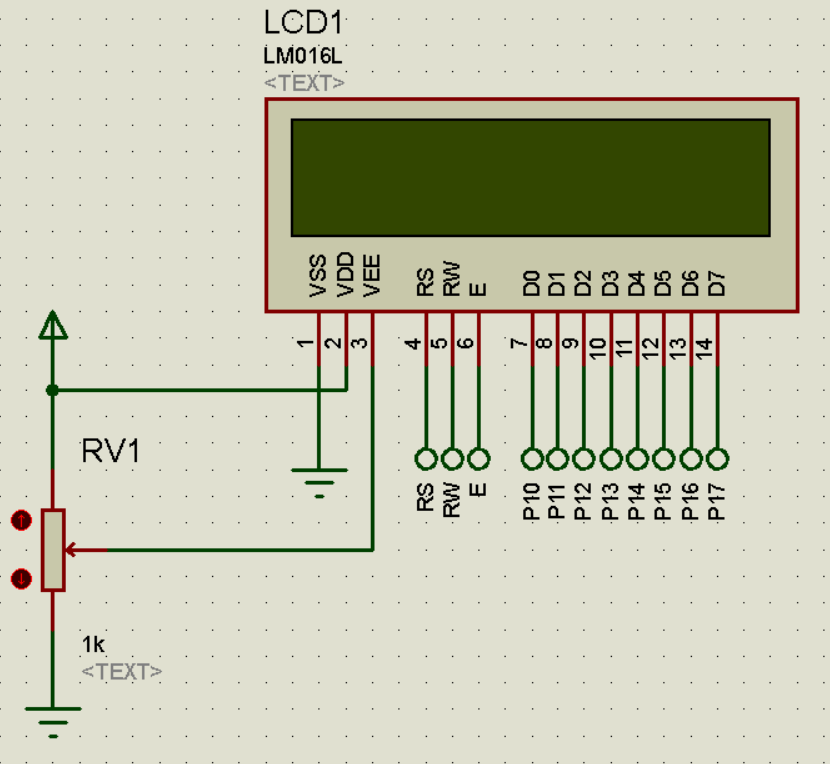
So we ultimately chose the array method, which has only one input and output.
PS: The input and output can be understood by looking at its circuit diagram, observing how its input and output operate, in order to infer and understand the steps of the internal code input, thus determining the coding method and steps.
For different components, the methods vary; it requires everyone to accumulate knowledge gradually and gain insights over time.
The operation steps of the microcontroller can be explained as input-output steps; first, input the code and then run it to check.
Following the steps from the last lesson, create your own code file, and then click on the microcontroller component in the image below (remember to double-click).
Then open the selected folder to import the code file into the microcontroller.
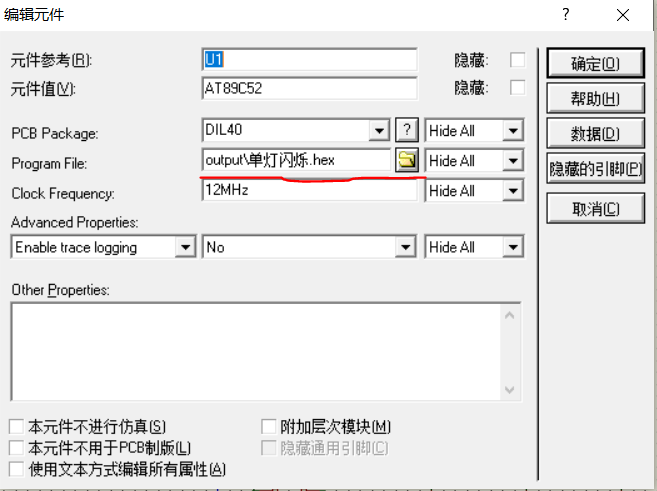
After importing, click the run button below the microcontroller to view the implementation effect.
We can use Keil software for C language programming, compiling, and debugging, and then generate .hex and .bin files that the microcontroller can recognize.
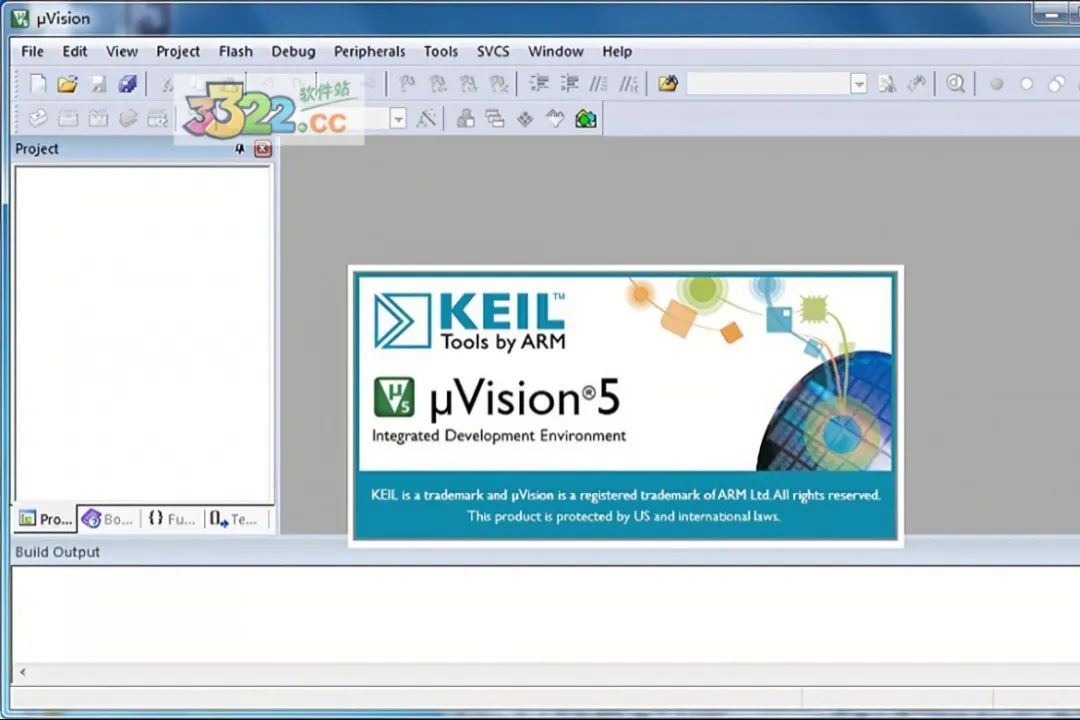
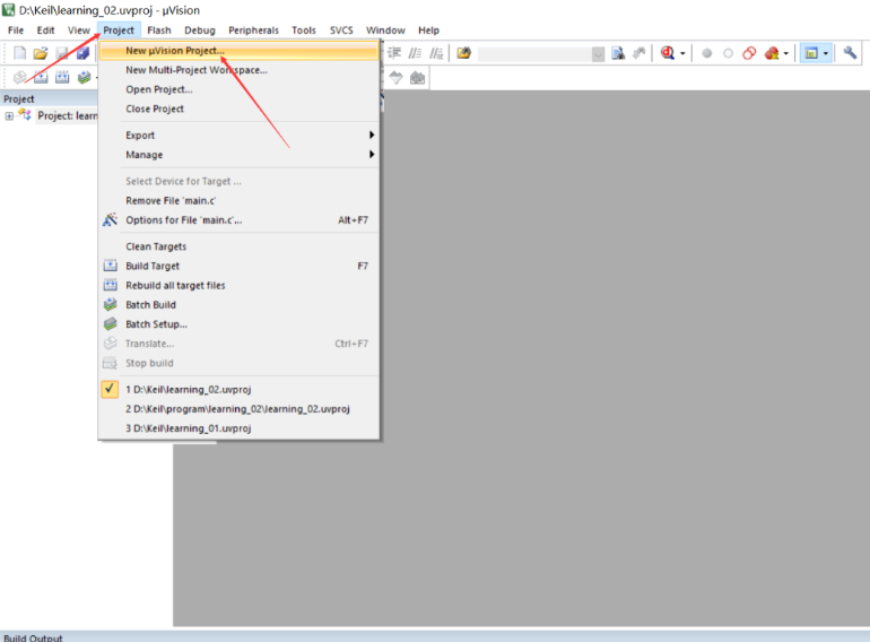
As before, let’s first open it, then create a new file and save it.
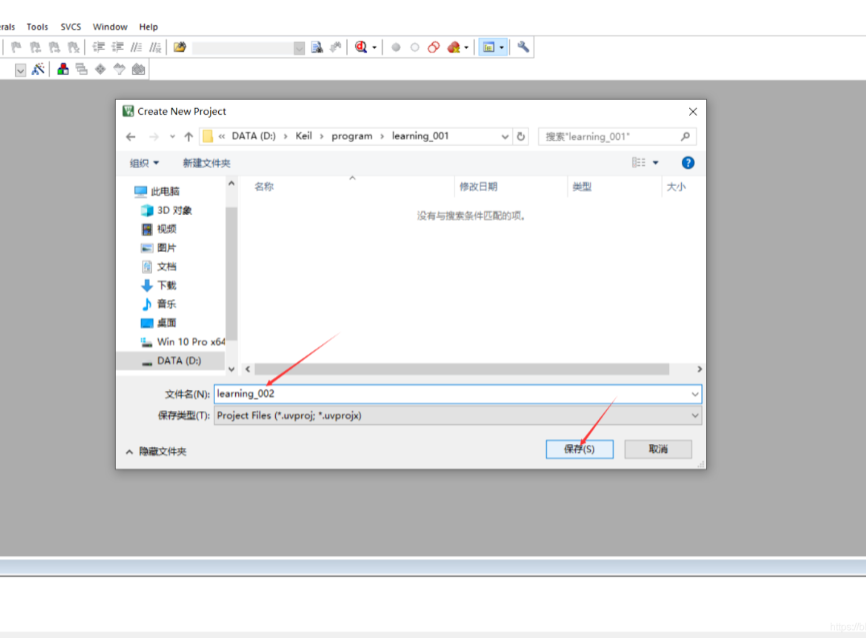
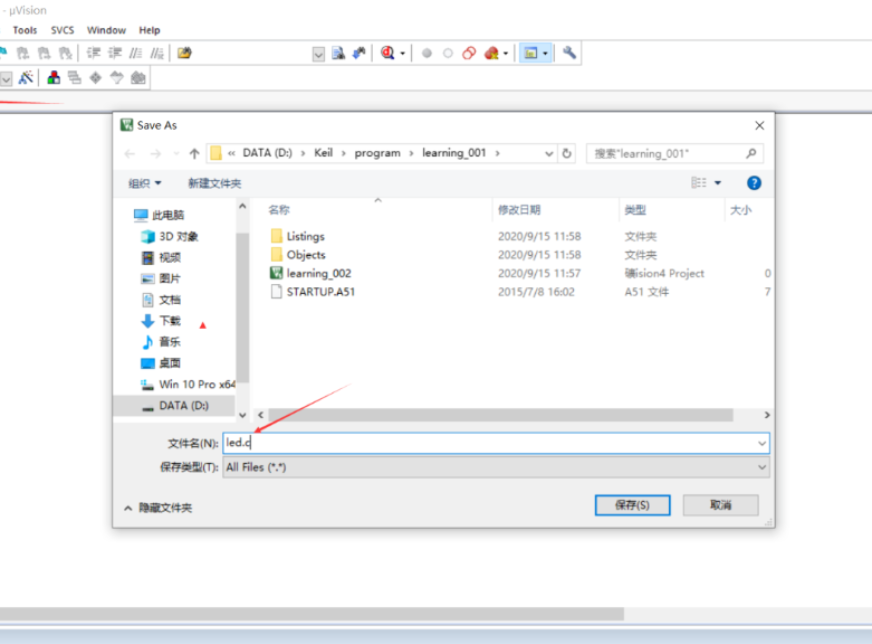
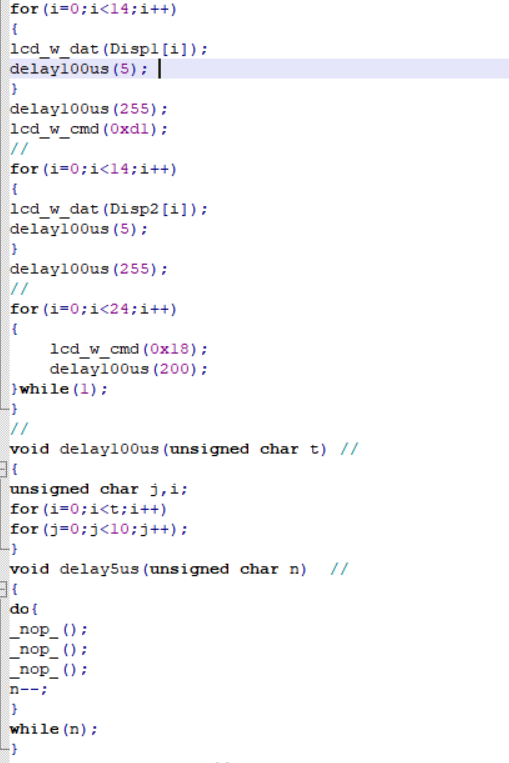
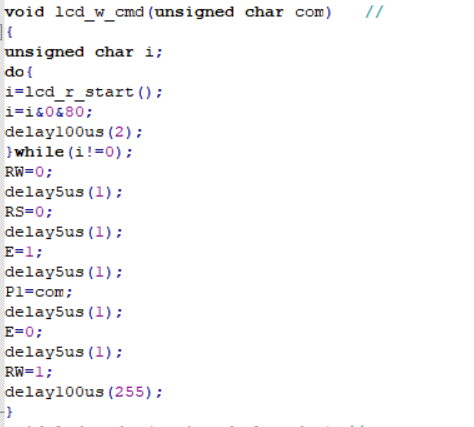
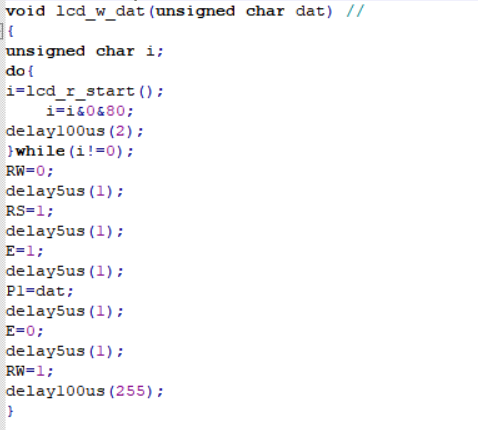
After completing these steps, we create a new file, name it led.c, save it, then open this file for coding.
The code is as follows:


Then click the “Option for target” checkbox in the toolbar and check “Create Hex file” to ensure that the source program you wrote can be converted into a .hex file for subsequent operations.
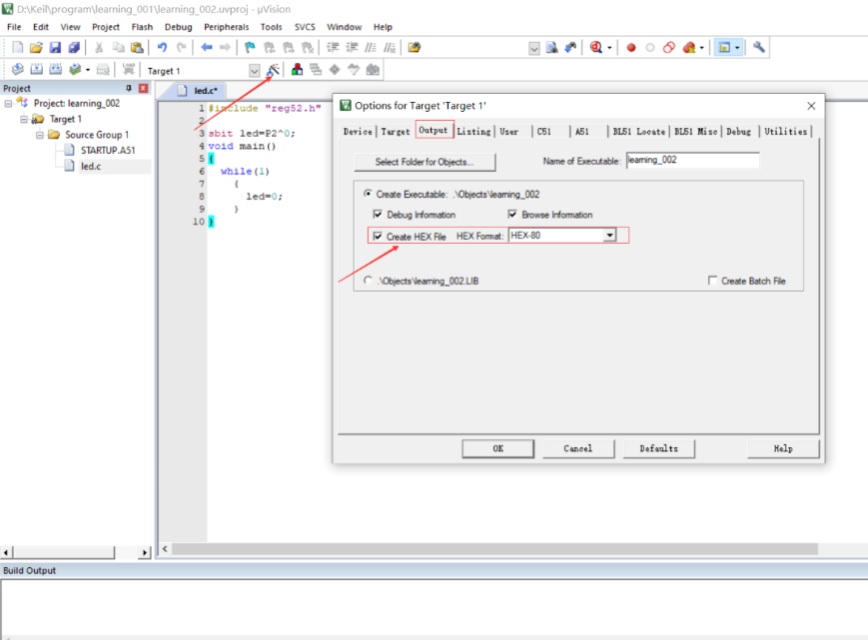
Click the toolbar buttons in sequence to generate the target file.
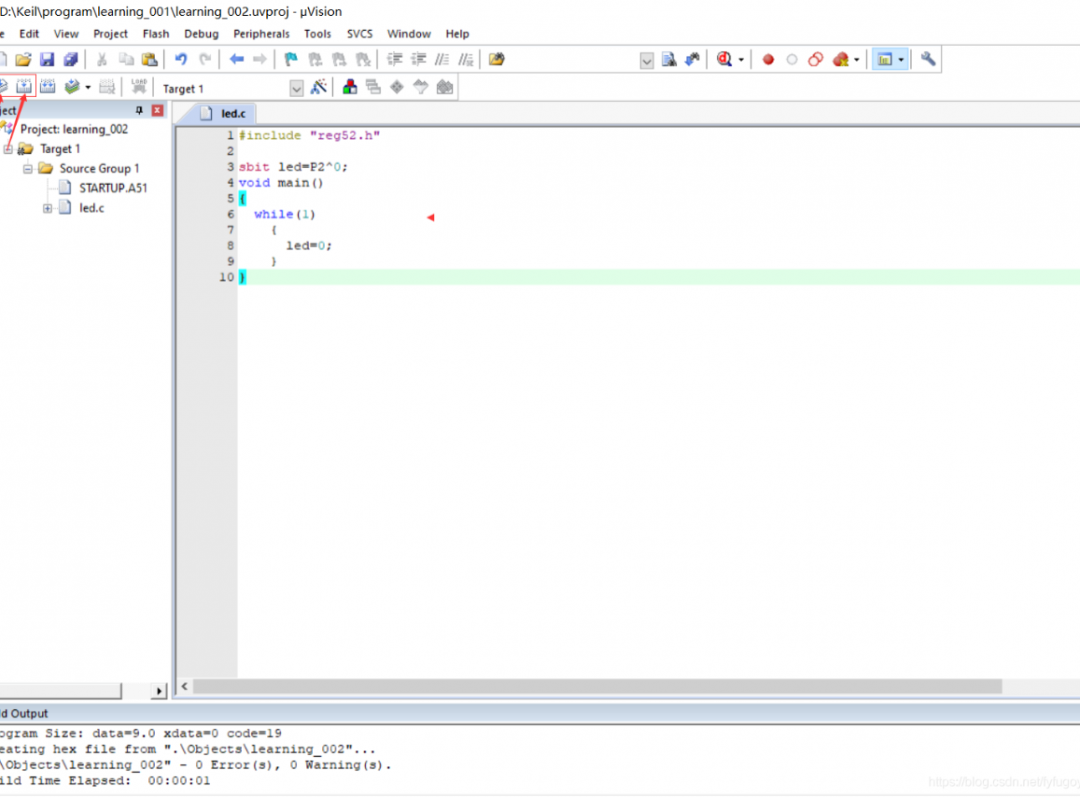
Upon successful execution of the program, a learning_002.hex file will be generated in the relative path Object folder (please refer to the steps; the steps remain unchanged, but the code must be modified).
Next, we use Proteus to build a virtual simulation circuit.
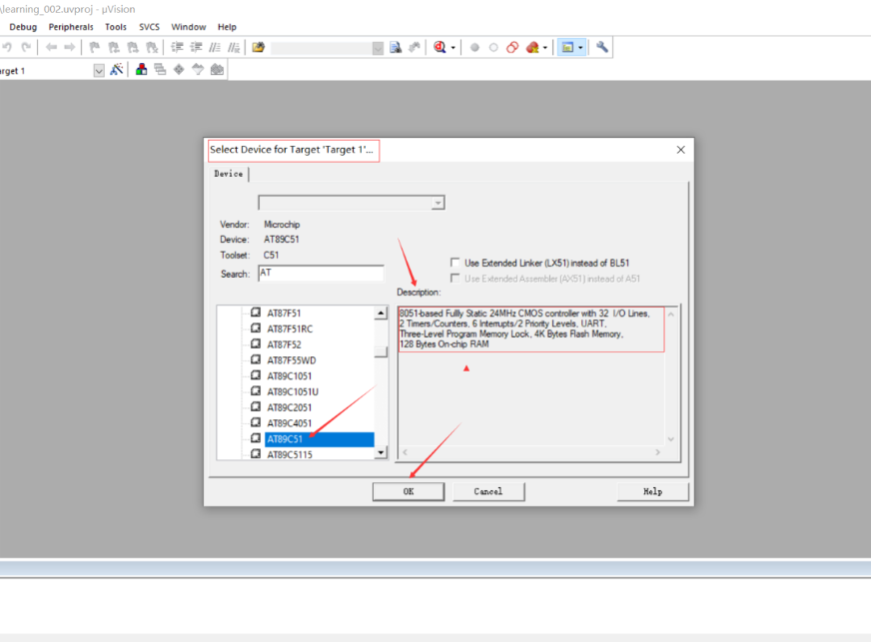
After building the circuit, click on the AT89C51 main controller and import the learning_002.hex file generated from the C language program in Keil.

Click the run button at the bottom right of the software to see the running effect in the software. (Please refer to the steps; the steps remain unchanged, but the components must be changed).
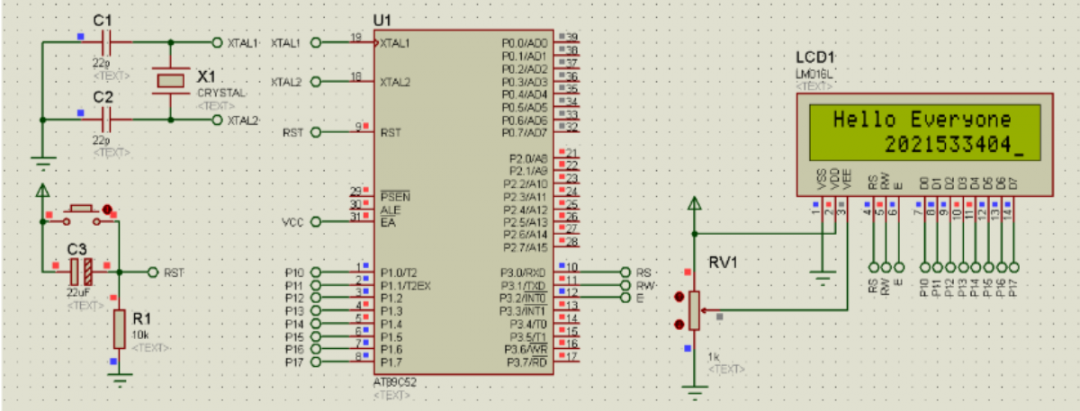
By following the above method, you can create a simple LED flowing light. The most important thing in learning is to have practical hands and a heart that loves learning. Once you learn this, you will have a deeper understanding of the basics of microcontrollers and will love microcontrollers even more.
Source of Information | Partially sourced from the internet
Information Edited by | Chen Qingqing, He Yiting
Information Reviewed by | Ye Mengni