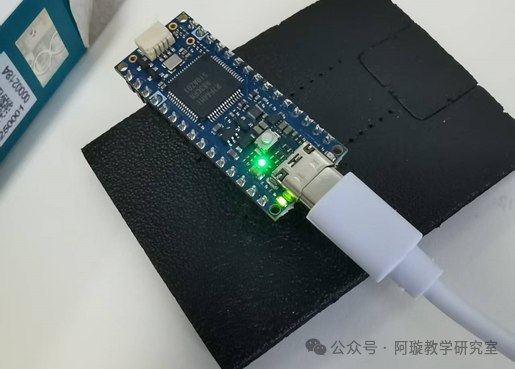
The Arduino Nano R4 was just released a few days ago (July 24), similar to the somewhat useless UNO R4, and it uses a 32-bit Renesas processor. Compared to the older R3 with the ATmega328P, its performance is significantly stronger. However, Arduino gives the impression that they are not very sincere; every upgrade feels like squeezing toothpaste, and one shouldn’t expect any leap in changes. Some features that I want to try this time include: built-in operational amplifier functionality (on pins A1, A2, A3), the ADC has been upgraded to 14 bits (resolving to 16384), and it can run FreeRTOS. I haven’t tried it yet. The price on TB for purchasing it is around 110 yuan.
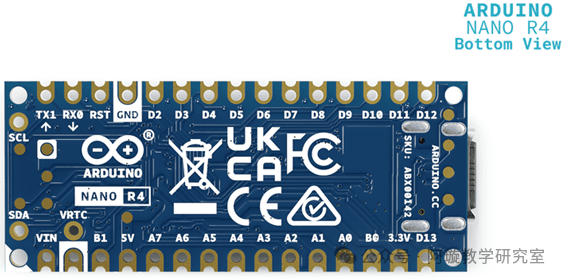
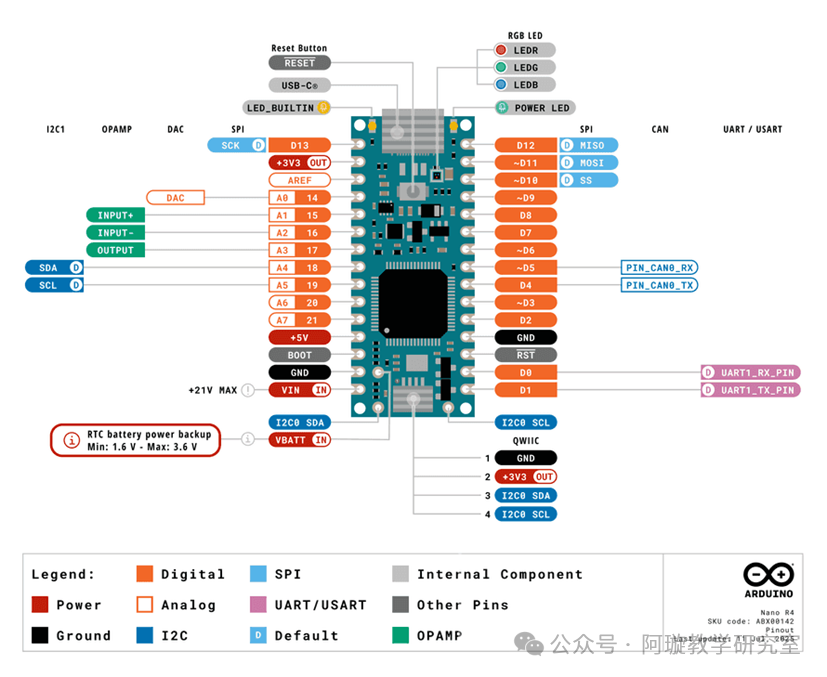
It comes with a built-in RGB LED, and the official also has a demo:
/**RGB LED Example for the Arduino Nano R4 Board
Name: nano_r4_rgb_led.ino
Purpose: This sketch demonstrates how to control the built-in
RGB LED of the Arduino Nano R4 board.
@author Arduino Product Experience Team
@version 1.0 01/06/25*/
void setup() {
    // Initialize serial communication and wait up to 2.5 seconds for a connection
    Serial.begin(115200);
    for (auto startNow = millis() + 2500; !Serial && millis() < startNow; delay(500));

    // Initialize LEDR, LEDG and LEDB as outputs
    pinMode(LEDR, OUTPUT);
    pinMode(LEDG, OUTPUT);
    pinMode(LEDB, OUTPUT);

    // Turn off all LEDs initially
    digitalWrite(LEDR, HIGH);
    digitalWrite(LEDG, HIGH);
    digitalWrite(LEDB, HIGH);
    Serial.println("- Arduino Nano R4 - RGB LED Example started...");
}

void loop() {
    // Turn on the built-in red LED and turn off the rest
    digitalWrite(LEDR, LOW);
    digitalWrite(LEDG, HIGH);
    digitalWrite(LEDB, HIGH);
    Serial.println("- Red LED on!");
    delay(500);

    // Turn on the built-in green LED and turn off the rest
    digitalWrite(LEDR, HIGH);
    digitalWrite(LEDG, LOW);
    digitalWrite(LEDB, HIGH);
    Serial.println("- Green LED on!");
    delay(500);

    // Turn on the built-in blue LED and turn off the rest
    digitalWrite(LEDR, HIGH);
    digitalWrite(LEDG, HIGH);
    digitalWrite(LEDB, LOW);
    Serial.println("- Blue LED on!");
    delay(500);

    // Turn off all LEDs
    digitalWrite(LEDR, HIGH);
    digitalWrite(LEDG, HIGH);
    digitalWrite(LEDB, HIGH);
    Serial.println("- All LEDs off!");
    delay(500);
}
The Nano R4 is quite interesting when programming; it is fundamentally different from the old R3 or ESP32 in the IDE, which offers various options. It is very clear; just select a port number, and the programming is done without allowing users to make unclear or random changes to the settings.