 The most common problem with Bluetooth earphones is that they won’t charge. The author has a pair of Bluetooth earphones that won’t charge. This article shares the complete process of reviving the Bluetooth earphones for just 4 yuan. Feel free to share your disassembly or DIY modification experiences.
Content
1. Introduction
The process is detailed as much as possible so that everyone can follow along and try to revive their abandoned Bluetooth earphones, saving some money. Enjoying an ice pop or a cola in the hot summer is also quite nice, and getting hands-on experience can be rewarding.
2. Confirming the Problem
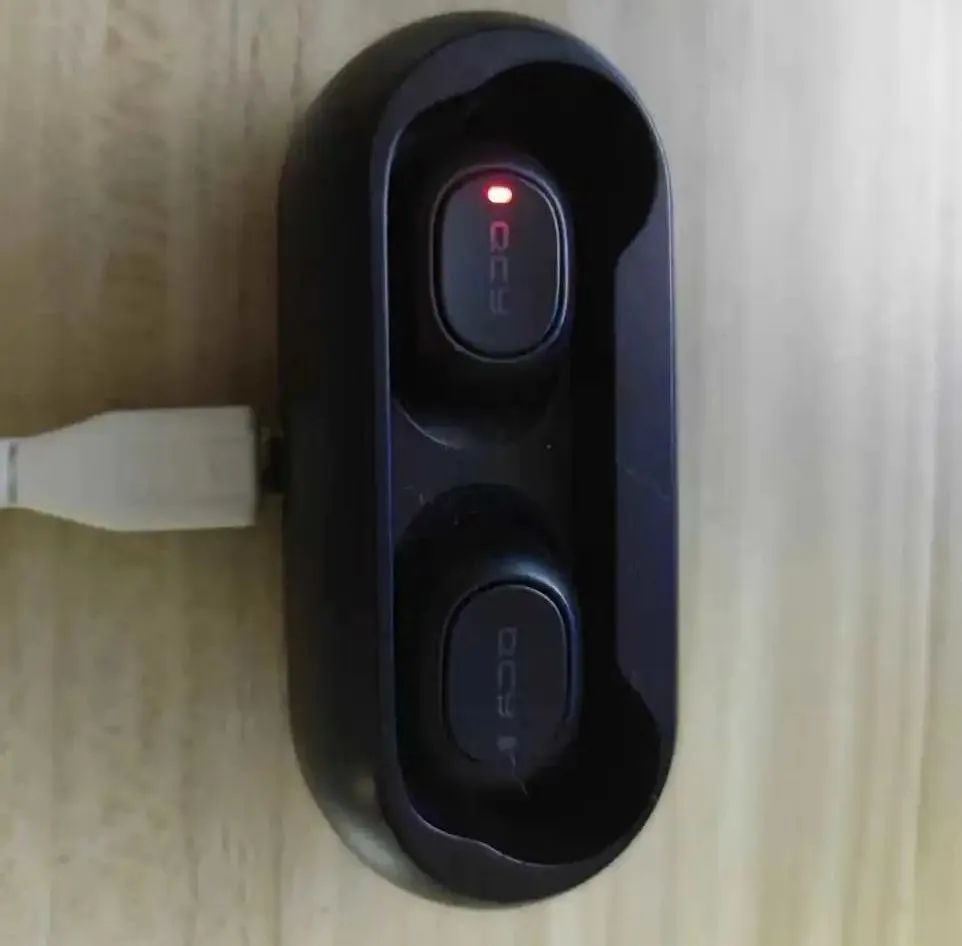
The phenomenon is that one earphone placed in the charging case has a charging indicator that does not light up, it won’t charge, and the battery is completely non-functional, as shown below:
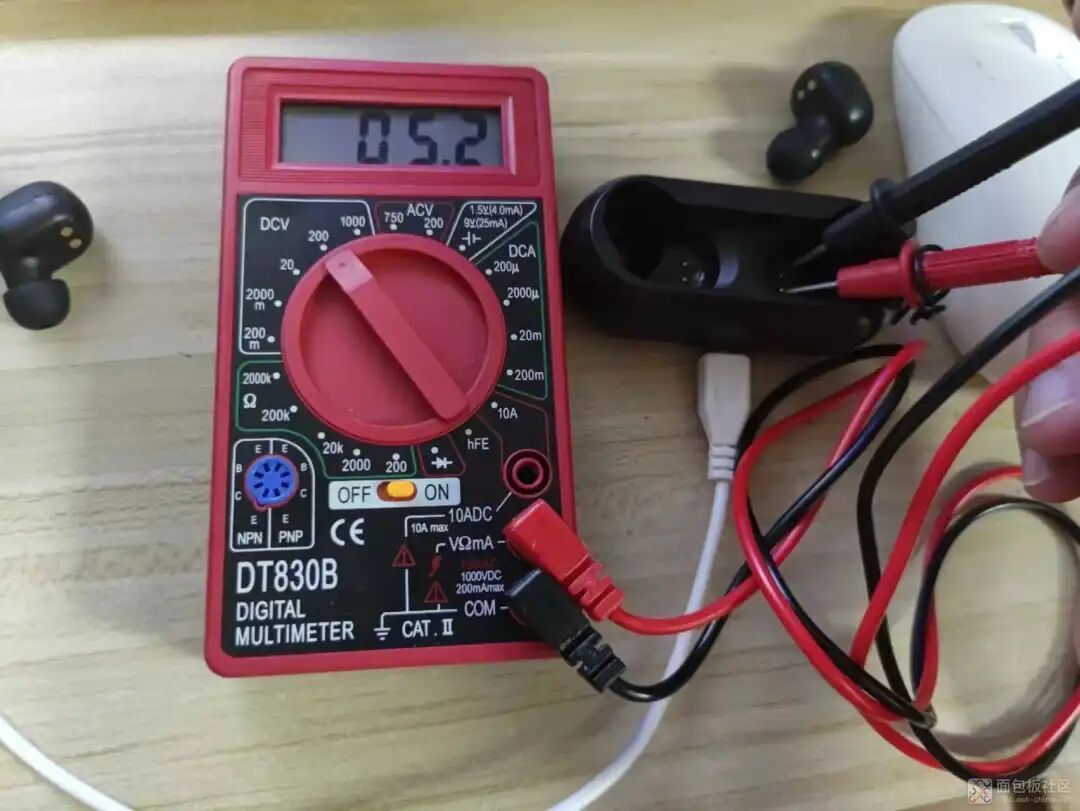
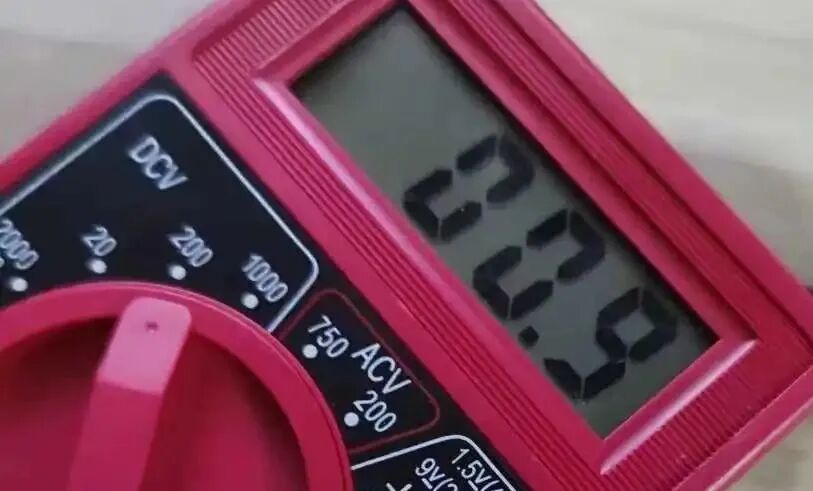
Testing the battery compartment voltage with a multimeter shows that it is OK, ruling out issues with the battery compartment.
 So the problem must be with the earphone itself. The first suspicion is that the battery has over-discharged and won’t charge, so it needs to be opened up to take a look.
3. Disassembly
The earphone’s exterior shows signs of seams, but there are almost no gaps, and no screws are visible. Given the small size, it is assumed there are no screws, and it should be a snap-fit structure.
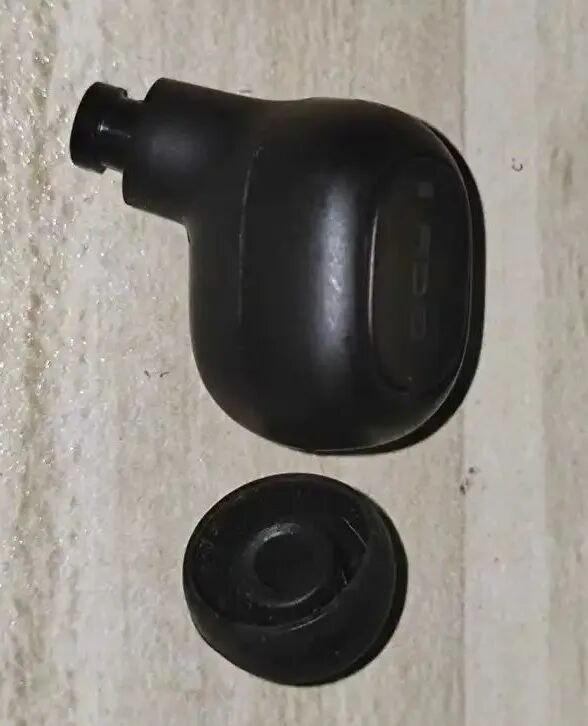
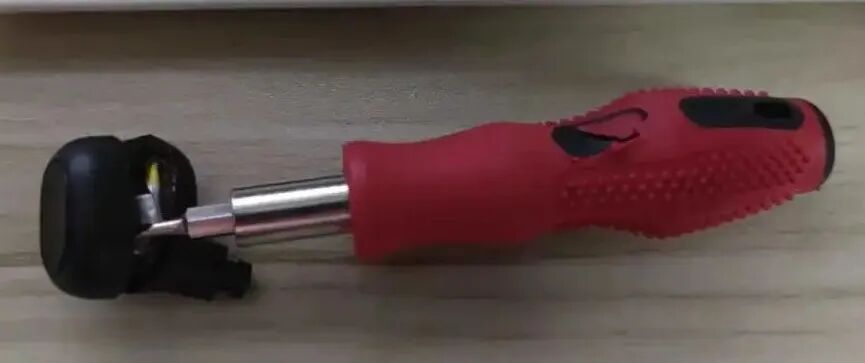
Using tweezers, insert along the seam and see if it can be pried open. It is concluded that tweezers should not be used here as they can leave significant pry marks affecting the appearance. A small flathead screwdriver is more suitable. Insert the flathead screwdriver and slide it around the seam to loosen it. Be careful not to insert it directly to avoid damaging internal components and wiring. Once loosened, use a fingernail to pry open the earphone. If you have a plastic pry tool for phone repairs, that would be even better. Pry it open as shown.
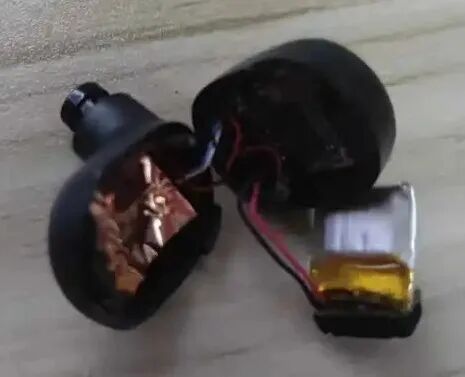
4. Earphone Structure
Carefully observe the surroundings, then pry open both sides, avoiding pulling the wires. Upon opening, the following is seen: in the middle is the battery, one side is the mainboard and MIC, and the other side is the earphone speaker and contact PCB.
Here’s a close-up, showing that the main control chip is the RTL8763BFR. The button is located behind the main control PCB, so it won’t be opened for inspection.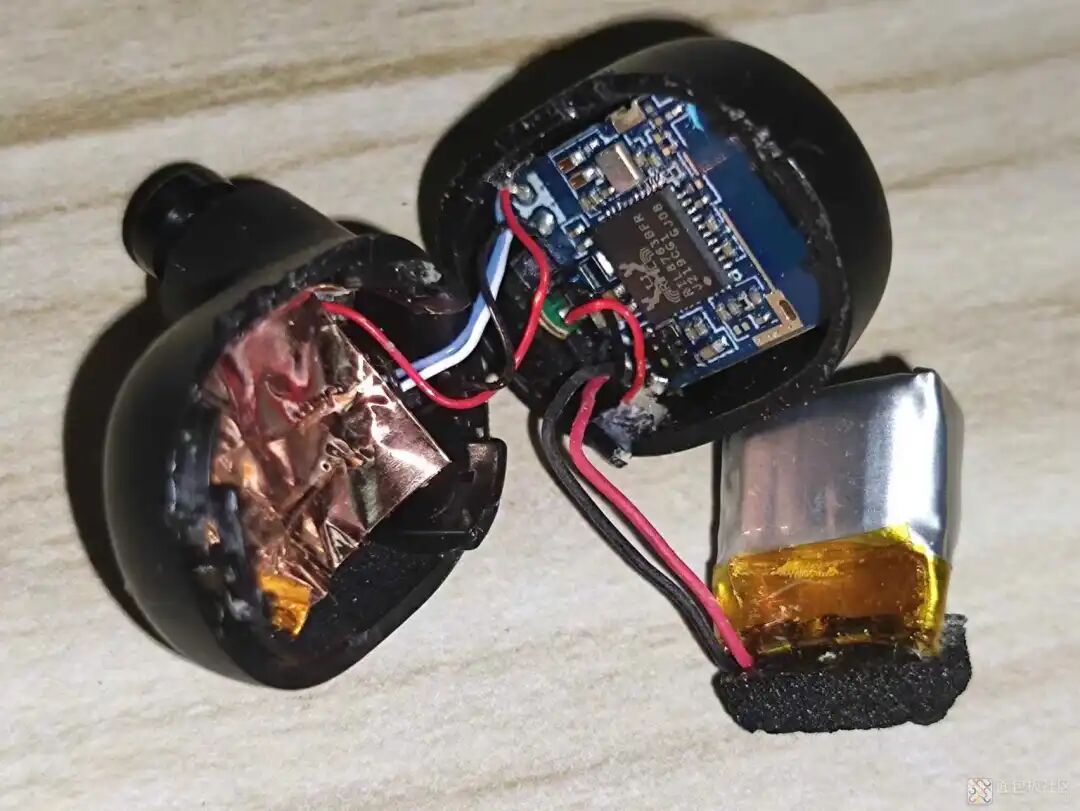 After searching for the chip’s manual, it is found to support Bluetooth 5. This chip is likely used in earphones priced around 100 yuan, a fairly common solution.

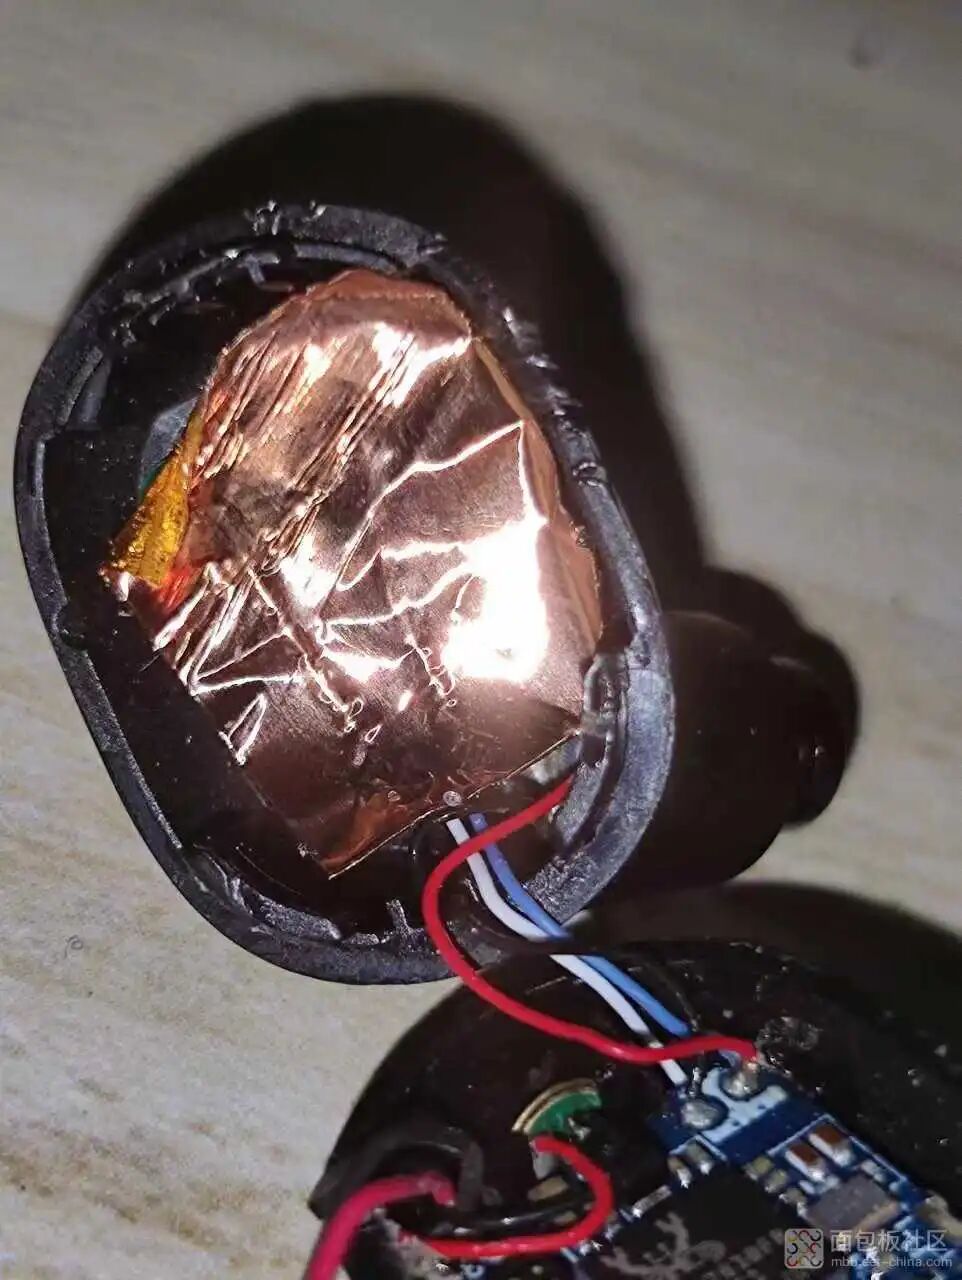 Peeling back the copper foil, which serves to shield and separate the battery.
Here we can see the battery compartment contact PCB and the earphone speaker.
5. Confirming the Battery Issue
Now let’s check the battery. Carefully peel back the yellow tape with tweezers and measure the battery voltage with a multimeter, which indeed shows 0, indicating that the battery is likely dead.
 6. Replacing the Battery
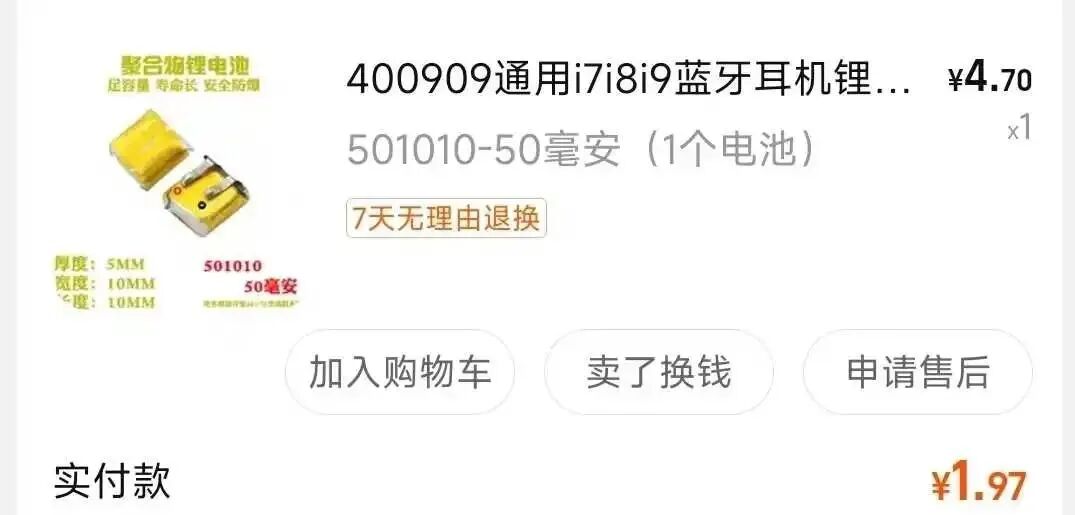
Next, measure the battery size and check the model on the back: 3.7V 43mAh SP541112.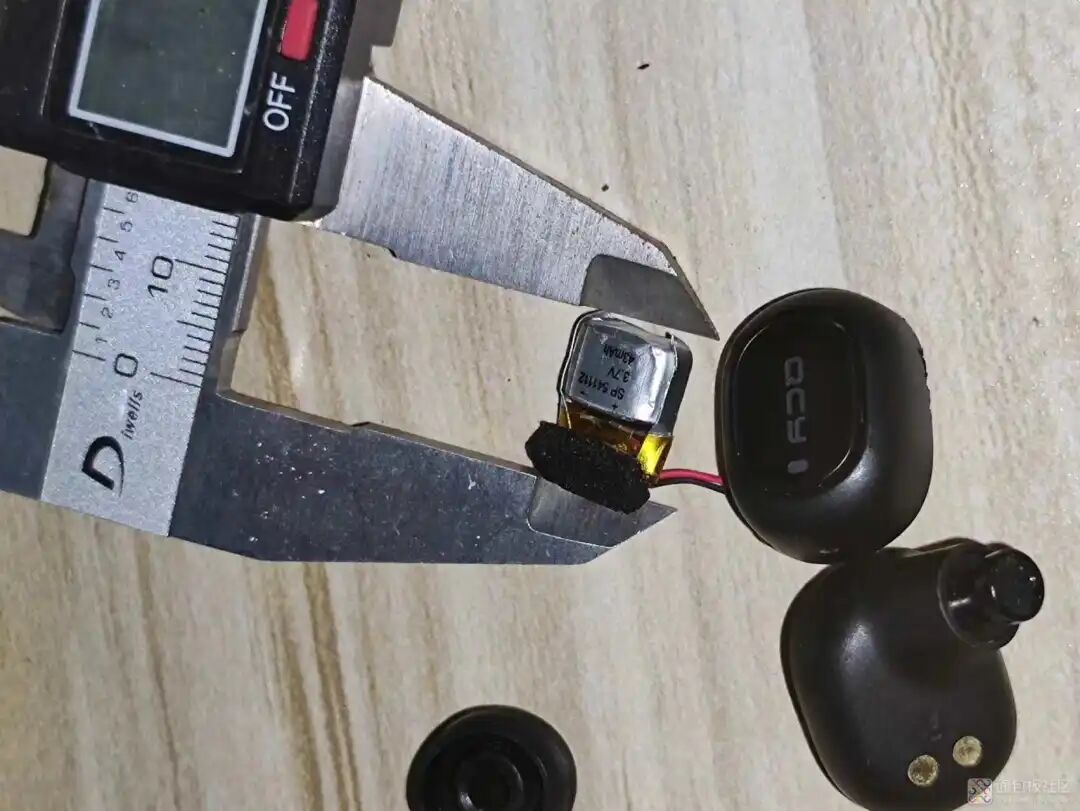 On an online store, I selected a similar-sized 501010 50mAh battery, originally priced over 4 yuan, but with a coupon, it cost less than 2 yuan, and shipping was free.
 After the battery arrived, I soldered it in place and confirmed the voltage with a multimeter, which was OK.
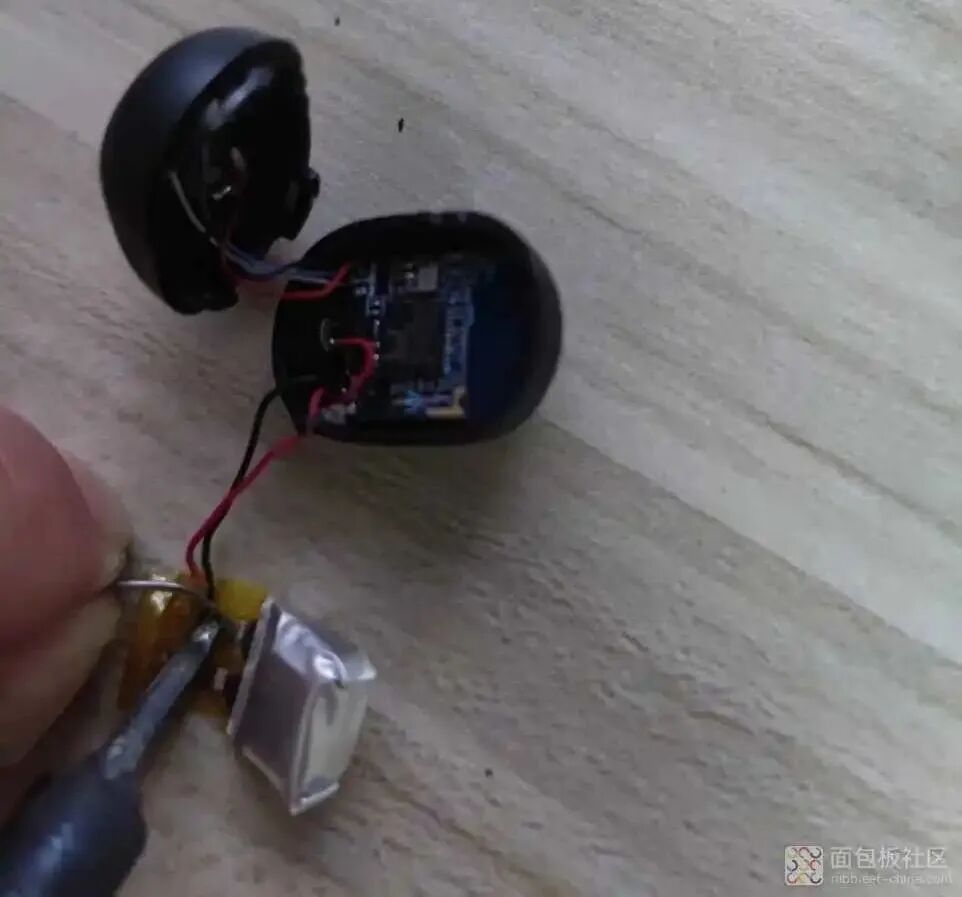 7. Restoration Confirmation
Reassemble the earphone. Here, you can see the marks left by the tweezers; I lacked experience the first time. It’s better to use a small flathead screwdriver next time.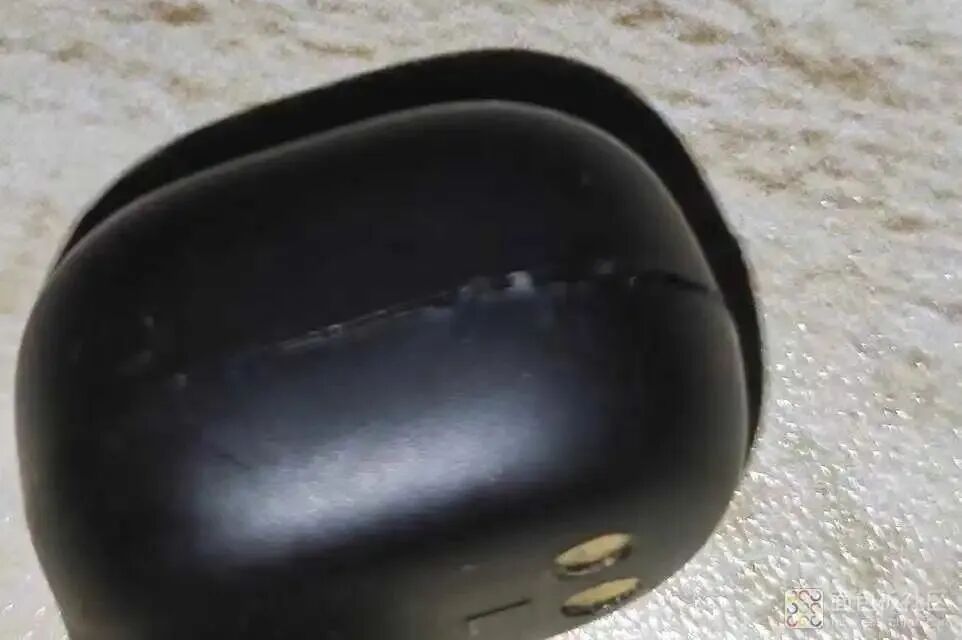 After placing it back in the battery compartment, it can be seen that it can now charge.
 After testing, all functions of the earphone are OK, mission accomplished, saving 100 yuan.8. Conclusion
1. The earphone structure is quite compact, so it is generally a snap-fit structure. It is better to use a flathead screwdriver or professional tools to pry it open, avoiding the use of sharp or thick tools that could affect the appearance. 2. The main components of the earphone include the main control, MIC, earphone speaker, contact structure, battery, and buttons. The battery is the most likely to fail due to over-discharge, etc. Looking at the battery itself, it generally does not come with over-discharge or over-charge protection boards, likely due to size and cost considerations. Therefore, check whether the main control and PCB hardware have over-discharge or over-charge protection. Earphones priced around 100 yuan likely do not have or have poorly implemented protection, so try to avoid long periods of disuse or over-discharge, and charge them in time. 3. Don’t give up on broken earphones; first, take a look at this article and try your hand at it. It might just be a battery issue that can be fixed quickly.
END

Circuit Diagram Collection
Common Analog Circuits | Operational Amplifier Circuits | Protection Circuits | EMC Standard Circuits | Power Supply Circuit Collection | Practical Control Circuits | Microcontroller Application Circuits | Waveform Generation Circuits | Automotive Circuit Diagram Collection | 555 Circuits | Small Appliance Circuits | 9 Basic Module Circuits | Schematic Abbreviations | Circuit Symbols
Basic Entry
Circuit Basics | Digital Circuits | Oscilloscope Basics | Multimeter Usage | Signal Integrity | Ground Knowledge | Embedded Basics | STM32 Knowledge Summary | C Language Key Points
Components
Resistors | Capacitors | Inductors | Diodes | Transistors | TVS | Thyristors | MOSFETs | IGBTs | Sensors | Relays | Equivalent Circuit of Components | Complete Guide to Component Selection | Component Failures
Join the Community
Welcome to join the 【Hardware Engineers Group】 to discuss technical topics together.