As many may know, Proteus is an EDA software that supports the simulation of microcontrollers. It has previously been used to simulate 51, AVR, PIC, MSP430, etc. Over time, it has gradually added support for Arduino, Raspberry Pi, and STM32. In the latest version (v8.17 sp4), Proteus has started to support MicroPython simulation. Below, I will demonstrate how to use Proteus to simulate MicroPython programs, the effects of the simulation, and the issues encountered during the simulation.
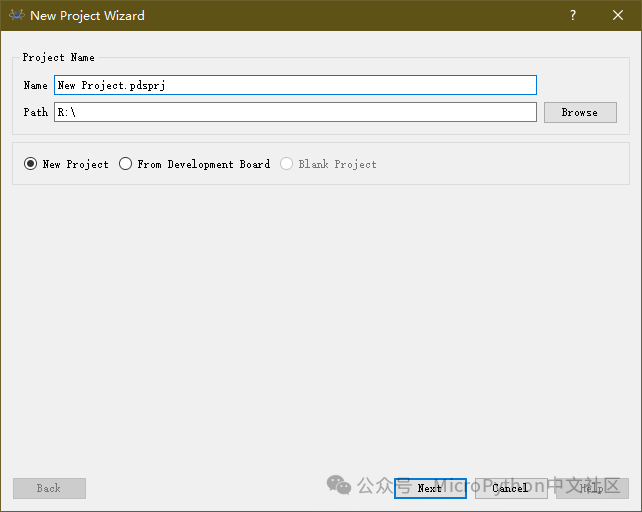
First, you need to install the latest version of the Proteus software, then create a new project and choose the project’s name and location:
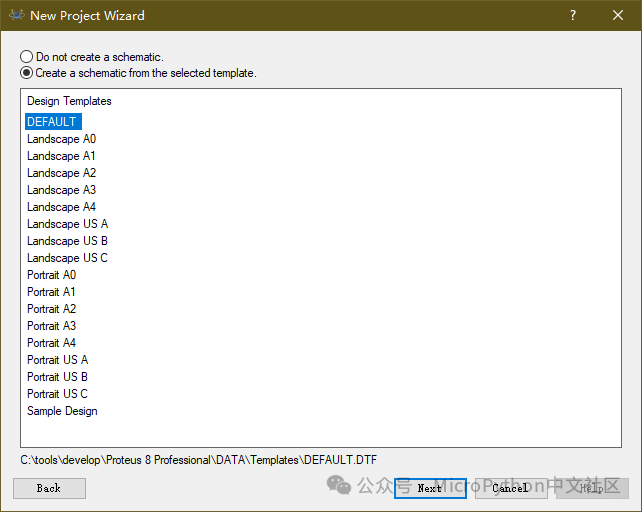
In the project wizard, select to create a schematic.
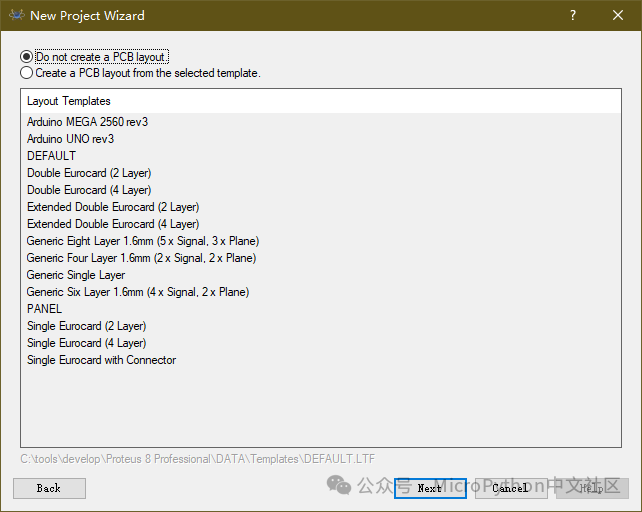
If the goal is just simulation, you do not need to create a PCB file.
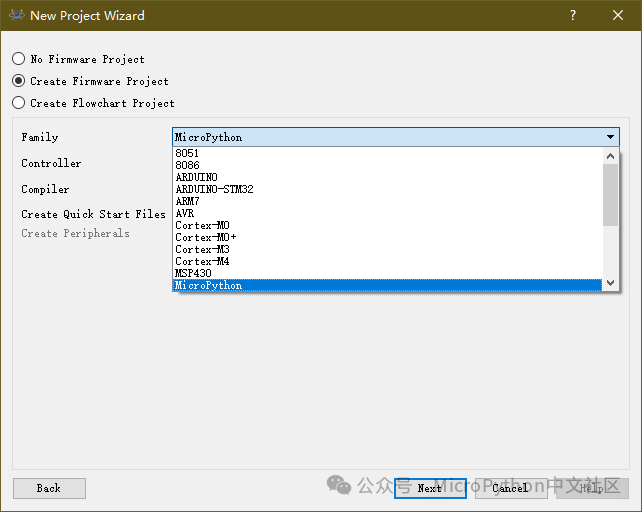
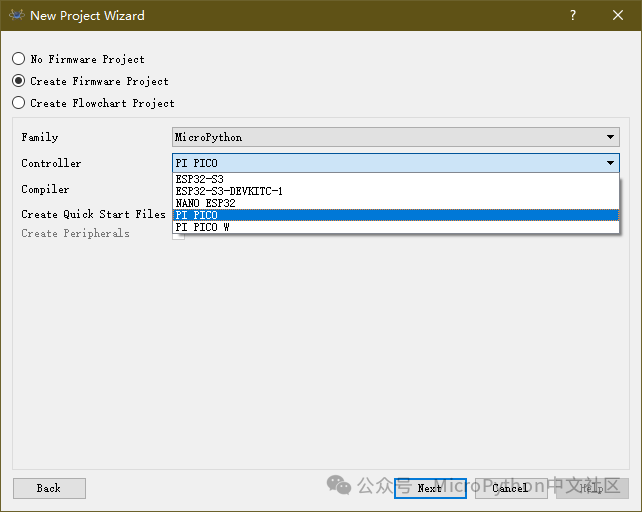
Then select to create a firmware project and choose MicroPython in the Family:
Next, choose the PI PICO in the Controller, which is the Raspberry Pi’s RP2040. Currently, Proteus supports two models of microcontrollers: ESP32-S3 and RP2040. It is recommended to select PI PICO because the software’s support for ESP32-S3 is not very complete, and some hardware functions cannot be simulated properly, such as the hardware I2C function.
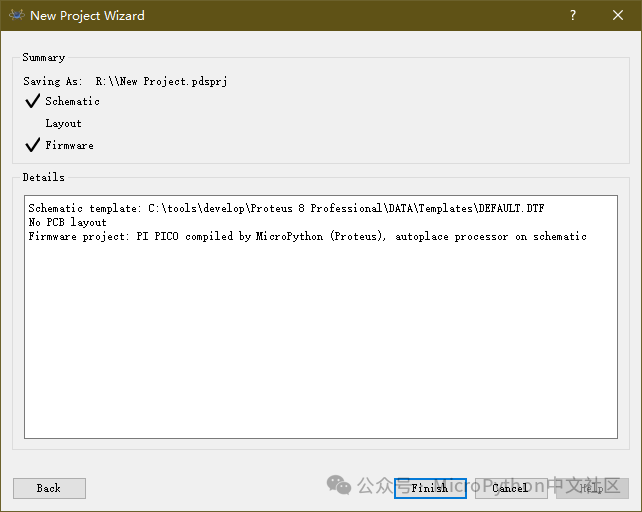
After confirming that the parameters are correct, click the Finish button to complete the project setup.
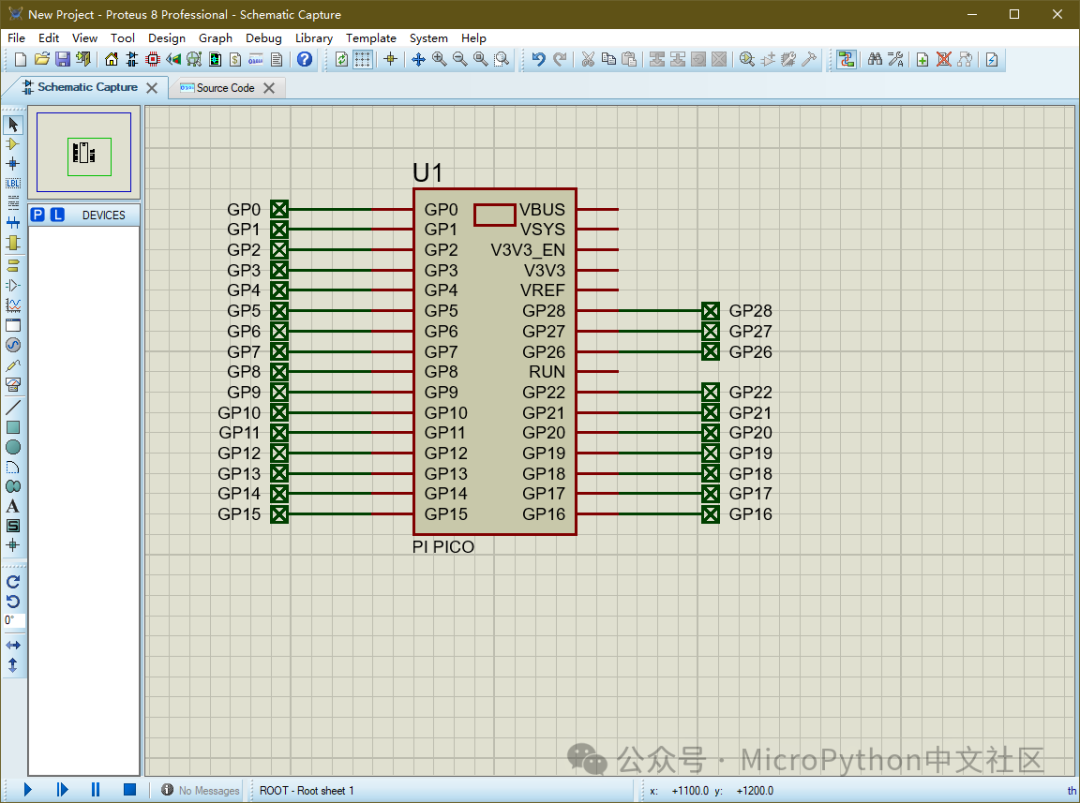
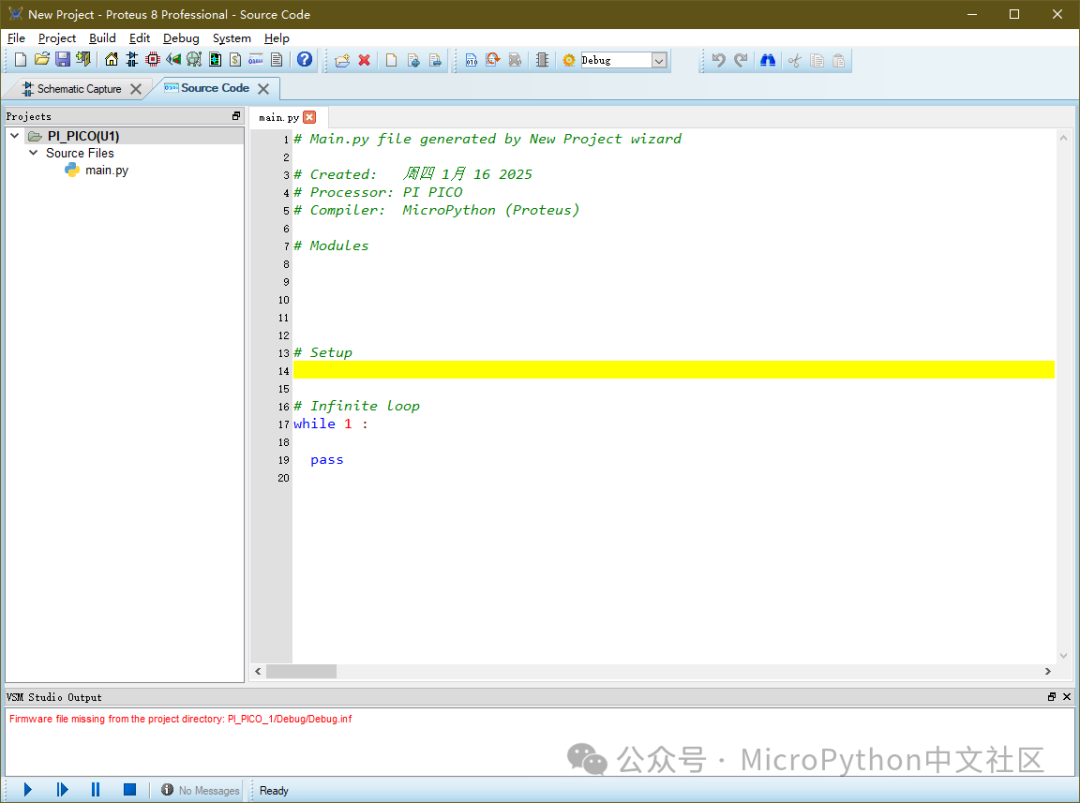
Once the project setup is complete, the following interface will appear: it includes the schematic and code editing. The schematic part already contains the RP2040 (and like the PI PICO development board, GPIO25 is connected to the internal LED and can be used directly), and the code editing area displays the default code template.
Now, like simulating other circuits, you can first add various components, then connect signals, write MicroPython code, add various MicroPython libraries, and finally simulate to verify the circuit design or program functionality.
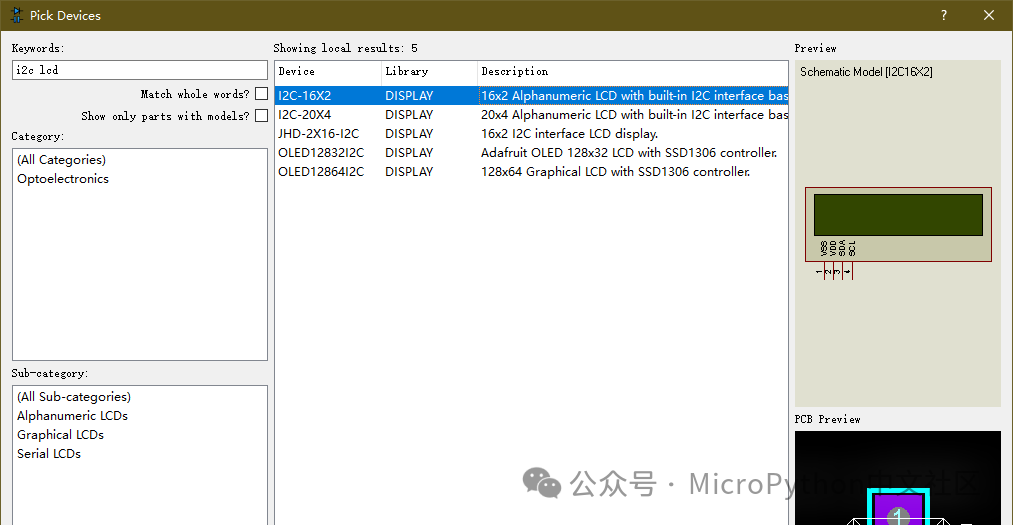
First, we will search for the I2C LCD in the device library and find the I2C-16×2, which is the I2C interface LCD1602.
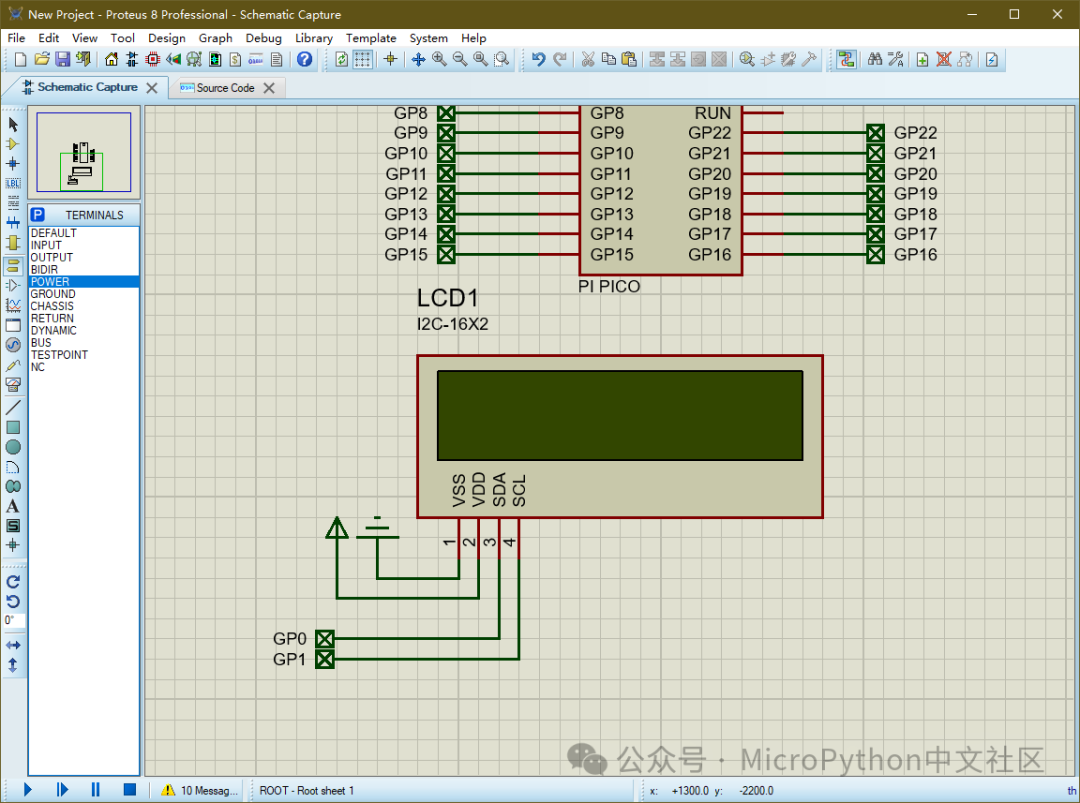
Add the component to the schematic, connect the LCD1602’s VDD and VSS, and then connect SDA/SCL to the RP2040’s GP0/GP1. These two GPIOs are used for I2C0 (note that the RP2040’s hardware I2C can only use a few specific pins, unlike the ESP32 which can use any pins). Here, the pull-up resistors for I2C are omitted as they do not significantly affect the simulation results.
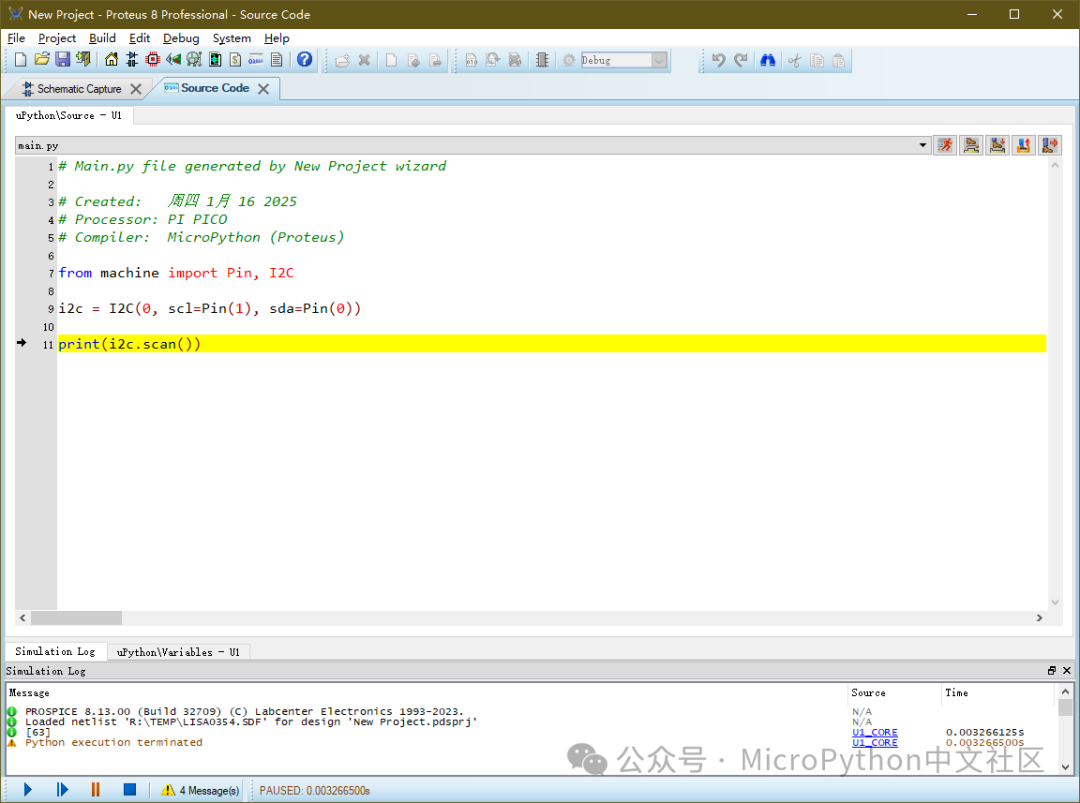
In the code editor, first enter the following code to search for the device address using i2c.scan():
from machine import Pin, I2C
i2c = I2C(0, scl=Pin(1), sda=Pin(0))
print(i2c.scan())
Press the run button in the lower left corner to start the simulation. If there are no errors, you will see the result below, showing that a device with address 63 was found. If there is an error, check the wiring and code to find the issue.
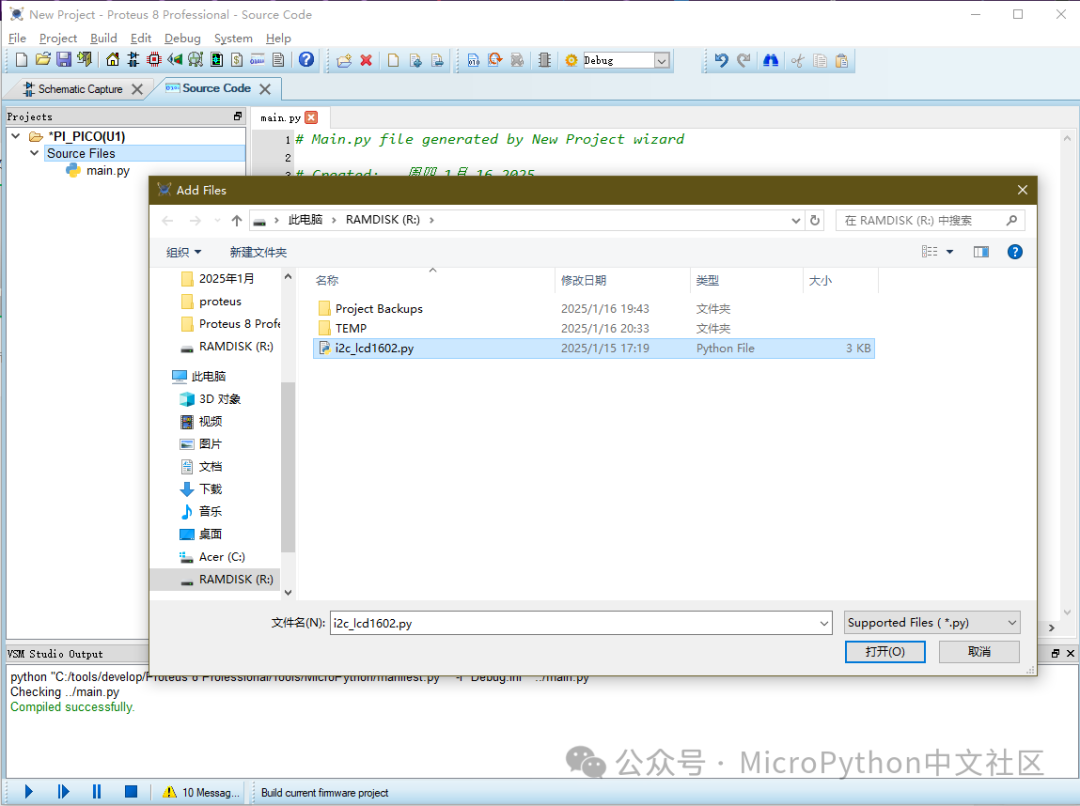
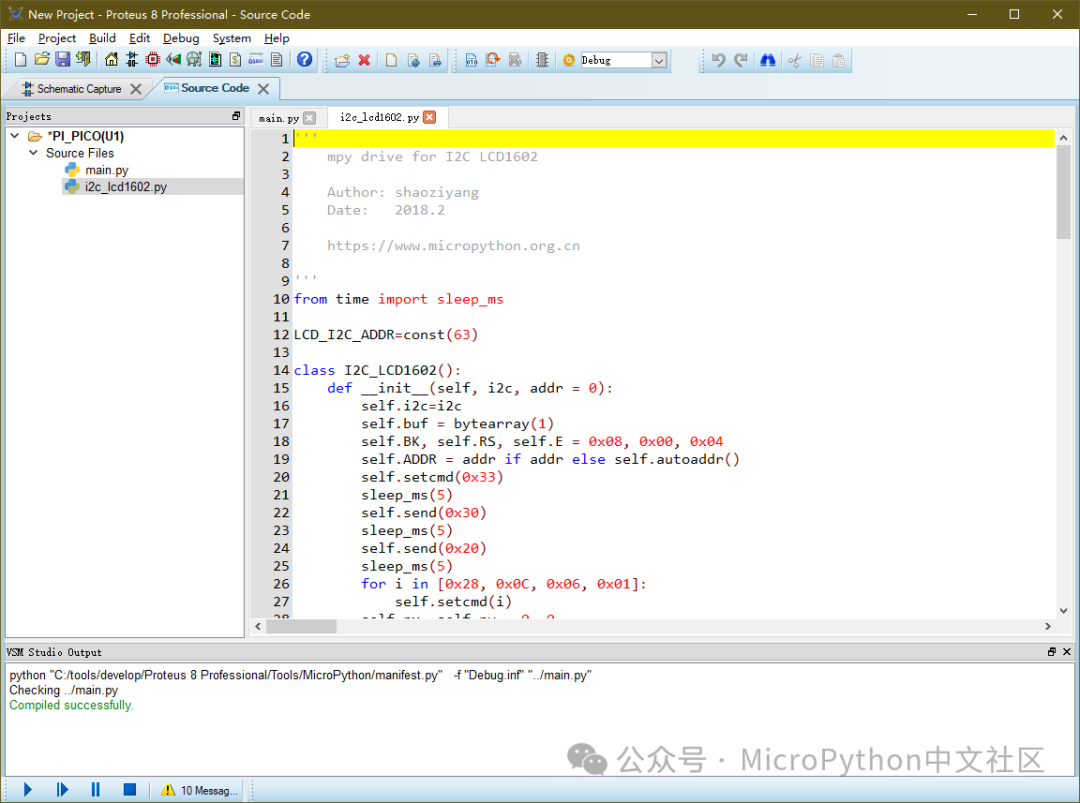
Then stop the simulation, download the community’s i2c lcd1602 driver library from GitHub or Gitee (https://gitee.com/microbit/mpy-lib/blob/master/lcd/I2C_LCD1602/i2c_lcd1602.py), select project -> Add File from the menu, and choose the downloaded i2c_lcd1602.py file.
This way, the i2c_lcd1602.py file can be added to the project and used in the program.
In main.py, write a test code that first creates an i2c object, then creates an LCD1602 instance, and finally displays an incrementing number on the screen:
from machine import Pin, I2C
from i2c_lcd1602 import I2C_LCD1602
from time import sleep_ms

led = Pin(25, Pin.OUT)
i2c = I2C(0, scl=Pin(1), sda=Pin(0))
print(i2c.scan())
lcd = I2C_LCD1602(i2c, 63)
n = 0
while 1:
    lcd.puts(n, 0, 0)
    n += 1
    sleep_ms(1000)
Run the simulation, and we can see the results below, which show that the simulation effect is consistent with running on actual hardware.
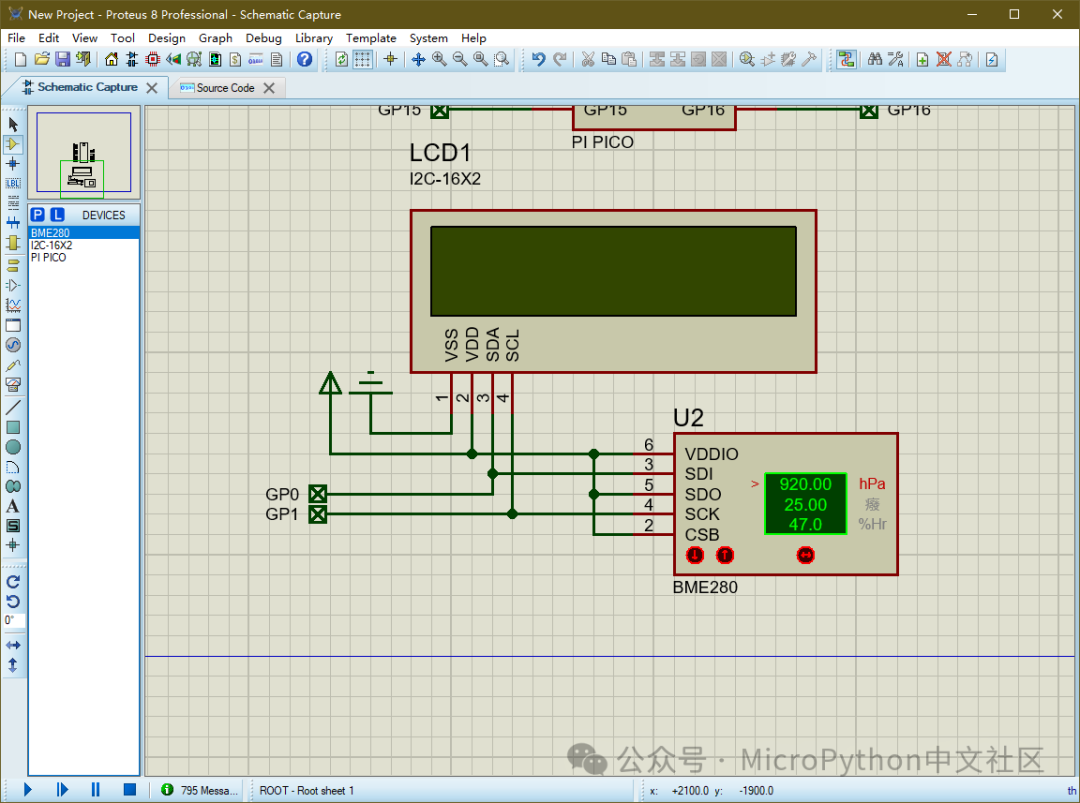
Next, we will search for and add a BME280 (temperature, humidity, and pressure sensor) from the component library, and connect its pins. The I2C interface is shared with the LCD. For convenience, the SDO pin of the BME280 is connected to VCC, making the device address 0x77.
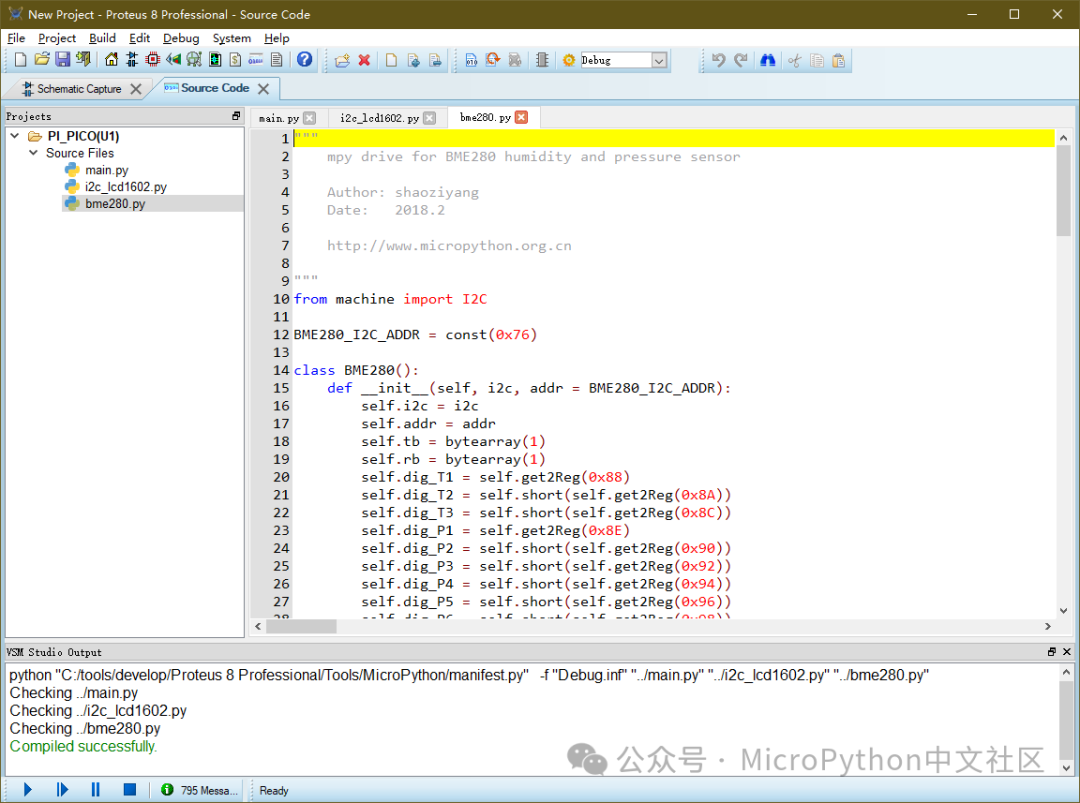
Download the BME280 driver from the community’s driver library (https://gitee.com/microbit/mpy-lib/blob/master/sensor/bme280/bme280.py) and add it to the project.
Modify main.py to add the relevant code:
from machine import Pin, I2C
from bme280 import BME280
from i2c_lcd1602 import I2C_LCD1602
from time import sleep_ms

led = Pin(25, Pin.OUT)
i2c = I2C(0, scl=Pin(1), sda=Pin(0))
print(i2c.scan())
bm = BME280(i2c, 0x77)
lcd = I2C_LCD1602(i2c, 63)
n = 0
while 1:
   led(not led())
   n+=1
   lcd.puts(n, 0, 0)
   lcd.puts(f"{bm.getHumi():.1f}%, 7, 0)
   lcd.puts(f"{bm.getTemp():.1f}C", 0, 1)
   lcd.puts(f"{bm.getPress()/100:.1f}P", 7, 1)
   sleep_ms(500)
When the simulation runs, you can see the sensor values on the LCD. During the simulation, you can change the sensor values using the three red buttons below the BME280, and you will see that the collected data changes synchronously on the screen.
From the above process, it can be seen that using Proteus makes it easy to debug circuits with MicroPython, simplifying the development process. The same method can be used to test more devices. Below are the simulation effects of the DS3232 (high-precision clock), MCP4018 (digital potentiometer), and SHT21 (temperature and humidity sensor). Everyone can also try more different sensors and modules to test the simulation effects in Proteus.
Using Proteus can simplify the development process, allowing development without actual hardware, quickly verifying software algorithms and hardware functions, and improving development efficiency. However, it is also important to note that software simulation cannot completely replace hardware; after all, software simulation is good at simulating algorithms and functions but cannot fully simulate all hardware functions or electrical performance. Below are some known issues.
Currently known limitations:
-
Too few supported main control chip models, and poor support for ESP32-S3.
-
REPL functionality is not supported.
-
Some devices cannot be simulated in MicroPython, such as DS18B20, I2C OLED 12864, etc.
Although there are some limitations, the simulation capabilities of Proteus are still a very powerful tool. As long as it is used wisely, in combination with other software and hardware, it can play a huge role.