Continuing to share some advanced installation tips.
After writing the boot image to the SD card, you can make the following modifications to the configuration files in the /boot partition before starting the Raspberry Pi. Step 1: Enable SSH by adding a file named ssh to automatically enable SSH.
Step 2: CPU Overclocking, Disable BT/WiFi, Reduce GPU Memory
#### RPi 4 Overclock
force_turbo=1
arm_freq=2200
over_voltage=8
#### Disable Bluetooth/WiFi
dtoverlay=disable-wifi
dtoverlay=disable-bt
#### GpuMem
gpu_mem=32
hdmi_force_hotplug=1
Step 3: Modify cmdline.txt to delete ‘quiet’ and add ‘init=/usr/lib/raspi-config/init_resize.sh’ at the end. Add ‘cgroup_enable=cpuset cgroup_enable=memory cgroup_memory=1 console=serial0,115200 console=tty1 root=PARTUUID=c0799831-02 rootfstype=ext4 elevator=deadline fsck.repair=yes rootwait cgroup_enable=cpuset cgroup_enable=memory cgroup_memory=1’. This achieves three effects: first, it shows all information during the boot process; second, it does not reserve space for other partitions; third, it displays some CT statistics in the PVE Web GUI.
Step 4: Start the Raspberry Pi and repartition
sudo fdisk /dev/sda
Command (m for help): n
Partition type p primary (1 primary, 0 extended, 3 free) e extended (container for logical partitions)
Select (default p): p
Partition number (2-4, default 2): 2
First sector (532480-234441647, default 589815): 532480 <——————- input the first sector number
Last sector, +/-sectors or +/-size{K,M,G,T,P} (532480-234441647, default 234441647): +24G <——— = set the root partition size
Created a new partition 2 of type ‘Linux’ and of size 24 GiB.
Partition #2 contains an ext4 signature.
Do you want to remove the signature? [Y]es/[N]o: n
Command (m for help): n <—————- Add the second partition for data, nfs, zfs, or ceph
Partition type p primary (2 primary, 0 extended, 2 free) e extended (container for logical partitions)
Select (default p): p
Partition number (3-4, default 3): 3
First sector (50855160-234441647, default 589815): 50855160
Last sector, +/-sectors or +/-size{K,M,G,T,P} (532480-62533295, default 62533295): +80G <———- Set according to disk size and your needs
Created a new partition 3 of type ‘Linux’ and of size 80 GiB.
Command (m for help): w
The partition table has been altered.
Syncing disks.
Step 5: Configure the filesystem
sudo resize2fs /dev/sda2
Step 6: Uninstall the dphys-swapfile service installed by RPiOS by default. This thing doesn’t do much other than reduce performance
apt purge dphys-swapfile -y
Step 7: Install zram-tools, which is better for swap partitions
sudo apt install zram-tools
You can use the default configuration or configure it manually, whichever you prefer
sudo nano /etc/default/zramswap
Step 8: Restart the Raspberry Pi. It’s best to restart it, but if you feel everything is okay, you can skip the restart
sudo reboot
Step 9: After rebooting, you can install Proxmox VE following the steps in “Pimox7: Proxmox VE on Raspberry Pi (Part 1)”
Step 10: Further optimize network and storage configurations. You can delete all configurations for eth0 and create a bridge so that virtual machines/containers (VMs/CTs) can use it.
Then you can create a zfs storage pool, as zfs is very useful
sudo zpool create sdpool /dev/sda3
Then you can add this zfs storage in the Web GUI.
Meanwhile, to prevent zfs from using too much memory, you can modify the zfs configuration file
sudo nano /etc/modprobe.d/zfs.conf
Set the maximum memory usage for zfs, for example, 1GB
options zfs zfs_arc_max=1024000000
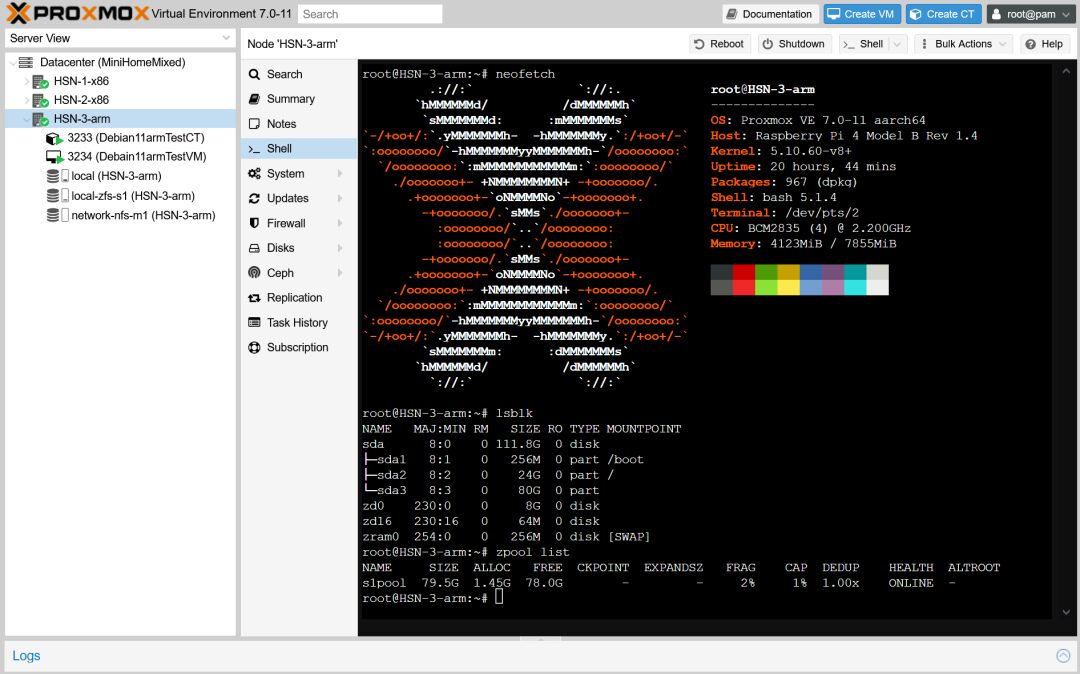
If you have multiple Raspberry Pis, you can try creating a cluster or something similar.
For example, as shown in the figure below:
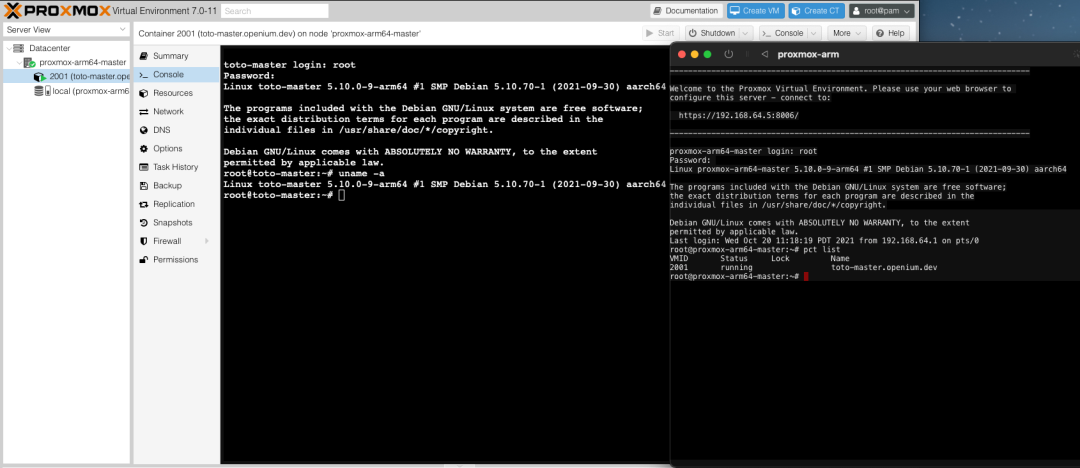
Some people have also successfully installed PVE on Apple laptops (M1 processor) using UTM, as shown below:
Some claim to have successfully installed Proxmox VE on rockpi and set-top boxes (tvbox). In short, as long as you are willing to experiment, nothing is impossible. The Pimox7 code repository on GitHub:
https://github.com/pimox/pimox7
The author Tux_1024 also has a repository on GitHub: https://github.com/TuxfeatMac/pimox7
https://mp.weixin.qq.com/cgi-bin/appmsg?t=media/appmsg_edit&action=edit&type=77&appmsgid=521407877&token=1044977584&lang=zh_CN