Setting up a software debugging environment for Cortex-M3 based on QEMU in VSCode.1. Obtain the ThreadX source code
https://github.com/eclipse-threadx/threadx2. Install the compiler and QEMU emulator in WSL
sudo apt update
sudo apt install gcc-arm-none-eabi binutils-arm-none-eabi gdb-multiarch
sudo apt install qemu qemu-system-arm
3. Compilethe ports/cortex_m3/gnu exampleWrite shell build scripts b0.sh and b1.sh for the WSL environment based on the bat build script in the example_build directory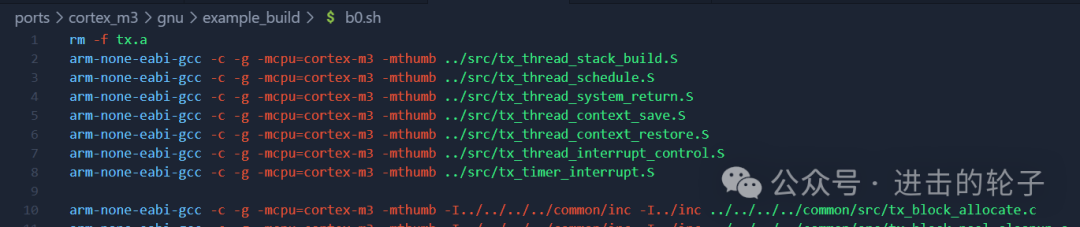

cd ports/cortex_m3/gnu/example_build
./b0.sh
./b1.sh
ls | grep "sample_threadx"
The compiled products are as follows: 4. Add debugging script files4.1 Add a launch.json file in the root directory of the VSCode project, with the following content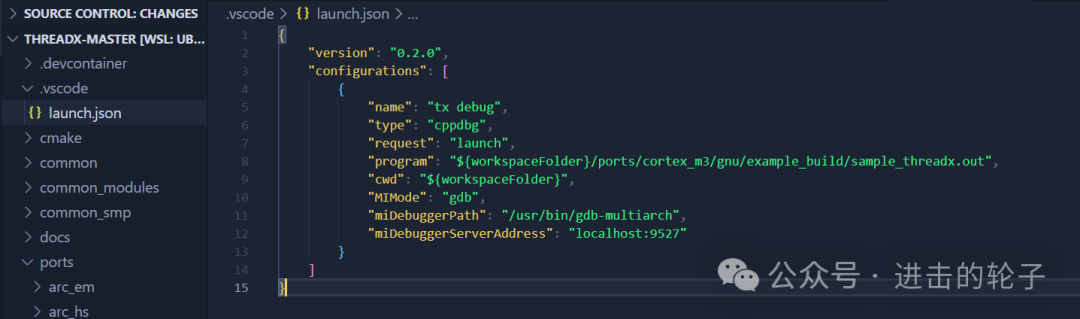
{
    "version": "0.2.0",
    "configurations": [
        {
            "name": "tx debug",
            "type": "cppdbg",
            "request": "launch",
            "program": "${workspaceFolder}/ports/cortex_m3/gnu/example_build/sample_threadx.out",
            "cwd": "${workspaceFolder}",
            "MIMode": "gdb",
            "miDebuggerPath": "/usr/bin/gdb-multiarch",
            "miDebuggerServerAddress": "localhost:9527"
        }
    ]
}
4.2 Add a debug.sh file in the /example_build directory, with the following content
qemu-system-arm -machine mps2-an385 -monitor null -semihosting --semihosting-config enable=on,target=native -kernel ./sample_threadx.out -serial stdio -nographic -S -gdb tcp::95275. Start the debugging environment5.1 First, use the debug.sh script to start the GDB server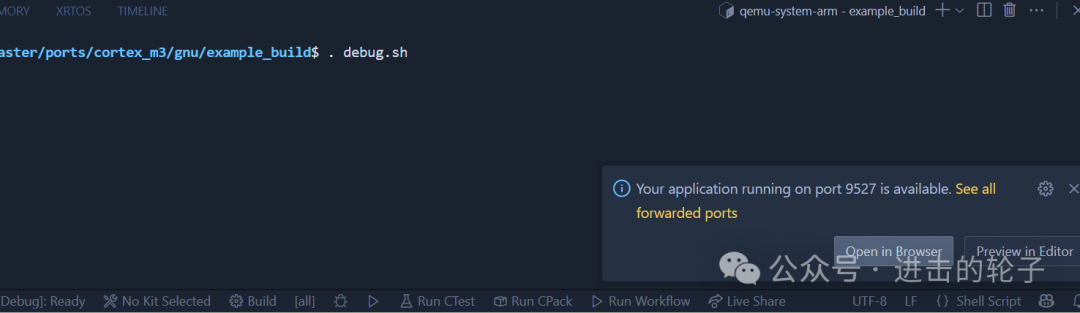 5.2 Start the GDB debugging client based on VSCode
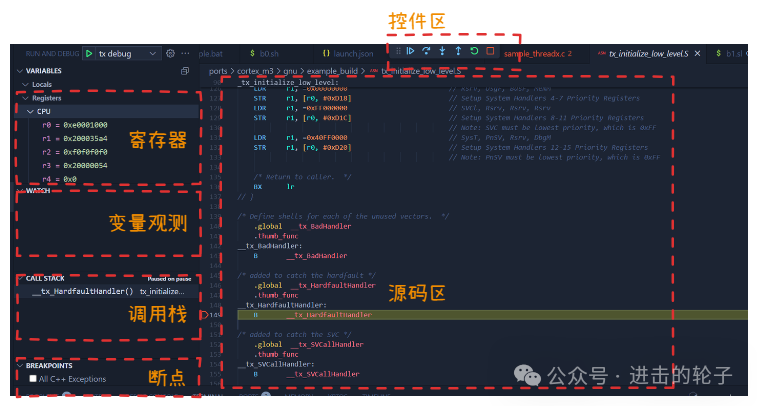
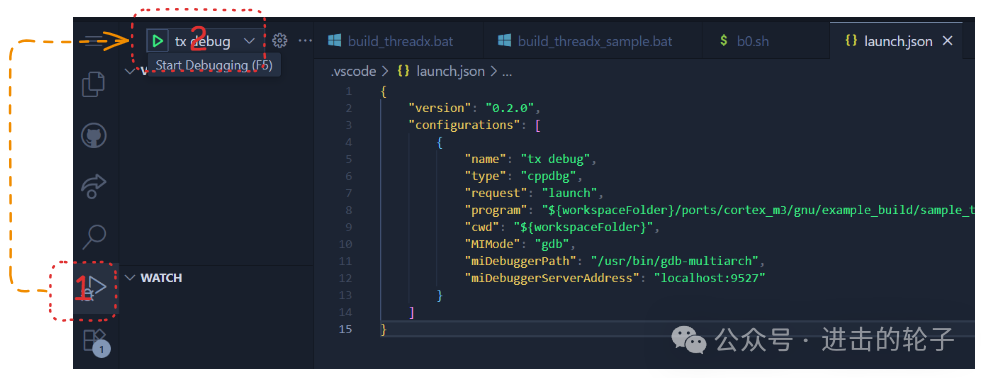 The debugging interface after startup is as follows,
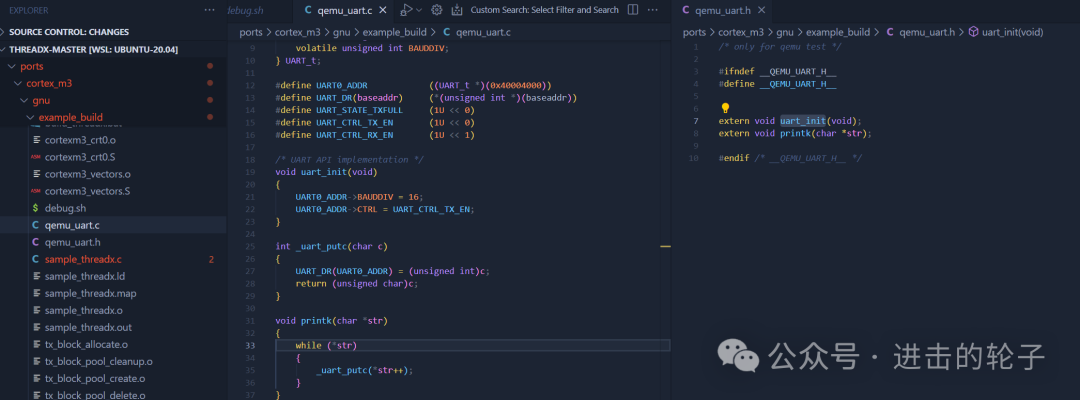
 6. Add print functionality in the M3 example project of the ThreadX open-source code6.1 Add UART driver and include it in the build script
 6.2 Execute b1.sh to rebuild6.3 Restart the debugging script, and you can observe the following logs in the terminal output
 PS. Serial port source code and calls
//qemu_uart.h/* only for qemu test */#ifndef __QEMU_UART_H__#define __QEMU_UART_H__extern void uart_init(void);extern void printk(char *str);#endif /* __QEMU_UART_H__ *///qemu_uart.c/* only for qemu test */typedef struct UART_t{ volatile unsigned int DATA; volatile unsigned int STATE; volatile unsigned int CTRL; volatile unsigned int INTSTATUS; volatile unsigned int BAUDDIV;} UART_t;#define UART0_ADDR ((UART_t *)(0x40004000))#define UART_DR(baseaddr) (*(unsigned int *)(baseaddr))#define UART_STATE_TXFULL (1U << 0)#define UART_CTRL_TX_EN (1U << 0)#define UART_CTRL_RX_EN (1U << 1)/* UART API implementation */void uart_init(void){ UART0_ADDR->BAUDDIV = 16; UART0_ADDR->CTRL = UART_CTRL_TX_EN;}int _uart_putc(char c){ UART_DR(UART0_ADDR) = (unsigned int)c; return (unsigned char)c;}void printk(char *str){ while (*str) { _uart_putc(*str++); }}Add QEMU UART initialization in the following file
ports/cortex_m3/gnu/example_build/sample_threadx.c
int main(){ /* init qemu uart utils */ uart_init(); printk("Hello from ThreadX on Cortex-M3!\n"); /* Enter the ThreadX kernel. */ tx_kernel_enter();}