Follow us+Star Public Account Number, don’t miss out on exciting content
Author | strongerHuang
WeChat Official Account | strongerHuang
For those who are not accustomed to developing with e2 studio, you can use RASC to generate a Keil project, and then happily complete development tasks in the Keil environment.
This article describes the method of generating Keil software projects based on RASC. Some content here is similar to the previous article in this series, Creating RA8 Projects Based on e2 Studio .
Preparation Work
This tutorial takes the Windows system with e2 studio V5.8.0 and Renesas RA8D1 microcontroller as an example.
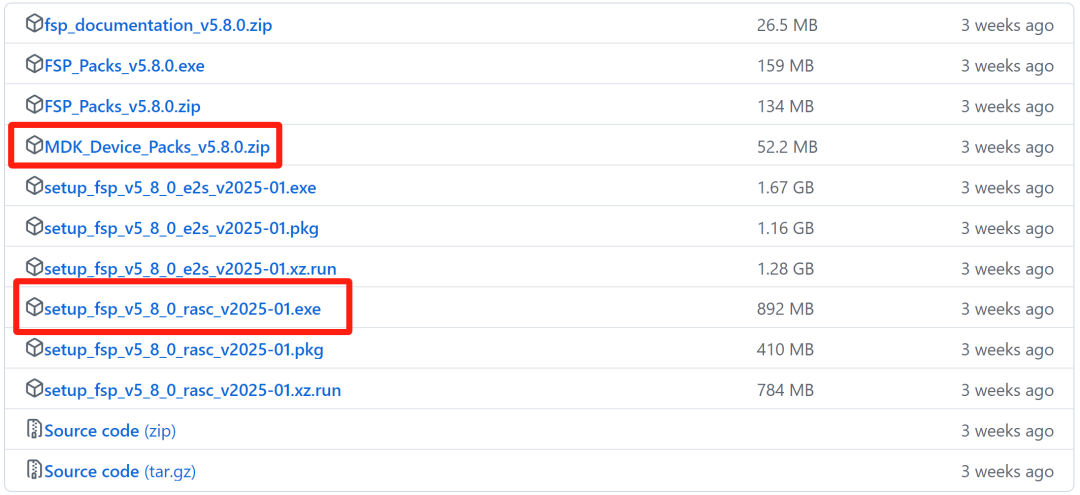
1. Download and install the RASC development tool and Keil software package
The previous article “Setting Up the Renesas RA8 Development Environment” mentioned the specific download and installation methods.
RASC and Keil software support package GitHub download address:
https://github.com/renesas/fsp/releases
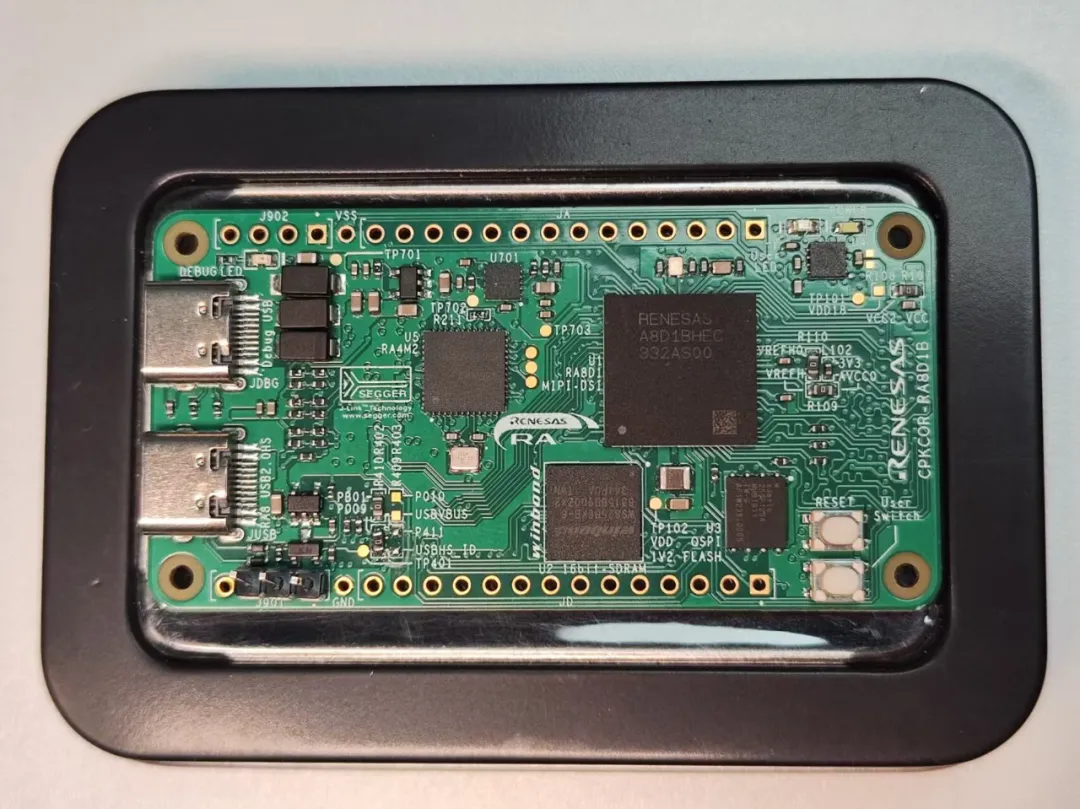
2. Prepare the development board and the download debugger
-
Download debugger: J-Link
-
Renesas RA8 development board
The development boards launched by Renesas often come with a J-Link debugger. For example, the Renesas CPKCOR-RA8D1B development board used in this article comes with a J-Link debugger.
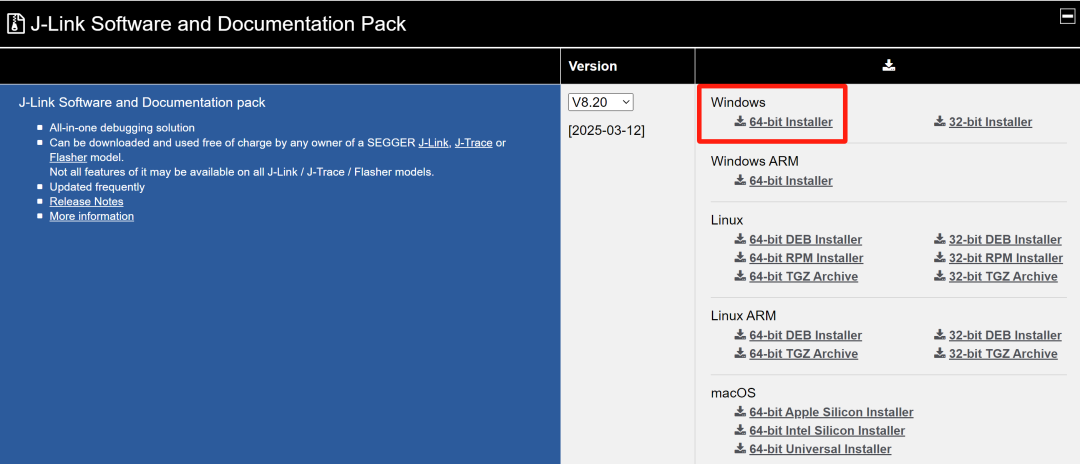
 3. Download and install J-Link supporting software
If you want to use some functions of J-Link, such as downloading/writing code, J-Link RTT, etc., it is recommended to download and install the J-Link supporting software.
Download address:
https://www.segger.com/downloads/jlink/
Generating Keil Projects Based on RASC
1. Create a New ProjectDouble-click RASC to open the software, set the project name and save location (default location is fine):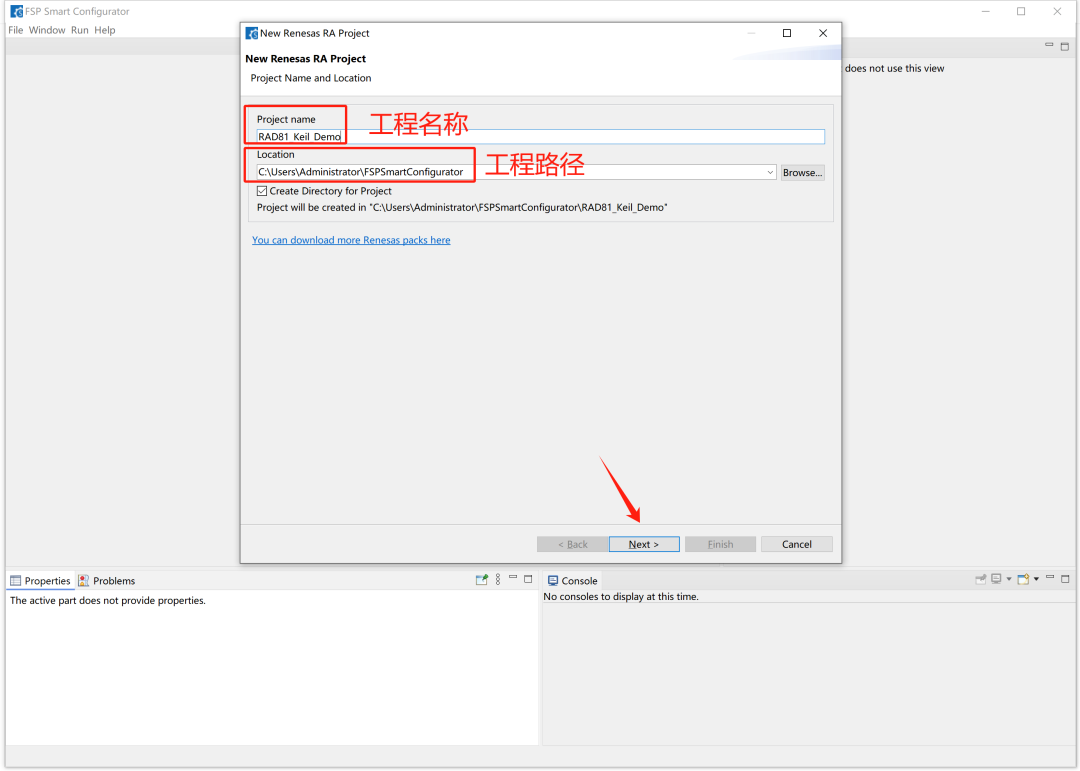 If you accidentally closed the 【New Renesas RA Project】 interface, you can also directly open the “Create New Project” interface from the menu: File -> New -> FSP Project.
 Then set the project: MCU model, IDE type, compiler, etc.
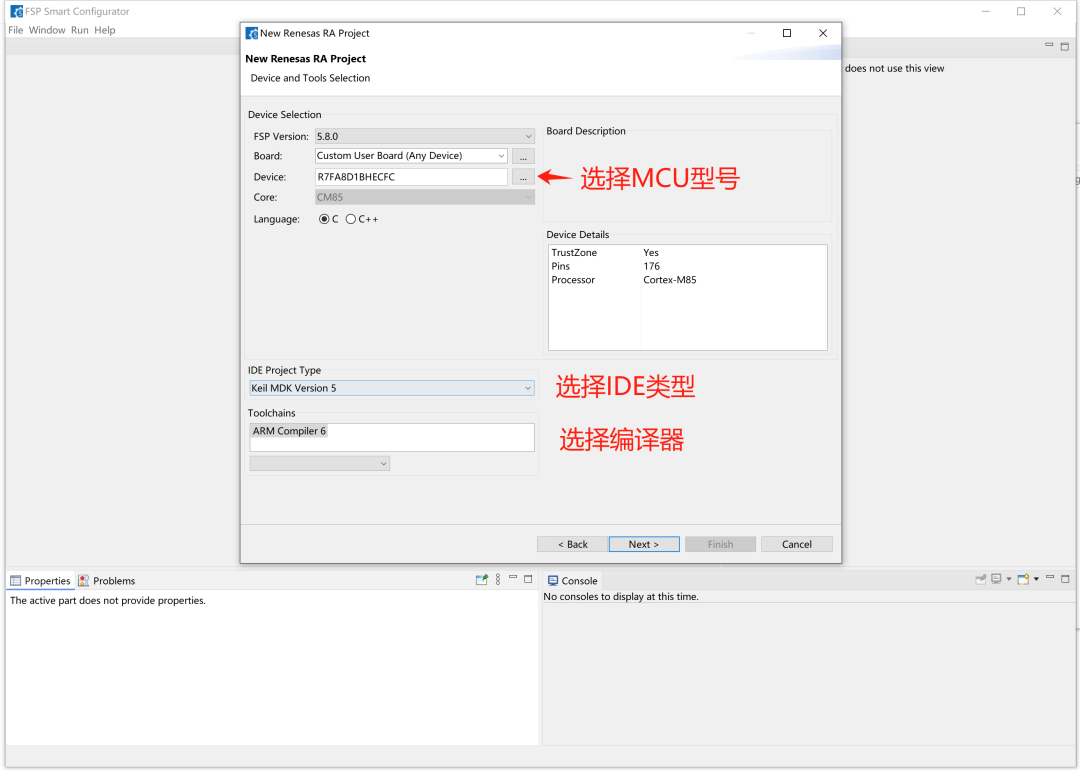 Then, keep clicking “next” (for the demo project, we will keep it simple)
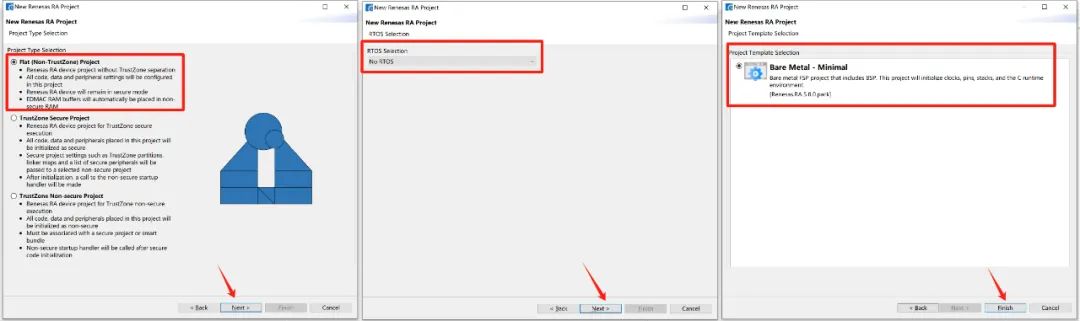 After completing the above steps, you will enter the following configuration interface:
 2. Configure the ProjectThe above steps are the basic steps for creating a new project. Once you enter the configuration interface, it becomes similar to the e2 studio environment. Below, we will configure two parameters.Modify the crystal oscillator clock:
 Configure the LED pin:
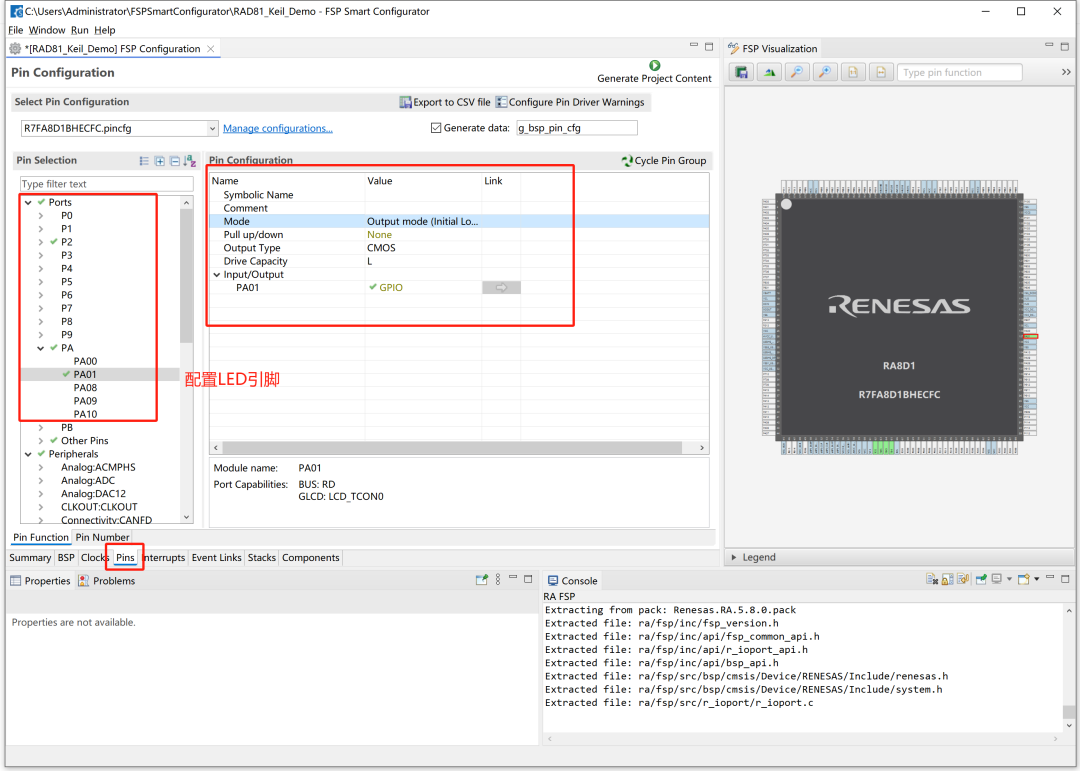 Once all configurations are complete, click 【Generate Project Content】 to generate the Keil project.
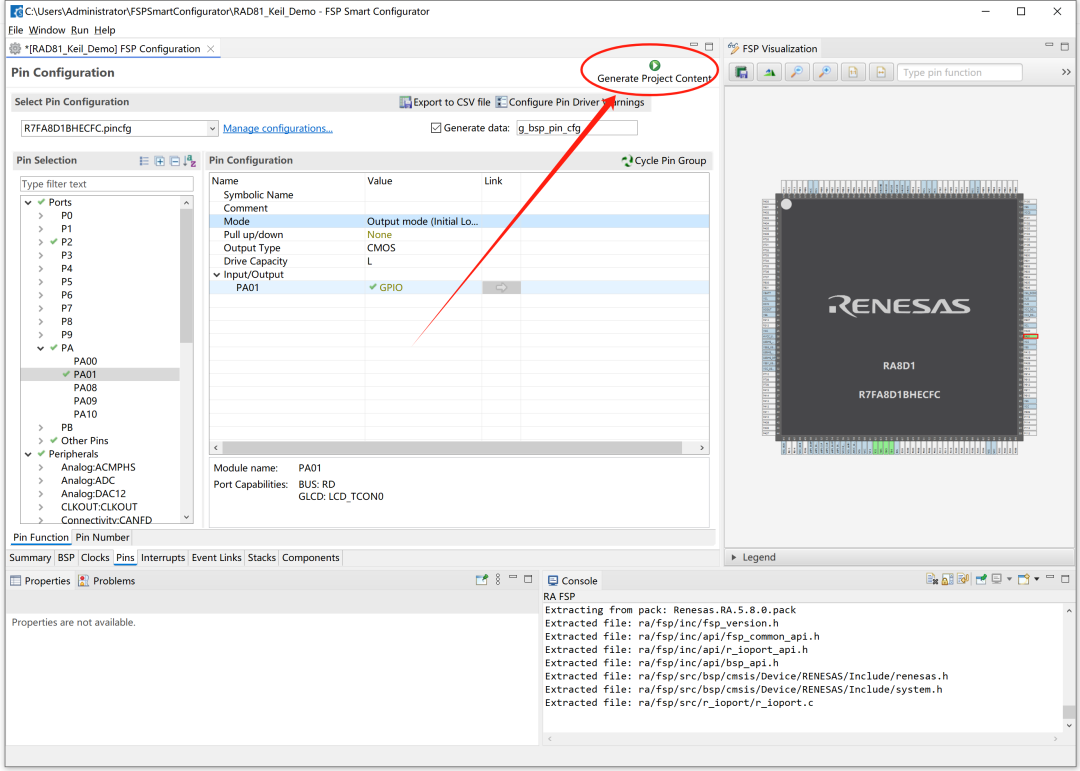 At this point, you will see the entire generated Keil project in the save path.
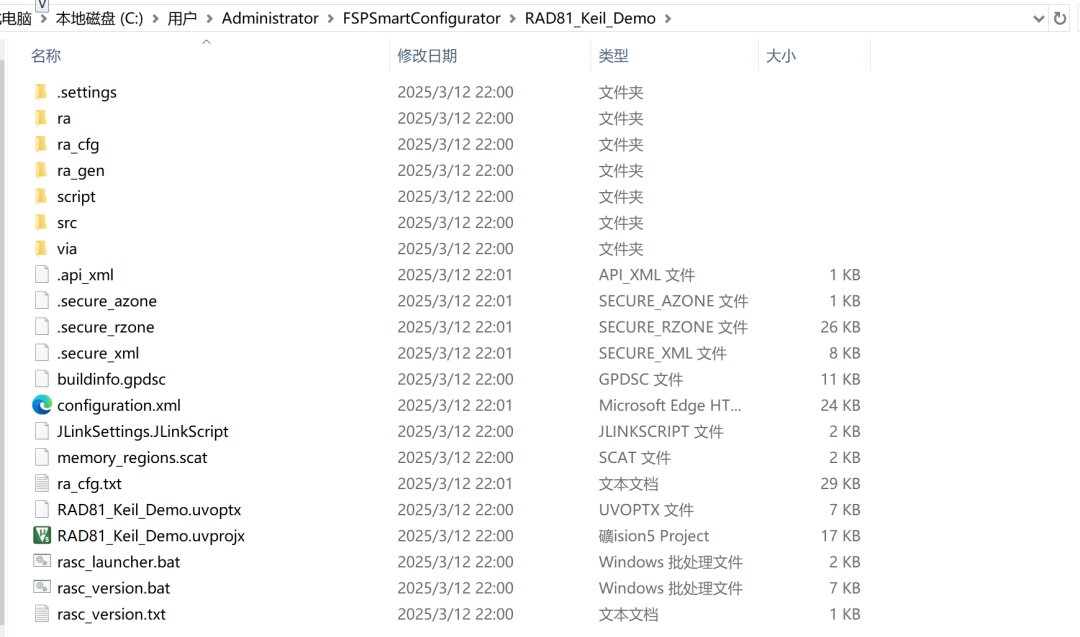
Editing and Compiling the Project in Keil Environment
After the above steps generate the Keil software project, we can happily work on the project in the Keil environment (writing code, compiling, debugging).Taking a simple LED blinking as an example, open the generated Keil software project and add a piece of LED blinking code.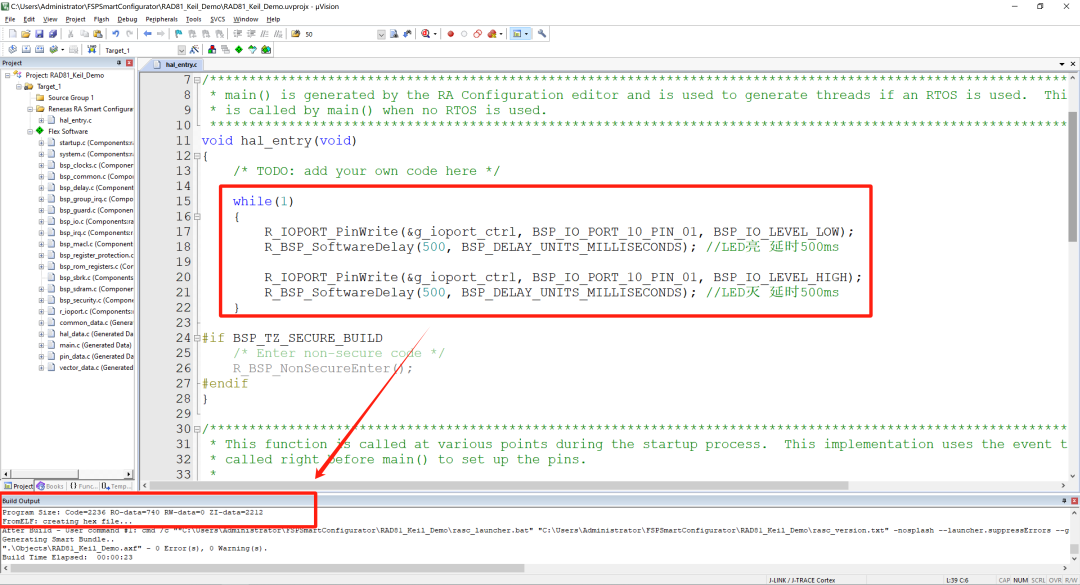 If the compilation is successful, you can download it to the RA8D1 microcontroller. If everything is normal, you will see the LED blinking.Renesas RA8 Series Tutorial······