Recent Updates to PyMeshGen: New 3D Mesh Processing and CGNS File Support
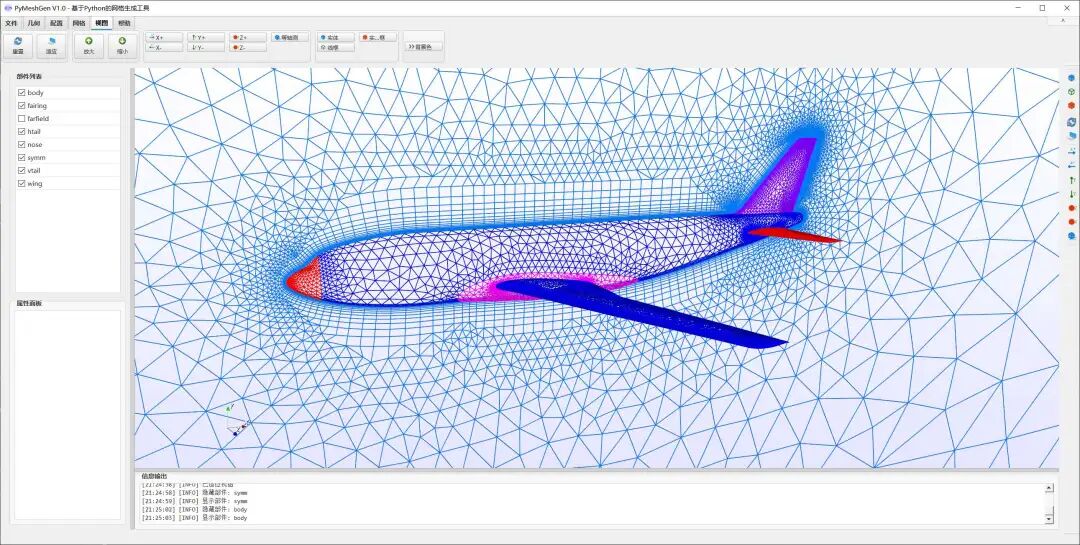
This article introduces the recent feature updates completed for the PyMeshGen project, mainly including enhancements to 3D mesh processing capabilities, support for CGNS file format, and improvements in visualization features.
Introduction
PyMeshGen is an open-source mesh generation tool developed in Python, designed to provide an easy-to-use mesh generation solution for computational fluid dynamics (CFD) and finite element analysis (FEA). Since its open-source release, the project has been committed to lowering the learning threshold for mesh generation algorithms, providing simple and understandable code implementations for beginners and researchers.
Recently, PyMeshGen has undergone a series of updates, mainly focusing on the following aspects:
- Expanded support for 3D mesh element types
- New support for CGNS file format
- Improved visualization rendering capabilities
- Optimized code architecture and test coverage
This article will detail the specific content and implementation details of these updates.
1. Expansion of File Format Support
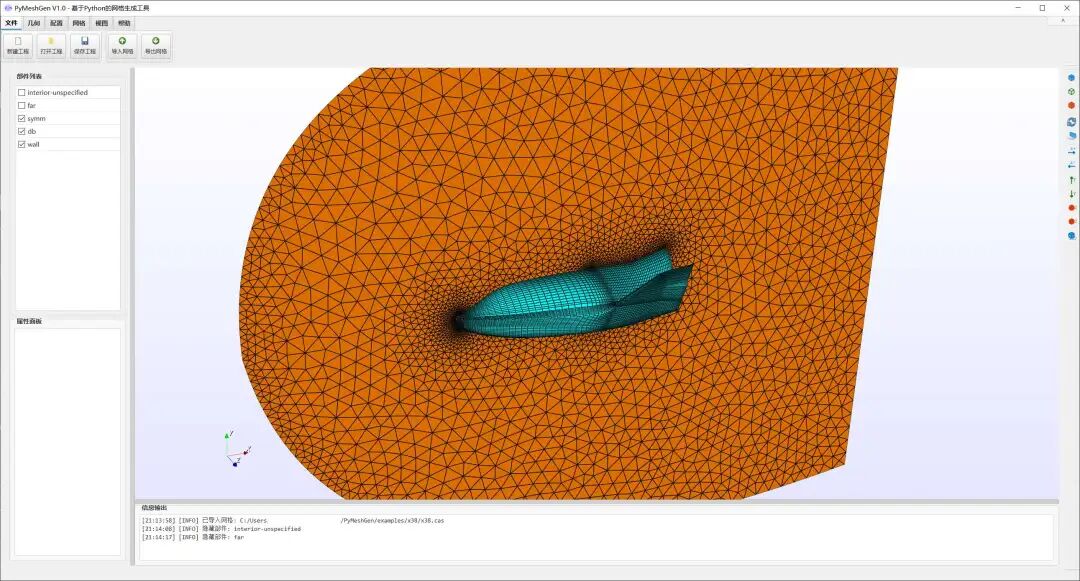
1.1 Support for CGNS File Format
CGNS (CFD General Notation System) is a widely used data format standard in the CFD field, supported by many commercial CFD software (such as ANSYS Fluent, OpenFOAM, etc.). This update adds the capability to read CGNS files, mainly including the following content:
Core Functionality Implementation
- File Reading: Implemented basic reading functionality for CGNS files, capable of parsing mesh nodes, elements, and boundary information
- Boundary Condition Handling: Supports reading and parsing boundary condition definitions in CGNS files
- High-Order Element Detection: Added recognition functionality for high-order elements, capable of distinguishing between linear and high-order elements
- Unit Testing: Comprehensive unit tests have been written for the CGNS reading functionality to ensure code quality
Code Structure
CGNS-related functionalities are organized in independent modules, mainly containing the following components:
# CGNS Cell Type Definitions
CGNS_CELL_TYPES = {
    "NODE": 0,
    "BAR_2": 1,
    "TRI_3": 2,
    "QUAD_4": 3,
    "TETRA_4": 4,
    "PYRA_5": 5,
    "PENTA_6": 6,
    "HEXA_8": 7,
    # More types...
}

# CGNS Boundary Condition Types
CGNS_BOUNDARY_TYPES = {
    "BCWall": 2,
    "BCInlet": 3,
    "BCOutlet": 4,
    # More types...
}
1.2 Integration of meshio Library
To support more mesh file formats, the project has integrated the meshio library. meshio is a powerful mesh I/O library that supports over 30 mesh file formats, including:
- VTK series formats (.vtk, .vtu, .vtp, etc.)
- Fluent formats (.msh, .cas)
- CGNS format (.cgns)
- STL format (.stl)
- And many other formats
With the integration of meshio, users can more easily import mesh files from different sources, enhancing the tool’s versatility.
Usage Example
import meshio

# Read mesh file
mesh = meshio.read("example.msh")

# Get node coordinates
nodes = mesh.points

# Get element connectivity
cells = mesh.cells
1.3 File Operation Logging Callback
To facilitate debugging and issue tracking, a logging callback feature has been added to the FileOperations class. Users can receive real-time progress information and error messages during file operations.
2. Enhanced 3D Mesh Processing Capabilities
2.1 New Support for 3D Element Types
Previously, PyMeshGen mainly supported 2D mesh generation. This update expands the processing capabilities for 3D meshes, adding four mainstream 3D element types:
| Element Type | Element ID | Application Scenario | Characteristics |
|---|---|---|---|
| Tetrahedron | 2 | Mesh generation for complex geometries | Flexibly adapts to any shape, mature generation algorithm |
| Pyramid | 5 | Connection in transitional areas | Used to connect tetrahedral and hexahedral meshes |
| Triangular Prism | 6 | Boundary layer mesh | Suitable for thin-layer structures, commonly used for boundary layer generation |
| Hexahedron | 4 | Structured mesh | High computational efficiency, good numerical accuracy |
Implementation Details
Each element type implements the following functionalities:
- Storage of element connectivity
- Geometric parameter calculations (volume, area, etc.)
- Support for visualization rendering
- Element quality assessment
For example, the volume calculation for a tetrahedron is implemented as follows:
def tetrahedron_volume(coords):
    """
    Calculate the volume of a tetrahedron
    coords: Coordinates of 4 nodes, shape (4, 3)
    """
    a = coords[1] - coords[0]
    b = coords[2] - coords[0]
    c = coords[3] - coords[0]
    volume = abs(np.dot(a, np.cross(b, c))) / 6.0
    return volume
2.2 Expansion of Geometric Calculation Functions
To support 3D meshes, the geometric calculation functionality module has been expanded, mainly including:
- Support for 3D coordinate systems
- Volume calculation for tetrahedra
- High-order element recognition
- 3D mesh reconstruction functionality
These functionalities lay the foundation for subsequent mesh quality assessment and optimization algorithms.
2.3 Data Structure Optimization
The Unstructured_Grid class has been split into independent modules to better support the 3D coordinate system. Additionally, the Fluent type definitions and VTK element type definitions have also been moved to independent modules, enhancing the maintainability of the code.
3. Improvements in Visualization Features
3.1 Rendering Mode Switching
PyMeshGen implements mesh visualization based on VTK (Visualization Toolkit). This update adds three rendering modes:
- Solid Mode: Displays the mesh in a solid manner, suitable for viewing the overall structure
- Wireframe Mode: Displays the mesh in a wireframe manner, facilitating the viewing of topological relationships
- Point Cloud Mode: Displays only the nodes, making it easier to check node distribution
Users can quickly switch between different rendering modes using toolbar buttons to adapt to different viewing needs.
Implementation Code Snippet
def set_render_mode(self, mode):
    """
    Set the rendering mode
    mode: 'solid', 'wireframe', 'points'
    """
    for actor in self.actors:
        if mode == 'solid':
            actor.GetProperty().SetRepresentationToSurface()
        elif mode == 'wireframe':
            actor.GetProperty().SetRepresentationToWireframe()
        elif mode == 'points':
            actor.GetProperty().SetRepresentationToPoints()
    self.render_window.Render()
3.2 View Control Tools
To enhance user experience, convenient view control features have been added:
- Six standard view directions (front/back/left/right/top/bottom)
- Isometric view
- Draggable dockable view toolbar
- Camera projection and zoom control optimization
These features reference the design of mainstream CAE software (such as ANSYS, OpenFOAM) and align with engineers’ usage habits.
3.3 Component Display Control
A checkbox has been added to the component list, allowing users to independently control the display/hide status of each component. This is particularly useful for large models containing multiple components, enabling users to:
- View different components one by one
- Hide components that do not need attention
- Quickly locate problem areas
4. Code Quality and Testing
4.1 Code Refactoring
To enhance code maintainability and extensibility, a series of refactoring efforts have been undertaken:
- Moved Fluent type definitions to independent modules
- Moved VTK element type definitions to independent modules
- Refactored CGNS reader code structure
- Optimized import paths and module organization
These refactorings have made the code structure clearer, facilitating subsequent functional expansions and maintenance.
4.2 Enhanced Test Coverage
Testing is an important means of ensuring code quality. This update has enhanced test coverage:
- Added unit tests for the CGNS file analysis tool
- Enhanced robustness of mesh import tests
- Updated test cases using example files
- Added tests for high-order element detection
Test Example
def test_cgns_reader():
    """Test CGNS file reading functionality"""
    reader = CGNSReader()
    mesh = reader.read("test.cgns")

    assert mesh is not None
    assert len(mesh.nodes) > 0
    assert len(mesh.cells) > 0
    assert len(mesh.boundaries) > 0
5. Practical Application Examples
5.1 Reading CGNS Files and Visualization
The following is a complete usage example demonstrating how to read CGNS files and visualize them:
from PyMeshGen.file_operations import FileOperations
from PyMeshGen.mesh_display import MeshDisplay

# Create file operations object
file_ops = FileOperations()

# Read CGNS file
mesh = file_ops.read_file("example.cgns")

# Create visualization object
display = MeshDisplay()

# Display mesh
display.set_mesh(mesh)
display.set_render_mode('wireframe')
display.show()
5.2 Multi-Format Mesh Conversion
Utilizing the integrated functionality of meshio, mesh format conversion can be easily performed:
import meshio

# Read Fluent format mesh
mesh = meshio.read("input.msh")

# Export to VTK format
mesh.write("output.vtk")

# Export to CGNS format
mesh.write("output.cgns")
6. Update Statistics
This update has completed a total of 27 commits, with the following statistics:
| Category | Count |
|---|---|
| New Features | 15 items |
| Optimizations | 8 items |
| Bug Fixes | 4 items |
| Test Enhancements | Multiple items |
Mainly involved file modules:
- File I/O module (file_operations.py, cgns_reader.py, etc.)
- Mesh display module (mesh_display.py)
- GUI module (gui_main.py, ribbon_widget.py, etc.)
- Data structure module (unstructured_grid.py, cell_types.py, etc.)
7. User Guide
7.1 Installation and Startup
# Clone the project
git clone https://github.com/your-repo/PyMeshGen.git

# Install dependencies
pip install -r requirements.txt

# Start the GUI
python start_gui.py
7.2 Quick Start
- Import File: Use the menu “File -> Open” or drag and drop files into the window
- Switch View: Use the view toolbar to switch rendering modes
- Control Display: Check/uncheck components in the component list
- Export Results: Use “File -> Export” to select the target format
8. Future Plans
According to the project’s development roadmap, future versions will focus on advancing the following functionalities:
8.1 Core Functionality Expansion
- 3D Mesh Generation: Implement a 3D front propagation method for generating tetrahedral meshes
- 3D Boundary Layer Mesh: Develop a 3D boundary layer propagation algorithm to support boundary layer mesh generation
- Multi-Directional Layer Propagation: Expand layer propagation algorithms to support multi-directional propagation
- Geometric Kernel Integration: Integrate a geometric kernel to enhance geometric processing capabilities
- Curve Mesh Generation: Implement curve discretization and curve mesh generation functionalities
- Surface Mesh Generation: Develop surface mesh generation algorithms
8.2 Performance Optimization
- EdgeSwap Efficiency Optimization: Optimize the EdgeSwap algorithm to improve mesh optimization speed
- Mesh Reconstruction and Rendering Efficiency
8.3 Other Improvements
- Mesh Quality Assessment Tools
- Improvement of User Documentation
- More Unit Test Coverage
👇Click the “Read the original text” in the lower left corner to access the project!
End of the article, thank you for reading, and creating is not easy.
😁😁
Feel free to follow, comment, like, share, and recommend!
👇👇
【Previous Reviews】
Python + VTK + PyQt5: Detailed Implementation of the Open Source Mesh Generation Tool PyMeshGen GUIExample and Code for Reading ANSYS Fluent Mesh Files cas and mshWant to get started with mesh generation algorithms? You might want to check out PyMeshGenBuild your own 3D model viewer using Python + VTK + Tkinter
I used DeepSeek-V3.1 for PDE programming solutions, let’s see how the results are!
Using Qwen Code to implement CFD development automation AI workflow
I used Qwen3-Coder for PDE programming solutions, and it was completed in 3 rounds of dialogue!
Using Qwen3-Coder to solve a one-dimensional diffusion equation
Post-processing results of PyFR using ParaView
Installation and usage record of the open-source high-order solver PyFR2.1 (CUDA parallel version)
Make the NACA0012 airfoil move and turn into a fish
Compilation of the latest version 4.13.1 of the open-source mesh generation software Gmsh