Welcome to click “The Beauty of Algorithms and Programming” ↑ to follow us!
This article was first published on WeChat public account: “The Beauty of Algorithms and Programming”, feel free to follow for timely updates on more articles in this series.
The 51 microcontroller development board has high functional module independence and can achieve various functions. In this article, we mainly use a thermistor and a digital tube to display the real-time temperature of the environment.
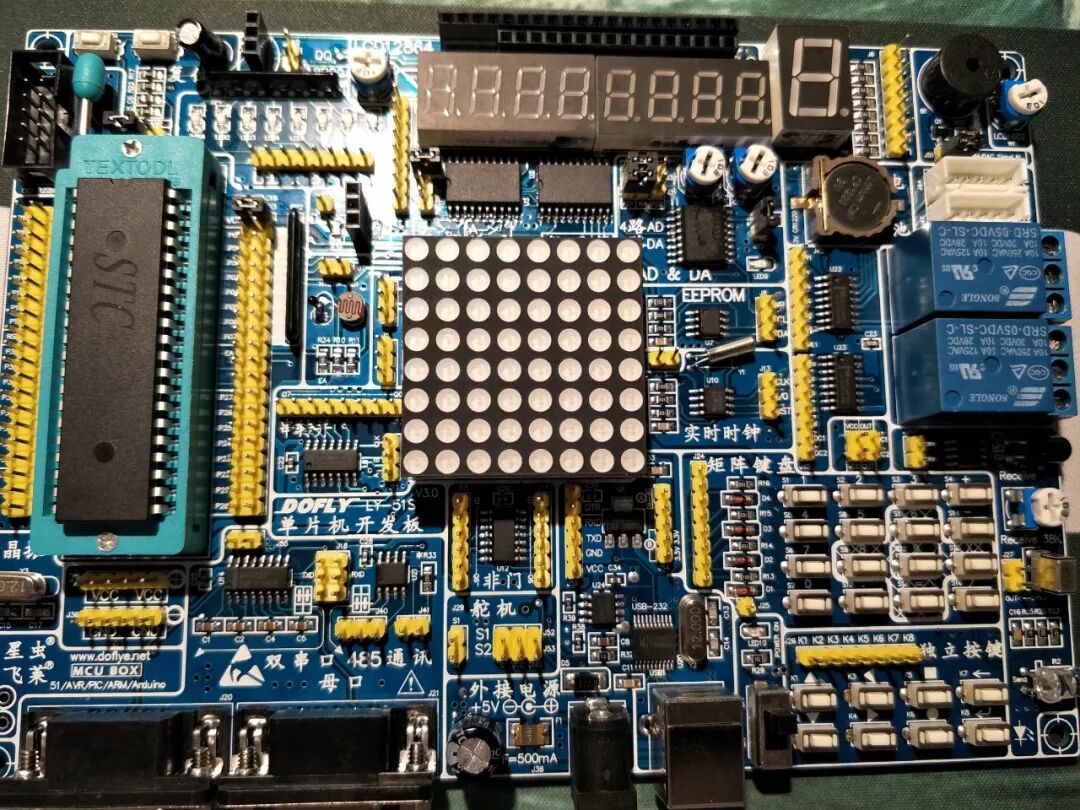
(The 51 microcontroller development board used in the experiment)
To implement the function, we need to understand the principle of temperature measurement using a thermistor. The typical characteristic of a thermistor is its sensitivity to temperature, exhibiting different resistance values at different temperatures. The thermistor used in this microcontroller is an NTC (Negative Temperature Coefficient) thermistor. NTC refers to the phenomenon and materials of thermistors that exhibit a decrease in resistance in an exponential relationship as temperature increases, having a negative temperature coefficient. Since the resistance-temperature change curve of the thermistor is nonlinear, and the computational capability of the 8-bit microcontroller is limited, we opted for a simpler approach in programming by using a lookup table instead of complex calculation formulas. Many may question the accuracy of the temperature measurement. Here, it is explained that the temperature accuracy mainly depends on the AD sampling accuracy, the precision of the temperature table, and the accuracy of the thermistor. As temperature changes, it causes variations in the resistance of the thermistor, which in turn leads to changes in the output voltage divider value. This output voltage is then processed by the microcontroller and ultimately displayed on the digital tube.
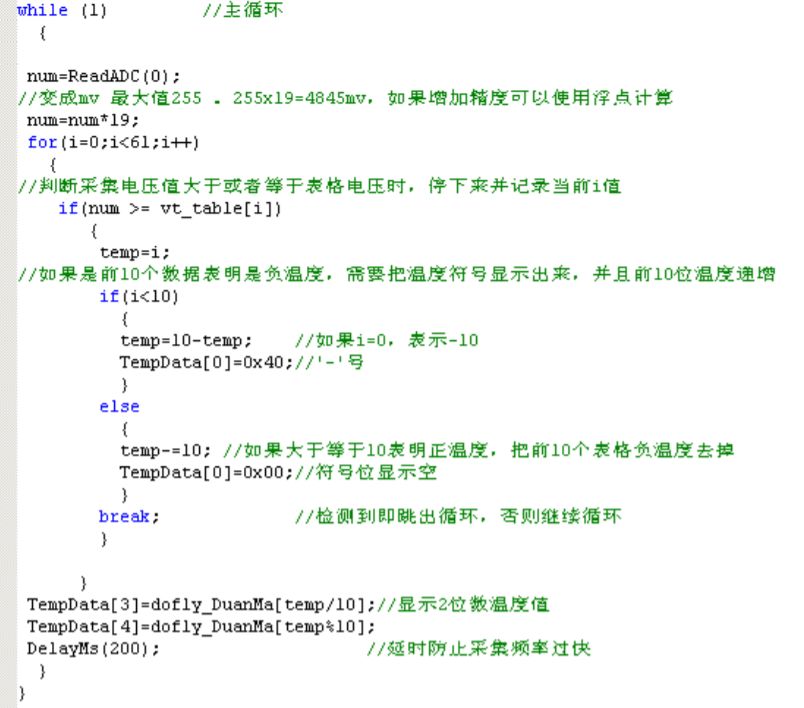
(Part of the program code)After writing the code, it needs to be compiled to generate a hex file, which is essential for programming the microcontroller, ending with .hex. Connect the microcontroller to the computer via serial port for communication, using the driver to connect to this port.
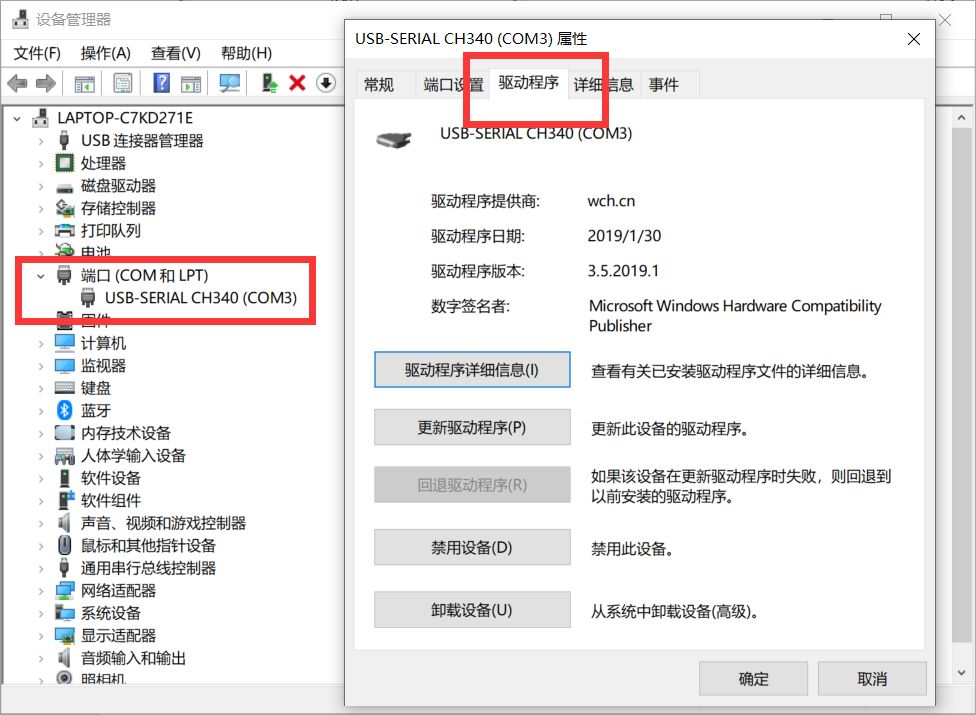
(Port settings)
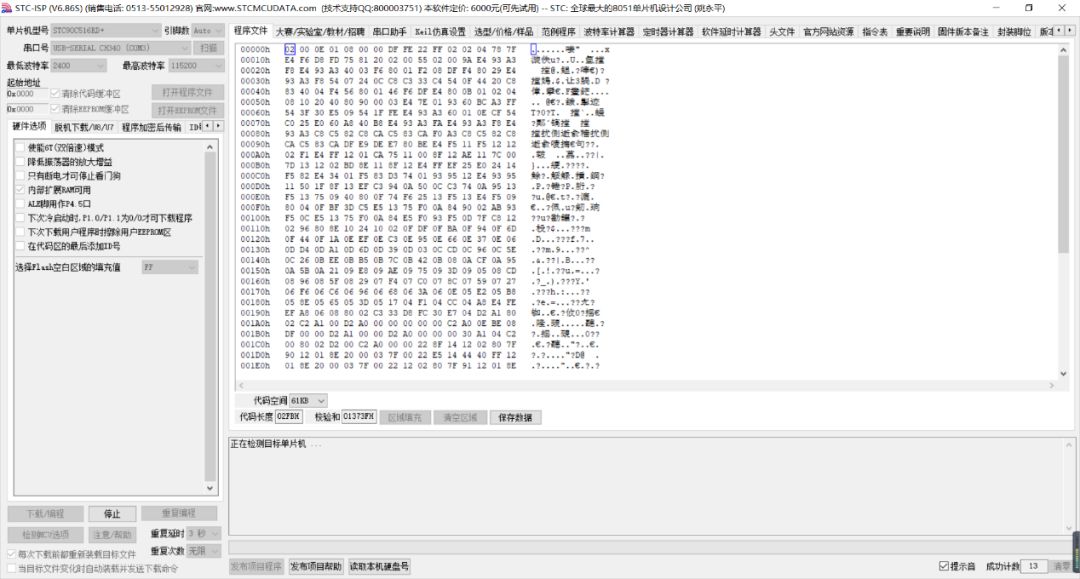
Select the STC-ISP programming software, ensuring it can properly drive the microcontroller, and then program the written code into the microcontroller. Choose the correct microcontroller model and serial port number.

(Pre-settings)
(Before starting the programming, turn off the main power of the development board)
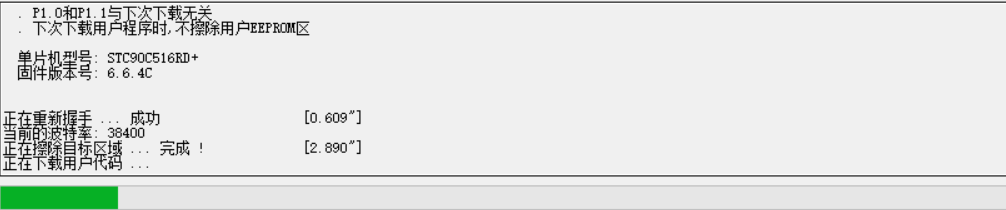
(After clicking download for 2 seconds, turn on the power to start programming)
After programming is complete, connect the corresponding modules of the development board using Dupont wires to achieve functionality. The wiring is shown in the diagram below.
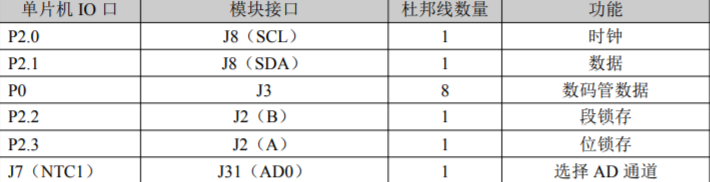
(Wiring diagram)Wiring is complete and functionality is achieved.

(Result image)
Conclusion
When using a microcontroller to implement functions, the design of the program and the reasonable arrangement and application of interfaces are particularly important. In the upcoming studies, we will delve into the working principles of microcontrollers and understand the roles of corresponding interfaces to achieve more functionalities.
References
“LY-51S V2.3 Development Board Manual”
END
Chief Editor | Zhang Zhenyue
Responsible Editor | Li Jinchao
where2go Team
WeChat ID: The Beauty of Algorithms and Programming

Long press to recognize the QR code to follow us!
Friendly Reminder: Click the lower right corner of the page “Write a message” to leave a comment, we look forward to your participation! We also look forward to your shares!