WSL: Windows Subsystem for Linux
WSL, short for Windows Subsystem for Linux, is a feature introduced by Microsoft for Windows that allows users to run Linux binary executables on Windows. WSL provides a fully compatible Linux kernel interface, enabling users to run a Linux environment without the need for a virtual machine or dual booting. This article will detail how to quickly deploy WSL, including installation, configuration, and usage.
How to Install WSL?
1. Enable WSL Feature
※ First, you need to enable the WSL feature in Windows. This can be done through the “Control Panel” or PowerShell commands.
Enable WSL through Control Panel:
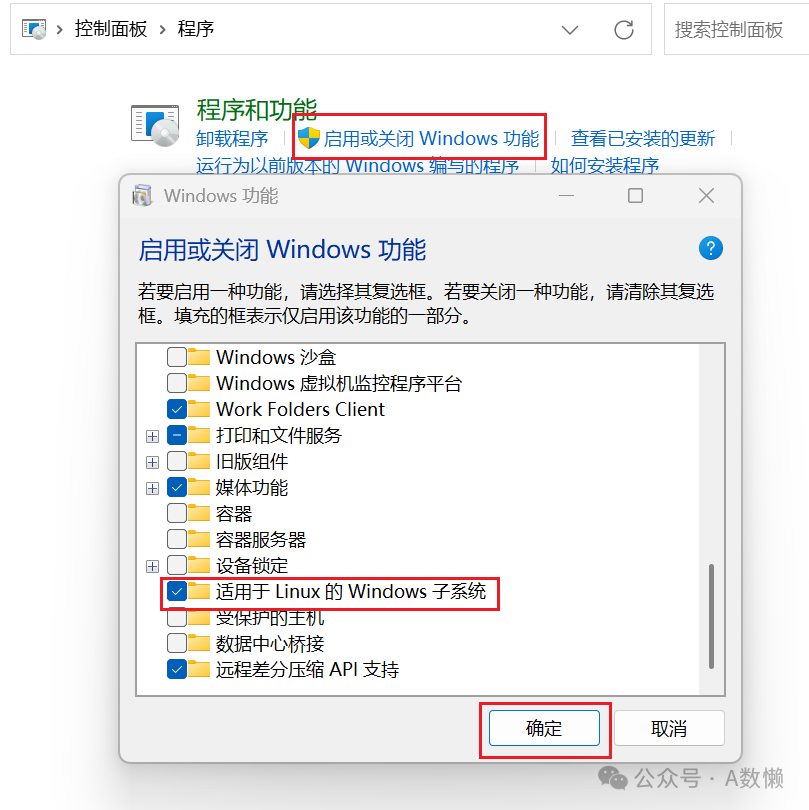
1. Open “Control Panel” > “Programs” > “Turn Windows features on or off”
2. Check “Windows Subsystem for Linux” and then click “OK”
3. The system will prompt you to restart, and after that, the WSL feature will be enabled
Or enable WSL through PowerShell:
1. Open PowerShell as an administrator
2. Enter the following command and press Enter:
dism.exe /online /enable-feature /featurename:Microsoft-Windows-Subsystem-Linux /all /norestart3. Enter the following command to enable the Virtual Machine Platform:
dism.exe /online /enable-feature /featurename:VirtualMachinePlatform /all /norestart4. Restart your computer to apply the changes
2. Install a Linux Distribution
※ After enabling the WSL feature, you can install the desired Linux distribution from the Microsoft Store or via the command line, such as Ubuntu, Debian, Kali Linux, etc.
Install Linux Distribution via Microsoft Store:
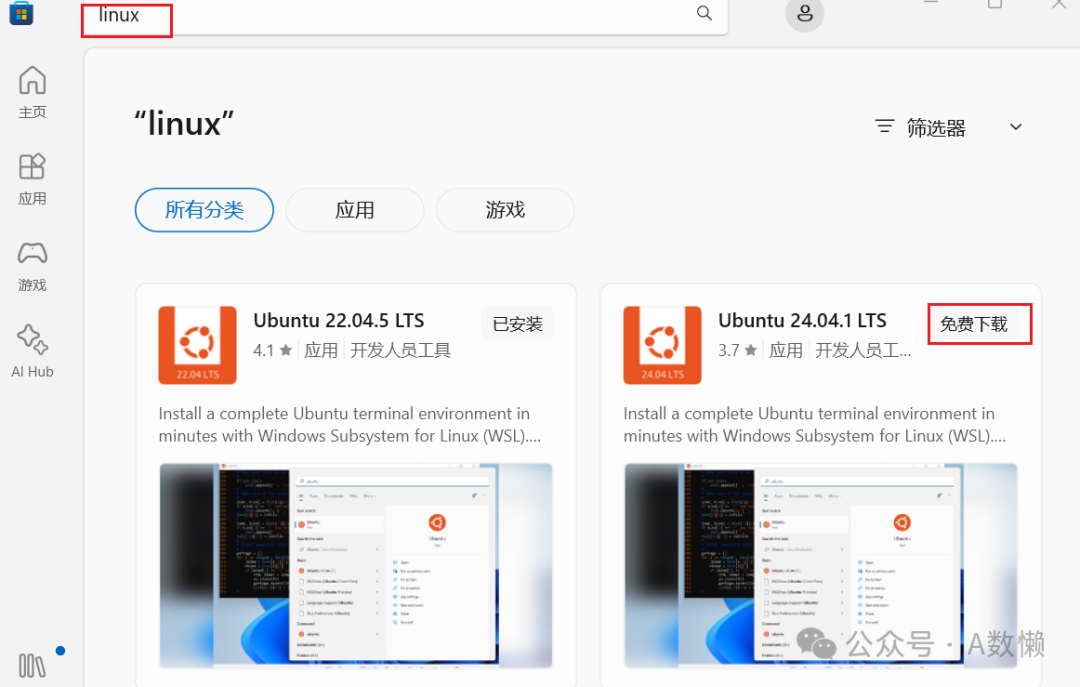
1. Open Microsoft Store
2. Search for “Linux” and select the distribution you want to install
3. Click “Get” to install
Or install Linux Distribution via Command Line:
1. Open PowerShell as an administrator
2. Enter the following command to install Ubuntu:
wsl --install -d Ubuntu3. Enter the following command to verify if the installation was successful:
wsl -l -v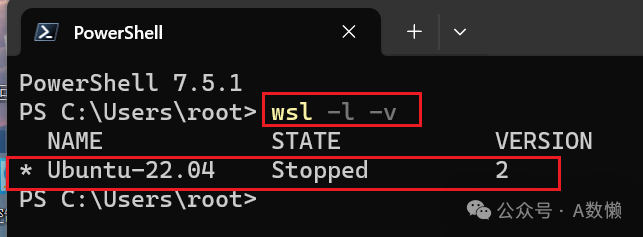
3. WSL Configuration
※ During the use of WSL, you may encounter a specific network issue where the system prompts: “Detected localhost proxy configuration, but not mirrored to WSL. WSL in NAT mode does not support localhost proxy.”
Set through Start Menu:
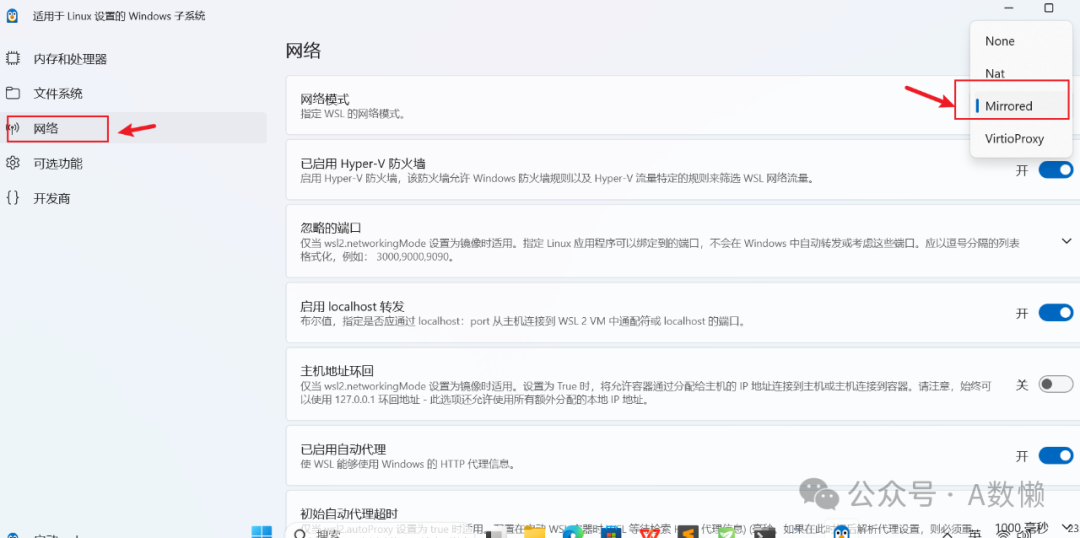
1. Open the Windows Start Menu, search for “WSL Settings”
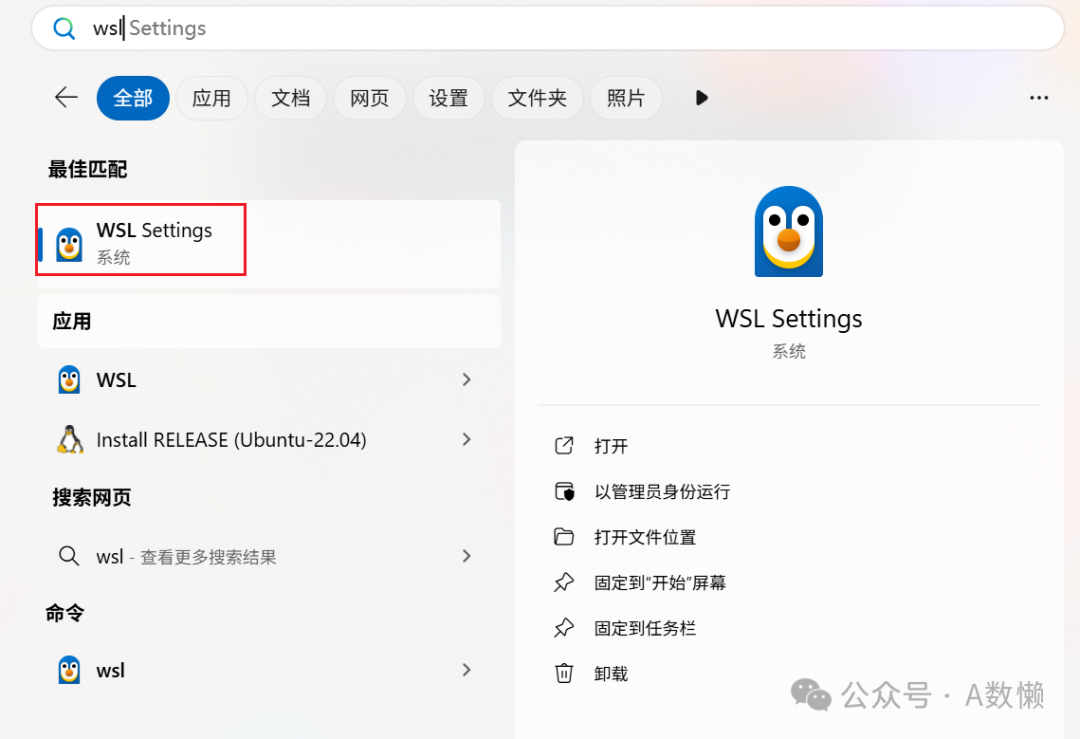
2. Click “WSL Settings” => “Network” => “Network Mode”, select “Mirrored”
Or set through configuration file:
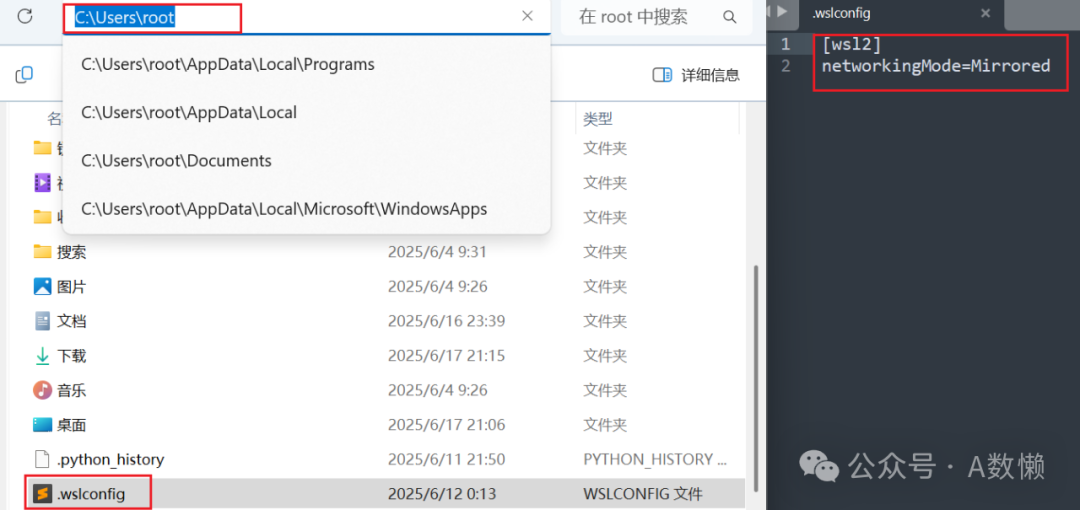
1. Open File Explorer, navigate to your user directory, usually at c:\Users\<your_username>
2. In that directory, create a new text file named .wslconfig and enter the following content in the file
[wsl2]
networkingMode=Mirrored
3. Open the command line and enter the following command to shut down the WSL distribution
wsl --shutdown4. Reopen the command line and enter the wsl command to start WSL
Modify WSL Mirror Source:
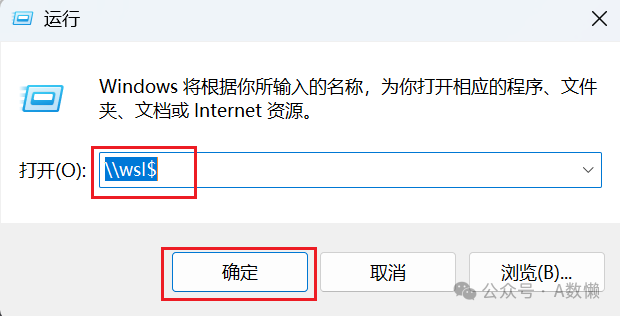
1. Find the WSL mirror source configuration file, use the “window+R” shortcut to open the “Run” command prompt, enter “\\wsl$”, and click “OK” to jump to the directory where the installed Linux distribution is located
2. Click through to /etc/apt, find the sources.list file, open it with Notepad, and replace the original mirror source:
The following are various domestic mirror sources:
Aliyun:
deb https://mirrors.aliyun.com/ubuntu/ jammy main restricted universe multiverse
deb-src https://mirrors.aliyun.com/ubuntu/ jammy main restricted universe multiverse
deb https://mirrors.aliyun.com/ubuntu/ jammy-security main restricted universe multiverse
deb-src https://mirrors.aliyun.com/ubuntu/ jammy-security main restricted universe multiverse
deb https://mirrors.aliyun.com/ubuntu/ jammy-updates main restricted universe multiverse
deb-src https://mirrors.aliyun.com/ubuntu/ jammy-updates main restricted universe multiverse
# deb https://mirrors.aliyun.com/ubuntu/ jammy-proposed main restricted universe multiverse
# deb-src https://mirrors.aliyun.com/ubuntu/ jammy-proposed main restricted universe multiverse
deb https://mirrors.aliyun.com/ubuntu/ jammy-backports main restricted universe multiverse
deb-src https://mirrors.aliyun.com/ubuntu/ jammy-backports main restricted universe multiverse
Tsinghua Source:
deb https://mirrors.tuna.tsinghua.edu.cn/ubuntu/ jammy main restricted universe multiverse
# deb-src https://mirrors.tuna.tsinghua.edu.cn/ubuntu/ jammy main restricted universe multiverse
deb https://mirrors.tuna.tsinghua.edu.cn/ubuntu/ jammy-updates main restricted universe multiverse
# deb-src https://mirrors.tuna.tsinghua.edu.cn/ubuntu/ jammy-updates main restricted universe multiverse
deb https://mirrors.tuna.tsinghua.edu.cn/ubuntu/ jammy-backports main restricted universe multiverse
# deb-src https://mirrors.tuna.tsinghua.edu.cn/ubuntu/ jammy-backports main restricted universe multiverse
deb http://security.ubuntu.com/ubuntu/ jammy-security main restricted universe multiverse
# deb-src http://security.ubuntu.com/ubuntu/ jammy-security main restricted universe multiverse
# deb https://mirrors.tuna.tsinghua.edu.cn/ubuntu/ jammy-proposed main restricted universe multiverse
# # deb-src https://mirrors.tuna.tsinghua.edu.cn/ubuntu/ jammy-proposed main restricted universe multiverse
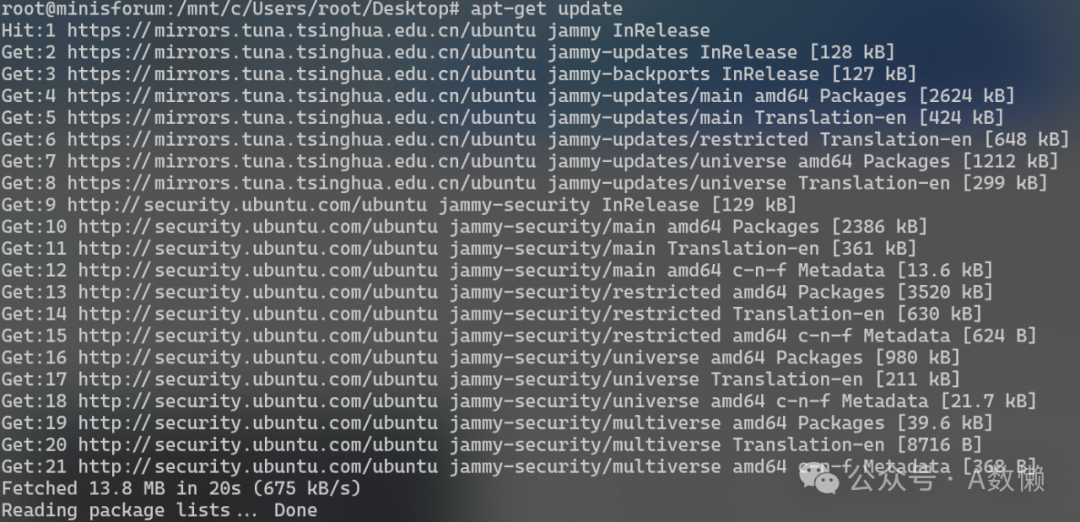
3. Enter the following command to update the mirror source list
sudo apt-get updatesudo apt-get upgrade
At this point, you can run both Linux and Windows on your Windows computer, sharing resources, enjoying the convenience of a graphical interface, and having a service running environment, such as installing databases, API interfaces, Docker, etc. For developers, this allows for excellent environment isolation, greatly improving development efficiency!