This article mainly covers the implementation of MQTT server connection and topic publishing in Python & the implementation of Python forms.
Refer to the following for setting up the MQTT server:
http://www.guyuehome.com/44993
Design Goals:
Implement remote control for faucet switch
Implement scheduled remote control for faucet
Implement a visual interactive interface
Based on the above design goals, the program can be roughly divided into three parts:
MQTT connection and publishing implementation
Interactive form and control implementation
Main program logic implementation
1. Python Implementation of MQTT Connection
and Topic Publishing
In Python, connecting to an MQTT server and implementing message publishing and subscription is usually done using the paho-mqtt client library. Below is a detailed explanation of connecting, publishing, and subscribing using this library:
Connecting to the MQTT Server
Follow these steps to connect to the MQTT server:
• Import the client module from the paho-mqtt library.
• Create a new mqtt.Client instance.
• Set the connection callback function, which is called when the client connects to the server.
• Connect to the MQTT server, providing the server address and port.
• Start the client’s network loop.
import paho.mqtt.client as mqtt_client
def on_connect(client, userdata, flags, rc):    if rc == 0:        print("Connected to MQTT Broker!")    else:        print("Failed to connect, return code %d\n", rc)
client = mqtt_client.Client("client-id")client.on_connect = on_connectclient.connect("broker_address", 1883)client.loop_start()
• import paho.mqtt.client as mqtt_client: This line imports the Paho MQTT client library and renames it to mqtt_client for use in the following code.
• def on_connect(client, userdata, flags, rc): This line defines a callback function named on_connect that is called when the client connects to the MQTT broker. The function receives four parameters: client instance object, any user-defined data, connection response flag, and connection result code.
• if rc == 0: This line checks the connection result code (rc). If rc equals 0, it indicates a successful connection.
• client = mqtt_client.Client(“client-id”): This line creates an MQTT client object and assigns a user-defined client ID to it.
• client.on_connect = on_connect: This line sets the on_connect function as the callback function when connecting to the MQTT broker.
• client.connect(“broker_address”, 1883): This line makes the client attempt to connect to the MQTT broker running at the specified address (“broker_address”) and port (1883).
• client.loop_start(): This line starts a new thread to handle the scheduling of the network loop and reconnections. This is non-blocking and runs in the background.
Publishing Messages
def publish_message(): client.publish("python/mqtt", "Hello MQTT")• def publish_message(): This line defines a function named publish_message, which does not require any parameters.
client.publish(“python/mqtt”, “Hello MQTT”): This line uses the publish method to publish a message to the topic “python/mqtt”. The content of the message is “Hello MQTT”.
Subscribing to Topics
• Set a message callback function that is called when a message is received from the subscribed topic.
• Use the subscribe method to subscribe to a topic.
def on_message(client, userdata, message):    print(f"Received message '{str(message.payload.decode())}' on topic '{message.topic}'")
client.on_message = on_messageclient.subscribe("topic")
• def on_message(client, userdata, message): This line defines a callback function named on_message that is called when the client receives a message from the subscribed topic. The function receives three parameters: client instance object, any user-defined data, and the received message object.
• print(f”Received message ‘{str(message.payload.decode())}’ on topic ‘{message.topic}’): This line prints the received message content and topic when a message is received. The message content is converted from byte format to string format by calling message.payload.decode().
• client.on_message = on_message: This line sets the on_message function as the callback function when a message is received from the subscribed topic.
• client.subscribe(“topic”): This line lets the client subscribe to the topic named “topic”. When a new message is published to this topic, the on_message function will be called.
Complete Code
import paho.mqtt.client as mqtt
def on_connect(client, userdata, flags, rc):    if rc == 0:        print("Connected successfully to MQTT broker")    else:        print("Connection failed with code %d" % rc)

def publish_message():    client.publish("python/mqtt", "Hello MQTT")
client = mqtt.Client()client.on_connect = on_connectclient.connect("mqtt.eclipse.org", 1883, 60)
# Starting the loopclient.loop_start()
publish_message()
In this code, we created an mqtt.Client instance, connected to the MQTT server, and published a message. Note that we used client.loop_start() to start the network loop, which will handle network events, including reconnections and resends in the background.
Run the program, and through the output, we can determine that the program has successfully connected to the MQTT server and published the topic:

2. Python Implementation of Form Display and Controls
Use Python’s Tkinter library to create a simple graphical user interface (GUI) application. This program will display a form containing an input field (text box) and a button. The user can enter text in the text box, and after clicking the button, the entered text will be displayed on a label within the form.
Step 1: Import the Tkinter Library
First, we need to import the Tkinter library and the tkinter.messagebox module, the latter is used to display pop-up message boxes.
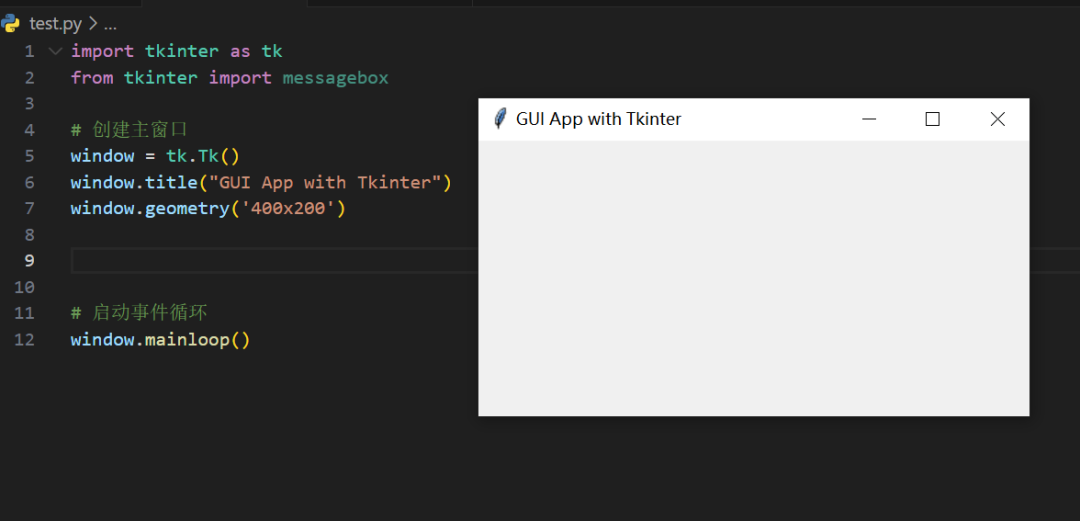
import tkinter as tkfrom tkinter import messageboxStep 2: Create the Main Window
Next, we will create a main window and set its title and size.
window = tk.Tk()window.title("GUI App with Tkinter")window.geometry('400x200')• window = tk.Tk(): This line creates a Tkinter window object, which serves as a container for all other Tkinter components (like buttons, labels, etc.). This window is often referred to as the main window or root window.
• window.title(“GUI App with Tkinter”): This line sets the window title to “GUI App with Tkinter”. This title will appear in the title bar of the window.
• window.geometry(‘400×200’): This line sets the initial size of the window to 400 pixels wide and 200 pixels high. The geometry method takes a string parameter formatted as ‘widthxheight’, where width and height are the pixel values of the window’s width and height.
Step 3: Add Input Field and Button
We need a text box for the user to input content and a button to perform an action (in this case, to display the input text).
# Input fieldentry = tk.Entry(window, width=50)entry.pack()
# Button actiondef on_button_click():    user_input = entry.get()    messagebox.showinfo("Message", f"You entered: {user_input}")
# Buttonbutton = tk.Button(window, text="Display Input", command=on_button_click)button.pack()
• entry = tk.Entry(window, width=50): This line creates an Entry component, which is a basic text input box where users can enter text. The parameter window indicates that this Entry component is a child of window, and width=50 sets the input box width to 50 characters.
• entry.pack(): This line adds the input box to the window. Pack is a layout manager used to control the position and size of components. After calling pack, the component will automatically resize to fit its content and be placed in the appropriate position within its parent component.
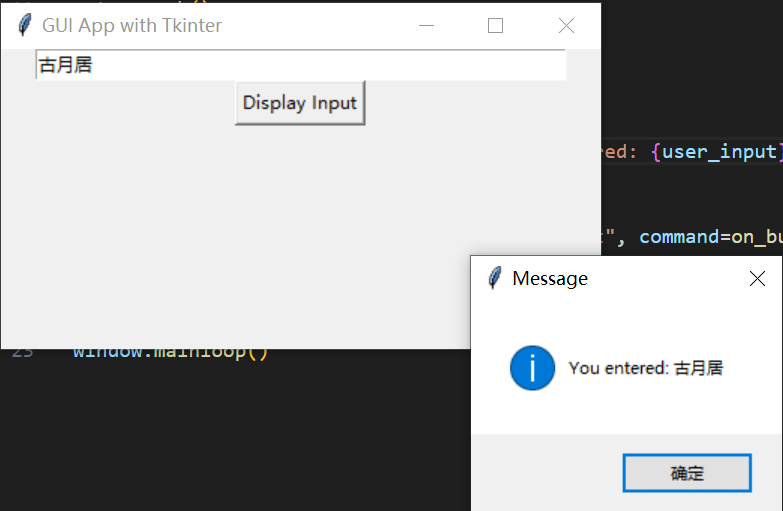
• def on_button_click(): This line defines a function that will be executed when the button is clicked.
• user_input = entry.get(): This line retrieves the text input by the user from the input box.
• messagebox.showinfo(“Message”, f”You entered: {user_input}”): This line calls the messagebox.showinfo function to display an information dialog box, with the title “Message” and the content being “You entered: ” followed by the user input text.
• button = tk.Button(window, text=”Display Input”, command=on_button_click): This line creates a Button component, with the button text being “Display Input”. When the button is clicked, the on_button_click function specified in the command parameter will be executed.
• button.pack(): This line adds the button to the window.
Step 4: Start the Event Loop
Finally, we need to start the application’s event loop so it can wait for user actions, such as button clicks.
window.mainloop()Combine the above code and run:
import tkinter as tkfrom tkinter import messagebox
# Create main windowwindow = tk.Tk()window.title("GUI App with Tkinter")window.geometry('400x200')
# Input fieldentry = tk.Entry(window, width=50)entry.pack()
# Button actiondef on_button_click():    user_input = entry.get()    messagebox.showinfo("Message", f"You entered: {user_input}")
# Buttonbutton = tk.Button(window, text="Display Input", command=on_button_click)button.pack()
# Start event loopwindow.mainloop()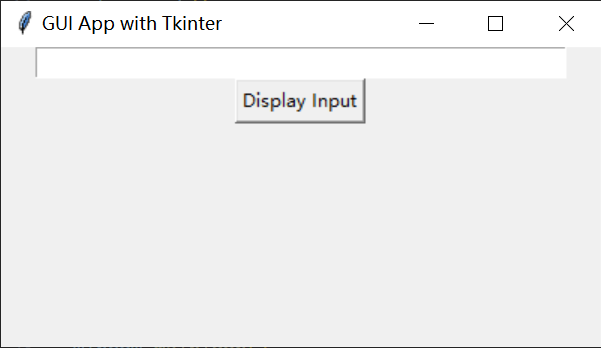
3. Complete Program Implementation:
Complete program:
import tkinter as tkfrom tkinter import ttkfrom paho.mqtt import client as mqtt_clientimport time
# MQTT server configurationbroker = '192.168.3.222'port = 1883topic = "slt"client_id = f'python-mqtt-{int(time.time())}'
# Function to connect to MQTT serverdef connect_mqtt():    def on_connect(client, userdata, flags, rc):        if rc == 0:            print("Connected to MQTT Broker!")        else:            print("Failed to connect, return code %d\n", rc)
    client = mqtt_client.Client(client_id)    client.on_connect = on_connect    client.connect(broker, port)    return client
# Function to publish messagesdef publish(client, msg):    result = client.publish(topic, msg)    status = result[0]    if status == 0:        print(f"Send `{msg}` to topic `{topic}`")    else:        print(f"Failed to send message to topic {topic}")
# Create a timer to publish messagesdef on_timer(client, interval, progress_var):    publish(client, "0")    progress_var.set(0)  # Reset progress bar    update_progress_bar(progress_var, interval, interval)  # Update progress bar
# Function to update progress bardef update_progress_bar(progress_var, interval, max_time):    progress_step = 100 / (max_time / 1000)    new_progress = progress_var.get() + progress_step    if new_progress < 100:        progress_var.set(new_progress)        root.after(1000, update_progress_bar, progress_var, interval-1000, max_time)    else:        progress_var.set(100)  # Complete
# Callback function for switch buttondef on_publish(client, msg):    publish(client, msg)
# Callback function for setting timerdef set_timer(progress_var):    try:        interval = int(timer_entry.get()) * 1000  # Convert seconds to milliseconds        progress_var.set(0)  # Reset progress bar        root.after(interval, on_timer, client, interval, progress_var)  # Set timer    except ValueError:        print("Please enter an integer value for the timer interval.")
# Create GUI windowroot = tk.Tk()root.title("MQTT Publisher")root.geometry("400x150")  # Set window size
# Timer setting area timer_frame = tk.Frame(root)timer_frame.pack(side=tk.TOP, fill=tk.X)timer_label = tk.Label(timer_frame, text="Timer (s):")timer_label.pack(side=tk.LEFT)timer_entry = tk.Entry(timer_frame, width=5)timer_entry.pack(side=tk.LEFT)progress_var = tk.DoubleVar()  # Progress bar variableprogress_bar = ttk.Progressbar(timer_frame, variable=progress_var, length=100, mode='determinate')progress_bar.pack(side=tk.LEFT, padx=5)btn_set_timer = tk.Button(timer_frame, text="Set Timer", width=10, command=lambda: set_timer(progress_var))btn_set_timer.pack(side=tk.LEFT, padx=5)
# Create switch buttonsbtn_on = tk.Button(root, text="ON", width=10, height=2, command=lambda: on_publish(client, "1"))btn_on.pack(pady=5)btn_off = tk.Button(root, text="OFF", width=10, height=2, command=lambda: on_publish(client, "0"))btn_off.pack(pady=5)
# Connect to MQTTclient = connect_mqtt()client.loop_start()
# Start GUI looproot.mainloop()
Program Function & Logic Analysis:
This Python program uses the tkinter and paho-mqtt libraries to create a simple graphical user interface (GUI) while implementing MQTT client functionality. The program’s logic can be divided into several main parts:
• MQTT Server Configuration defines the configuration information for the MQTT server, including server address, port, and topic.
The program generates a unique client_id for the MQTT client based on the current timestamp.
• MQTT Connection and Message Publishing The connect_mqtt() function is responsible for creating an MQTT client instance and setting the connection callback function on_connect. If the connection is successful, a success message is printed; if it fails, an error code is printed.
The publish() function is used to publish messages to the specified MQTT topic. A success message is printed upon successful publishing, and an error message is printed if it fails.
• GUI and Timer Logic The program creates a Tkinter window that includes timer settings, a progress bar, and on/off buttons.
The on_timer() function acts as a timer callback, publishing a “0” message and resetting the progress bar each time the timer expires.
The update_progress_bar() function is responsible for periodically updating the progress bar until it reaches 100%.
The on_publish() function is the callback for the buttons, which publish either a “1” or “0” message when pressed.
The set_timer() function retrieves the user input for the timer interval (in seconds) from the text box and sets the timer.
• GUI Layout The user interface is created using Tkinter’s Frame, Label, Entry, Button, and Progressbar components.
The progress_var is a DoubleVar object used for data binding with the progress bar component.
The pack() method is used to arrange the components’ positions in the window.
• Program Execution The program first attempts to connect to the MQTT server and starts the MQTT client’s event loop.
It then starts the Tkinter main event loop, waiting for user actions.
Overall, this program is an MQTT message publisher with a user interface that allows users to start/stop message publishing and set a timer for periodic message publishing. The program provides user interaction through a graphical interface while handling MQTT communication in the background, demonstrating how to combine MQTT communication with GUI applications.

↑ Hot course, limited time coupon! 🎉 Grab it quickly ↑