The PY32C673 series microcontrollers utilize a high-performance 32-bit ARM® Cortex®-M0+ core, with up to 64 Kbytes of embedded flash and 8 Kbytes of SRAM memory, operating at a maximum frequency of 72 MHz. The chip integrates multiple communication peripherals such as I2C, SPI, USART, a 12-bit ADC, four 16-bit timers, one 32-bit timer, as well as two comparators, two operational amplifiers, and one LCD driver.This article describes the process of programming and simulating the PY32C673 microcontroller using PY32 LINK.
1. Programming with PY32 LINK
1. Serial Connection:
|
PY32 LINK |
PY32C673 |
|
3.3V |
VCC |
|
GND |
GND |
|
DIO |
SWDIO |
|
CLK |
SWCLK |
2. Select the Emulator
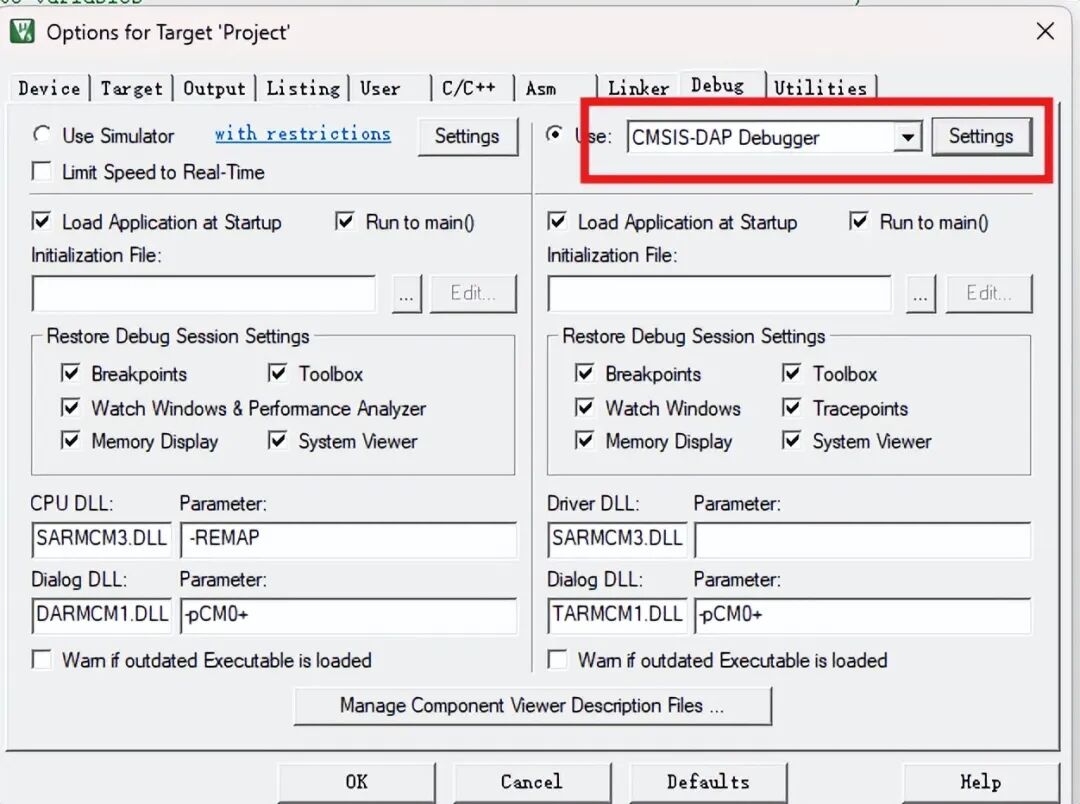
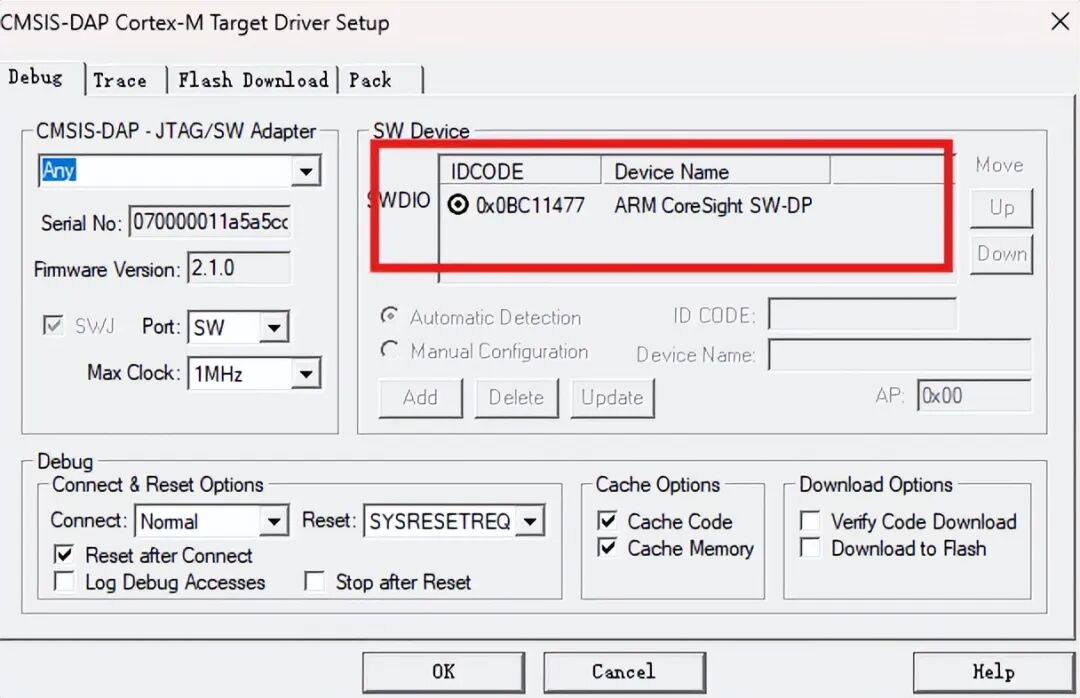
3. Compile and Download:
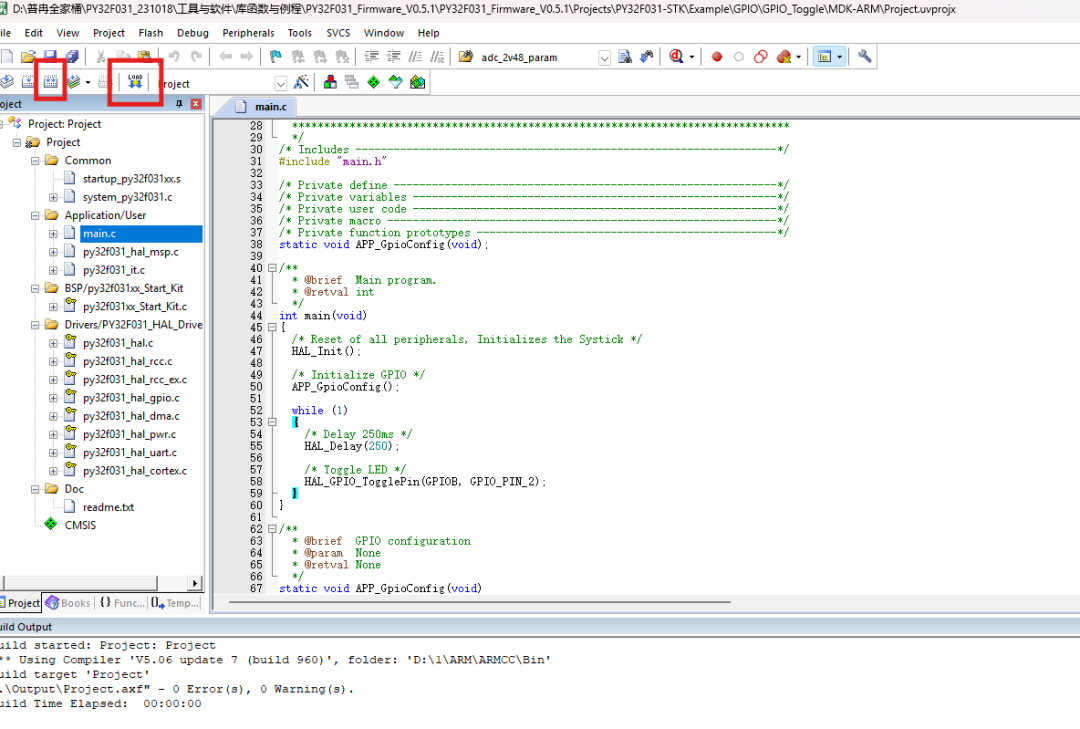
4. For the LED example routine, after successful programming, the LED will blink.
2. Using PY32 Link for Simulation
1. Connection of Simulation Tools
|
PY32 Link |
PY32C673 |
|
3.3V |
VCC |
|
GND |
GND |
|
DIO |
SWD |
|
CLK |
SWCK |
2. Select the Emulator
Select the magic wand and enter Debug to choose the emulator.
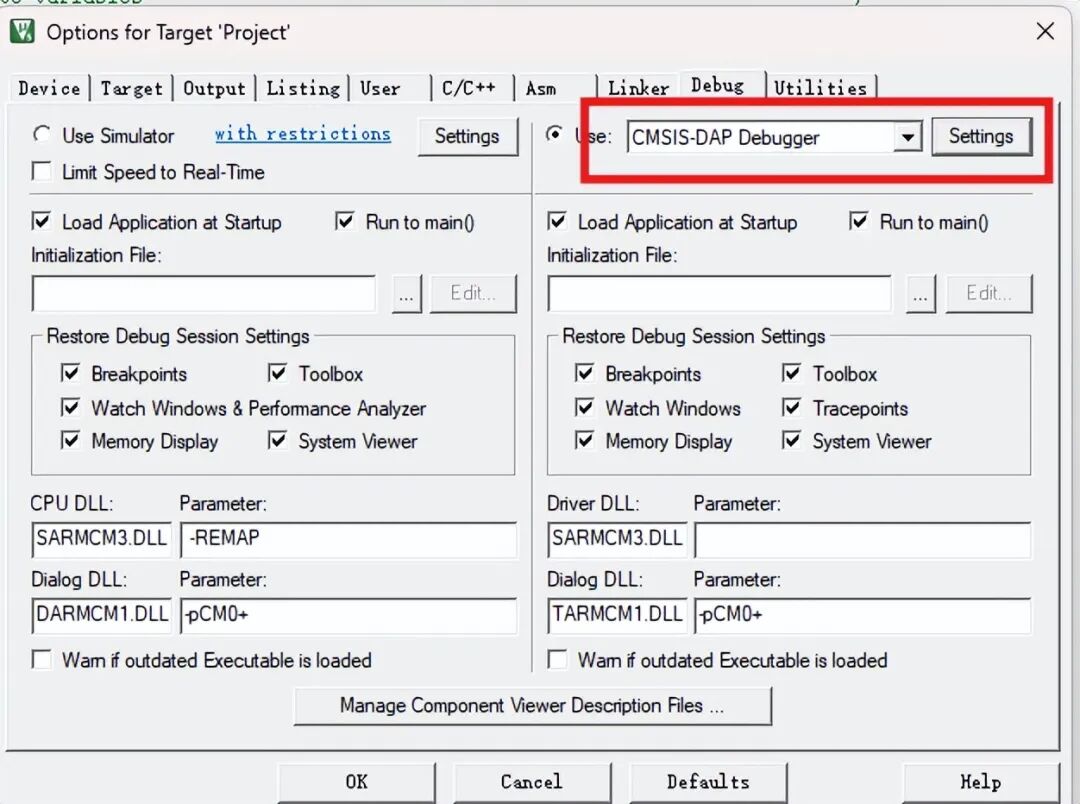
After selecting the emulator, click settings to check if the microcontroller has been recognized.
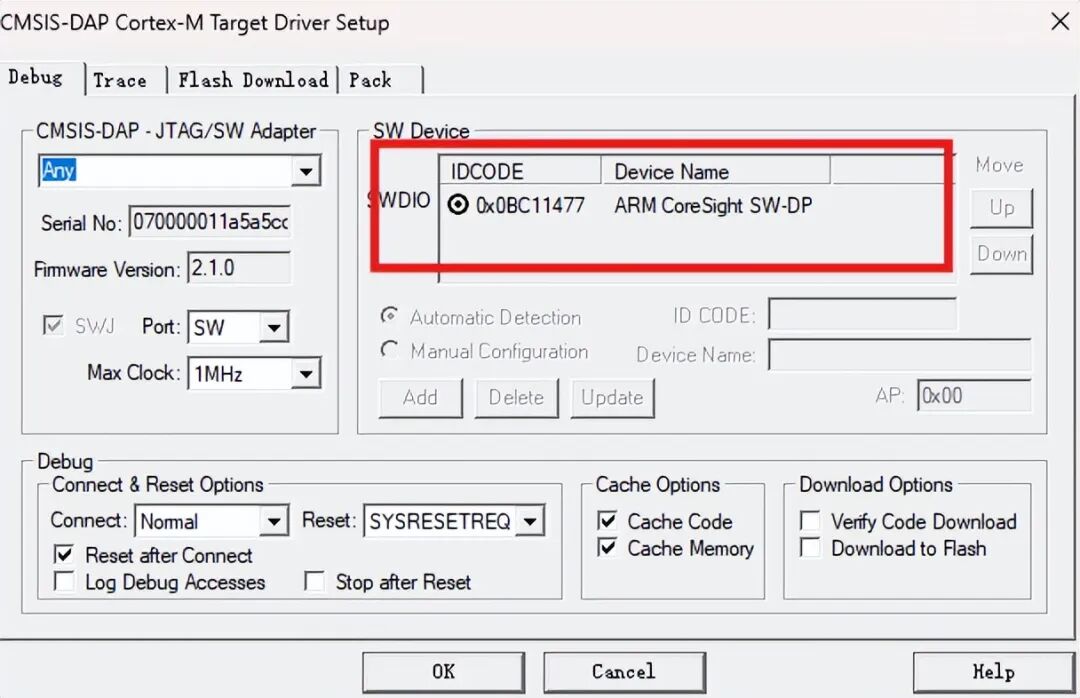
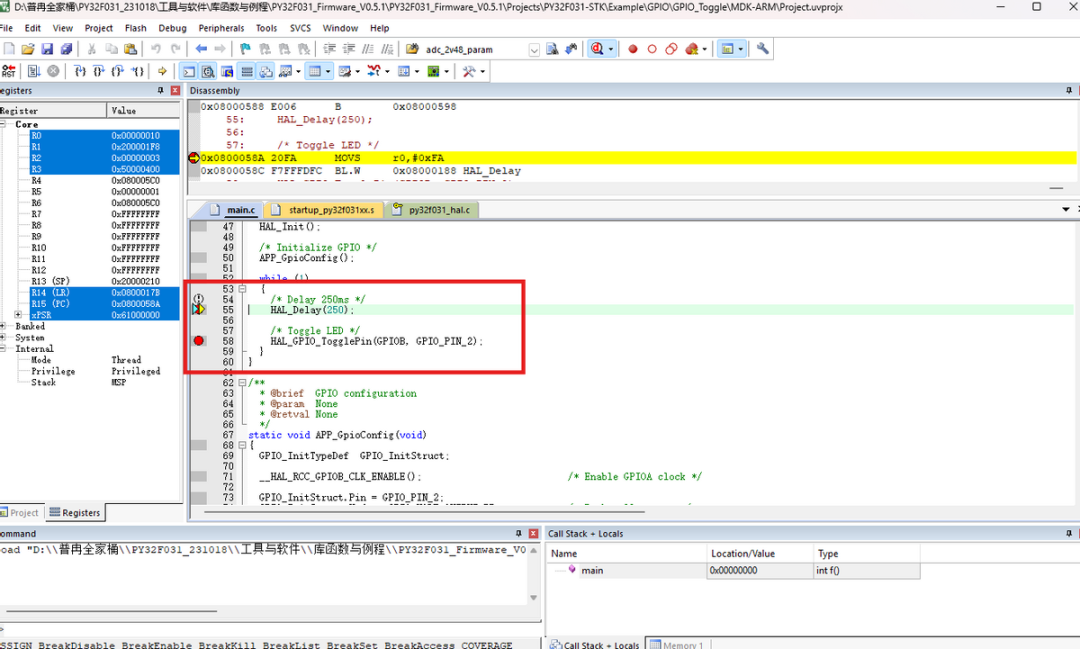
3. Click the magnifying glass to successfully enter simulation mode.
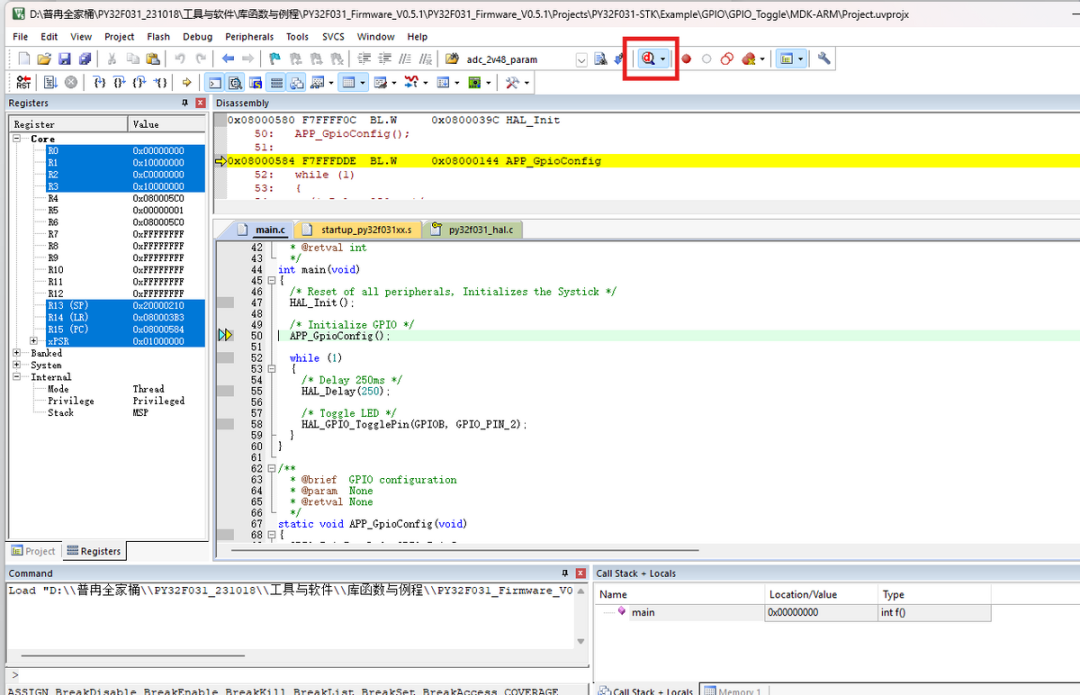
Set breakpoints and run successfully.