Introduction
Previously, we published an article about MultiTimer in the Embedded Open Source Project Selected Column. This week, some friends reminded me in the group that MultiTimer is quite different from the article. My first reaction was that it has been refactored. When experts improve their technical skills, they tend to refactor projects, so I checked GitHub to see what happened.
The master branch still has the previous v1 version, which is the same as the article:
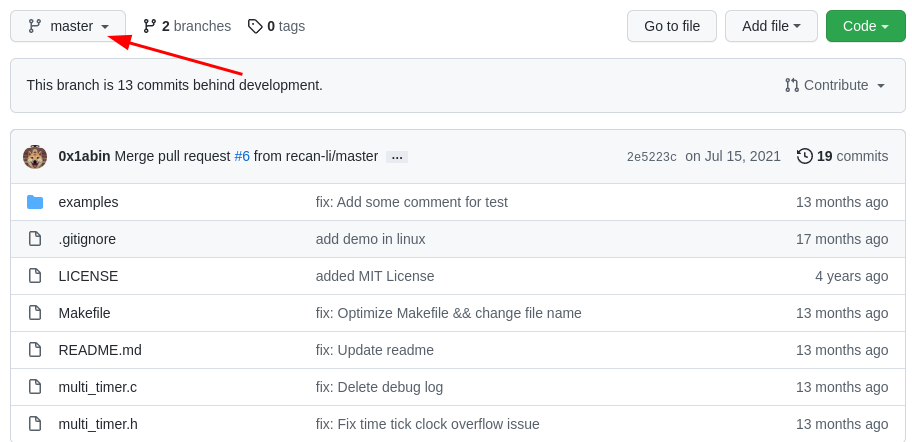
Sure enough, the development branch has refactored the project and released v2:
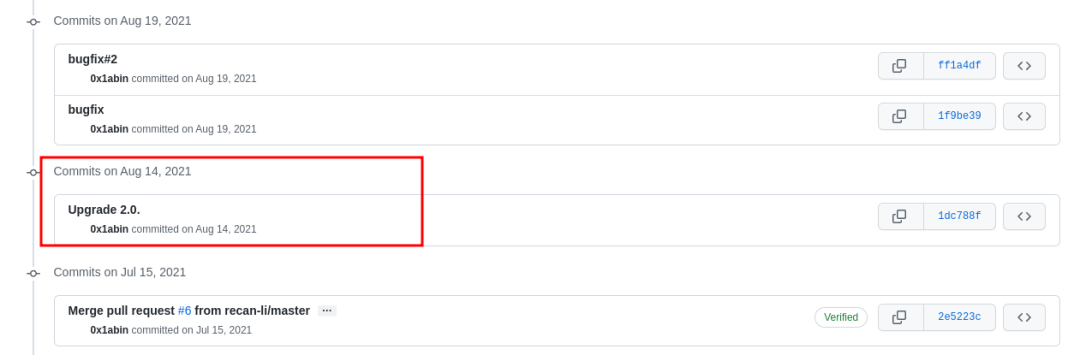
Synchronizing and updating the tutorial.
1. MultiTimer
This issue introduces the open-source project MultiTimer, an extensible software timer, created by 0x1abin, which currently has 399 stars and follows the MIT open-source license.
MultiTimer is a software timer extension module that can infinitely expand the timer tasks you need, replacing the traditional flag-based judgment method, allowing for more elegant and convenient management of the program’s time-triggered sequence.
Project address: https://github.com/0x1abin/MultiTimer
2. Porting MultiTimer
1. Porting Approach
During the porting process of the open-source project, the main reference is the project’s README document, which generally requires only two steps:
- ① Add the source code to the bare-metal project;
- ② Implement the required interfaces;
I used the BearPi IoT development kit for this article, with the main control chip being STM32L431RCT6:
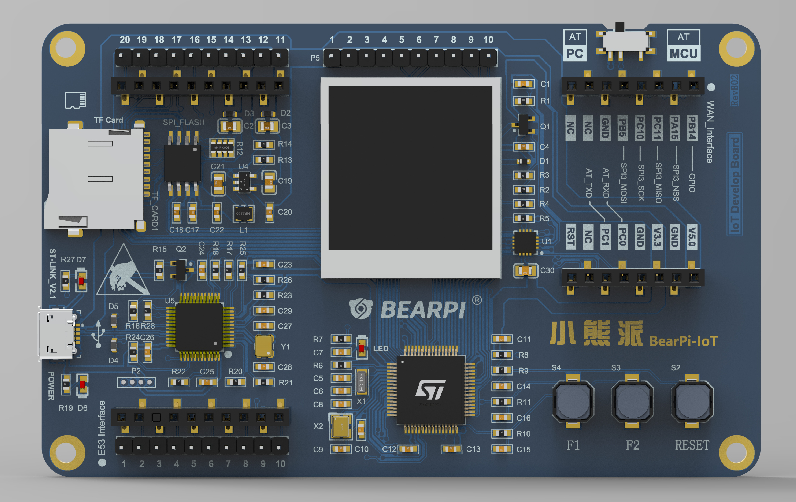
Before porting, a bare-metal project needs to be prepared. I generated it using STM32CubeMX, requiring the following configurations:
- Configure a serial port for printing information
- Redirect printf
2. MDK Porting
① Copy the MultiTimer source code into the project:
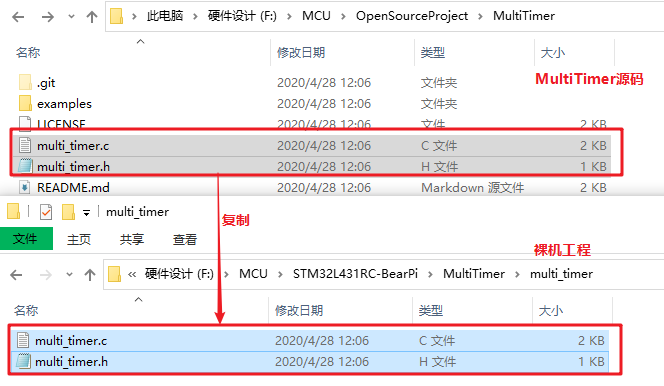
② Add MultiTimer’s source files in Keil:
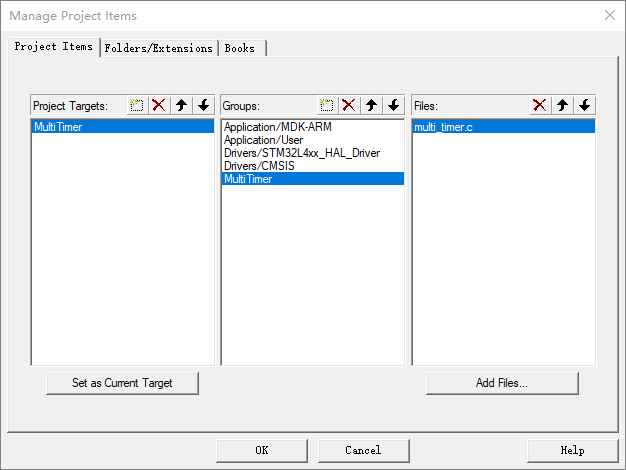
③ Add the MultiTimer header file path in Keil:
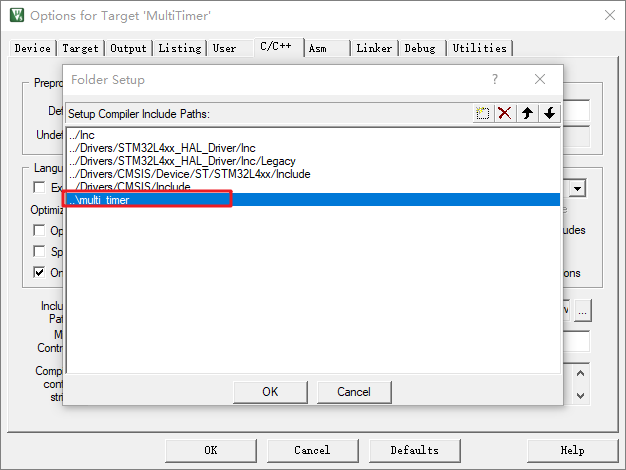
3. GCC Porting
① Copy the MultiTimer source code into the project:

② Add MultiTimer’s source files in the Makefile:
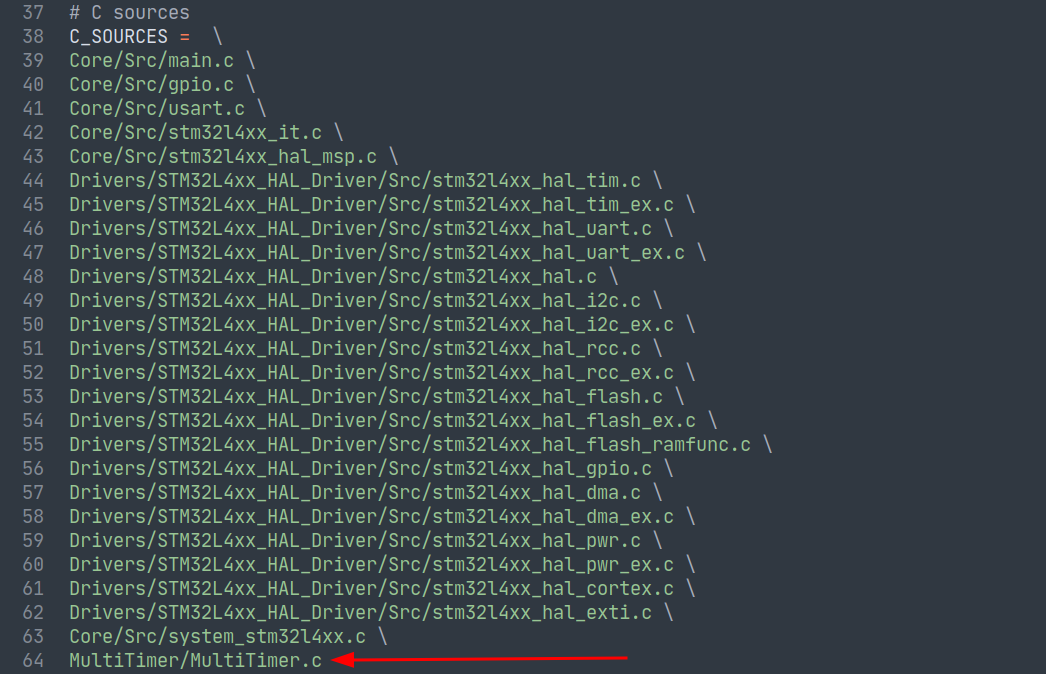
③ Add the MultiTimer header file path: 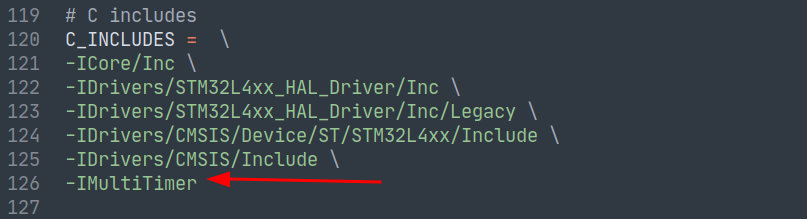
3. Using MultiTimer
Include the header file when using:
#include "multi_timer.h"
1. Provide Timer Base Signal
The base signal in MultiTimer needs to be installed. The API is as follows:
/**
 * @brief Platform ticks function.
 *
 * @param ticksFunc ticks function.
 * @return int 0 on success, -1 on error.
 */
int MultiTimerInstall(PlatformTicksFunction_t ticksFunc);
The PlatformTicksFunction_t function pointer is defined as follows:
typedef uint64_t (*PlatformTicksFunction_t)(void);
In this article, I used the STM32HAL library, so I provide it through Systick without setting additional timers.
Write a function to get the system tick:
/* Private user code ---------------------------------------------------------*/
/* USER CODE BEGIN 0 */
uint64_t PlatformTicksGetFunc(void)
{
  return (uint64_t)HAL_GetTick();
}
/* USER CODE END 0 */
Install this tick function in the main function:
/* USER CODE BEGIN 2 */
printf("MultiTimer v2 Port on BearPi board by mculover666!\r\n");
MultiTimerInstall(PlatformTicksGetFunc);
/* USER CODE END 2 */
2. Create Timer Object
The software timer is abstracted as the MultiTimer structure:
struct MultiTimerHandle {
    MultiTimer* next;
    uint64_t deadline;
    MultiTimerCallback_t callback;
    void* userData;
};

typedef struct MultiTimerHandle MultiTimer;
So you can directly create a software timer using the MultiTimer type:
/* USER CODE BEGIN PV */
MultiTimer timer1;
/* USER CODE END PV */
3. Timer Callback Function
The callback function type is defined as follows:
typedef void (*MultiTimerCallback_t)(MultiTimer* timer, void* userData);
Following the callback function format, create a timeout callback function:
/* Private user code ---------------------------------------------------------*/
/* USER CODE BEGIN 0 */
void timer1_callback(MultiTimer* timer, void* userData)
{
    printf("timer1 timeout!\r\n");
}
/* USER CODE END 0 */
4. Initialize and Start Timer
The API to start the timer is as follows:
/**
 * @brief Start the timer work, add the handle into work list.
 *
 * @param timer target handle struct.
 * @param timing Set the start time.
 * @param callback deadline callback.
 * @param userData user data.
 * @return int 0: success, -1: fail.
 */
int MultiTimerStart(MultiTimer* timer, uint64_t timing, MultiTimerCallback_t callback, void* userData);
Initialize the timer object, register the timer callback handler, and set the timeout (ms):
/* USER CODE BEGIN 2 */
printf("MultiTimer v2 Port on BearPi board by mculover666!\r\n");
MultiTimerStart(&timer1, 1000, timer1_callback, NULL);
/* USER CODE END 2 */
5. Timer Object Handling
The API definition for Timer object handling functions is as follows:
/**
 * @brief Check the timer expired and call callback.
 *
 * @return int The next timer expires.
 */
int MultiTimerYield(void);
Call the Timer object handling function in the main loop; the handling function will check if each timer in the linked list has expired, and if so, invoke the registered callback function:
/* Infinite loop */
/* USER CODE BEGIN WHILE */
while (1)
{
  /* USER CODE END WHILE */

  /* USER CODE BEGIN 3 */
  MultiTimerYield();
}
 /* USER CODE END 3 */
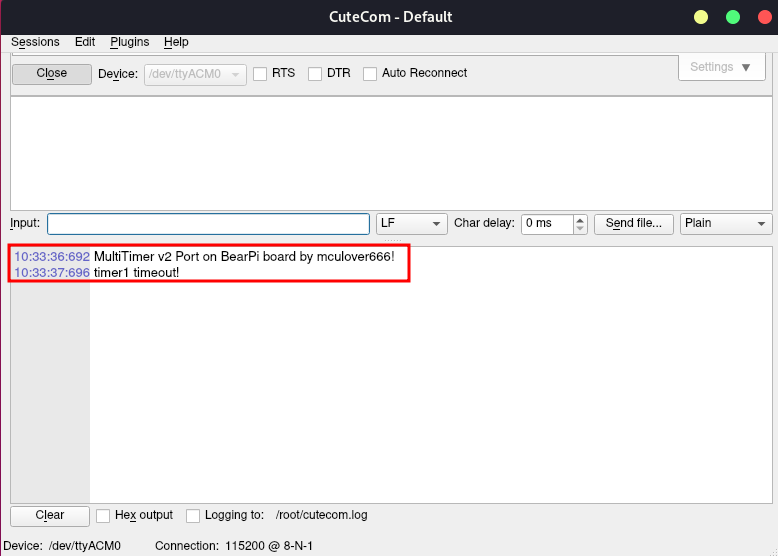
Next, compile and download, and check the printed logs in the serial assistant:
4. How to Trigger in a Loop
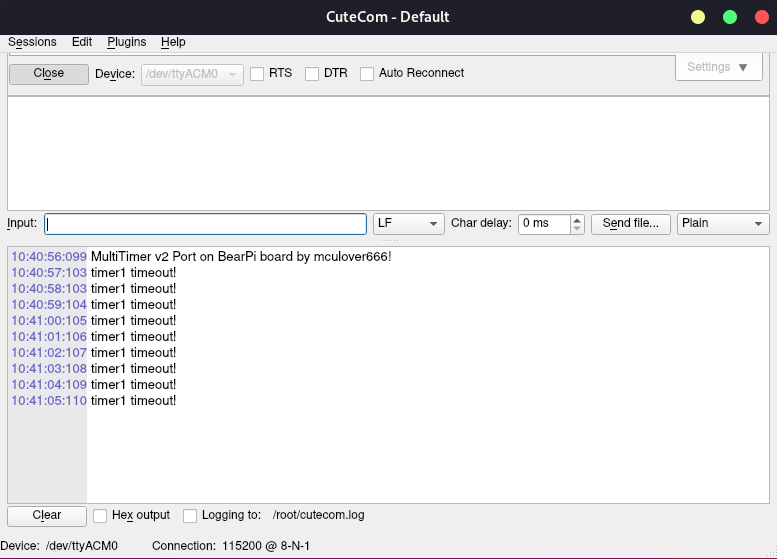
In the timer timeout function, simply restart the timer.
void timer1_callback(MultiTimer* timer, void* userData)
{
    printf("timer1 timeout!\r\n");

    // restart
    MultiTimerStart(&timer1, 1000, timer1_callback, NULL);
}
5. Design Philosophy Interpretation
Compared to the v1 version, the v2 version is significantly more concise, with only 4 functions and 82 lines of code in the C file.
In v2, a registration mechanism is used for the user to provide ticks, which has the advantage of greater portability, as it does not interfere with the system tick interrupt. Only when MultiTimer is scheduled can it obtain the system tick through the installed API, using this as a reference to determine if the timer has expired.
Version 2 also optimizes the linked list insertion mechanism; previously, it simply inserted nodes into a single linked list. Now, it inserts in a sorted manner based on timeout, making it more elegant:
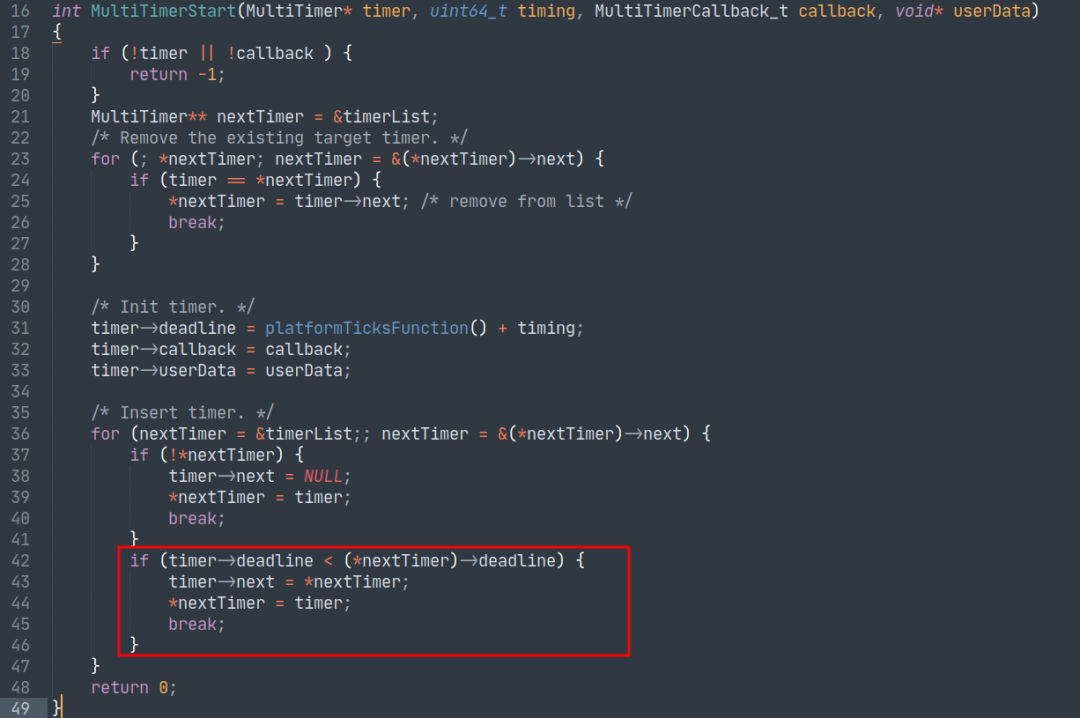
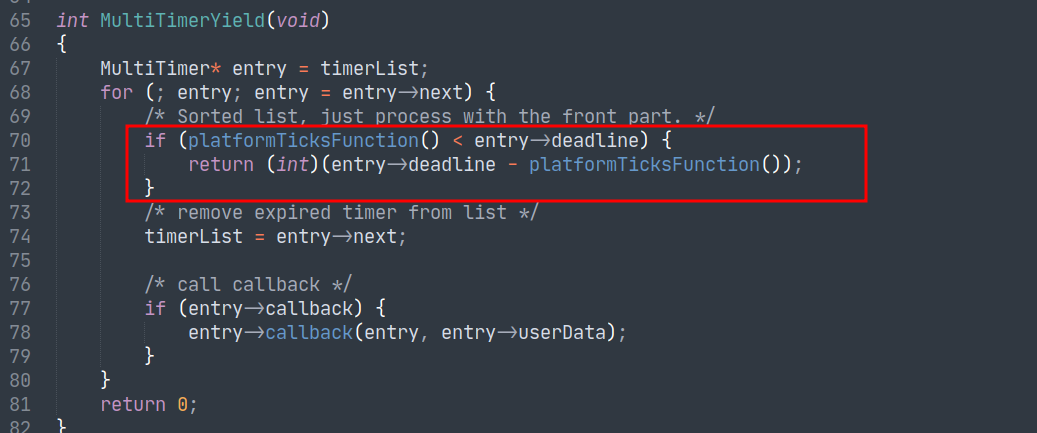
Besides being more elegant in insertion, this approach also enhances the performance of the software timer in two ways during scheduling:
- The timers with the nearest expiration are always prioritized for processing
- If the previous timers have not yet expired, scheduling can be ended directly
The implementation ideas for software timers can refer to the previous tutorial on version 1.
You may also like:
Share Embedded Software Debugging Methods and Some Useful Tools!
Embedded Mixed Bag Weekly | Issue 6 FlexibleButton
Reply with 1024 in the WeChat official account chat interface to obtain embedded resources; reply with m to view the article summary.