Hello everyone, this is the second lesson, where we will add an ultrasonic sensor to the previous programming car. The main function of the ultrasonic sensor is to measure distance, and using this feature, we can create very useful things. We’ll talk about the projects later; first, let’s get familiar with the sensor.
Ultrasonic Sensor
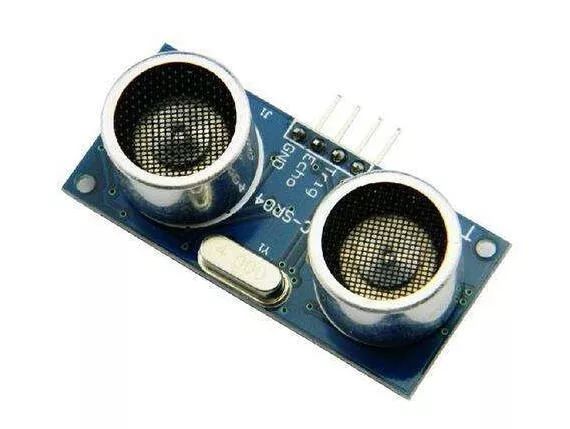
The most commonly used model in maker projects is: HC-SR04
As for the specific principles, I can explain the general concept of ultrasonic waves, but I can’t clearly explain the triggering of high and low levels. Interested students can search for it on Baidu.
What we need to know is how to use it.
Previously, my car, which everyone has seen, used an expansion board to drive the motor:
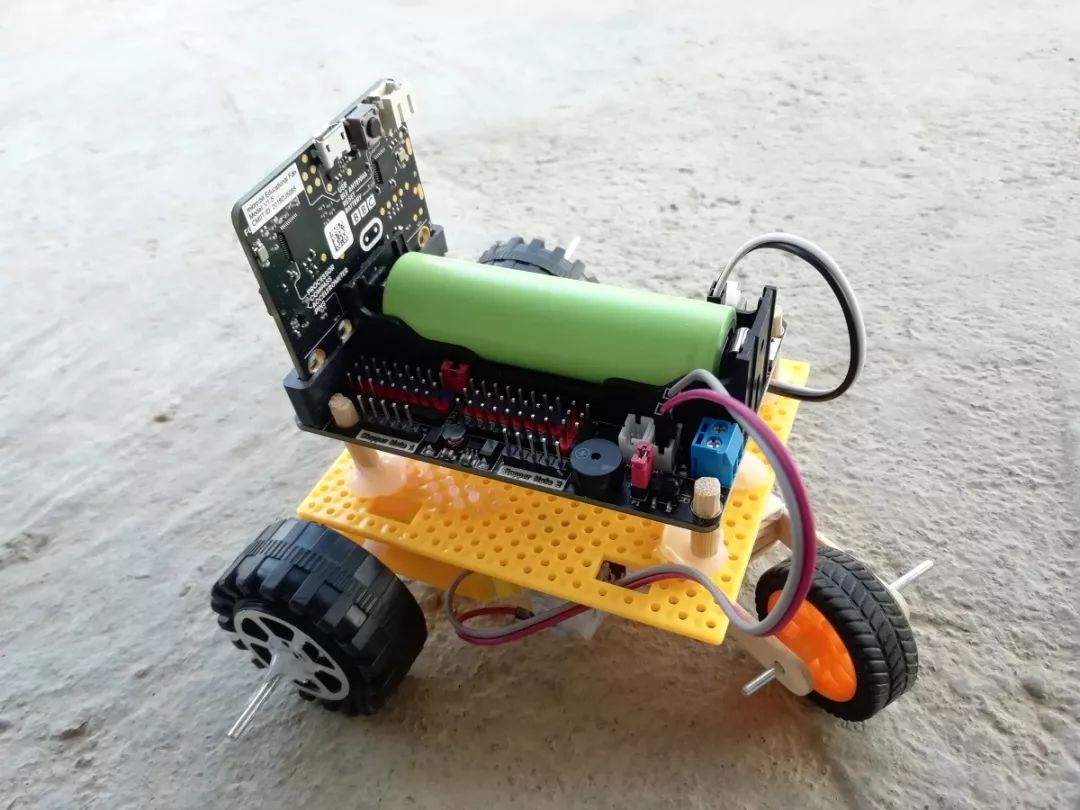
The expansion board looks like this:
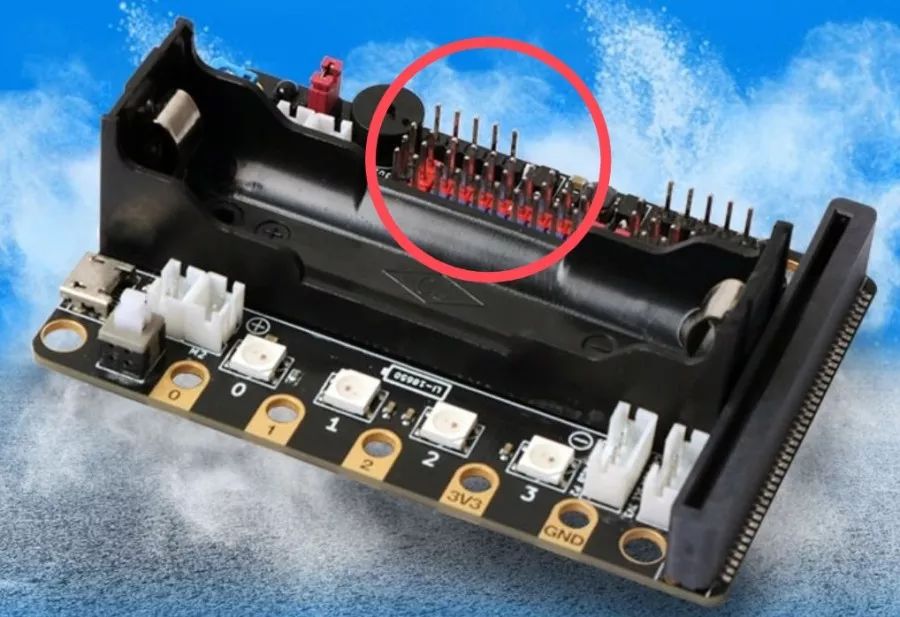
There are many pin headers next to it, which can be connected to our ultrasonic sensor.

Note:
The ultrasonic sensor has four pins, which are:
1. VCC, power supply of 5V (must be 5V; I have personally tested that 3.3V is ineffective);
2. GND for ground;
3. Trig for triggering control signal input, connected to a pin;
4. Echo for echo signal output, connected to a pin.
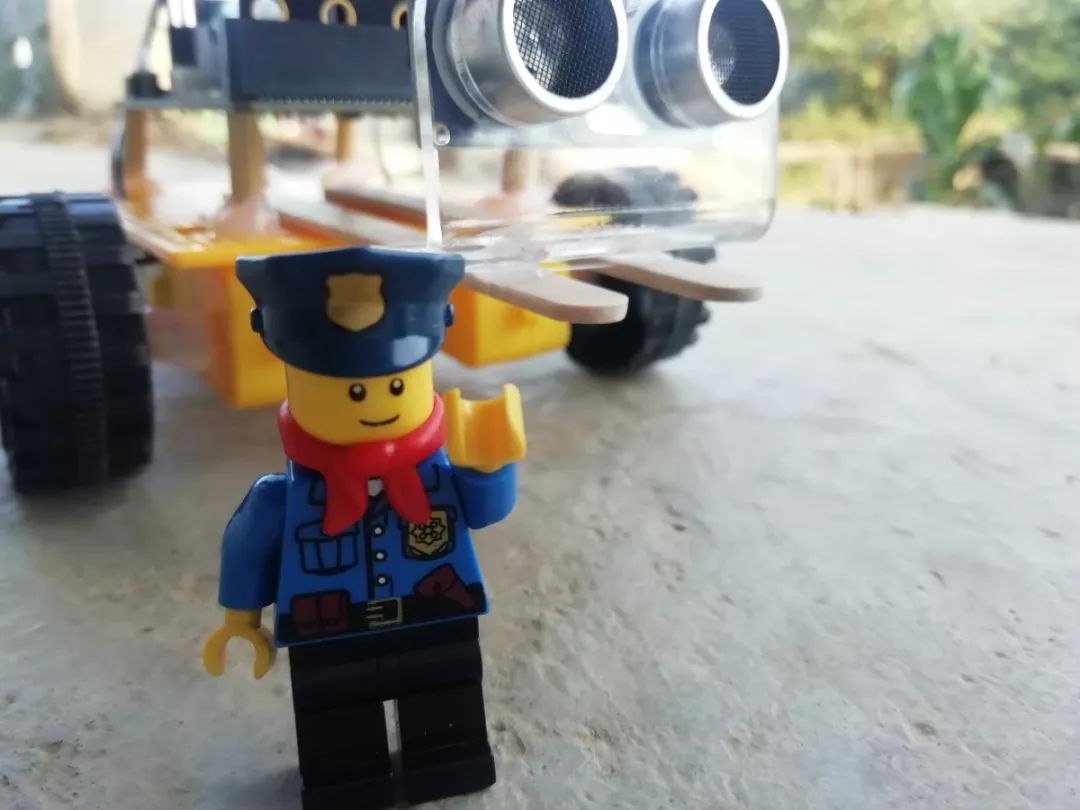
Now, we have assembled it:
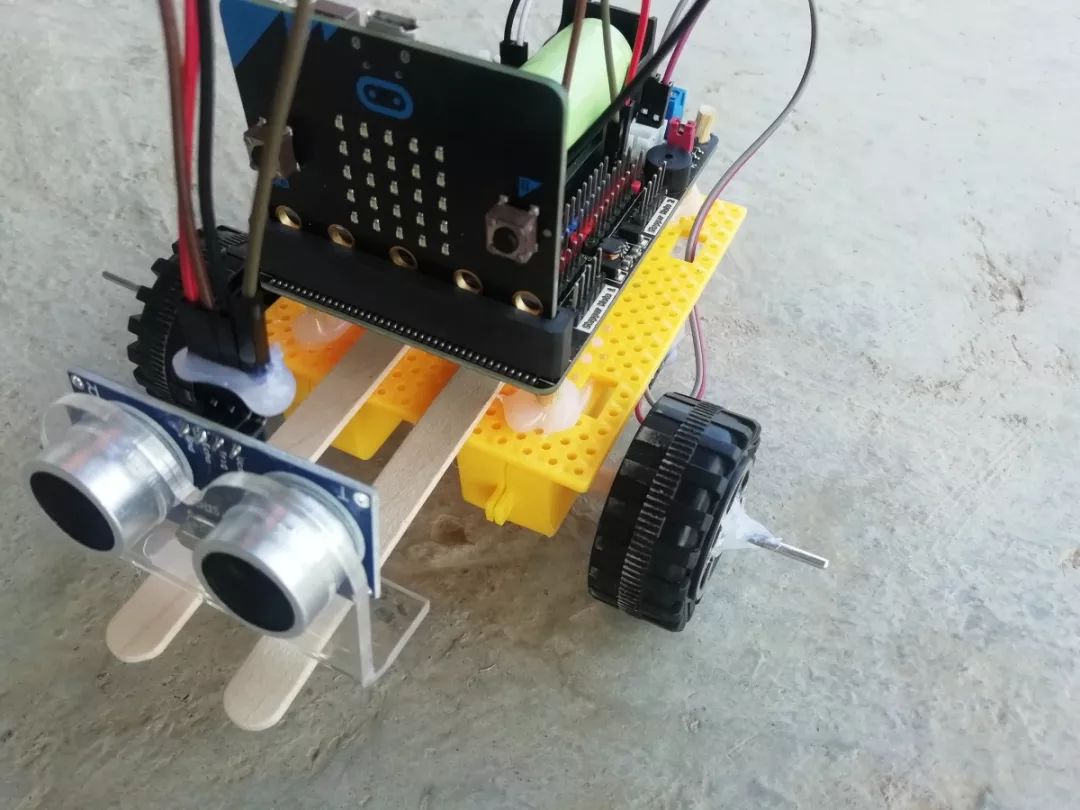
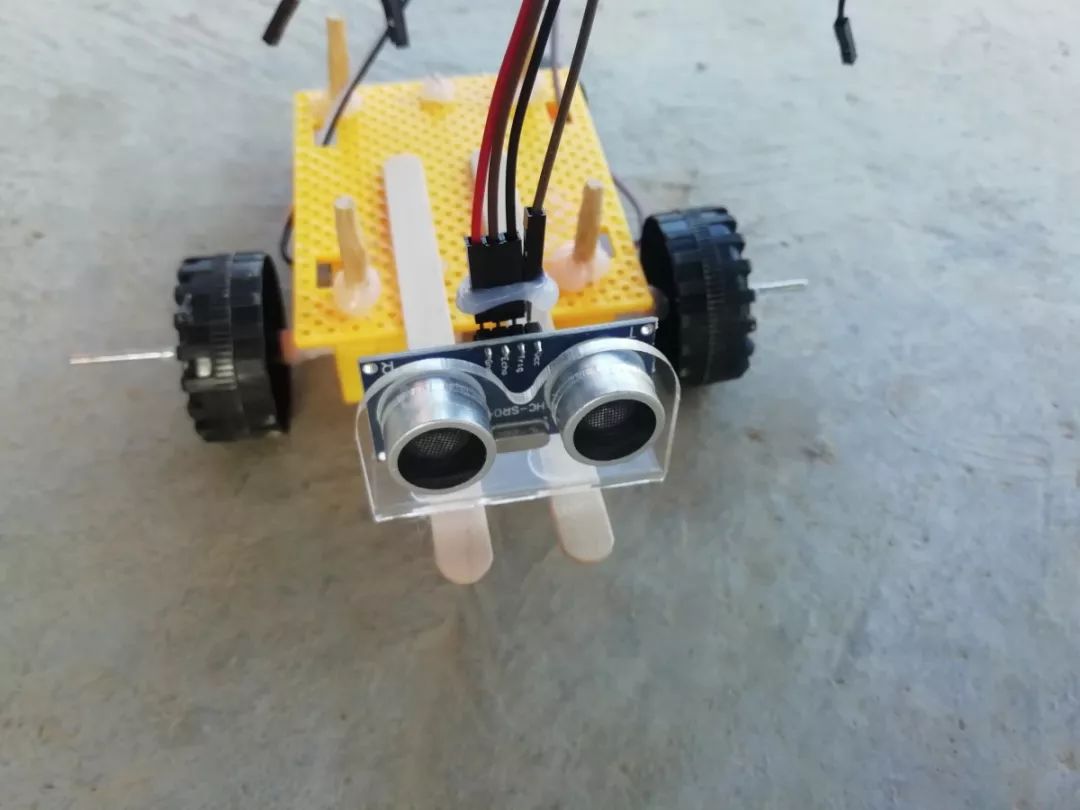
Please ignore my use of ice cream sticks to hold it together.
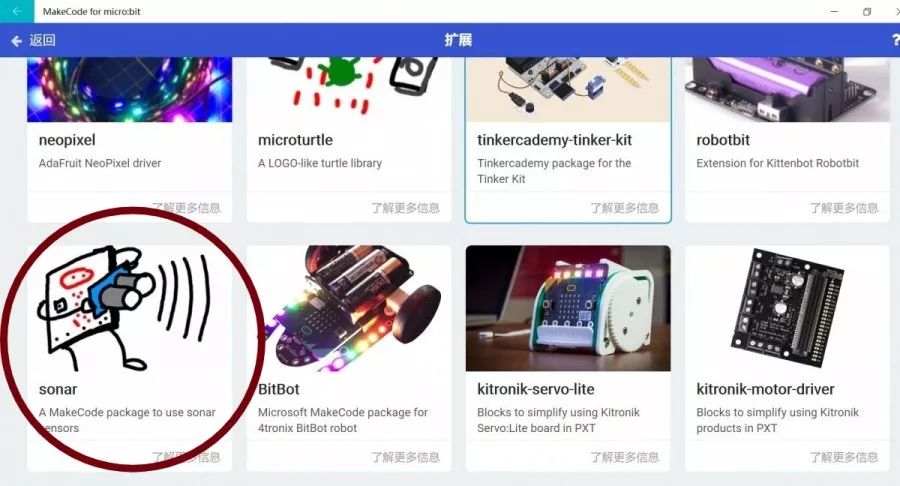
Step 1: Go to the “Extensions” and find the sonar extension block:
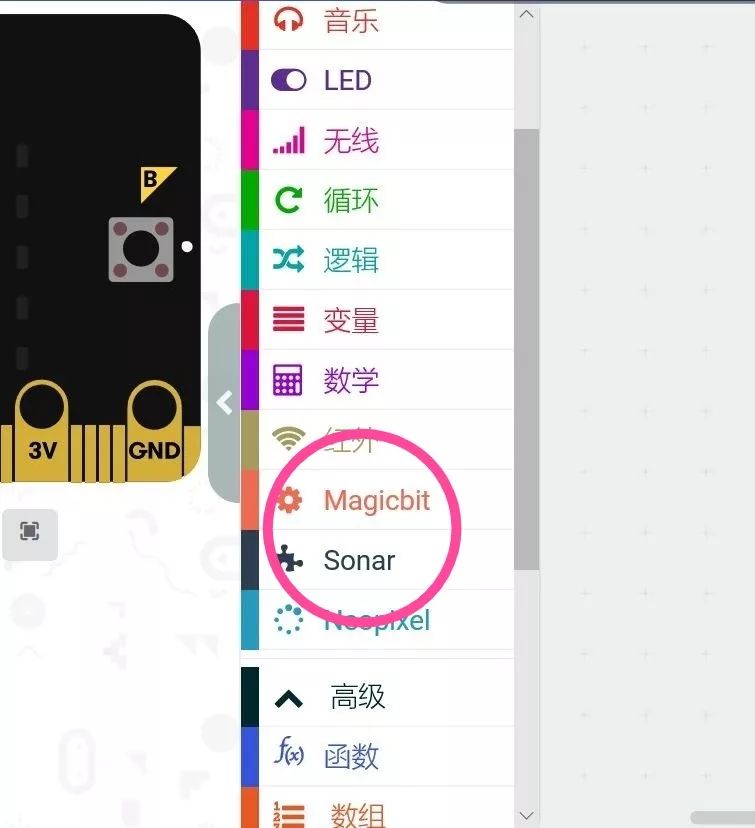
Then start programming, ensuring that you have these two blocks in your loaded program:
Now, let’s officially begin:
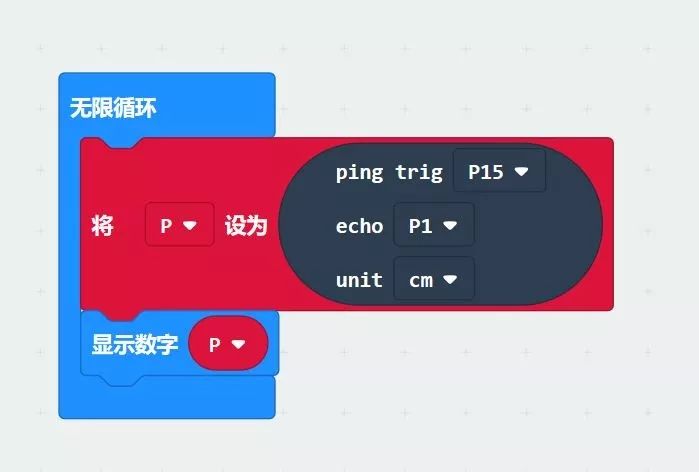
Display the ultrasonic distance reading on the microbit screen
Note:
1. The red module is the “Variables” module. I set a variable P in the “Variables” module, which is the distance read by the ultrasonic wave.
2. Regarding setting the value of P, the black module retrieves it from the newly loaded sonar module; pay attention to which port connects to which pin, and do not make mistakes. The last unit is the unit symbol; I am Chinese, so I used centimeters.
3. Finally, use the first blue module to display P.
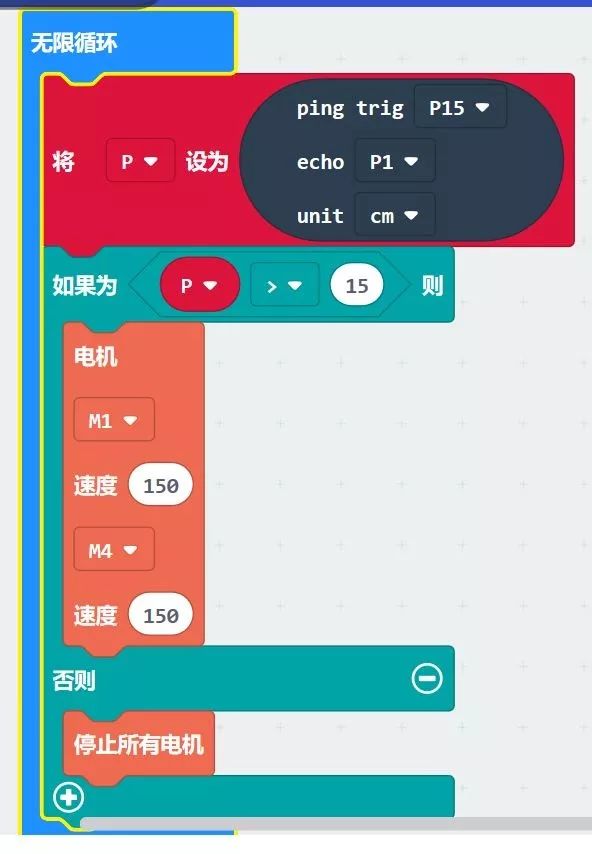
Stop ultrasonic sensing
Note:
1. A logical choice is used here, because the maximum reading range of the ultrasonic wave can reach 250cm, so we set a closer distance for it to stop when it sees a wall.
I set it to 15cm.
2. After reading the data of P, we determine if it is greater than 15, then continue moving forward; if less than 15, then stop.
(I wonder if any experts have easier programs to operate; feel free to leave comments for discussion.)
Ultrasonic Car Following
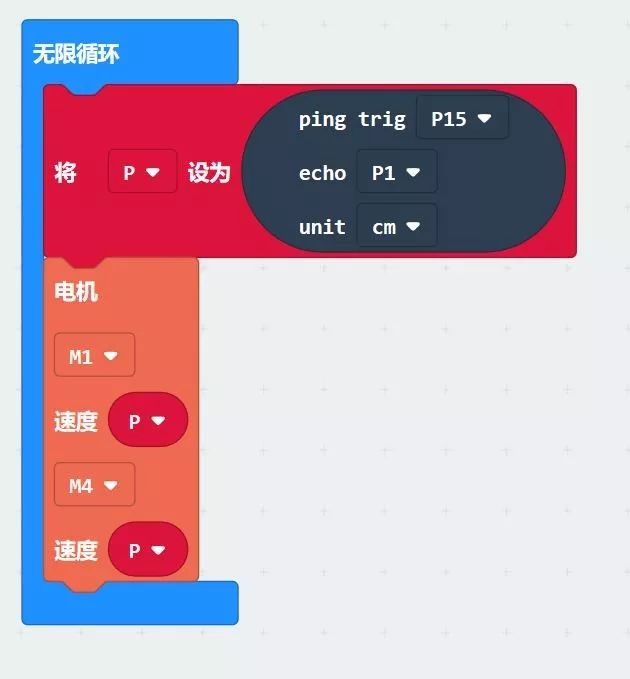
Note: I want to create a program that allows the car to follow a person, or to place an object in front of it so that it can continuously follow. However, during the practical operation, it was quite unfortunate as the car easily got stuck and could not move. I am not sure if it is due to the ultrasonic sensor.

Finally, these are the three small examples. I hope they can help everyone. Thank you. If you like it, please share and follow. Haha!