
Follow STEM graphical programming education to gain access to a wealth of tutorials


This tutorial is from the Meow Family Forum—Zhao Dad’s work;
Thanks to Zhao Dad for adding the tutorial for Micro:bit,

The 5X5 LED screen of Micro:bit;
It also serves as a light sensor;
Not only can it sense light;
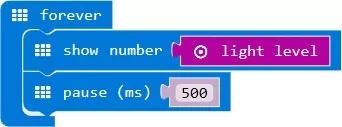
It can also display the corresponding light value;
Let’s write a small program to get to know it.
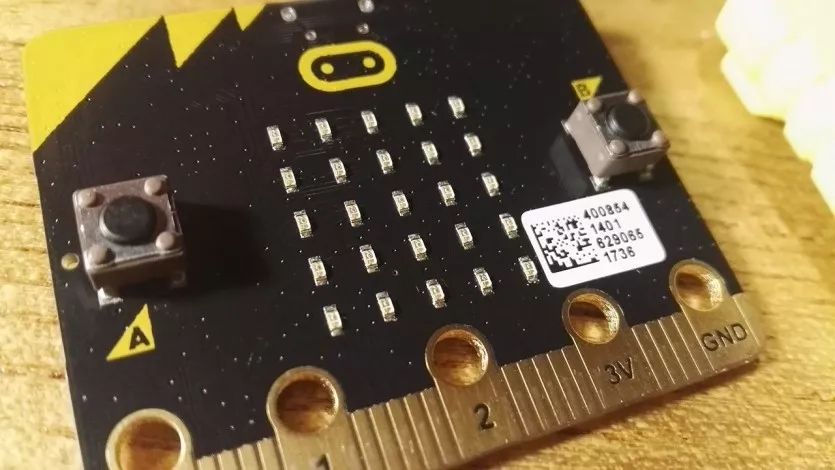
Program Schematic;
Video Demonstration:
Materials Required
To make a light-sensing night light with Micro:bit,
the materials needed are as follows:
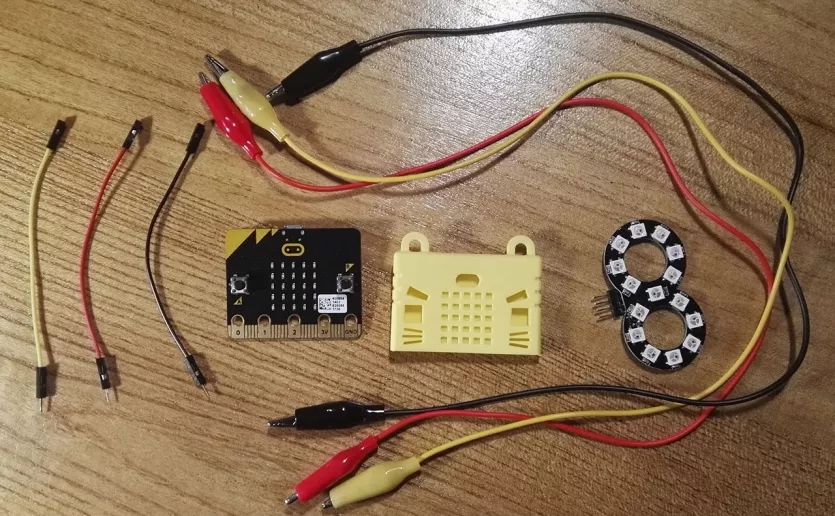
3 Crocodile Clips
3 Male-Female Wires
1 Micro:bit
1 Silicone Case for Micro:bit
(Kitten Family) 1 RGB Eight-Character LED Ring
Building Program Using Blocks:
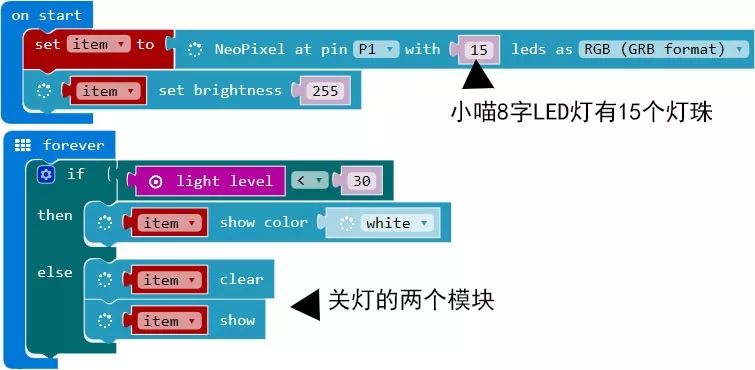
Start Execution Items:
-
First, set a project to connect a small Meow 8-character LED light to pin P1, with a total of 15 bulbs, so input 15, and the mode is RGB format;
-
The second line is about brightness, 255 is the maximum value, actually, it doesn’t need to be this high, but for video clarity, we input the highest value.
-
Next is the light-sensing setting, in the loop execution, the first line states that if the light value is less than 30, then execute the second line—display white light; otherwise, execute the third line to turn it off.
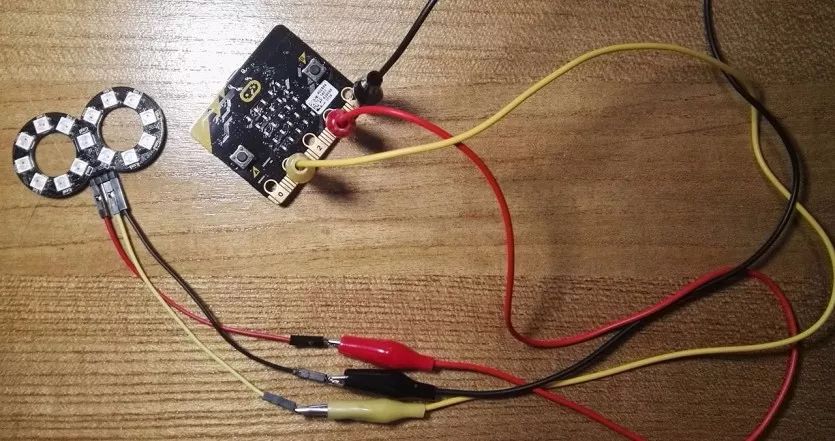
Wiring Diagram:
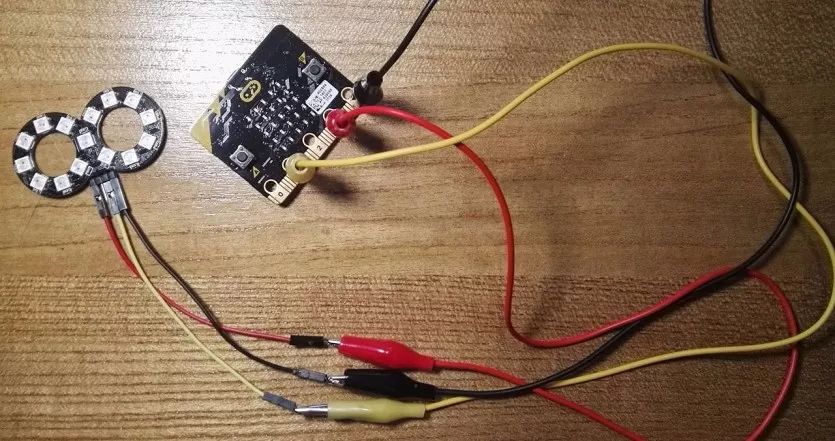
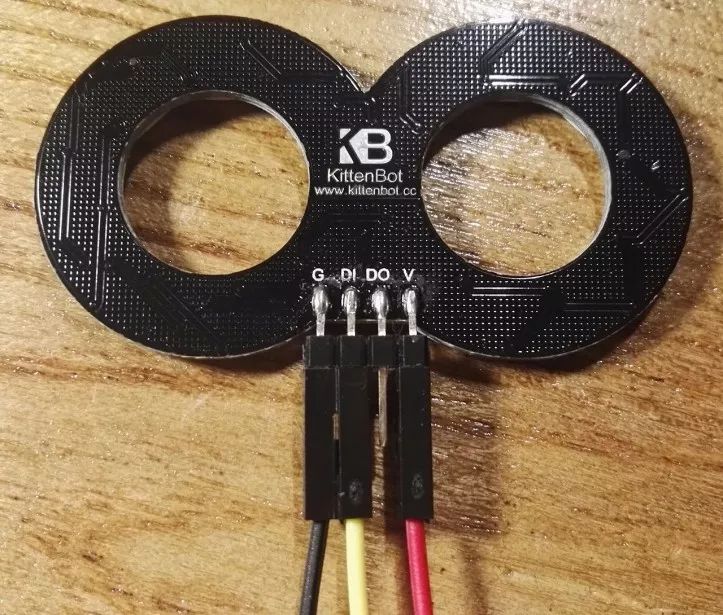
Thus, the night light is ready;
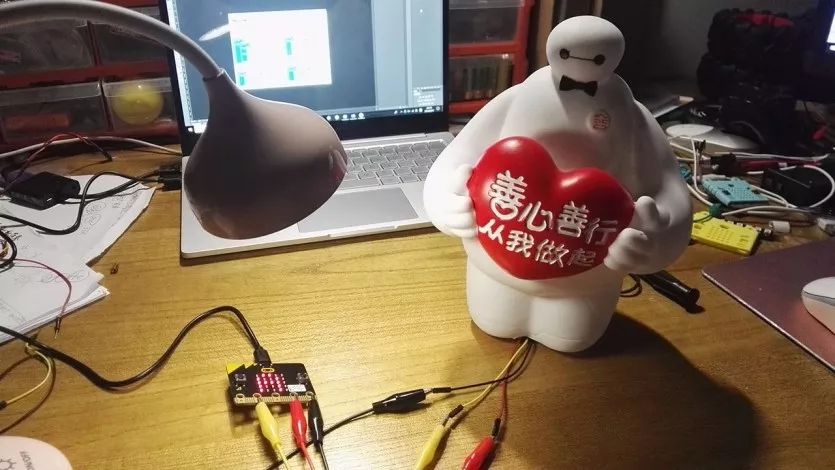
The child loves Baymax;
Specifically found a translucent Baymax piggy bank;
Inserted the LED light ring, the effect is pretty good.
But the child won’t be easily satisfied,
thinking a single-color night light is too monotonous,
Finally, let’s add a few more colors~
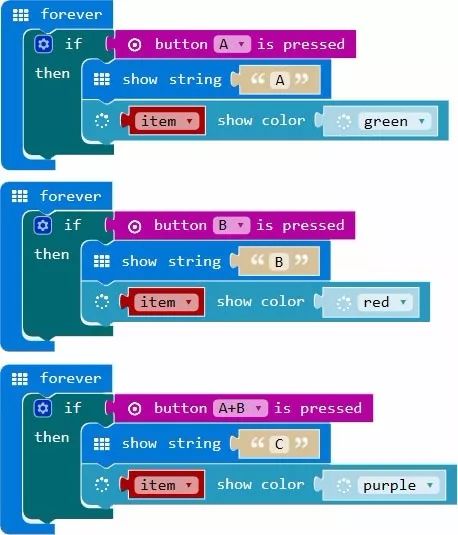
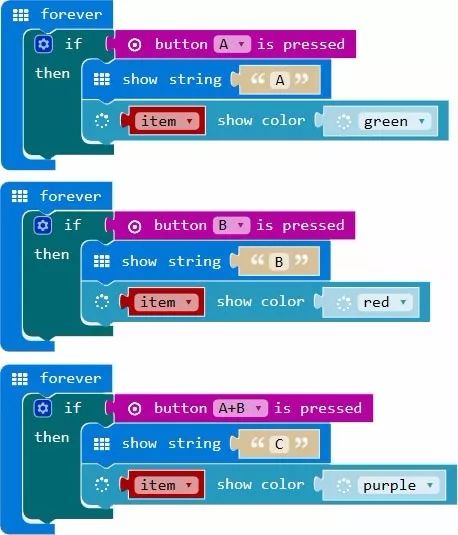
So all buttons on the Micro:bit have something to do,
Press A for one color,
Press B for another color,
Press A+B for another color,
Luckily, there are only these three buttons .
.

Program Adjustments are as follows:
Video Demonstration:
After watching the video
Did everyone notice a problem?
When the button is pressed, the Baymax color changes,
But once the button is released, the color returns to white,
How can this be improved?
I quickly consulted the expert,
Finally, the program was improved as shown below:
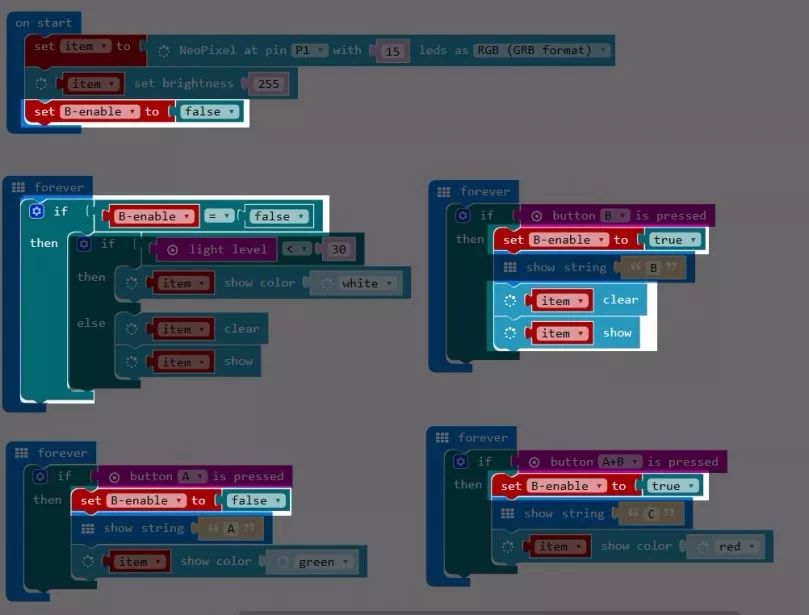
I don’t quite understand, but I think it means something like this:
Add a variable in the start execution,
About adding an unused variable,
Then in the night light program block, add an if statement,
If this variable is not executed,
Then continue executing the relevant content of the night light.
01
B
If button B is pressed,
Then this variable executes,
which means turning off the night light option,
and the night light loses its light-sensing function,
Executing the turn-off command.
02
A+B
If buttons A+B are pressed simultaneously,
Then execute the red light for a long time,
At this time, the previous night light mode will not execute,
Whether the ambient light is bright or dark, it will not affect the night light mode.
03
A
If you want to return to night light mode, press A,
Executing the third command in the start command,
The light-sensing module will start to function again,
Isn’t it a bit complicated,
In any case, I almost understood,
I don’t know if you understood;
Everyone can first try the program I wrote,
Practice is the only criterion for testing truth,
Maybe after you experience it, you’ll understand!
Final Video Effect:
Alright, today’s tutorial ends here,
Everyone is welcome to experience it together.
Next, let’s talk about something different, hey-ha
To be honest with you,
Every time I finish posting a tutorial,
There are always Meow fans chasing (me) asking,
Where can I buy the same equipment as this tutorial??
Today, I directly took action
Meow fans who need it, hurry up and buy~
☆
Recommended Equipment
☆
[KittenBot] Store
Copy the following message
¥Kk8r0sbteeE¥
Then open Taobao on your phone.