
Get More IIoT Insights
Click the blue text
Follow us

HongKe
IIoT
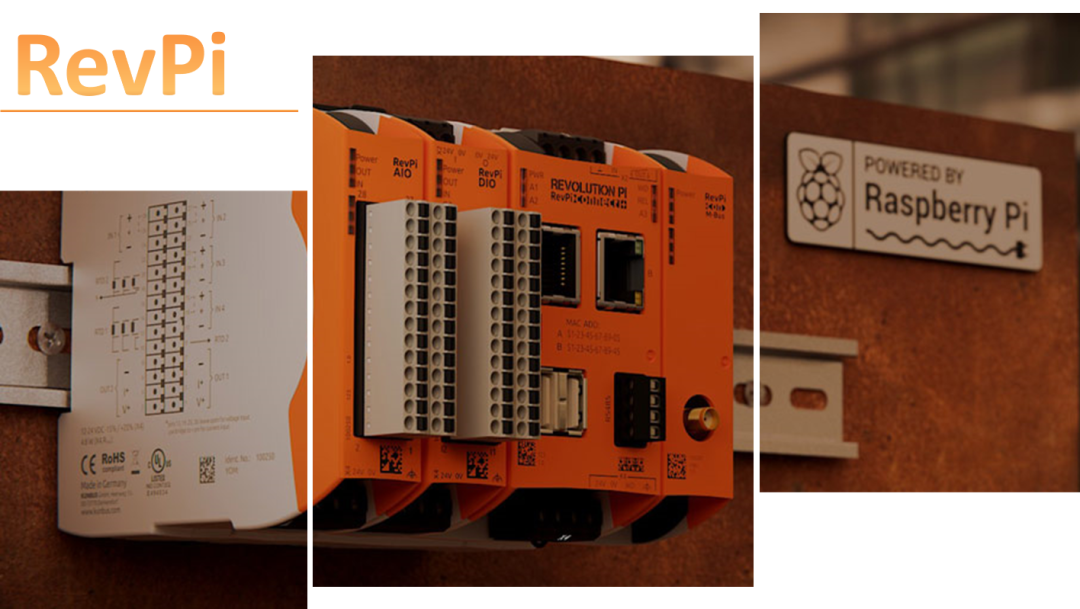
HongKe Industrial Raspberry Pi Node-RED Application (1) Low-Code Implementation of Status Monitoring
HongKe Technology
Hong
/
Ke
/
Insights
/
Knowledge
01
Introduction
Node-RED is a programming development tool used to connect hardware devices, APIs, and online services in novel and interesting ways. During the development process of the HongKe Industrial Raspberry Pi, Node-RED can be utilized to implement industrial IoT applications, reducing development difficulty. In previous articles, we briefly introduced popular science knowledge about Node-RED for the HongKe Industrial Raspberry Pi. Next, the HongKe Industrial IoT team will continue to explain how to build an IoT platform step by step. This article presents the first application explanation—implementing status monitoring for the industrial Raspberry Pi.


02
Node and Control Introduction & Application
1. Nodes
All nodes can be installed in the node manager
(1) node-red-dashboard
This is an essential node for building visual interfaces, containing 16 controls, which are necessary for building visual interfaces. Using the controls within the node can quickly create monitoring interfaces.

(2) node-red-node-email
Email sending and receiving node, used for notifying the responsible person via email in emergencies.

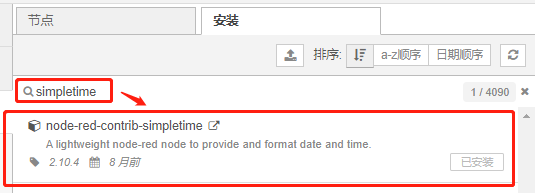
(3) node-red-contrib-simpletime
Time node, used to display system time.
2. Controls
The nodes contain many controls; this article only introduces the controls used to build the status monitoring interface. If you are interested in other controls, you can click the corresponding control to view the introduction:
(1) Switch & Button Controls
The switch control and button control are both buttons and can be used as status monitoring switches. The difference is that the button control triggers once every time it is pressed, equivalent to a momentary switch in circuit applications, which will reset automatically; the switch control maintains its state every time it is pressed, equivalent to a latching switch in circuit applications.


(2) Text Control
This control is used to display system time.

(3) Gauge Control
The gauge control’s main function is to serve as a dashboard to display data. In this application, this control is used to display data and act as an indicator light.

(4) Chart Control
This control is a chart control, which can be used as a line chart or bar chart to display data changes or data comparisons. In this application, this control is used to display data change trends.

(5) Notification Control
The notification control can operate reminders. In this application, this control is used for interface alarms.

(6) Email Control
The email control’s function is to send emails. In this application, this control is used for email reminders to relevant personnel.

(7) Simpletime Control
The simpletime control’s function is to obtain time. In this application, this control is used to obtain the raw time, which is then integrated through functions to form a complete system time.

(8) Function Control
The function control is used to write functions to process data and output the desired values. In this application, data processing is mainly achieved through simple statements.


03
1. Processor Temperature Monitoring
(1) Switch Settings
Drop down “Group” to select and add a new group;

(2) Dashboard Settings
Modify according to the following image, where:
Group: must be selected the same as the switch control to ensure that this control and the switch control are on the same interface;
Type: this control provides four display methods, which can be selected according to needs;
Label: set the name displayed by this control
Units: set the units;
Range: set the maximum and minimum values for this control;
Note: Units and Range will change with the selection of Type.

(3) Change Curve Settings
Group: must be selected the same as the switch control to ensure that this control and the switch control are on the same interface;
Label: set the name displayed by this control;
Type: this control provides six display methods, which can be selected according to needs;
X-axis: set the range displayed on the horizontal axis;
Legend: set the display method of the curve;
Note: X-axis and Legend will change with the selection of Type.

(4) Effect

2. Indicator Light Monitoring (Simulation)
(1) Status Simulation Settings
Drop down “Group” to select and add a new group;
Add three button controls, with Label and Payload set according to the following rules:
-
Normal Operation: 5
-
Abnormal Operation: 10
-
Standby Status: 15

(2) Indicator Light Settings
Group: must be selected the same as the switch control to ensure that this control and the switch control are on the same interface;
Type: this control provides four display methods, which can be selected according to needs;
Label: set the name displayed by this control;
Range: set the gauge range;
Sectors: set different colors for different ranges of data display, where “Normal Operation” corresponds to “Green”, “Abnormal Operation” corresponds to “Red”, and “Standby Status” corresponds to “Orange”.

(3) Popup Alarm Settings
-
Notification Control Settings
Layout: set the popup mode, which can be selected according to needs;
Default action label: set the popup button;
Topic: set the popup topic;
Name: set the control name;

-
Function Control Settings
Add the following function:

(4) Email Alarm Settings (2 Methods)
-
Email Control Settings
Need to enable IMAP for the email (receiving/sending) and obtain the authorization code:
To: set the email address to receive emails
Userid: set the email address to send emails
Password: fill in the authorization code corresponding to the email address used to send emails
Name: set the control name

-
Conditional Judgment Settings (2 Methods)
Change Control

Function Control

(5) Effect

3. System Time Settings
(1) Simpletime Control Settings

(2) Function Control Settings


(3) Effect

4. Final Effect


04
Status Monitoring Platform
The main functions achieved by this platform are as follows:
(1) Display system time;
(2) Real-time display of the temperature value of the HongKe Industrial Raspberry Pi processor and temperature changes;
(3) The three buttons “Standby Status”, “Normal Operation”, and “Abnormal Operation” simulate the three states of the HongKe Industrial Raspberry Pi during operation. Pressing the “Normal Operation” button will display green on the dashboard, and the HongKe Industrial Raspberry Pi A1 and A2 indicator lights will show green; pressing the “Standby Status” button will display green on the dashboard, and the HongKe Industrial Raspberry Pi A1 and A2 indicator lights will show orange; pressing the “Abnormal Operation” button will display red on the dashboard, and the HongKe Industrial Raspberry Pi A1 and A2 indicator lights will show red;
(4) Message notifications; pressing the “Abnormal Operation” button will trigger a popup reminder for the operator and send an email to notify relevant personnel.


05
Conclusion
Throughout the construction process of the status monitoring platform, apart from applying a small amount of simple code in the function control to achieve data parsing and conversion, the rest was accomplished through simple configuration and wiring of controls to form a data flow to meet the requirements.
Node-RED includes thousands of nodes, each containing controls, and different combinations of controls can produce different effects. Next, HongKe will continue to share in-depth applications of the HongKe Industrial Raspberry Pi combined with Node-RED, stay tuned.

HongKe–Industrial IoT
HongKe is a high-tech company with over 3 years of experience in the industrial IoT IIoT industry. HongKe collaborates with top companies in the world, including EXOR, Eurotech, Unitronics, Matrikon, KUNBUS, etc., to provide advanced high-end Industrial 4.0 industrial touch screens, high-end edge computers, IoT development frameworks, PLC and HMI integrated machines, OPC UA, industrial-grade Raspberry Pi, SCADA and other solutions. All members of the IoT division are professionally trained and certified, with an average of over 3 years of technical experience and consistent quality, earning excellent reputation from customers. We actively participate in the work of industry associations and have made significant contributions to the promotion of advanced technology. To date, HongKe has provided various solutions from hardware to software for many users in the industry and has participated in and assisted numerous OEM equipment development and migration projects, as well as smart factory and Industrial 4.0 upgrade projects for end users.

Scan the QR code to get more cutting-edge IIoT knowledge

Previous Issues
Highlights
RevPi Application Cases · Here
● Quickly upload sensor data to the cloud with only 4 steps using CloudRai.Box
● How to achieve industrial protocol and MQTT conversion in low-code/no-code ways?
● Five possible uses of industrial Raspberry Pi as soft PLC
● How to easily solve three major problems faced by IIOT with industrial Raspberry Pi combined with CODESYS
Edge Computing · What You Should Know
● Want to achieve device service? You need a powerful edge device!
● What is the machine-as-a-service model?
● What characteristics should HMI for food & pharmaceutical industries have?
● Application of intelligent industrial control screen eX707 in underwater remote-controlled robots
What You Want to Know · OPC UA
● How to solve the headache of DCOM configuration
● Step-by-step guide to mastering all your UA servers with OPC UA data platform
MQTT Broker · HiveMQ
● Helping AGV carts achieve communication with control systems
● IAV application of HiveMQ to build urban flood warning systems with automotive data
● BMW car-sharing applications rely on powerful HiveMQ for reliable connections
Click below “Read Original” to see more