Main Content:
- Background Color
- Callback
- AddClipPlane
- AIS_Shape
- HLR Mode
- Hide Boundary Lines
- Hide/Delete/Redisplay
- View Level
- Context Level
- Line Style
- Point Style
Background Color
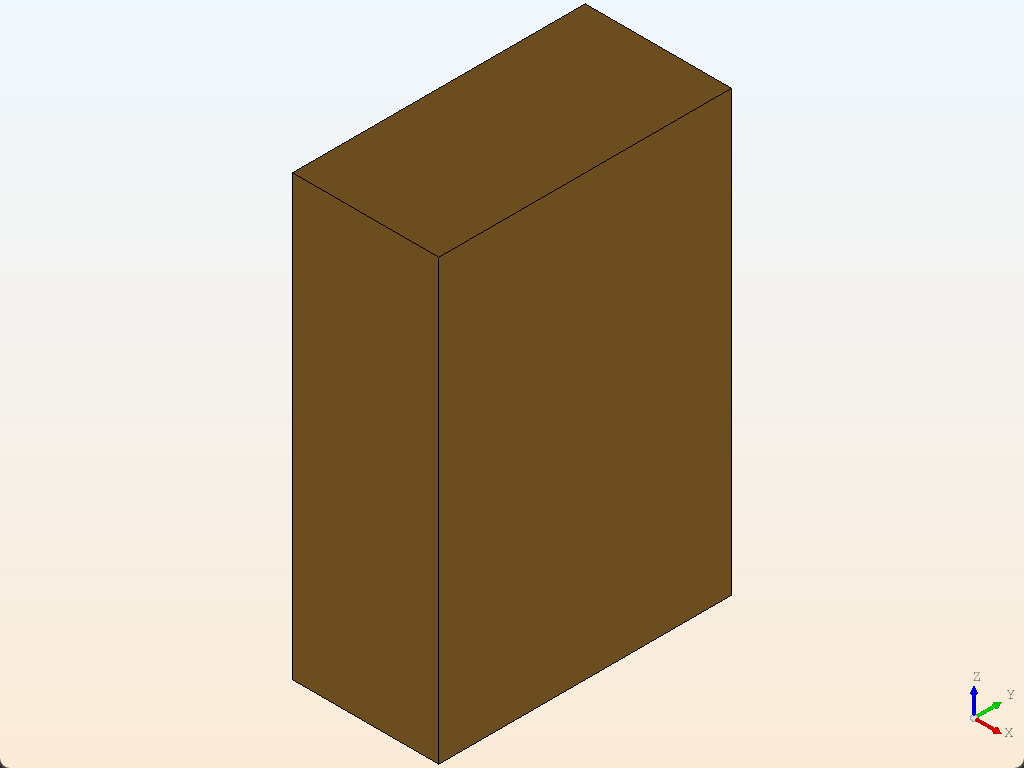
from OCC.Display.SimpleGui import init_display
from OCC.Core.BRepPrimAPI import BRepPrimAPI_MakeBox
from OCC.Core.Quantity import (
    Quantity_Color,
    Quantity_NOC_ALICEBLUE,
    Quantity_NOC_ANTIQUEWHITE,
)

display, start_display, add_menu, add_function_to_menu = init_display()
my_box = BRepPrimAPI_MakeBox(10.0, 20.0, 30.0).Shape()

# Set the background of the display window to a gradient color
display.View.SetBgGradientColors(
    Quantity_Color(Quantity_NOC_ALICEBLUE),
    Quantity_Color(Quantity_NOC_ANTIQUEWHITE),
    2, # Gradient type: vertical
    True, # Immediate view update
)
display.Repaint() # Ensure background color updates
display.DisplayShape(my_box, update=True)
start_display()
Callback
Users can add mouse callback events. In the official example, when clicking on a geometry, some information about the geometry will be printed:
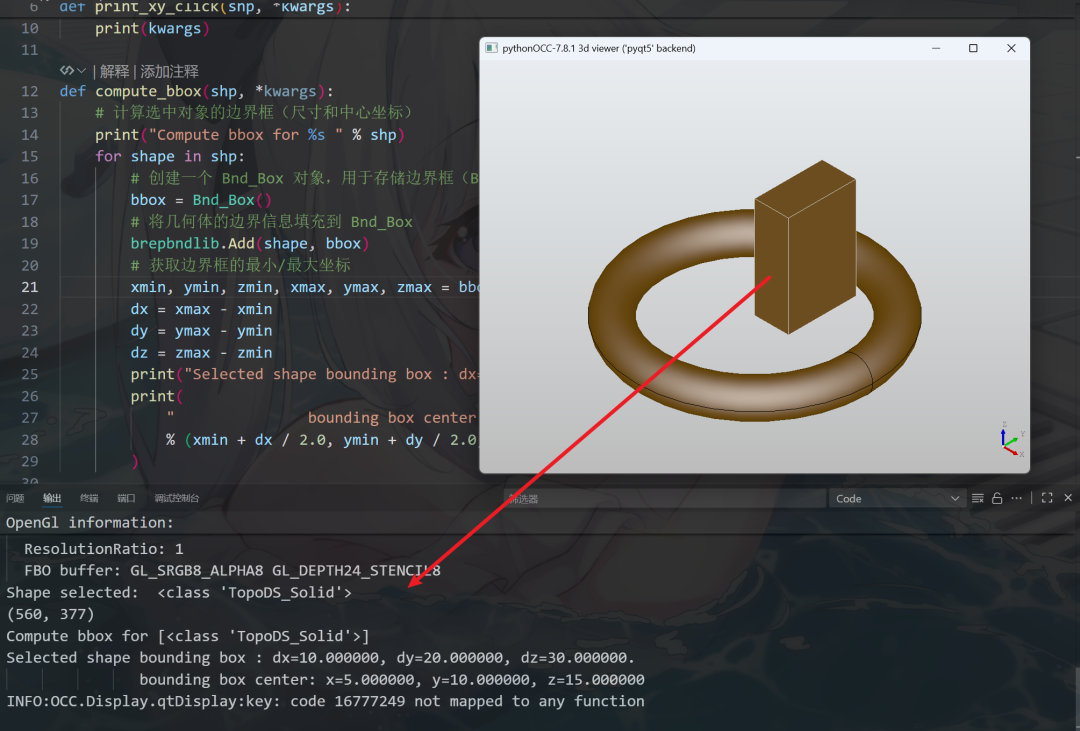
from OCC.Core.BRepPrimAPI import BRepPrimAPI_MakeBox, BRepPrimAPI_MakeTorus
from OCC.Core.Bnd import Bnd_Box
from OCC.Core.BRepBndLib import brepbndlib
from OCC.Display.SimpleGui import init_display

def print_xy_click(shp, *kwargs):
    # When the user clicks on a 3D object, print the selected object's Python object information
    for shape in shp:
        print("Shape selected: ", shape)
    print(kwargs)

def compute_bbox(shp, *kwargs):
    # Calculate the bounding box (size and center coordinates) of the selected object
    print("Compute bbox for %s " % shp)
    for shape in shp:
        # Create a Bnd_Box object to store bounding box data
        bbox = Bnd_Box()
        # Fill the bounding information of the geometry into Bnd_Box
        brepbndlib.Add(shape, bbox)
        # Get the minimum/maximum coordinates of the bounding box
        xmin, ymin, zmin, xmax, ymax, zmax = bbox.Get()
        dx = xmax - xmin
        dy = ymax - ymin
        dz = zmax - zmin
        print("Selected shape bounding box : dx=%f, dy=%f, dz=%f." % (dx, dy, dz))
        print(
            "               bounding box center: x=%f, y=%f, z=%f"
            % (xmin + dx / 2.0, ymin + dy / 2.0, zmin + dz / 2.0)
        )

display, start_display, add_menu, add_function_to_menu = init_display()

# Bind the two functions to mouse selection events
display.register_select_callback(print_xy_click)
display.register_select_callback(compute_bbox)

# Create geometries
my_box = BRepPrimAPI_MakeBox(10.0, 20.0, 30.0).Shape()
my_torus = BRepPrimAPI_MakeTorus(30.0, 5.0).Shape()

display.DisplayShape(my_torus)
display.DisplayShape(my_box, update=True)

start_display()
AddClipPlane
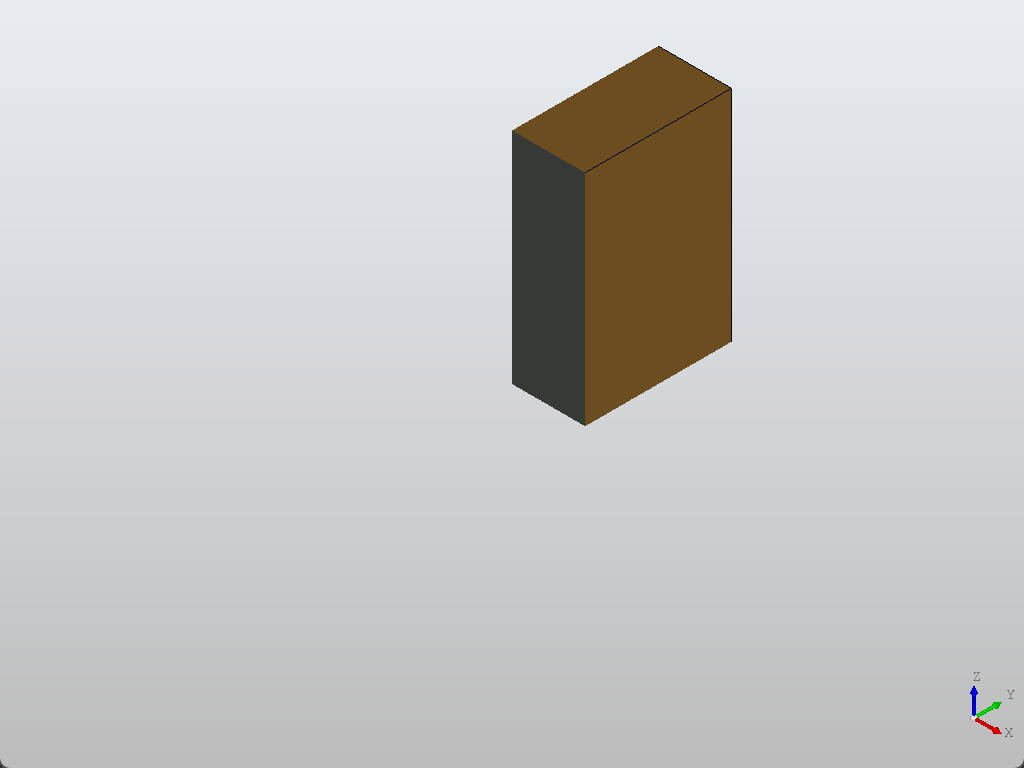
from OCC.Display.SimpleGui import init_display
from OCC.Core.BRepPrimAPI import BRepPrimAPI_MakeBox
from OCC.Core.Graphic3d import Graphic3d_ClipPlane
from OCC.Core.Quantity import Quantity_Color, Quantity_TOC_RGB
from OCC.Core.gp import gp_Pln, gp_Pnt, gp_Dir
from OCC.Core.Bnd import Bnd_Box
from OCC.Core.BRepBndLib import brepbndlib

def shape_center(shape):
    """Return the center point (cx, cy, cz) of the shape's bounding box."""
    bbox = Bnd_Box()
    brepbndlib.Add(shape, bbox)
    xmin, ymin, zmin, xmax, ymax, zmax = bbox.Get()
    return (0.5 * (xmin + xmax), 0.5 * (ymin + ymax), 0.5 * (zmin + zmax))

def make_clip_plane(point, normal, rgb=(0.75, 0.78, 0.85)):
    """
    Create a clipping plane with capping enabled:
    - point: a point on the plane (x, y, z)
    - normal: normal vector (nx, ny, nz)
    - rgb: cross-section fill color (0~1)
    """
    clip = Graphic3d_ClipPlane()
    clip.SetOn(True)            # Enable
    clip.SetCapping(True)       # Enable cross-section fill
    clip.SetCappingHatch(True)  # With hatch lines

    mat = clip.CappingMaterial()
    col = Quantity_Color(*rgb, Quantity_TOC_RGB)
    mat.SetAmbientColor(col)
    mat.SetDiffuseColor(col)
    clip.SetCappingMaterial(mat)

    pln = gp_Pln(gp_Pnt(*point), gp_Dir(*normal))
    clip.SetEquation(pln)
    return clip

def main():
    display, start_display, *_ = init_display()

    my_box = BRepPrimAPI_MakeBox(10.0, 20.0, 30.0).Shape()
    ais = display.DisplayShape(my_box, update=True)[0]

    # Calculate center point
    cx, cy, cz = shape_center(my_box)

    # Three orthogonal clipping planes (all passing through the center)
    plane_x = make_clip_plane((cx, cy, cz), (1, 0, 0), rgb=(0.80, 0.70, 0.70))  # X direction
    plane_y = make_clip_plane((cx, cy, cz), (0, 1, 0), rgb=(0.70, 0.80, 0.70))  # Y direction
    plane_z = make_clip_plane((cx, cy, cz), (0, 0, 1), rgb=(0.70, 0.75, 0.90))  # Z direction

    # Add to interactive object
    ais.AddClipPlane(plane_x)
    ais.AddClipPlane(plane_y)
    ais.AddClipPlane(plane_z)

    # Visualization
    display.FitAll()
    start_display()

if __name__ == "__main__":
    main()
- If you want to keep the other half (flipping cut), you can negate the corresponding normal vector, for example
<span>(1, 0, 0) → (-1, 0, 0)</span> - If you want to change the cutting position from the center to any cross-section (for example
<span>x = 6</span>): change<span>point</span>to<span>(6, cy, cz)</span>and the normal remains<span>(1, 0, 0)</span>
AIS_Shape
from OCC.Core.AIS import AIS_Shape
from OCC.Core.BRepPrimAPI import BRepPrimAPI_MakeBox
from OCC.Display.SimpleGui import init_display
from OCC.Core.Quantity import (
    Quantity_Color, Quantity_TOC_RGB,
    Quantity_NOC_BLUE1
)
display, start_display, add_menu, add_function_to_menu = init_display()

s = BRepPrimAPI_MakeBox(200, 100, 50).Shape()

ais_shp = AIS_Shape(s)

ais_shp.SetWidth(4) # Set line width
ais_shp.SetTransparency(0.50) # Set transparency
ais_shp.SetColor(Quantity_Color(Quantity_NOC_BLUE1)) # Set color

# Get Context
ais_context = display.GetContext()
ais_context.SetAutoActivateSelection(False) # Mouse selection does not affect line color change
ais_context.Display(ais_shp, True)

display.View_Iso()
display.FitAll()
start_display()
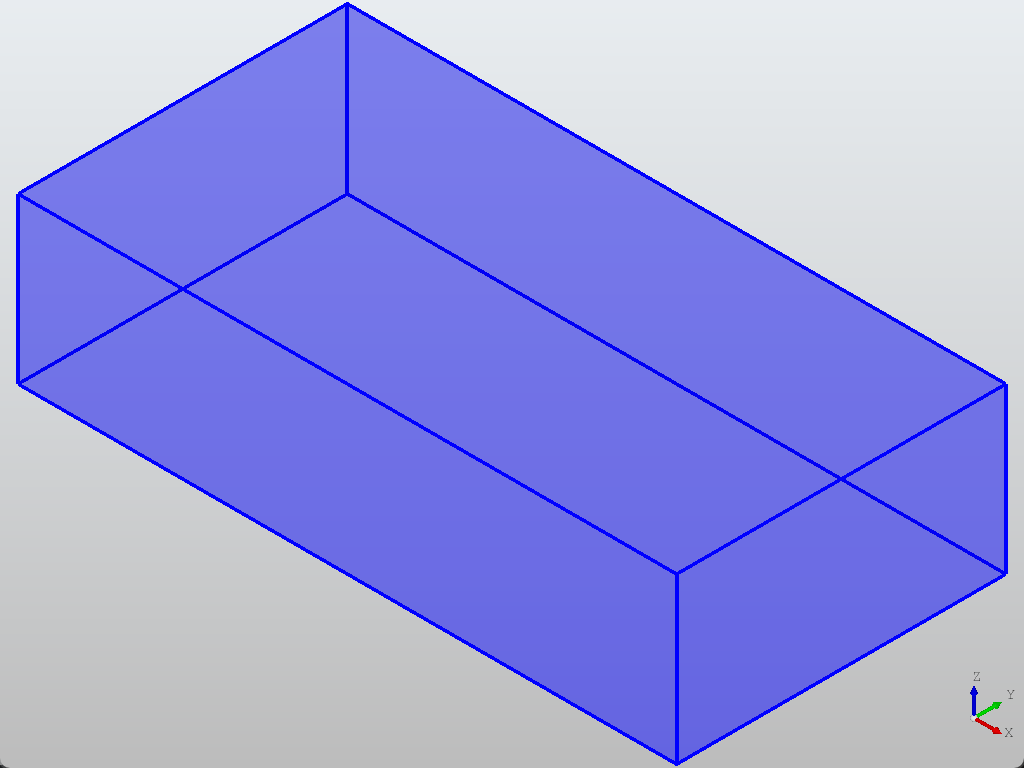
By using <span>AIS_Shape(s)</span>, you can obtain the features of the shape. Post-processing display is more flexible. The above code can create a box with 10% transparency and a line width of 4:
HLR Mode
<span>SetModeHLR()</span>: Set to HLR Mode (Hidden Line Removal), in this mode, the object only displays outline lines and visible edges.
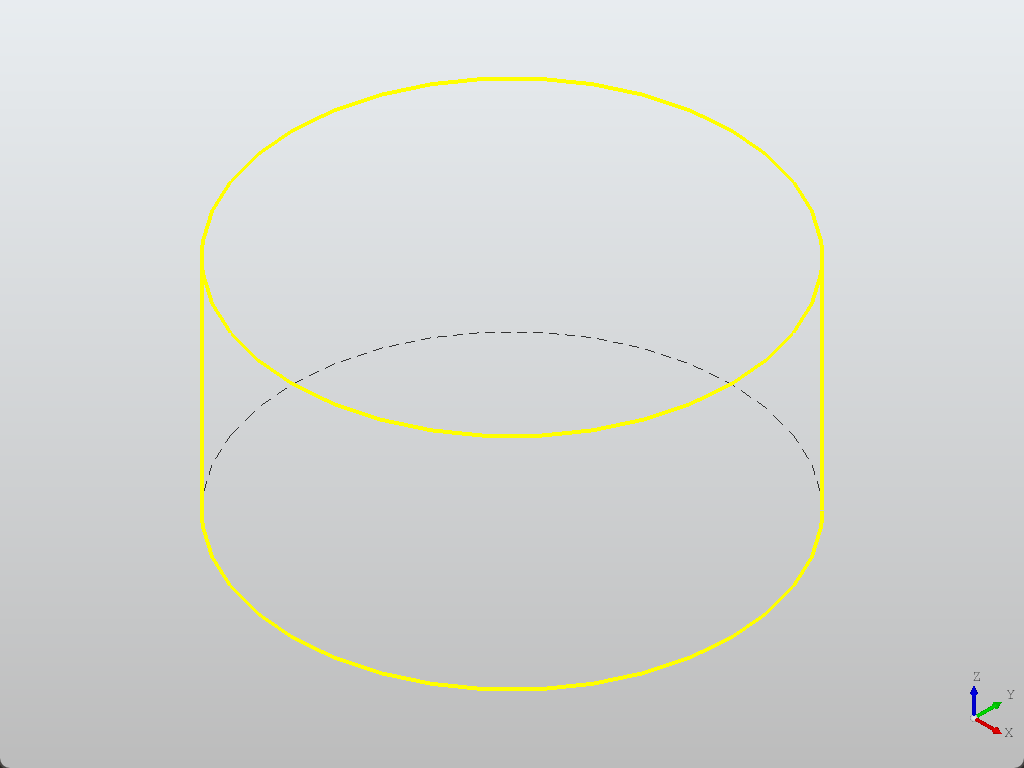
from OCC.Core.BRepPrimAPI import BRepPrimAPI_MakeCylinder
from OCC.Display.SimpleGui import init_display

display, start_display, add_menu, add_function_to_menu = init_display()

# HLR mode
display.SetModeHLR()

# Manage interactive objects
ais_context = display.GetContext()

# Control drawing parameters
drawer = ais_context.DefaultDrawer()
drawer.SetIsoOnPlane(True) # Enable isoparametric lines (auxiliary lines drawn on surfaces)

la = drawer.LineAspect()
la.SetWidth(4)

line_aspect = drawer.SeenLineAspect()   # Get visible line style
drawer.EnableDrawHiddenLine()           # Enable hidden line display
line_aspect.SetWidth(4)

# Apply this line style to wireframe display mode
drawer.SetWireAspect(line_aspect)

s = BRepPrimAPI_MakeCylinder(50.0, 50.0).Shape()
display.DisplayShape(s)

display.View_Iso()
display.FitAll()
start_display()
Hide Boundary Lines
<span>SetFaceBoundaryDraw(False)</span>: Do not draw face boundary lines
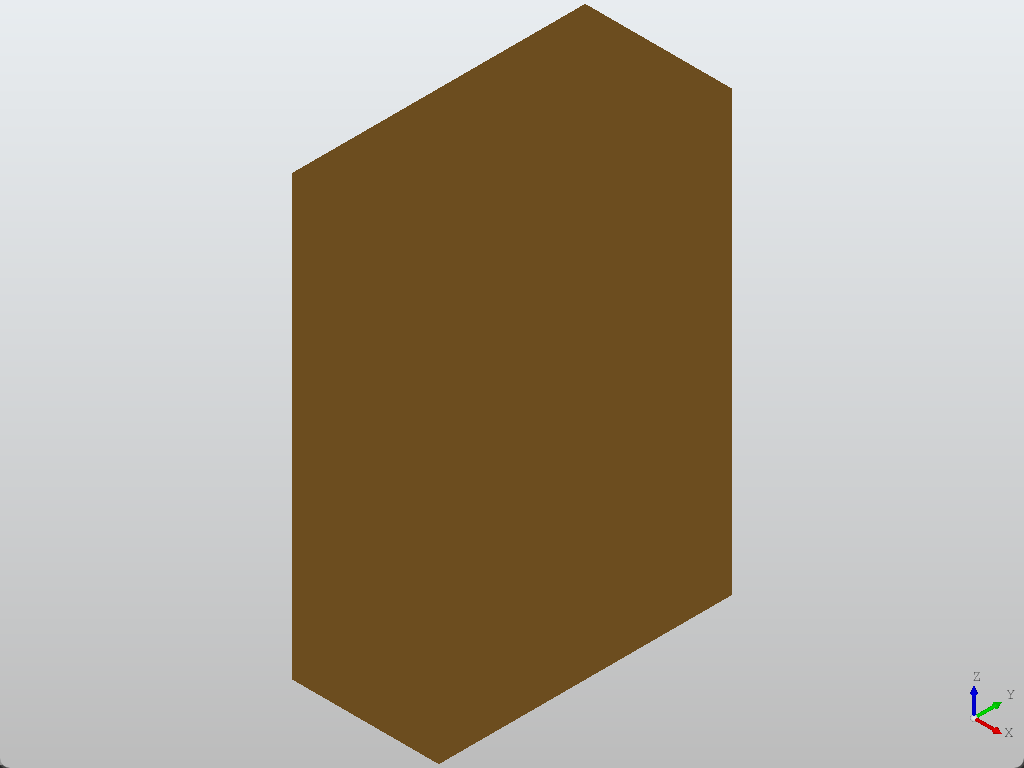
from OCC.Display.SimpleGui import init_display
from OCC.Core.BRepPrimAPI import BRepPrimAPI_MakeBox

display, start_display, add_menu, add_function_to_menu = init_display()
my_box = BRepPrimAPI_MakeBox(10.0, 20.0, 30.0).Shape()

display.default_drawer.SetFaceBoundaryDraw(False)
display.DisplayShape(my_box, update=True)
start_display()
Hide/Delete/Redisplay
from OCC.Core.BRepPrimAPI import (
    BRepPrimAPI_MakeBox,
    BRepPrimAPI_MakeCylinder,
    BRepPrimAPI_MakeSphere,
)
from OCC.Core.BRepBuilderAPI import BRepBuilderAPI_Transform
from OCC.Core.gp import gp_Trsf, gp_Vec
from OCC.Display.SimpleGui import init_display

display, start_display, add_menu, add_function_to_menu = init_display()

a_box = BRepPrimAPI_MakeBox(10.0, 20.0, 30.0).Shape()

tr1 = gp_Trsf(); tr1.SetTranslation(gp_Vec(50, 0, 0))
a_sphere = BRepBuilderAPI_Transform(BRepPrimAPI_MakeSphere(10.0).Shape(), tr1, False).Shape()

tr2 = gp_Trsf(); tr2.SetTranslation(gp_Vec(-50, 0, 0))
a_cylinder = BRepBuilderAPI_Transform(BRepPrimAPI_MakeCylinder(10.0, 40.0).Shape(), tr2, False).Shape()

ais_box = display.DisplayShape(a_box)[0]
ais_sphere = display.DisplayShape(a_sphere)[0]
ais_cylinder = display.DisplayShape(a_cylinder)[0]

display.FitAll()

# Hide (erase from view, but still in context, can be displayed again)
# display.Context.Erase(ais_box, True)
# display.Context.Erase(ais_sphere, True)
# display.Context.Erase(ais_cylinder, True)

# Redisplay
# display.Context.Display(ais_box, True)
# display.Context.Display(ais_sphere, True)
# display.Context.Display(ais_cylinder, True)

# Permanently remove
# display.Context.Remove(ais_box, True)
# display.Context.Remove(ais_sphere, True)
# display.Context.Remove(ais_cylinder, True)

# Hide/Clear all
# display.EraseAll()                         # Clear all from view
# display.Context.EraseAll(True)             # Clear all from context
# display.Context.RemoveAll(True)            # Remove all from context

# Enter interaction
start_display()
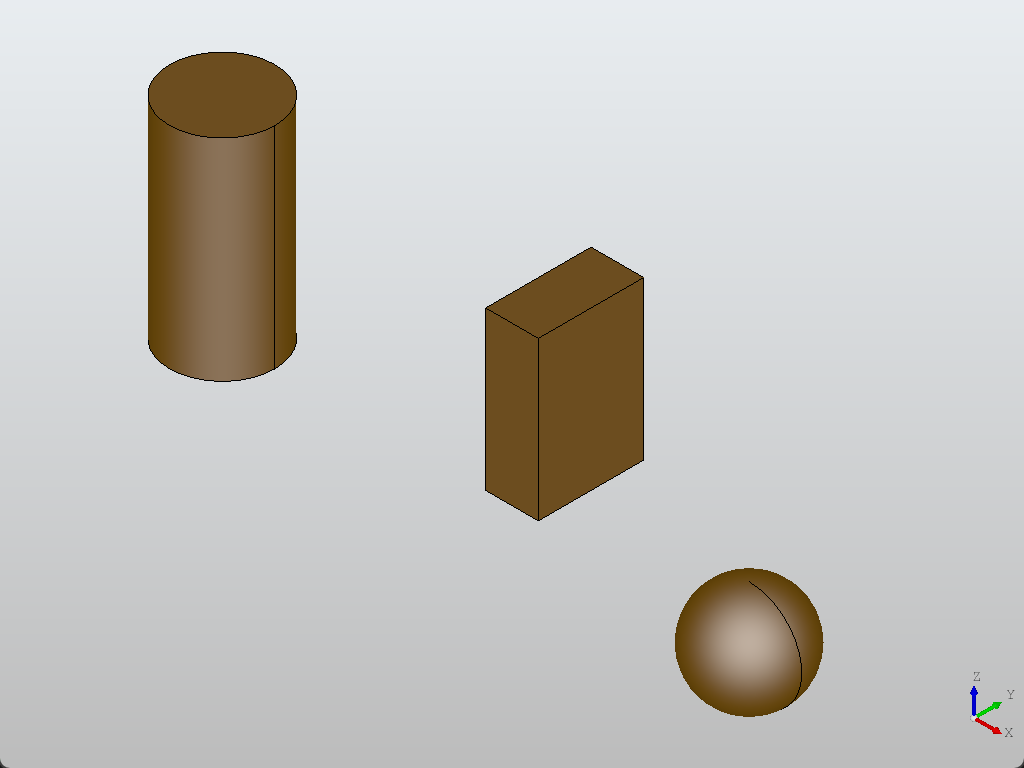
<span>display.DisplayShape(a_box)</span>returns a list here, if it is<span>display.DisplayShape(a_box)[0]</span>it returns the AIS_Shape object, which can be further operated on, of course, you can also pass the Shape list to<span>display.DisplayShape</span>and then index it
View Level
- Only interacts with the drawing buffer in the current window
- For example,
<span>display.EraseAll()</span>: Clear the screen, remove all graphics from the canvas - However, the objects themselves are still stored in the AIS_InteractiveContext (context), and next time
<span>FitAll()</span>or<span>Redisplay()</span>they will reappear
Context Level
- Manages the lifecycle and display state of AIS objects themselves
- There are three common operations here:
- Similarly, but operates on all objects
- Completely remove from context, no longer manage this object. To see it again, you must recreate a new AIS with
<span>DisplayShape()</span> - Hide the object (marked as not displayed in context), but still saved in context, can be displayed again with
<span>Display()</span>
<span>Erase(ais_shape, True)</span><span>Remove(ais_shape, True)</span><span>EraseAll()</span>/<span>RemoveAll()</span>
Line Style
from OCC.Display.SimpleGui import init_display
from OCC.Core.gp import gp_Pnt, gp_Dir
from OCC.Core.Geom import Geom_Line
from OCC.Core.AIS import AIS_Line
from OCC.Core.Prs3d import Prs3d_Drawer, Prs3d_LineAspect
from OCC.Core.Quantity import Quantity_Color, Quantity_TOC_RGB, Quantity_NOC_RED
from OCC.Core.Aspect import (
    Aspect_TOL_SOLID,
    Aspect_TOL_DASH,
    Aspect_TOL_DOT,
    Aspect_TOL_DOTDASH,
)

display, start_display, add_menu, add_function_to_menu = init_display()

p = gp_Pnt(2.0, 3.0, 4.0)
d = gp_Dir(4.0, 5.0, 6.0)
gline = Geom_Line(p, d)

ais_line = AIS_Line(gline)

# Set style through Drawer + LineAspect
drawer = Prs3d_Drawer()

color = Quantity_Color(0.2, 0.6, 0.9, Quantity_TOC_RGB)

# Line type: optional Aspect_TOL_SOLID / _DASH / _DOT / _DOTDASH
line_type = Aspect_TOL_SOLID

# Line width
width = 3.0

# Combine into line style object
aspect = Prs3d_LineAspect(color, line_type, width)
drawer.SetLineAspect(aspect)
ais_line.SetAttributes(drawer)

display.Context.Display(ais_line, True)
display.FitAll()
start_display()
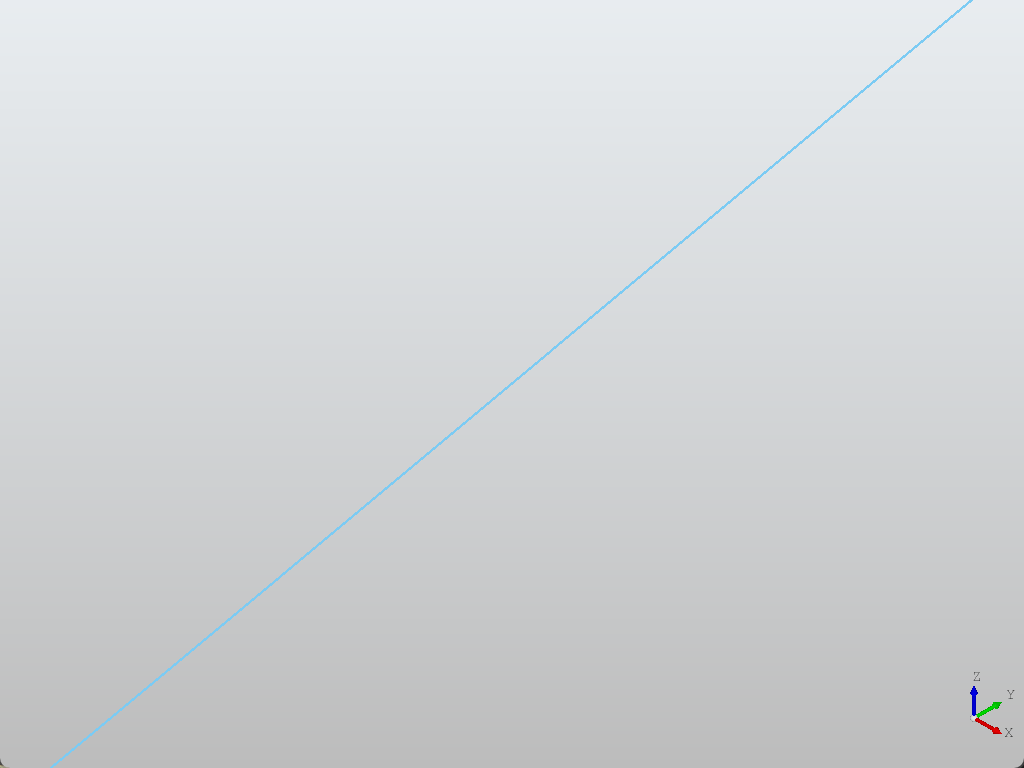
For line style, refer to OCC documentation:
<span>Aspect_TOL_SOLID</span> |
continuous |
|---|---|
<span>Aspect_TOL_DASH</span> |
dashed 2.0,1.0 (MM) |
<span>Aspect_TOL_DOT</span> |
dotted 0.2,0.5 (MM) |
<span>Aspect_TOL_DOTDASH</span> |
mixed 10.0,1.0,2.0,1.0 (MM) |
<span>Aspect_TOL_USERDEFINED</span> |
defined by Users |
Point Style
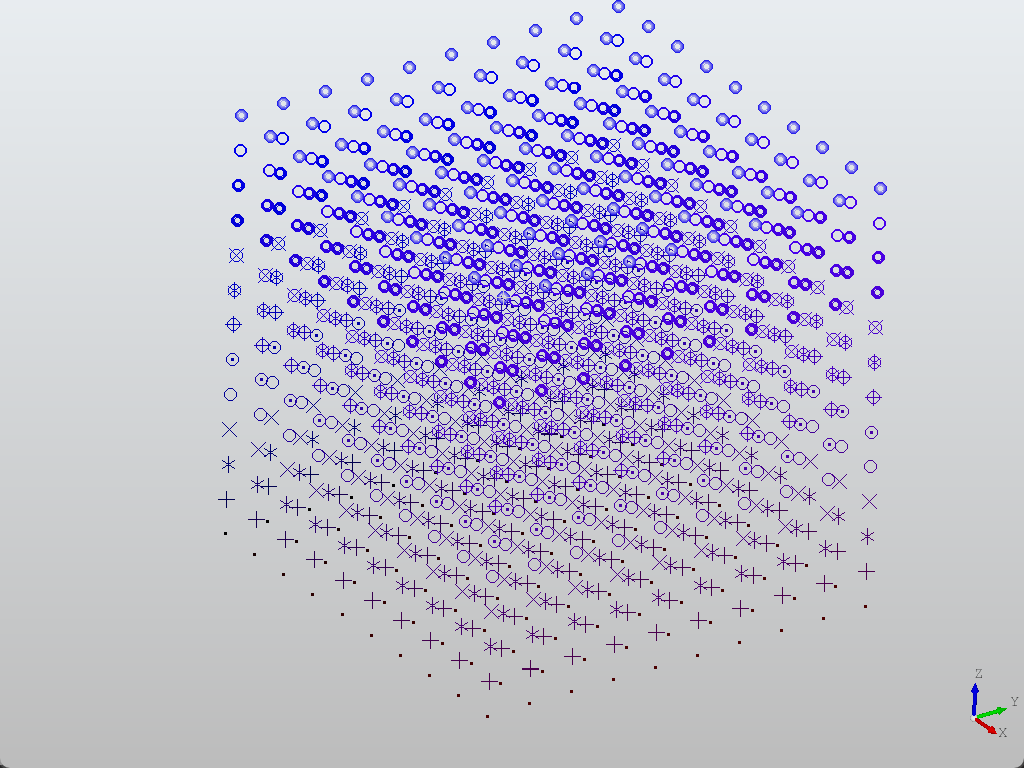
import sys

from OCC.Core.gp import gp_Pnt
from OCC.Core.Geom import Geom_CartesianPoint
from OCC.Core.Quantity import Quantity_Color, Quantity_TOC_RGB
from OCC.Core.Aspect import (
    Aspect_TOM_POINT,
    Aspect_TOM_PLUS,
    Aspect_TOM_STAR,
    Aspect_TOM_X,
    Aspect_TOM_O,
    Aspect_TOM_O_POINT,
    Aspect_TOM_O_PLUS,
    Aspect_TOM_O_STAR,
    Aspect_TOM_O_X,
    Aspect_TOM_RING1,
    Aspect_TOM_RING2,
    Aspect_TOM_RING3,
    Aspect_TOM_BALL,
)
from OCC.Core.AIS import AIS_Point
from OCC.Core.Prs3d import Prs3d_PointAspect, Prs3d_Drawer

from OCC.Display.SimpleGui import init_display

display, start_display, add_menu, add_function_to_menu = init_display()

ALL_ASPECTS = [
    Aspect_TOM_POINT,    # Solid point
    Aspect_TOM_PLUS,     # Plus sign
    Aspect_TOM_STAR,     # Star
    Aspect_TOM_X,        # X shape
    Aspect_TOM_O,        # Hollow circle
    Aspect_TOM_O_POINT,  # Circle with point
    Aspect_TOM_O_PLUS,   # Circle with plus sign
    Aspect_TOM_O_STAR,   # Circle with star
    Aspect_TOM_O_X,      # Circle with X
    Aspect_TOM_RING1,    # Single ring
    Aspect_TOM_RING2,    # Double ring
    Aspect_TOM_RING3,    # Triple ring
    Aspect_TOM_BALL,     # Sphere
]

def pnt():
     # Create a 10x10 grid of points, using different marker types for each Z layer
    for idx in range(10):
        for idy in range(10):
            for idz, aspect in enumerate(ALL_ASPECTS):
                x = 0 + idx * 0.1
                y = 0 + idy * 0.1
                z = 0 + idz / len(ALL_ASPECTS)
                p = Geom_CartesianPoint(gp_Pnt(x, y, z))
                color = Quantity_Color(x / len(ALL_ASPECTS), 0, z, Quantity_TOC_RGB)
                # Create interactive point object
                ais_point = AIS_Point(p)

                # Get current drawer
                drawer = ais_point.Attributes()
                # Create point display attributes: marker type, color, size(3.0)
                asp = Prs3d_PointAspect(aspect, color, 3)
                # Set point attributes and apply to object
                drawer.SetPointAspect(asp)
                ais_point.SetAttributes(drawer)

                display.Context.Display(ais_point, False)
    display.FitAll()
    start_display()


def exit(event=None):
    sys.exit()

if __name__ == "__main__":
    pnt()
For point styles, refer to OCC documentation:
| Aspect_TOM_POINT | point . |
|---|---|
<span>Aspect_TOM_PLUS</span> |
plus + |
<span>Aspect_TOM_STAR</span> |
star * |
<span>Aspect_TOM_X</span> |
cross x |
<span>Aspect_TOM_O</span> |
circle O |
<span>Aspect_TOM_O_POINT</span> |
a point in a circle |
<span>Aspect_TOM_O_PLUS</span> |
a plus in a circle |
<span>Aspect_TOM_O_STAR</span> |
a star in a circle |
<span>Aspect_TOM_O_X</span> |
a cross in a circle |
<span>Aspect_TOM_RING1</span> |
a large ring |
<span>Aspect_TOM_RING2</span> |
a medium ring |
<span>Aspect_TOM_RING3</span> |
a small ring |
<span>Aspect_TOM_BALL</span> |
a ball with 1 color and different saturations |
<span>Aspect_TOM_USERDEFINED</span> |
defined by Users (custom image) |
Related previous articles
- 3D Model Creation
- 2D Basic Modeling
- Boolean Operations
- Geometric Transformations
- 2D/3D Fillets
- Arrays
- Dimensioning
- Colorbar
Fan Group Chat: Reply in the backgroundstress.
Join more interactive discussions, leave your footprints in the comment area below~
-End-
♡ If you like this article, feel free to share it in your circle of friends ♡
Yi Mu Mu Xiang Ding Dang
Wishing to accompany you through the brief yet long research life