Introduction
In the previous article, I made a lantern that lights up when lifted, preparing decorations for the New Year.
This article will focus on safety, creating a smoke alarm using a combustible gas detector.
In daily life, smoke alarms are typically installed in areas with a high risk of fire, such as kitchens, laboratories, and various public places.
When the concentration of smoke or combustible gas increases, the alarm will sound to alert those nearby, giving them more time to respond to the emergency.
This practical project has exposed me to more diverse and complex needs in reality, which differs from my previous self-planned projects.
Previous devices like the lantern and birthday song player were more for aesthetic or entertainment purposes, and subjective feelings were involved when evaluating the project. In contrast, the smoke detector is a practical tool that can be evaluated using relatively objective standards for the quality of the finished product.
From the feasibility perspective, the basic smoke detector’s hardware and software are not complex, making it an ideal learning project.
Materials Required
Arduino UNO development board
USB-A to USB-B data cable
Breadboard
Jumper wires
10KΩ potentiometer
Screwdriver
LCD display
Buzzer
MQ-2 gas sensor module
Computer
Hardware Connections
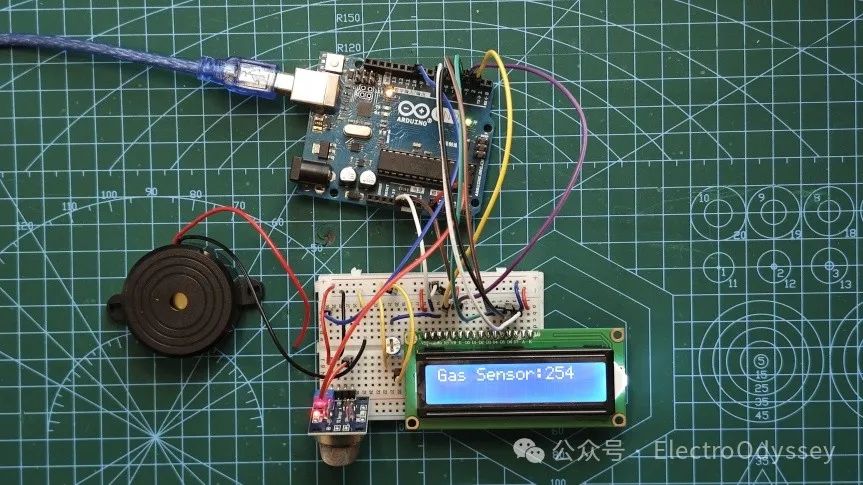
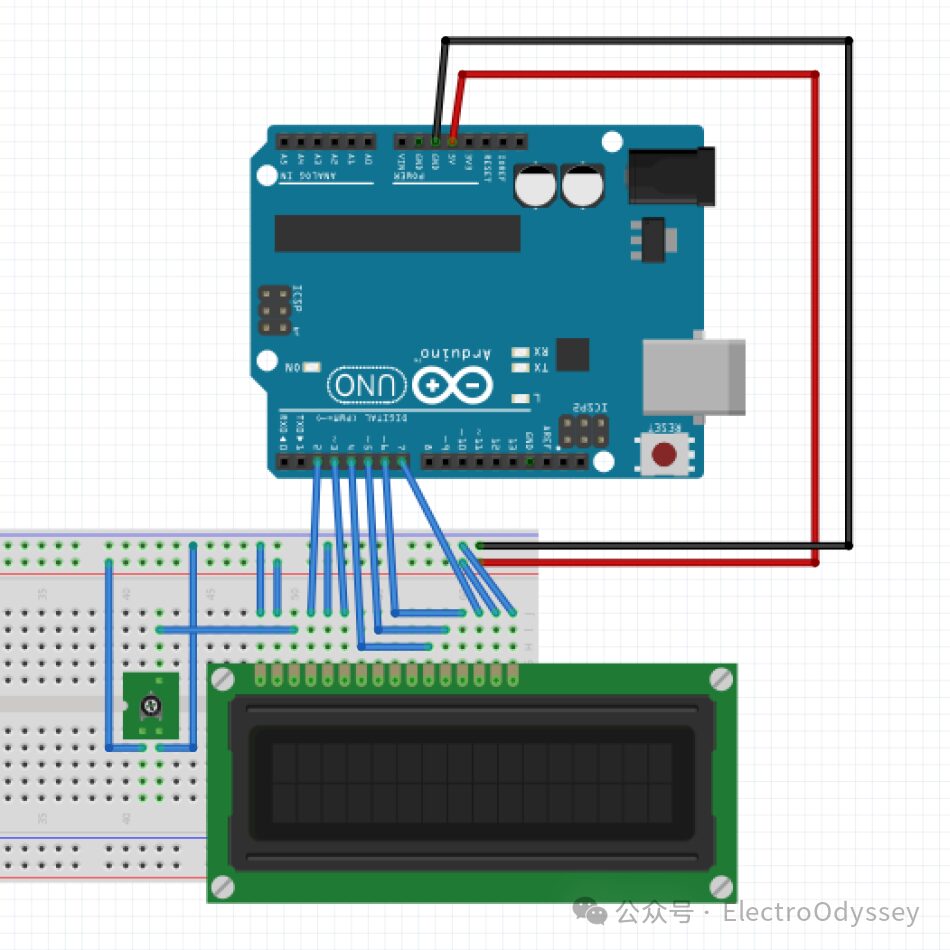
In this project, I used the MQ-2 gas sensor to help the system detect combustible gases and smoke. The sensor’s Vcc and GND are connected to the development board’s 5V and GND ports, and the analog output AO is connected to the A0 port of the development board.

I studied the structure and principle of the sensor and summarized the following:
After removing the explosion-proof stainless steel mesh of the sensor, we can see the core part of the MQ-2: a gray cylindrical body. The cylinder is divided into three layers: the outer layer detects combustible gases with tin dioxide, the middle layer is a ceramic support for heat conduction, and the inner layer is the heating wire for the tin dioxide.
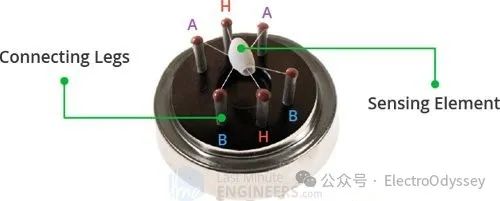
After powering on, the heating wire needs to heat the tin dioxide to its working temperature. Once the target temperature is reached, if the concentration of combustible gases in the air is normal, the resistance of tin dioxide will be high, and the sensor’s analog output will remain low.
As the concentration of combustible gases increases, the resistance of tin dioxide will gradually decrease, and the analog output voltage will gradually increase.
The development board will respond to the gas sensor’s warning, such as controlling the buzzer to emit an alert sound.
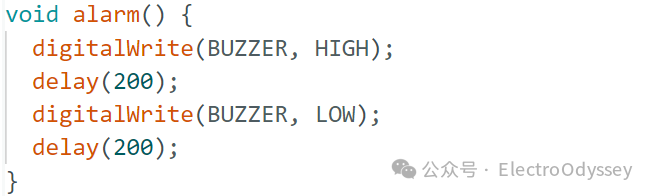
Here, I used an active buzzer with a built-in vibration source. The development board does not need to output waveform signals; it just needs to output a high level to make the active buzzer sound.

In addition to the two key components above, I also installed an LCD display on the smoke alarm for easier debugging.
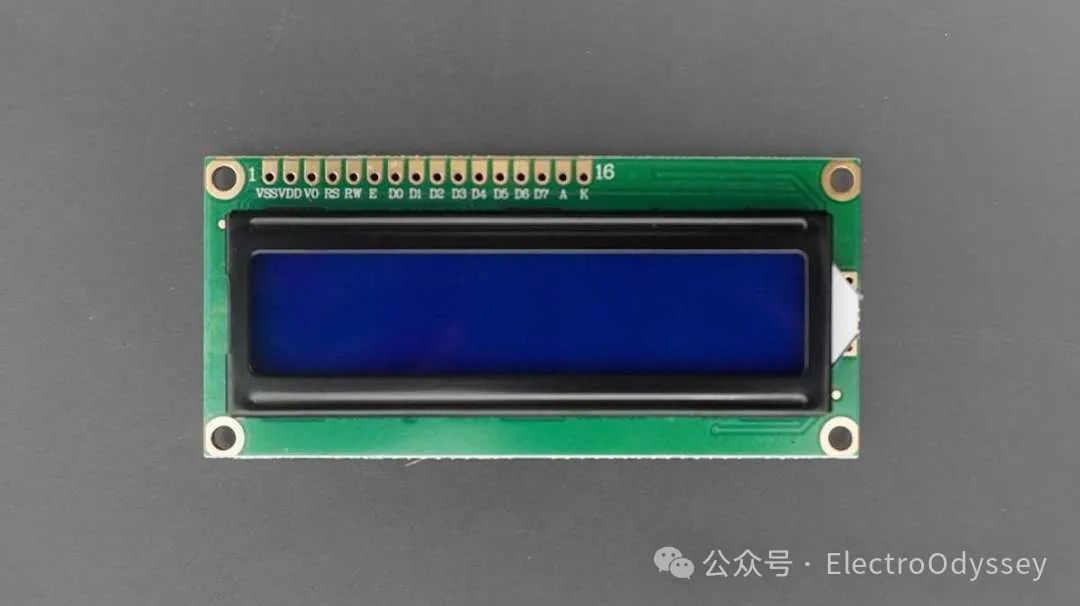
Compared to the smoke sensor, the LCD has many more connections. Vss connects to ground, Vdd connects to power, V0 connects to the 10KΩ potentiometer, RS connects to port 2, E connects to port 3, D4~D7 connect to ports 4-7, RW connects to the negative pole, A connects to the positive pole, and C connects to the negative pole.
For safety reasons, I chose to test the smoke sensor on the balcony. However, the balcony is small, making it inconvenient to monitor the information coming from the development board’s serial port with a computer.
Installing the LCD display allowed me to see the readings from the smoke sensor directly, eliminating the need to carry a computer around. This design made the entire debugging process much simpler.
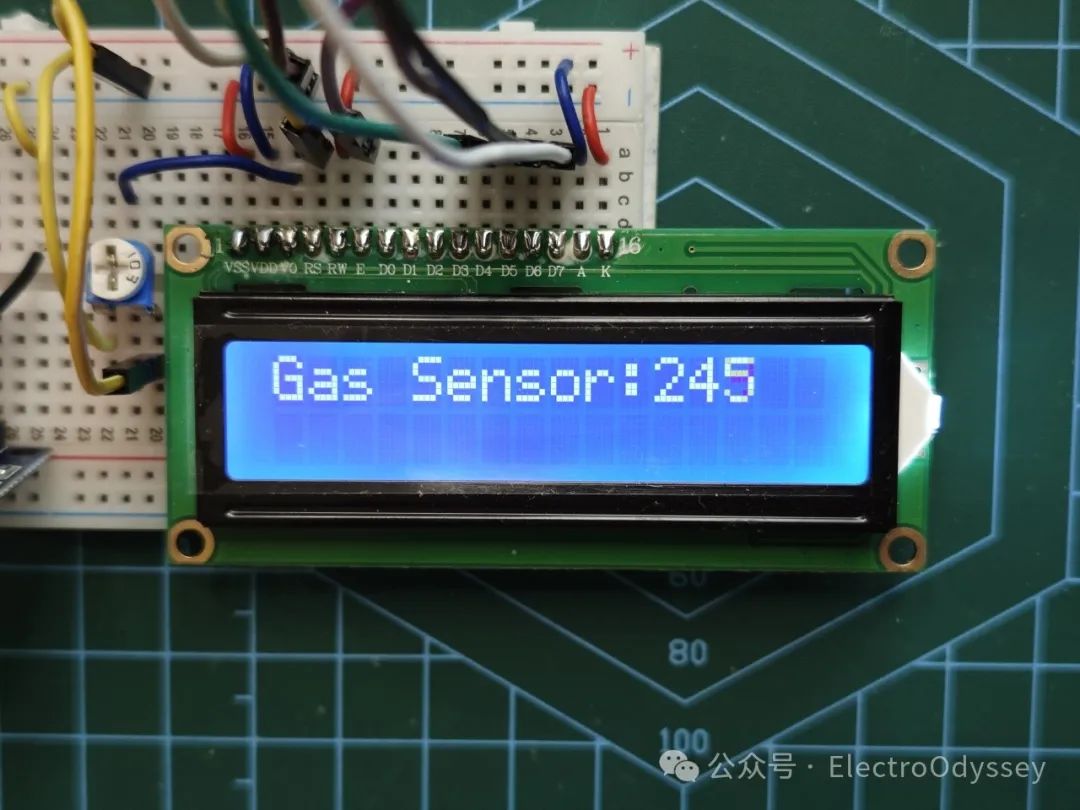
It turned out that I was quite lucky to get the desired data after just one test.
Below is the wiring diagram for the LCD created using Fritzing.
Software Programming
Organizing the features of the smoke sensor, I found that the code needs to implement the following functions: read sensor values, drive the active buzzer to emit an alarm, and control the LCD to display the sensor values.
To drive the active buzzer, simply set the digital port to high.
The LCD is slightly more complicated. First, we need to include the driver library at the beginning of the program and create an LCD object. Then, we move the cursor to the correct position and print “Gas sensor:” followed by the sensor return value.

To read the sensor values, we just need to detect the voltage at the A0 port, check if the signal exceeds the preset threshold, and then control the buzzer to sound or mute accordingly.
Before setting the threshold, I went to the balcony, lit a stick of incense, and brought the burning end close to the smoke sensor’s mesh. The reading on the LCD screen slowly rose from 80 to over 300. After removing the incense, the reading gradually fell back to around 80.
Based on this observation, I decided to set the sensor threshold at 130 to make it react when detecting smoke.
Testing and Adjustments
The smoke alarm also went through several iterations, mainly to address the recognition issue of the buzzer sound.
Initially, the alarm sound I set was a continuous “beep…” sound. However, this sound had neither a special rhythm nor high volume, making it easily masked by environmental noise.
Therefore, I first made the audio line intermittently turn on, emitting a dotted “beep beep beep beep” sound. A few days later, I replaced it with a larger diameter, louder buzzer.
This way, the “wow wow” sound can cover every corner of the room.
Additionally, there were improvements in fire safety. Since I couldn’t find a lighter at home initially, I used the gas stove’s flame to light the incense, which was not safe; when burning napkins, I also didn’t place fireproof materials on the table or the floor, posing a risk of igniting furniture.
To address these issues, I bought a lighter, an iron bucket, a stainless steel plate, and two 1kg fire extinguishers to reduce the risk of fire at home.
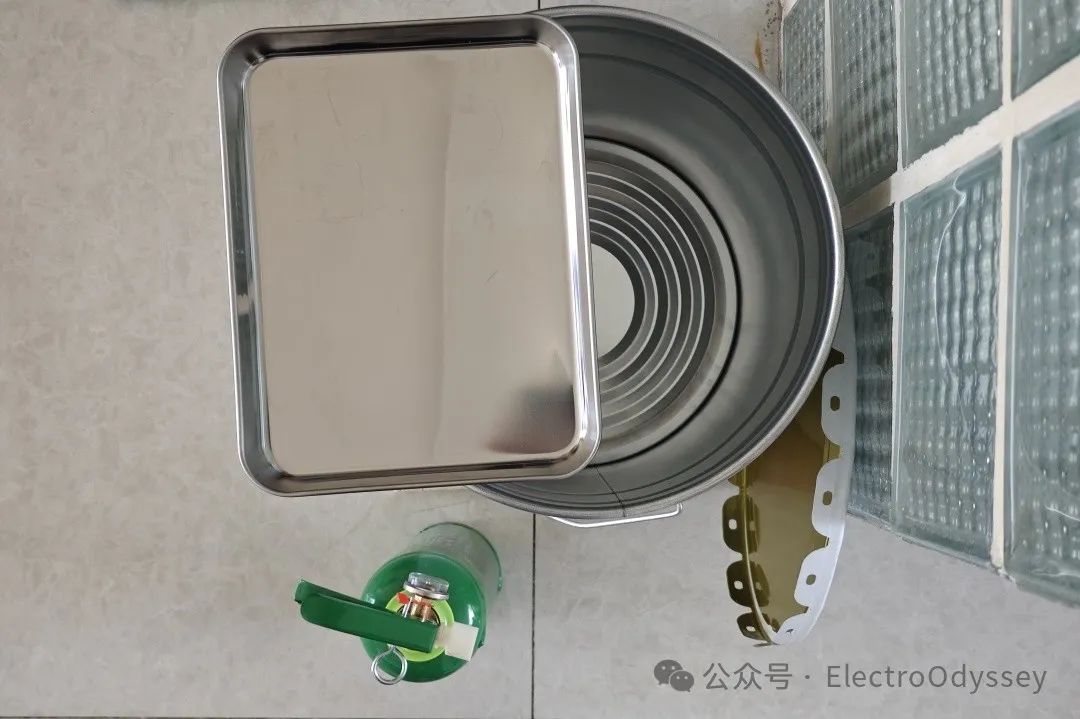
The green item is the fire extinguisher
Additionally, I also prepared cut-resistant gloves, gauze, band-aids, and iodine cotton swabs to prevent and treat accidental injuries.
Results Display
One More Thing
My device is DIY, and both its durability and stability cannot compare with mass-produced products. This alarm is just for fun.
Finally, I wish everyone a safe year ahead.
References
1. Blum, J. (2020). Exploring Arduino®: Tools and techniques for engineering wizardry (Second edition). Wiley. https://doi.org/10.1002/9781119405320
2. In-Depth: How MQ2 Gas/Smoke Sensor Works? & Interface it with Arduino. (2018, August 14). Last Minute Engineers. https://lastminuteengineers.com/mq2-gas-senser-arduino-tutorial/