Project Description
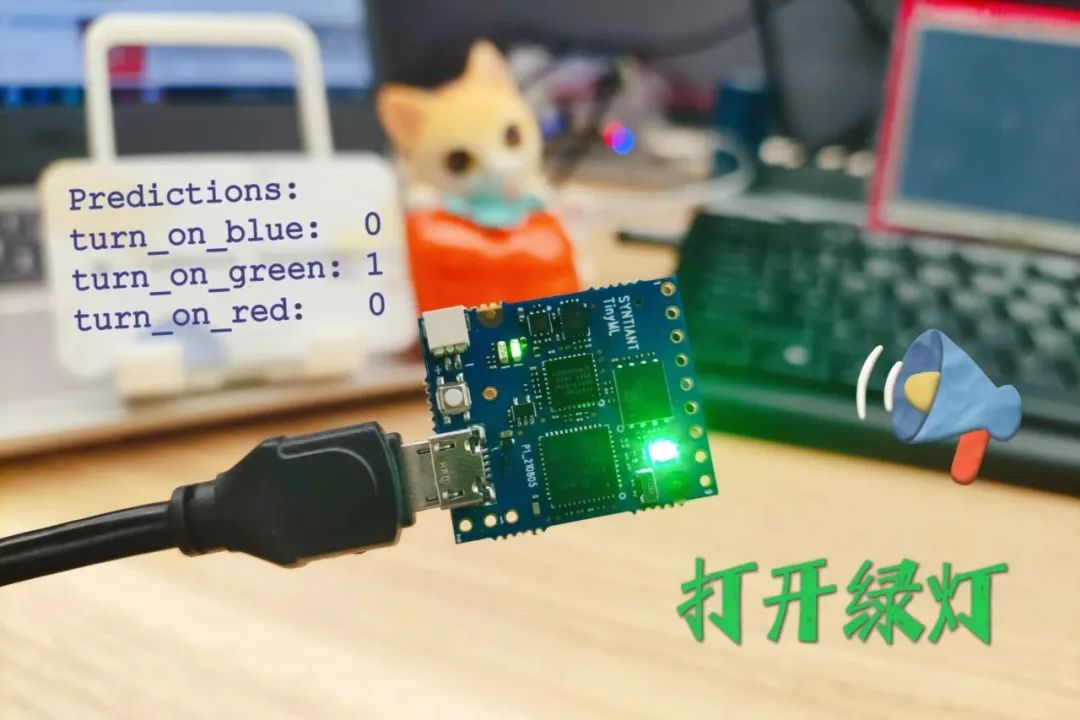
This project uses the microphone built into the Syntiant TinyML development board to build a machine learning model through Edge Impulse, allowing the LED light on the board to display different effects based on Chinese voice commands. A total of four labels of sound data were trained, as detailed below.
| Label | Keyword | Action |
|---|---|---|
| turn_on_blue | Turn on blue light | Make the RGB LED on the board display blue |
| turn_on_green | Turn on green light | Make the RGB LED on the board display green |
| turn_on_red | Turn on red light | Make the RGB LED on the board display red |
| turn_off | Turn off lights | Turn off the RGB LED on the board |
Hardware Platform
The Syntiant TinyML Board is a TinyML development board launched by Syntiant, an AI chip developer in the United States. It is equipped with the ultra-low-power Syntiant NDP101 Neural Decision Processor, enabling voice and sensor applications to run below 140 and 100 microwatts, respectively. Compared to traditional MCU-based systems, the Syntiant TinyML board has a throughput increase of 20 times and a system efficiency improvement of 200 times.
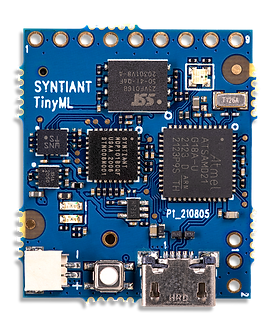
The Syntiant TinyML board is very small, measuring only 24mm x 28mm, making it a compact standalone system. Developers can directly connect the hardware via Micro USB and easily download the trained model through Edge Impulse without any dedicated debugging hardware.
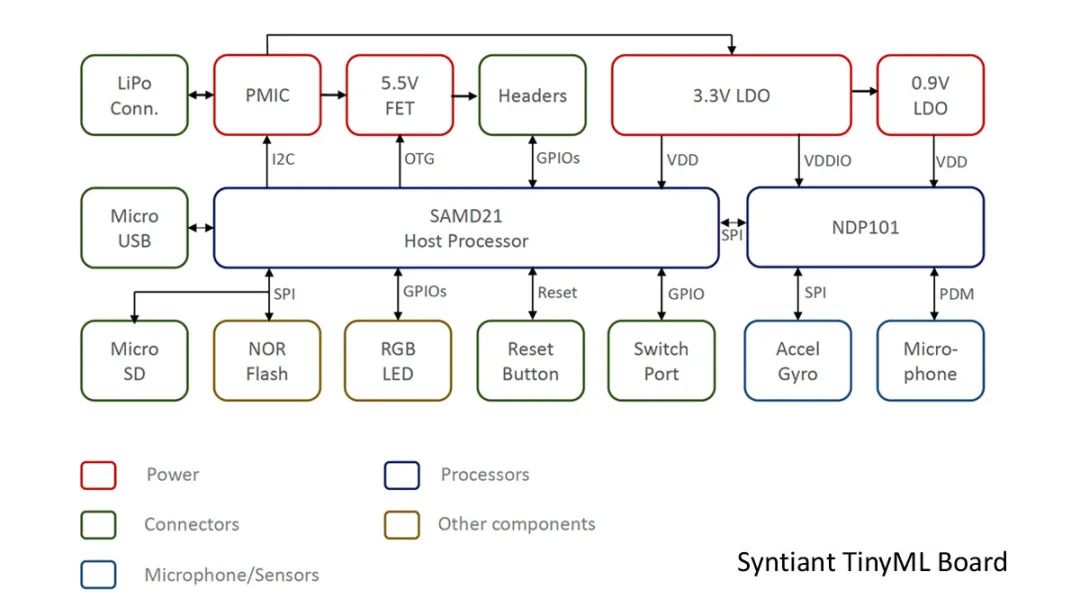
Hardware Components:
-
The Neural Decision Processor uses NDP101 and connects to two sensors
-
BMI160 6-axis motion sensor
-
SPH0641LM4H microphone
-
Main processor: SAMD21 Cortex-M0+ 32-bit low-power 48MHz ARM MCU
-
Built-in 256KB FLASH and 32KB SRAM
-
5 digital I/O (compatible with Arduino MKR series boards)
-
Includes 1 UART interface and 1 I2C interface (included in the digital I/O pins)
-
2MB onboard serial flash
-
One user-defined RGB LED
-
uSD card slot
-
The circuit board can be powered by 5V Micro-USB or 3.7V LiPo battery
Voice Training
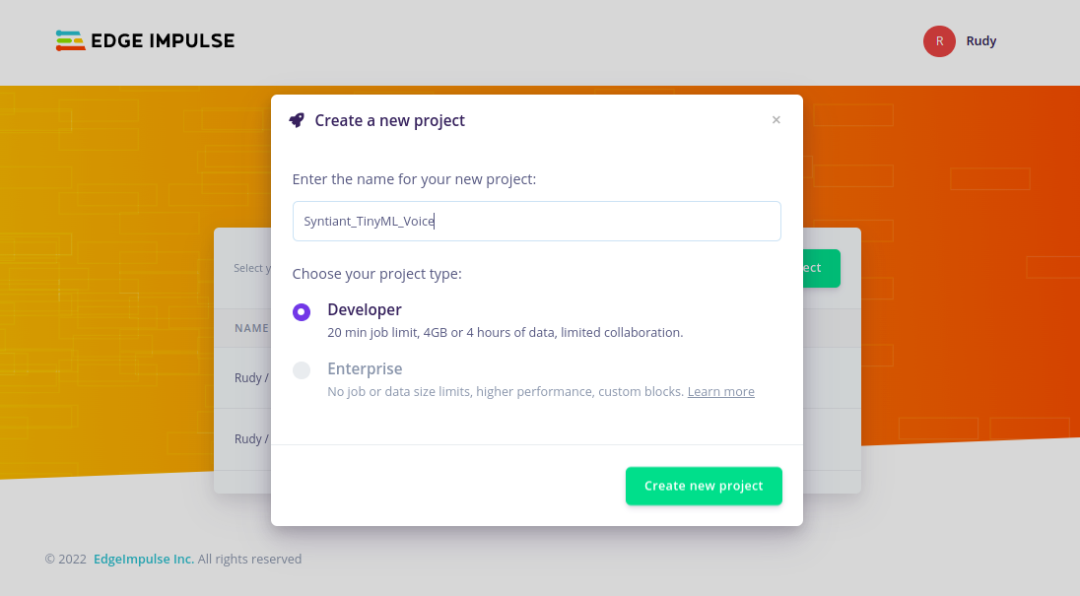
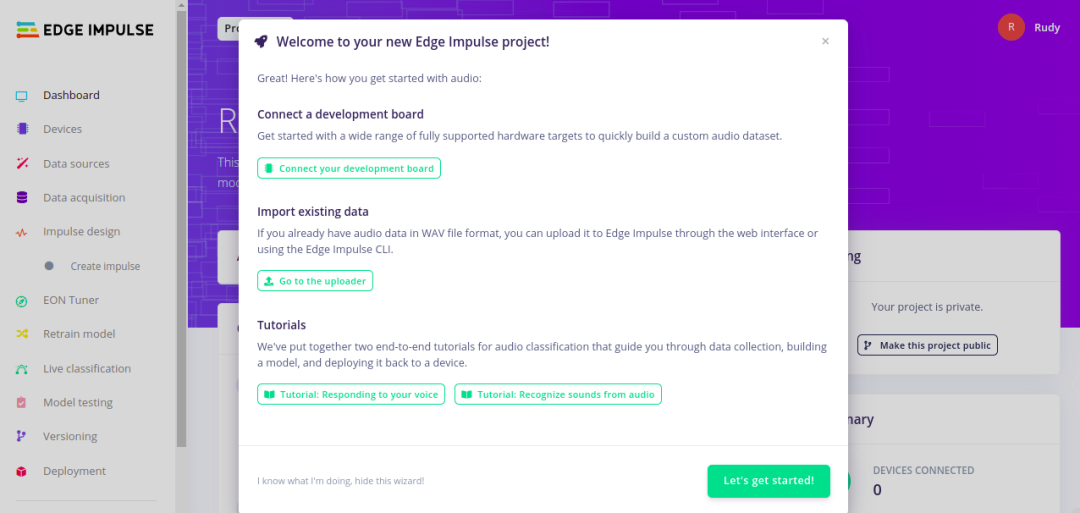
Open the studio.edgeimpulse.com website, create a new project, such as Syntiant_TinyML_Voice, as the project for this voice training.
After creation, enter the project main page, where you can see the general process of training: select device, select voice input source, collect voice data, create Impulse model, train data, generate firmware, deploy to hardware.
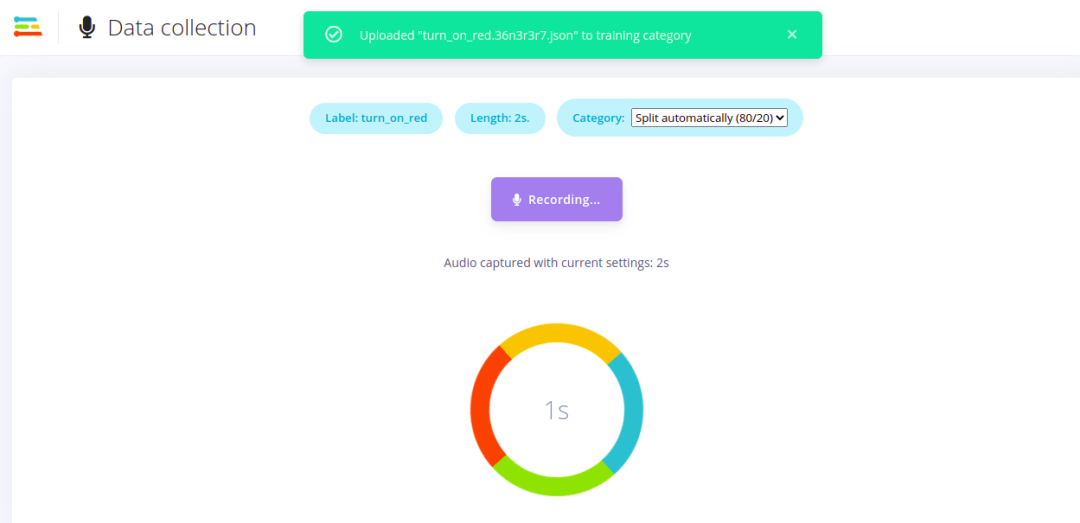
For voice data collection, since we need to collect speech like “turn on red light”, we set the collection duration to 2 seconds for convenience in collection and training. We collected 20 sets of data for each of the four labels, dividing them into training and testing sets in an 8:2 ratio.
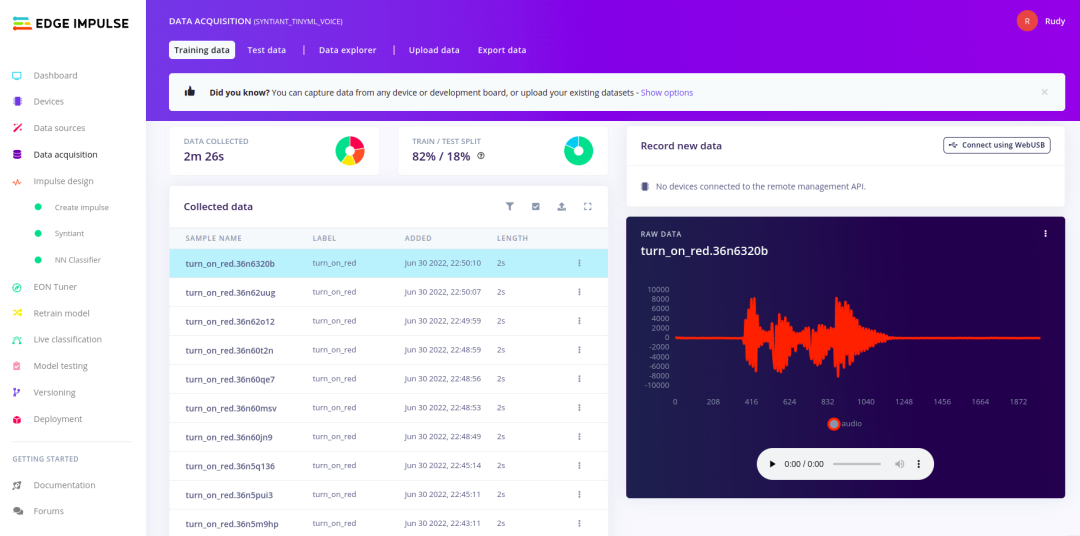
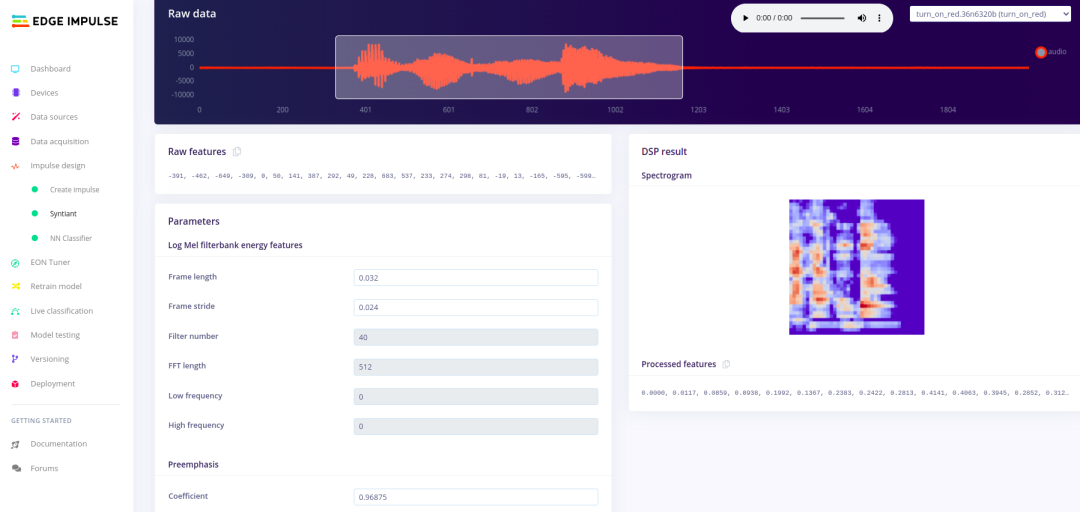
After collecting data, remember to check the quality of the data. On the Data acquisition page, select any collected voice data to see the sound waveform and playback the recording. Before training, ensure that all training and testing data is intact, as this will affect the training outcome.
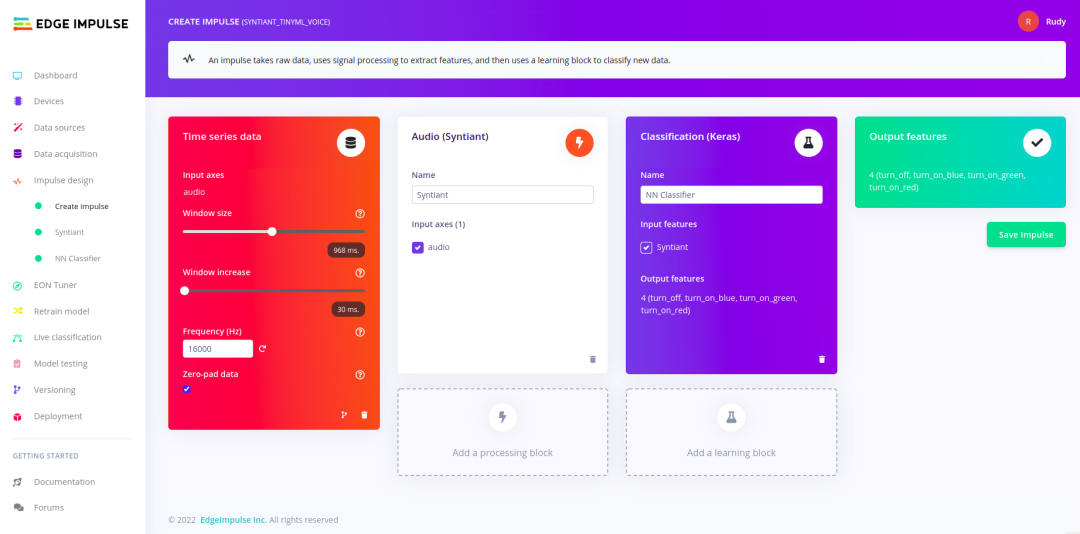
If the data is fine, we can proceed to create the machine learning model, which consists of four modules. First is the time window setting; for the Syntiant TinyML voice module, the Window size is fixed at 968 ms, and the Window increase is set to 30 ms (a smaller window increase setting is beneficial for machine learning to match speech). The second module selects Syntiant audio, the third module selects the Nearest Neighbor Classifier, and finally confirms the output labels: turn_off, turn_on_blue, turn_on_green, and turn_on_red. Click Save Impulse to save the model.
Then set the Mel filter feature parameters, using the default parameters here.
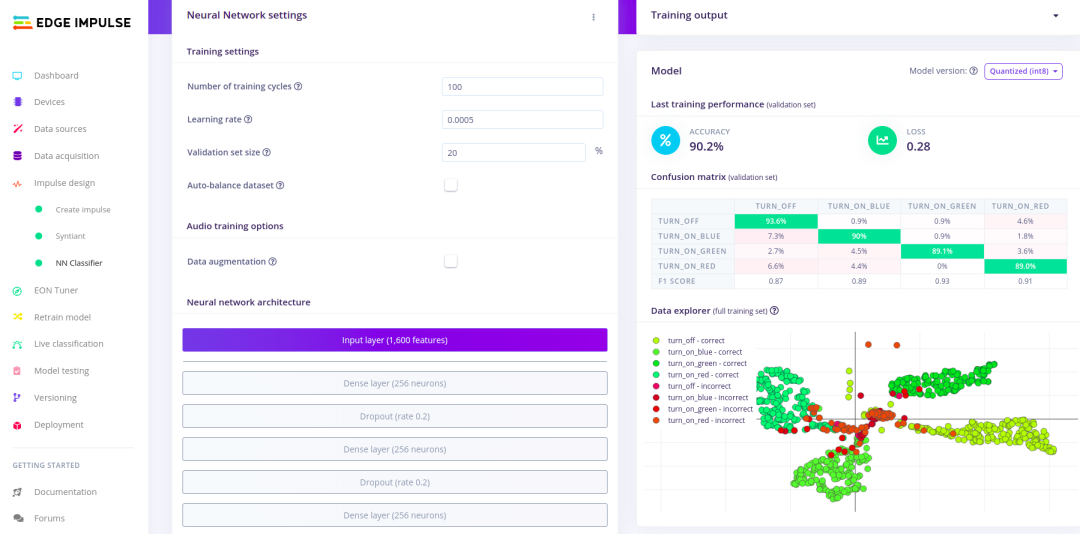
Start the training mode, with a training result accuracy of 90.2%. While not particularly high, it can still be tested.
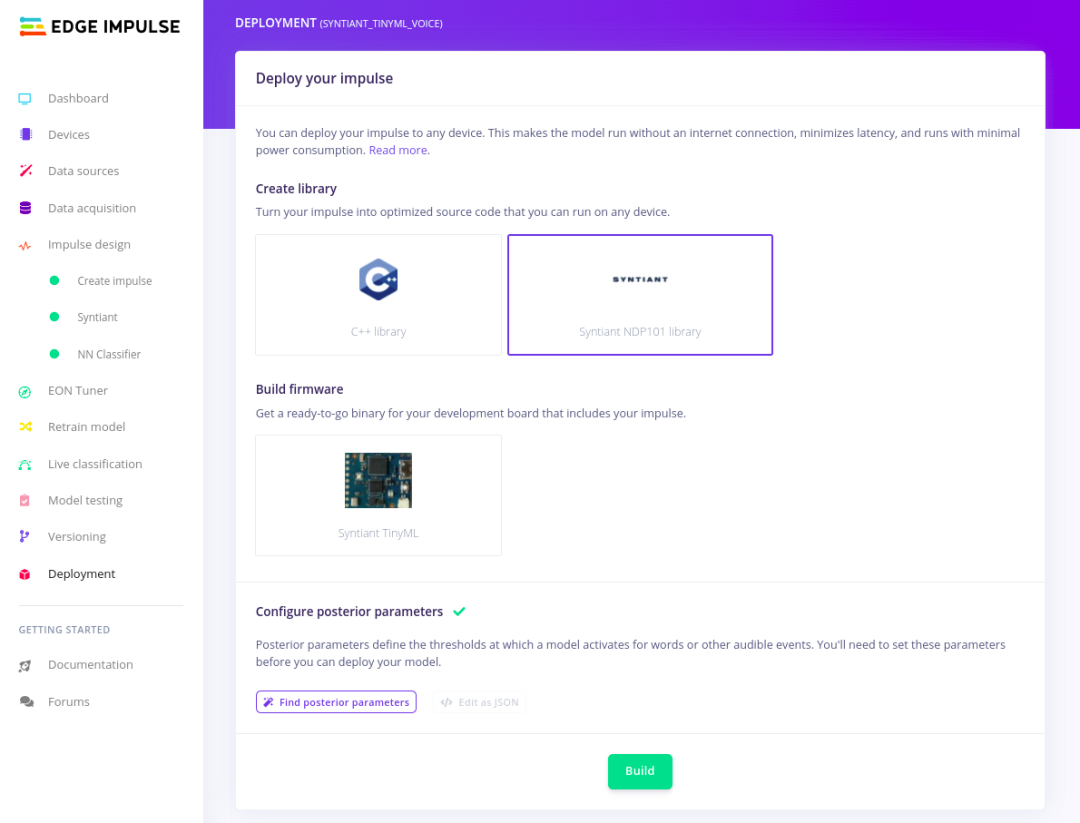
Click on the Deployment in the left sidebar, select the Syntiant NDP101 library to download the trained library, and replace it in your project (refer to Syntiant TinyML Board firmware download).
Arduino Project
Refer to the VoiceResponding project in Syntiant_TinyML_Board_Demo to modify the label names and their corresponding actions. The code is as follows.
void on_classification_changed(const char *event, float confidence, float anomaly_score) { // here you can write application code, e.g. to toggle LEDs if (strcmp(event, "turn_on_red") == 0) { // Toggle LED digitalWrite(LED_RED, HIGH); digitalWrite(LED_BLUE, LOW); digitalWrite(LED_GREEN, LOW); } if (strcmp(event, "turn_on_green") == 0) { // Toggle LED digitalWrite(LED_GREEN, HIGH); digitalWrite(LED_BLUE, LOW); digitalWrite(LED_RED, LOW); } if (strcmp(event, "turn_on_blue") == 0) { // Toggle LED digitalWrite(LED_BLUE, HIGH); digitalWrite(LED_GREEN, LOW); digitalWrite(LED_RED, LOW); } if (strcmp(event, "turn_off") == 0) { // Toggle LED digitalWrite(LED_BLUE, LOW); digitalWrite(LED_GREEN, LOW); digitalWrite(LED_RED, LOW); }}Recompile and upload to the Syntiant TinyML Board using the Arduino IDE to see the results!
Funpack Activity
Funpack Activity

END
Yinghe Academy
The Yinghe team is dedicated to providing standardized core skill courses for electronic engineers and related students, helping everyone effectively enhance their professional capabilities at various stages of learning and work.

Yinghe Academy
Exploring and advancing together in the field of electronics
Follow Yinghe’s official account to access classes anytime

Click to read the original text for more details