
Click on the "Xiaobai Learns Vision" above, and choose to add "Star" or "Top"
Heavyweight content delivered to you in real-time
1. Task Description
Implement object recognition using machine vision, with the Raspberry Pi as the main controller, issuing different commands to the lower machine based on different recognition results to control the operation of the entire machine. The process is as follows:

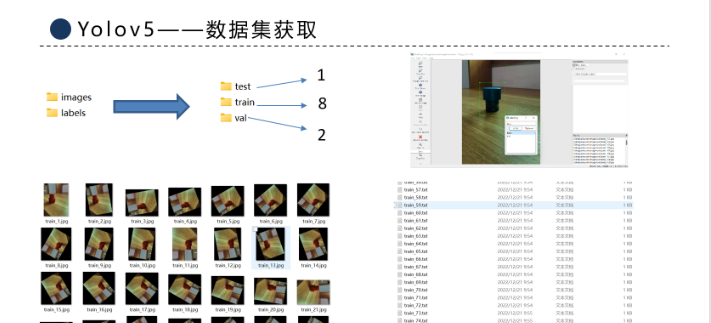
2. Dataset Acquisition
This is a part sent by the teacher, so there are definitely no directly usable models online, unlike mask detection which has ready-made datasets. Therefore, we need to acquire the dataset ourselves.
Since we only have two parts, if we want to obtain a large number of images, we can use rotation. I set it so that each image generates a new photo with a rotation of 10 degrees, allowing us to generate 36 images from each photo taken, thus expanding the dataset source.
Then, we use labelImg to annotate the images, which allows us to obtain a large dataset and corresponding label txt files. I allocated the images in the ratio of test:train:val = 1:8:2. Thus, our dataset is ready.
3. Yolov5 Model Training
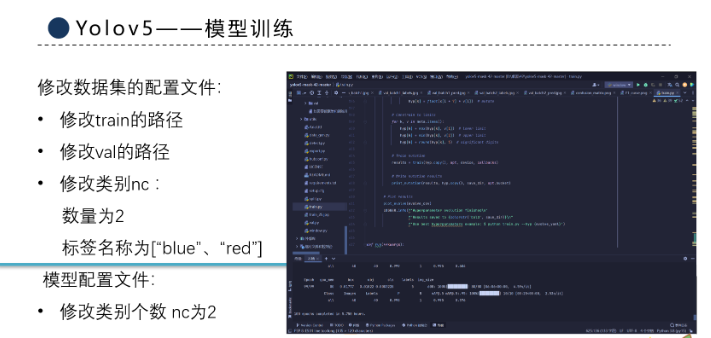
Since the creators of Yolov5 have open-sourced the model code, we can use it directly. We just need to modify the paths for train and val to our own, as well as the number of categories. Here, I have divided it into two categories, so it is 2, and the label names correspond to the colors, blue and red.
I chose the Yolov5s model, which is lighter and has a faster detection speed. I also set the number of categories to 2. Once prepared, we started training. Since I used the CPU for training, the duration was about 5.7 hours; using a GPU would significantly speed things up.
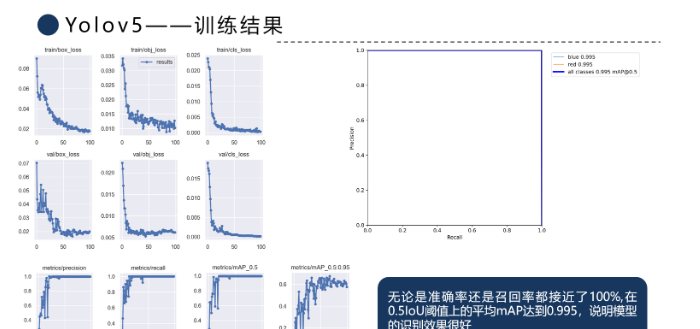
4. Model Training Results
From the image, we can see that both the accuracy and recall rates are close to 100%, with an average mAP of 0.995, indicating that the model performs well in recognition tasks for our workpieces.
5. Detection Effect
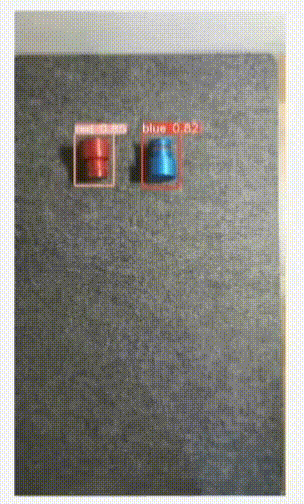
From the video, we can see that the red and blue workpieces are recognized, with the red labeled as ‘red’ and the blue labeled as ‘blue’. The numbers represent accuracy, which is generally above 0.8, indicating a relatively ideal result.
Frame-by-frame detection of the video shows excellent recognition results for every frame. This is the result of the model running on a laptop. Now, our Yolov5 module has reached a conclusion, and the next question is how to get it to run perfectly on the Raspberry Pi.
6. Raspberry Pi Environment Setup
This is my first time working with Raspberry Pi and Linux, so I encountered many issues, sometimes spending an entire day to solve a single problem.
I documented this learning process and the various problems encountered and posted them on CSDN, hoping to help you. The link is as follows: Yolov5 Raspberry Pi 4B Problem Summary Raspberry Pi 4B Learning Notes
The environment I chose is the 64-bit operating system for Raspberry Pi, which makes it easier to download OpenCV. After long exploration, I found that Pytorch is very difficult to install on a 32-bit operating system, and even if successfully installed, it cannot run.
Therefore, I chose the 64-bit operating system for Raspberry Pi, installing OpenCV and Pytorch.
7. Yolov5 Migration to Raspberry Pi
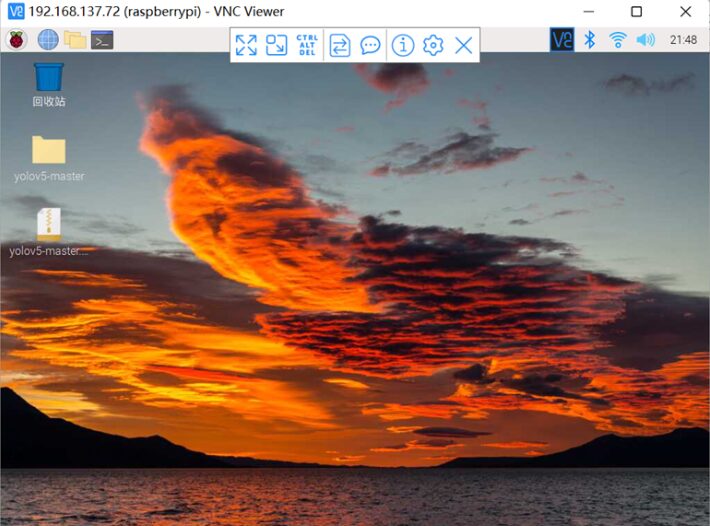
After preparing the environment, we need to migrate Yolov5. First, connect to the Raspberry Pi through VNC viewer, allowing us to control the Raspberry Pi from the computer. For issues encountered, you can refer to my previous two blogs.
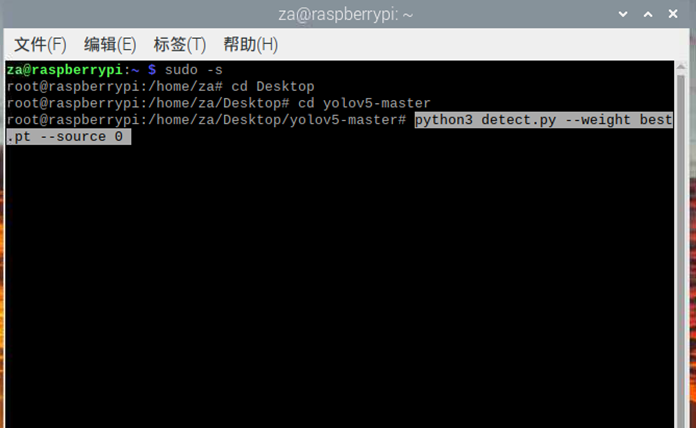
Use the file transfer at the top to transfer the trained pt module to the Raspberry Pi. Use the Linux cd command to enter the folder where yolo is located, input the run command, python3 to run the detect file, using the weight file we just transferred, best.pt, and setting source to 0 to call the CSI camera installed on the Raspberry Pi. After pressing enter, it can run.
8. Raspberry Pi Detection Results
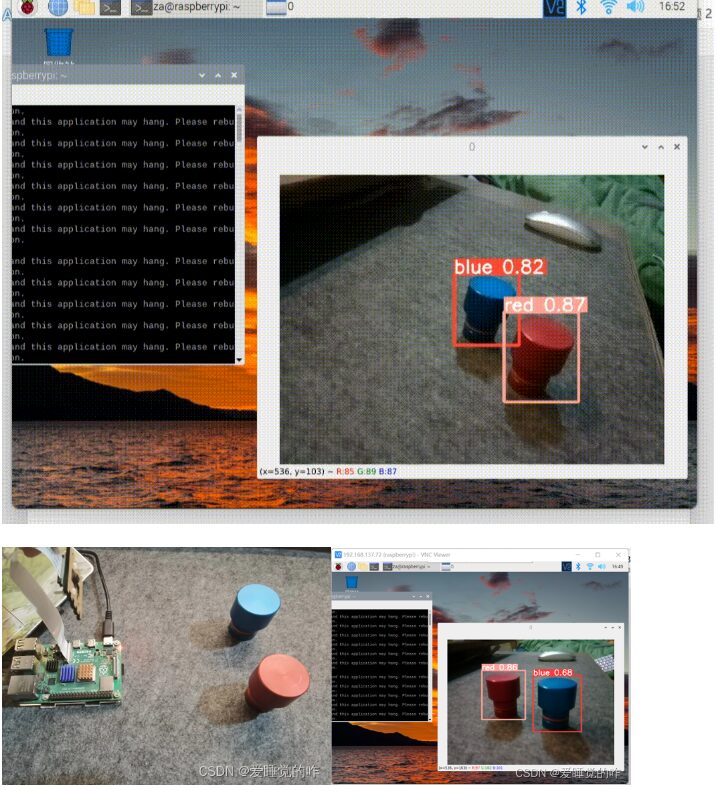
Let’s take a look at the detection results: on the left is the detection environment, with the Raspberry Pi using the CSI camera to capture images. The image below is one taken during detection.
We can see that the red part is recognized and labeled as ‘red’, and the blue part is also recognized and labeled as ‘blue’. We can use these two labels to issue different commands to the lower machine to complete specified tasks.
Conclusion
The project mainly involves using Yolov5 for object detection, then using the Raspberry Pi as the main controller to migrate the model for recognition and control the operation of the lower machine.
Throughout the process, I encountered countless issues, both hardware and software, often spending an entire day on a single problem. This process was painful, but fortunately, the results were satisfactory. During detection, I also found that the recognition speed of the Yolov5 model is indeed a bit slow; even a laptop struggles with it, and it is even more laggy on the Raspberry Pi, taking 2-3 seconds to detect a single image.
Future optimization directions include optimizing the model by using the yolov5-lite model and optimizing the method using OpenCV template matching for recognition, which should be much faster without involving deep learning.
Of course, that’s a topic for later. There are still many areas in artificial intelligence that I have not studied or even heard of; I am still just a beginner. Let’s keep pushing forward!
Copyright Statement: This article is an original piece by CSDN blogger “The One Who Likes to Sleep” and follows the CC 4.0 BY-SA copyright agreement. Please include the original source link and this statement when reprinting.
Original link:
https://blog.csdn.net/weixin_63866037/article/details/128427628
Editor: Guyueju
Statement: Some content is sourced from the internet for learning and communication purposes only. The copyright of the article belongs to the original author. If there are any issues, please contact for removal.
Download 1: OpenCV-Contrib Extension Module Chinese Version Tutorial

Reply "Extension Module Chinese Tutorial" in the backend of the "Xiaobai Learns Vision" public account to download the first OpenCV extension module tutorial in Chinese, covering installation of extension modules, SFM algorithms, stereo vision, object tracking, biological vision, super-resolution processing, and more than twenty chapters of content.

Download 2: 52 Python Vision Practical Projects

Reply "Python Vision Practical Projects" in the backend of the "Xiaobai Learns Vision" public account to download 31 visual practical projects including image segmentation, mask detection, lane line detection, vehicle counting, eyeliner addition, license plate recognition, character recognition, emotion detection, text content extraction, facial recognition, etc., to help quickly learn computer vision.

Download 3: 20 OpenCV Practical Projects

Reply "OpenCV Practical Projects 20 Lectures" in the backend of the "Xiaobai Learns Vision" public account to download 20 practical projects based on OpenCV.

Group Chat

Welcome to join the public account reader group for discussions with peers. Currently, there are WeChat groups for SLAM, 3D vision, sensors, autonomous driving, computational photography, detection, segmentation, recognition, medical imaging, GAN, algorithm competitions, etc. (which will be gradually subdivided). Please scan the WeChat number below to join the group, and note: "Nickname + School/Company + Research Direction", for example: "Zhang San + Shanghai Jiao Tong University + Visual SLAM". Please follow the format; otherwise, you will not be approved. After successfully adding, you will be invited to relevant WeChat groups based on your research direction. Please do not send advertisements in the group; otherwise, you will be removed. Thank you for your understanding~