
I am someone who compulsively chases the latest updates; every time I see software updates, I have to upgrade, or I feel uneasy. This time, I fell victim to this obsession.While developing on the 407 development board using the latest version of Keil for ARM 5.33, I found that my self-created project could not compile properly, resulting in dozens of warnings instead of errors. Based on my understanding of this software and my personal programming skills, there shouldn’t be any issues. I finally discovered that this was caused by a bug in the software itself.This post will share this significant discovery with everyone and show how to use Keil’s project wizard configuration tool to create new project files.To get started, you must first launch the software.1. Start the software, go to Project -> New Project, enter the project wizard, and set the project name to save.
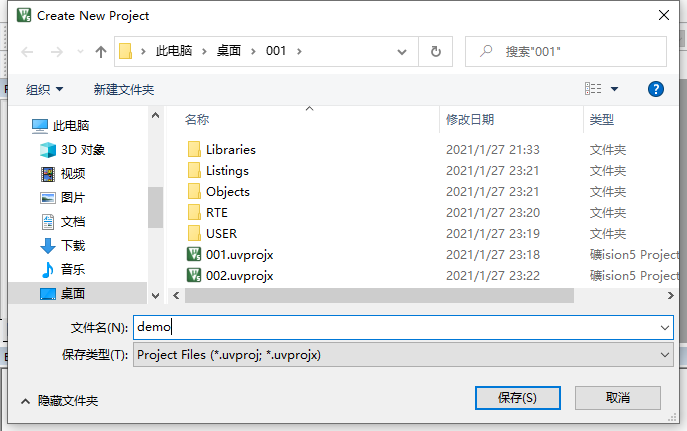 Note: It is recommended that the project path and project name use only ASCII characters, avoiding Chinese paths or full-width characters; it is best to use only letters, numbers, and underscores.2. In the device selection list, find the device you need, such as AT32F407VGT7.
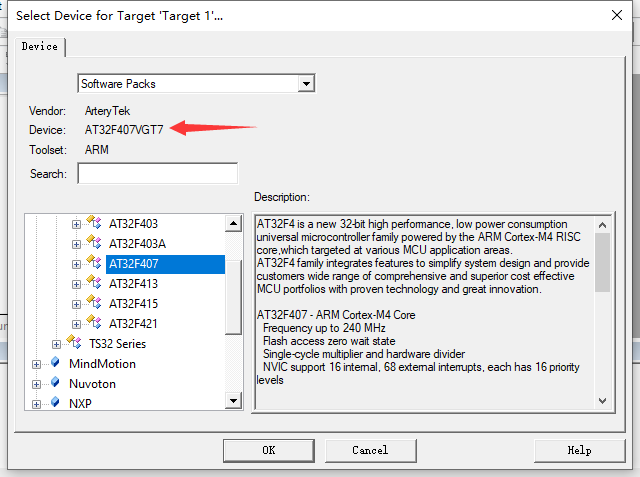 Note: You must first install the official pack support package; otherwise, you will not find the chip model you need in Keil.The download link for the AT32F4 series pack used in this post is here.Click OK to proceed to the next step, manage the RT environment, and select software components.This interface is something many people may not have seen before; very few people use this, and I haven’t seen anyone mention it in online posts. However, it is quite convenient if you know how to use it.
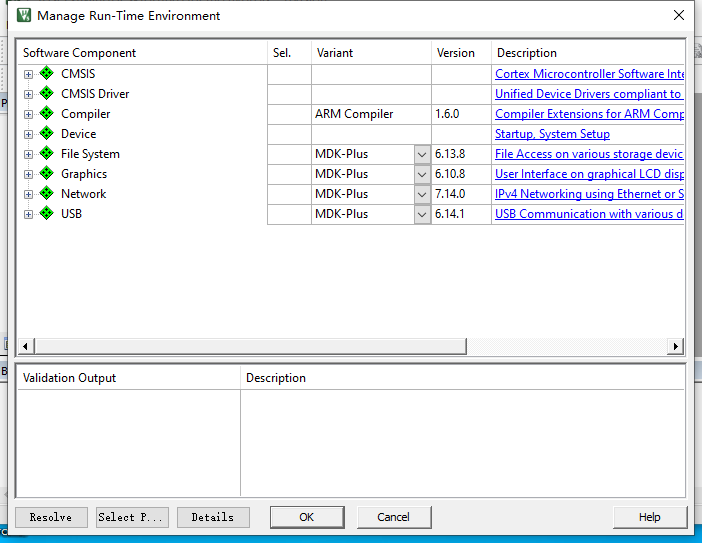 Select CORE from CMSIS, Startup and System_AT32Fxx from Device, and choose standard peripheral drivers as needed, such as GPIO, etc.You can also select all peripheral library files, but this will slow down the compilation speed. It is faster to select only the peripherals you will use.If you find it troublesome, you can select all peripheral libraries.
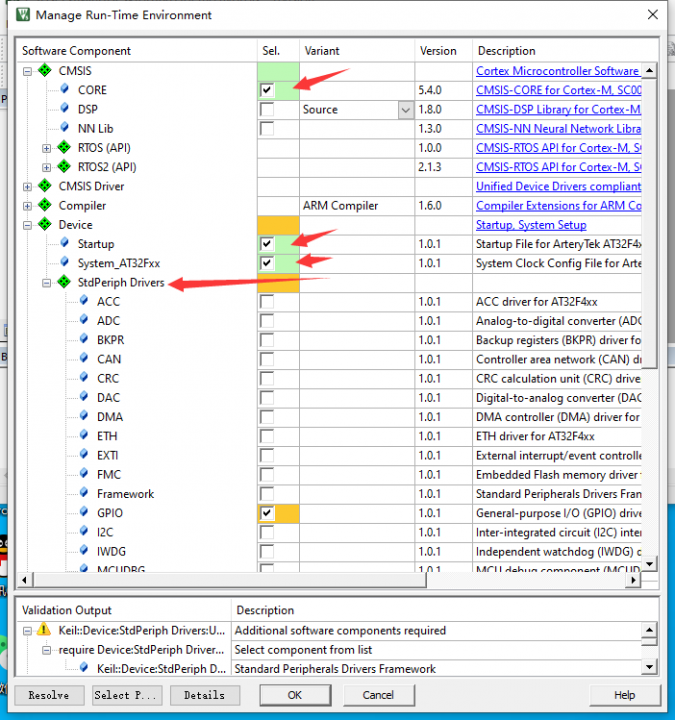 Then click OK; the basic project is established. Add user functions, such as writing a simple main.c file to include.
 The directory of the project you created is different, which may be unfamiliar to many people, but you will get used to it after seeing it more often. Compile… wait a few seconds, and it’s done, but…
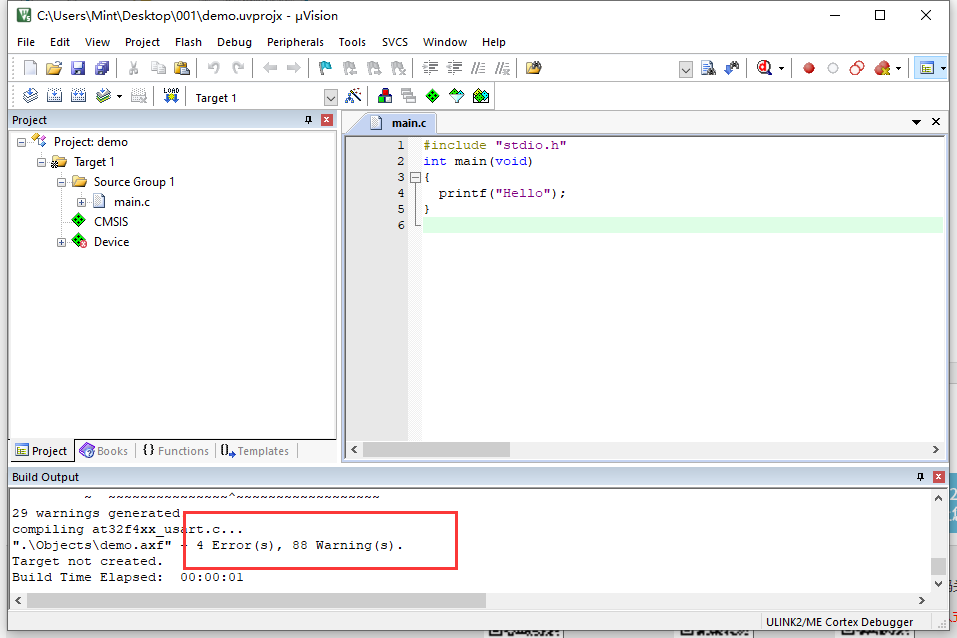 What the hell, why are there so many errors and warnings? It’s terrifying. Why is this happening?I encountered this problem before and spent a long time resolving the errors, but I couldn’t fix the warnings, which always indicated type conversion warnings or that a certain register was not defined. This issue troubled me for two days, but I finally resolved it. Don’t be afraid; go into the project configuration and change the compiler version from 6 to 5. There are multiple versions available; version 6 is too new and has bugs.
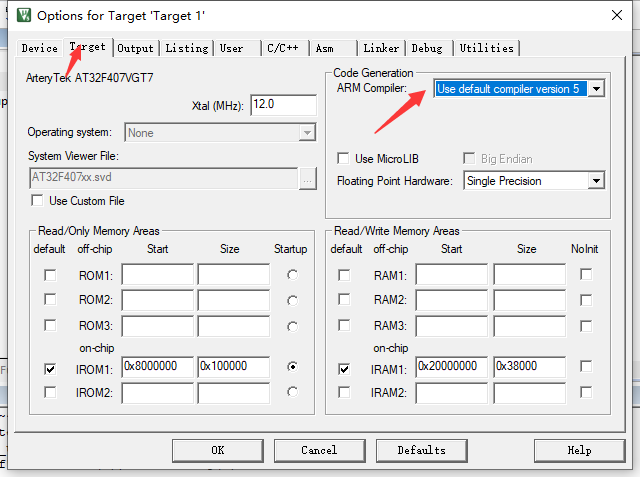 Compile again, and a miracle happens: 0 errors and 0 warnings.
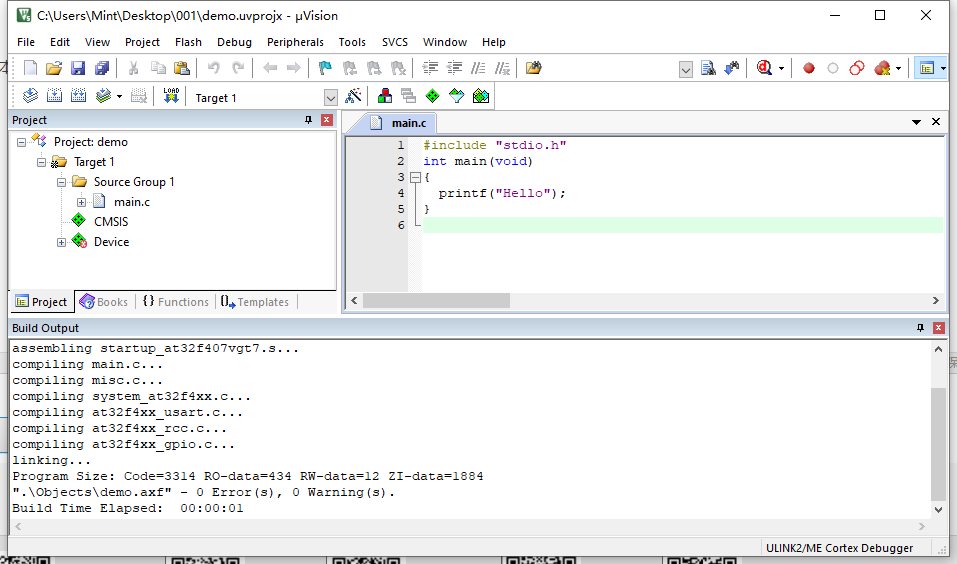 At this point, I changed the compiler version back to the default 6, and there were still no errors or warnings. It’s truly strange.In the previous step, there were four options for selecting the AC compiler; I suspect that there are actually only two. I’m not sure if my understanding is correct.
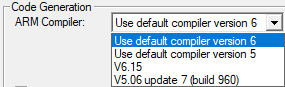 Finally, I added code to complete a simple Blink program. At this point, you can understand how to use the peripheral library by looking up the header files and function prototypes. After compiling once, you can also locate the prototypes, making it easier to find functions and variables.
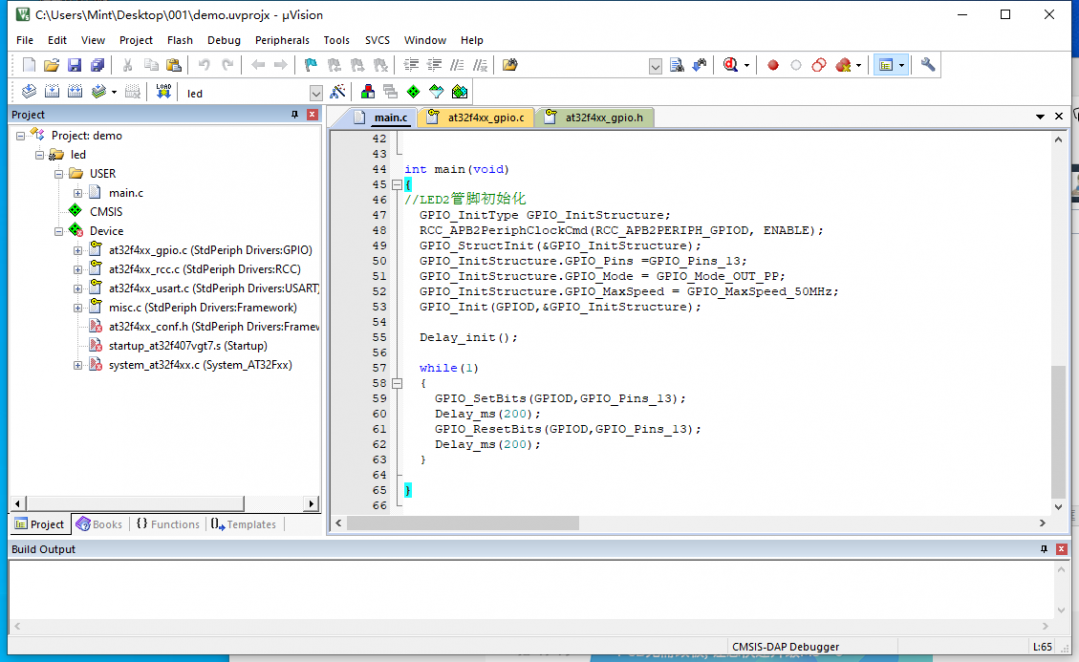
Netizenmuyichuan2012 stated that they encountered similar AC6 issues here. AC6 has many versions, such as AC6.14, AC6.15, etc. Among them, it is recommended not to use AC6.14.1 as it has many problems.
ENDThis article is an original work by the blue V author gaoyang9992006 from the 21ic forum.▍Recommended Reading
Raspberry Pi Pico: An MCU for Only $4
Summary of Bare-Metal Programming Methods for Embedded Linux Development Boards
Pain Points of Domestic 16-bit MCUs, This Cost-Effective Product Can Help