01
Preparation Work
To flash the ESP32 application program using a serial port in a virtual machine, you must first ensure that the serial port of the development board can be correctly connected to the virtual machine.
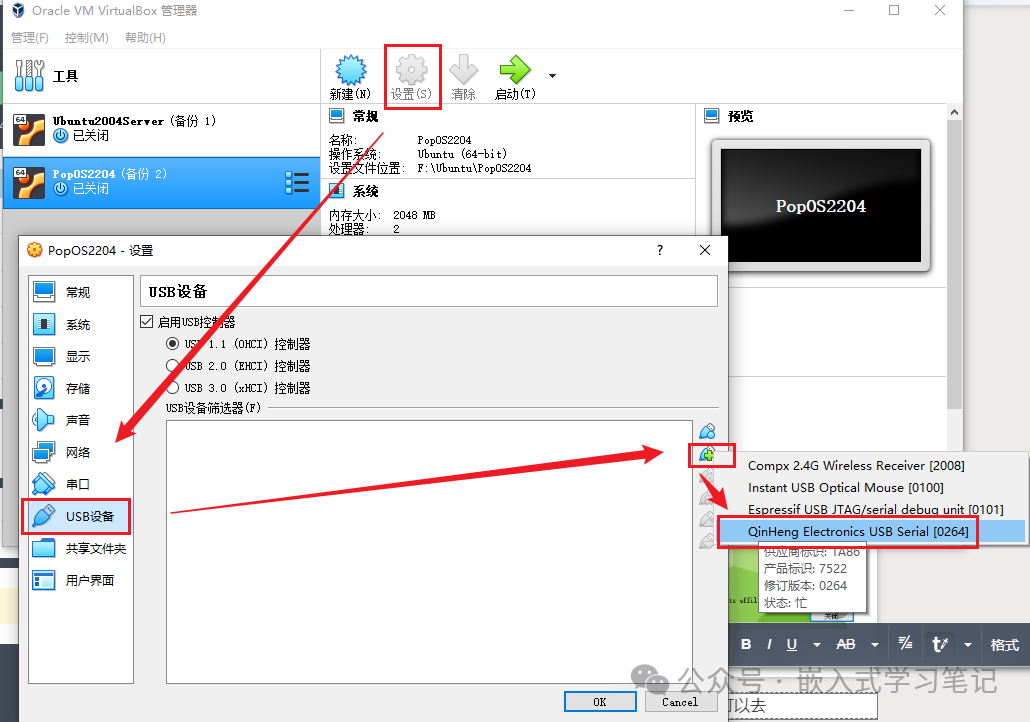
The virtual machine software I am using is VirtualBox 6.0. When the development board is connected to the computer, there is no pop-up prompt like VMware that asks whether the current device should connect to the host or the virtual machine.
If you encounter this issue like I did, you can go to the virtual machine settings ➡ USB Devices ➡ Add a USB filter, and select the USB-to-serial chip used by your current development board. My development board should be using the CH34x series chip from Qinheng Micro, so I selected as follows:
02
Linux System Settings
You can plug and unplug the development board, then execute the ls /dev command to confirm which port the development board is using. Here, I confirmed it is /dev/ttyUSB0.
Executing ls -l /dev/ttyUSB0 command, you can see that ordinary users do not have permission to operate this port, so the idf.py flash command cannot flash the application program.

To solve the problem of being unable to flash, there are two methods. The simplest is to use the chmod command to add permissions for ordinary users, but this method will fail after the virtual machine restarts.
The other more permanent method is to add the current user to the dialout user group, so that restarting the virtual machine will not affect the use of idf.py flash to flash programs.
Execute the following command to add the current user to the dialout user group:
sudo usermod -a -G dialout $USER03
Flashing the Application Program
At the end of the following article, we used the idf.py build command to compile the hello world project. Here, we continue to explain how to flash the compiled application program.
https://mp.weixin.qq.com/s/HhubJj0uie_f53R_IPpc0A?token=148450378&lang=zh_CN
Enter the application project and enter the idf.py flash command. This command will automatically search for available serial ports and then execute the program flashing. Upon successful flashing, the terminal will display the following information:
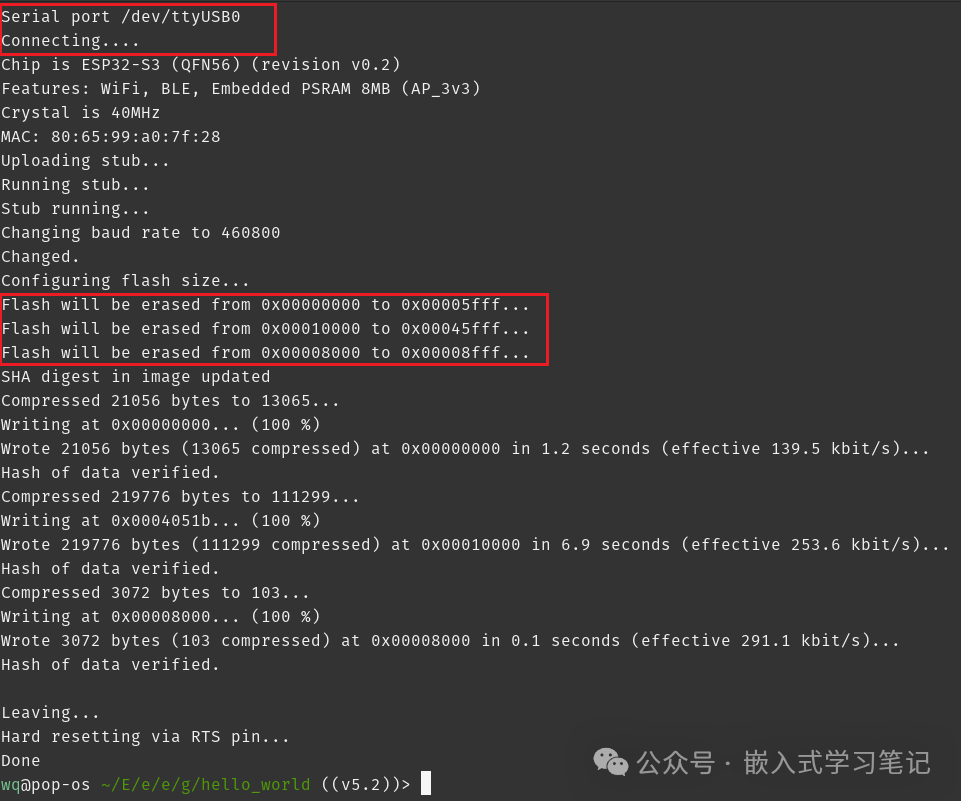
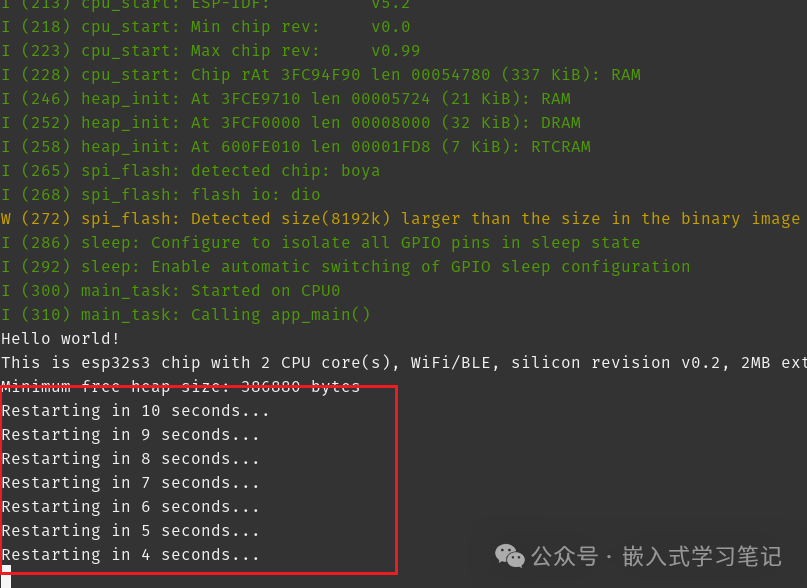
After the program is successfully flashed, you can execute the idf.py monitor command to view the logs output by the program.
We need to understand what operations idf.py flash performed in order to understand how to use the flash_download_tool tool to flash the program later.
We can see that idf.py flash outputs the following content, indicating that the bootloader/bootloader.bin file was flashed at address 0x0, the hello_world.bin application program was flashed at address 0x10000, and the partition_table/partition-table.bin file was flashed at address 0x8000.
esptool.py --chip esp32s3 -p /dev/ttyUSB0 -b 460800 --before=default_reset --after=hard_reset write_flash --flash_mode dio --flash_freq 80m --flash_size 2MB 0x0 bootloader/bootloader.bin 0x10000 hello_world.bin 0x8000 partition_table/partition-table.bin04
Using flash_download_tool to Flash Program
The flash_download_tool is an official flashing tool provided by Espressif, and you can also use this tool to flash application programs.
This tool can be downloaded from the following address:
https://dl.espressif.cn/public/flash_download_tool.zip
The usage of this tool can refer to the official documentation:
https://docs.espressif.com/projects/esp-test-tools/zh_CN/latest/esp32/production_stage/tools/flash_download_tool.html
First, select the chip you are using, and configure the others as follows:

Next, select the three firmware mentioned above, namely build/bootloader/bootloader.bin, build/partition_table/partition_table.bin, hello_world.bin, and fill in their partition offset addresses as follows:

Before flashing, you need to put the development board into download mode. You can refer to the official technical reference manual for specifics; here is just a simple explanation.
When powered on or reset, if both GPIO0 and GPIO46 of the ESP32 are low, the chip will enter download mode:

Since GPIO46 is low by default during reset, you only need to pull GPIO0 low.

Generally, the ESP32S3 development board has a boot button, which is used to pull down the GPIO0 pin.

We can press and hold the boot button, then press the RST button once, so that the chip enters download mode, and then simply click the start button of the flash_download_tool.