The DY-SV8F MP3 voice playback module is a compact tool that can easily play audio. It has a cool feature – it can handle various audio formats, providing you with different types of audio file options. Additionally, it comes with a built-in amplifier, making the sound clear and pleasant. Due to its user-friendly interface, it is easy to set up, making it perfect for DIY projects or any situation that requires smooth audio playback. The module is compatible with various power supplies, and its small size and low power consumption mean it is very suitable for different setups, whether you are tinkering with electronics or just playing with audio projects.
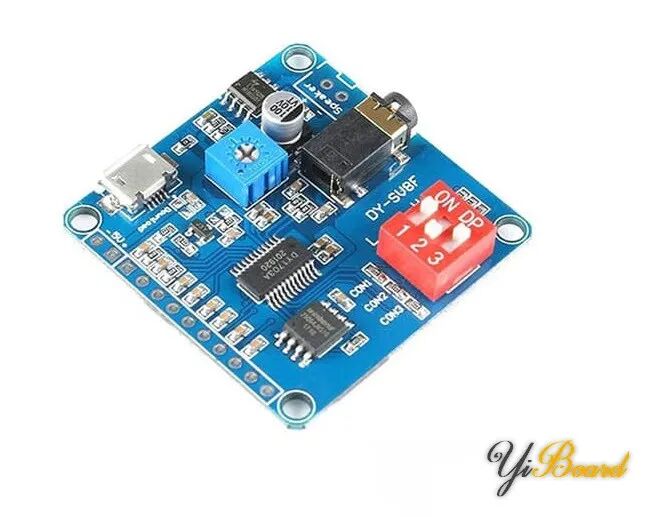
Pin Distribution of DY-SV8F MP3 Voice Playback Module
This voice playback module has a total of 14 pins, as shown in the figure below:
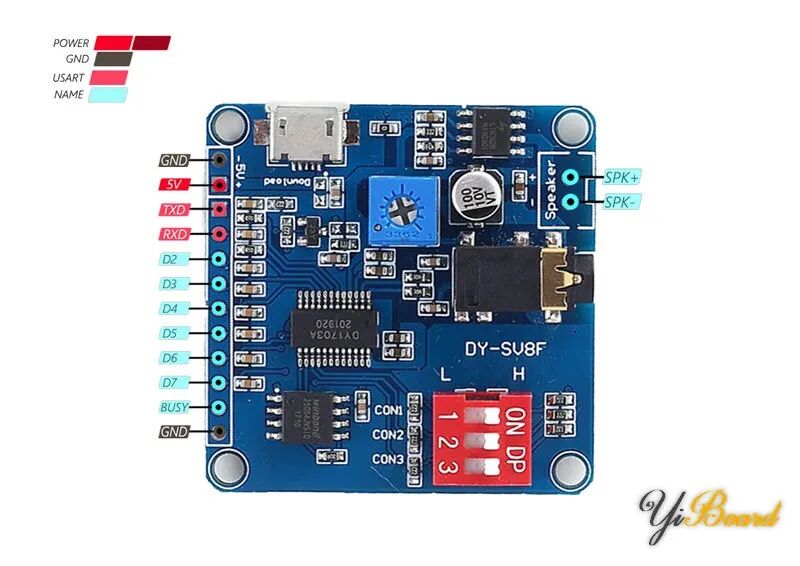
● VCC (5V): Power input.
● GND: Ground reference for the module.
● IO0 (TX): Transmit serial communication data.
● IO1 (RX): Receive serial communication data.
● IO2 to IO7: General input/output pins.
● BUSY: Indicates the operating status of the module.
● SPEAKER OUT: Output for connecting external speakers.
● AUX OUT: Auxiliary audio output for external devices.
● USB IN: USB interface for data transfer and power supply.
Hardware Connection
Before starting the connection, you must upload songs to the module using a computer. First, connect the module to the PC using the microUSB port on the module. Once connected, the module will appear as a flash drive, allowing you to easily copy files to it.
The DY-SV8F module is versatile, offering seven different operating modes. In this article, we will delve into two main modes, showcasing the module’s adaptability.
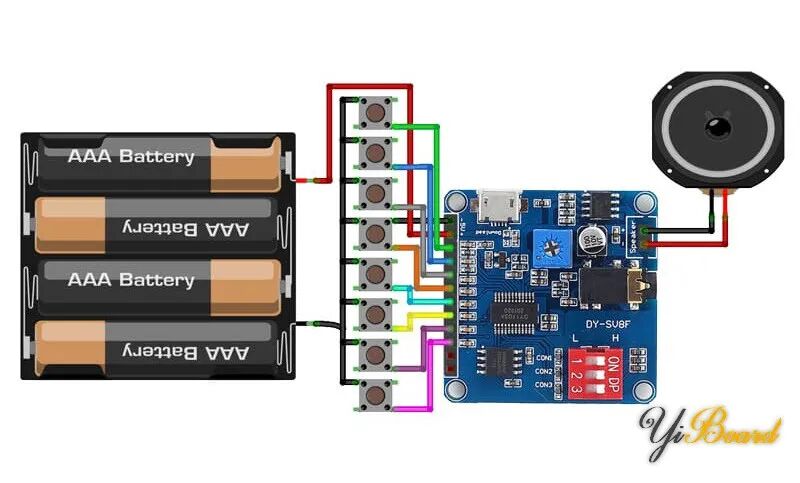
IO Mode
The first mode emphasizes simplicity, allowing users to control sound playback specifically using IO (buttons). This straightforward approach caters to users who enjoy hands-on interaction with the module based on buttons.
Serial Mode
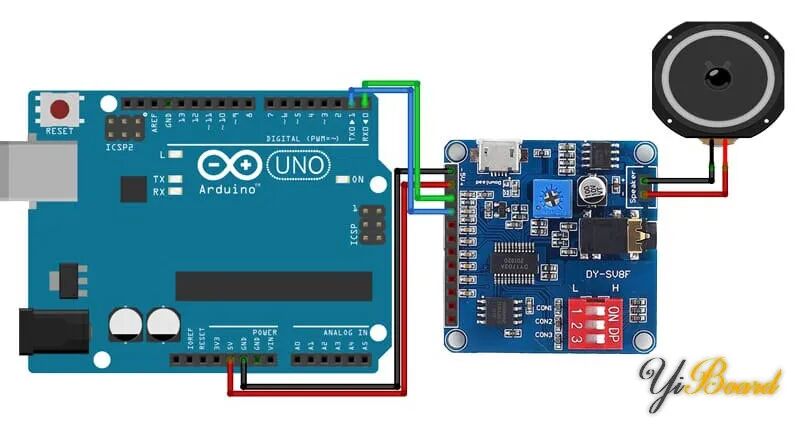
The second mode demonstrates the module’s compatibility with serial communication, allowing seamless integration with various controllers or microprocessors. As a practical example in this article, we will demonstrate how to use the DY-SV8F module with Arduino. The following circuit shows how to connect the Arduino to this module.
Code
First, install the following library in the Arduino IDE: dyplayer.
Upload the following code to your Arduino.
/*Create on January 02, 2024*/
#include <Arduino.h>
#include "DYPlayerArduino.h"
// Initialise the player, it defaults to using Serial.
DY::Player player;
// Alternatively initialise on another serial port.
// DY::Player player(&Serial2);
void setup() {  player.begin();  player.setVolume(30); // 50% Volume  player.playSpecified(1);}
void loop() {
}
After uploading, the Arduino board will send commands to the DY-SV8F module to play the first “00001.mp3” file on the module. After that, you can simply use the reset button on the Arduino to replay the same track.
For more content, please click“Read the original text” 》》