Guide to Configuring a Meteorological Python Environment in an Offline Network (Based on Anaconda)
This guide is suitable for the Anaconda + VSCode development environment, helping users quickly set up the required Python environment for meteorological data analysis without internet access.
📦 Project Name
Configuration of the Meteorological Python Environment (MeteoPy310)
Main Purpose: Pre-install commonly used libraries for meteorological data processing and visualization, including xarray, numpy, meteva, cartopy, matplotlib, etc., to meet the needs of reading, processing, and visualizing meteorological data.
1. Install Anaconda

1. Installation sequence: Next -> I Agree -> All users ->
2. Change the installation path to a drive other than C:

3. Check all boxes √, then click install. It may take a long time, and after installation, click the Windows key to see the Anaconda folder.
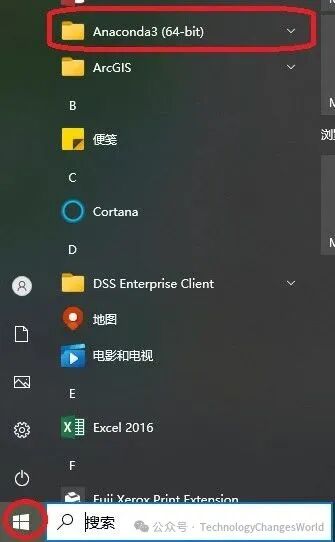
Note: Do not install on the C drive.
📁 2. Extract the Virtual Environment Package
-
Virtual environment package:
<span>MeteoPy310.tar.gz <img alt="Guide to Configuring a Meteorological Python Environment in an Offline Network" src="https://boardor.com/wp-content/uploads/2025/11/25152543-774f-4129-815b-e972333c84b5.png"/></span>Extract to the path S:\anaconda\envs\MeteoPy310. S:\anaconda (your installation path)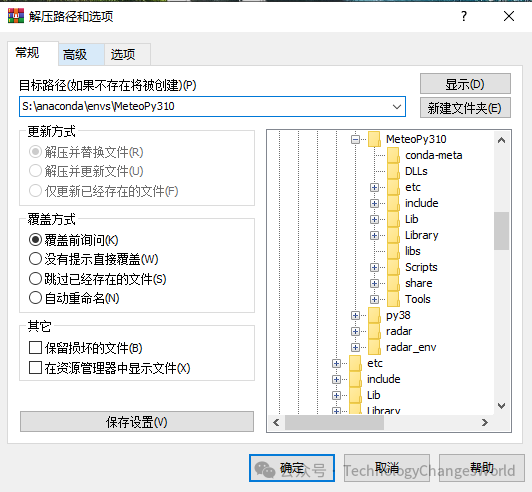
-
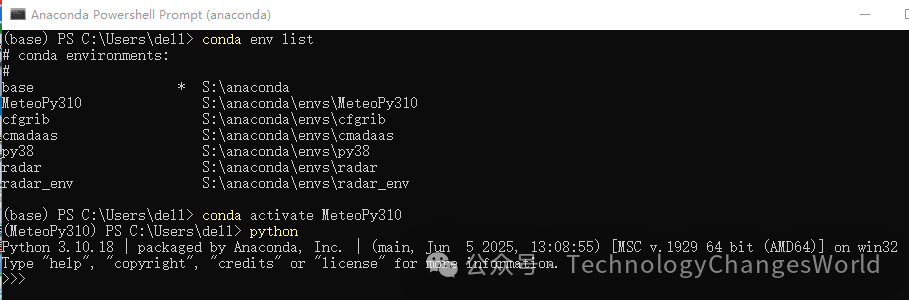
Check the virtual environment: Click Powershell and enter
conda env listto display: xxx:\anaconda\envs\MeteoPy310, indicating the environment was installed successfully; enterconda activate MeteoPy310; enterpython, and the content shown in the following image indicates the environment is configured successfully.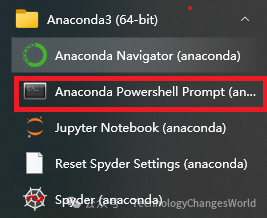
3. Configure Jupyter Path
- Open conda Powershell and enter
jupyter notebook --generate-config
- Locate the file
jupyter_notebook_config.pybased on the path, and open it with Notepad.
- After opening the file, press Ctrl+F to find
#c.NotebookApp.notebook_dir, replace it with your defined folder path. For example,r'D:\jupyter_file', write it as r’your_path’, and remove the # comment.
- Right-click on the Jupyter Notebook file location
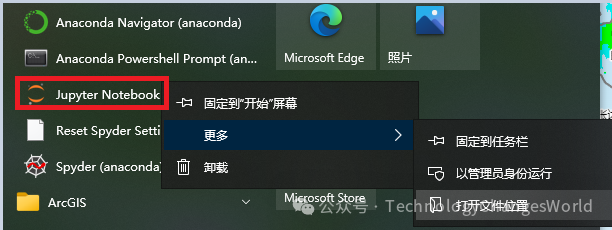 Right-click on Jupyter Notebook, find properties, and delete the %xxxxxx% field from the properties.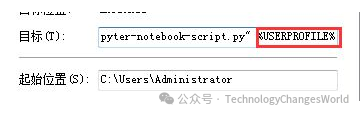
4. Start the Jupyter Kernel in the Virtual Environment
Run the following command in conda Powershell to register this virtual environment in Jupyter Notebook:
conda activate MeteoPy310
python -m ipykernel install --user --name=MeteoPy310 --display-name="MeteoPy310"
🖥️ 5. Configure the VSCode Editing Environment
1. Install VSCode

2. Install Recommended Extensions (in VSCodeexecute) follow the steps below to prepare for installing extensionsextensions
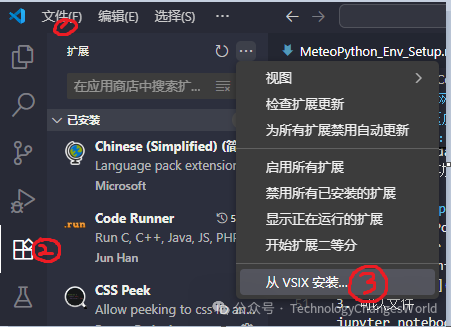
Install the following extensions
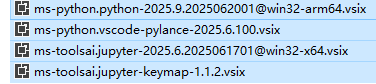
3. Start Writing Code
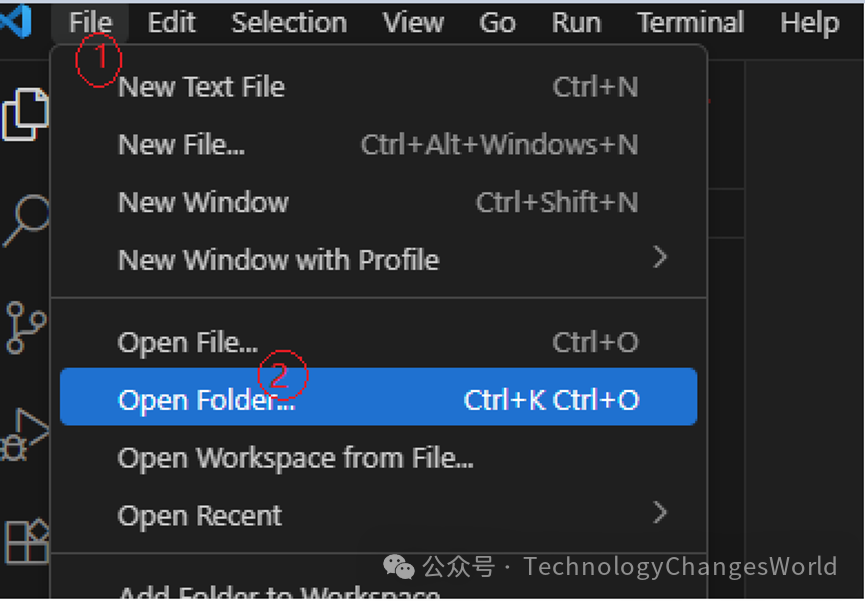
1. Open the folder for the jupyter file path, D:\jupyter_file
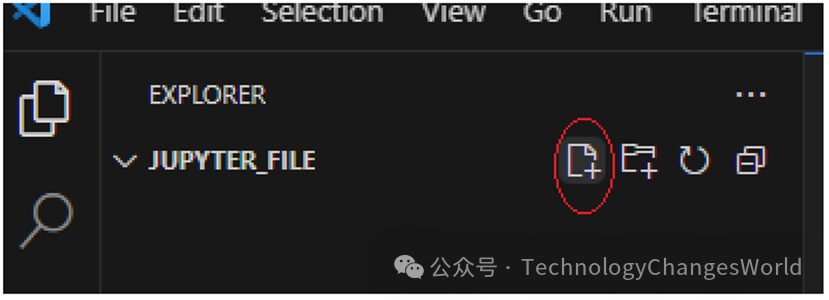
2. Create a new file named test.ipynb under jupyter_file
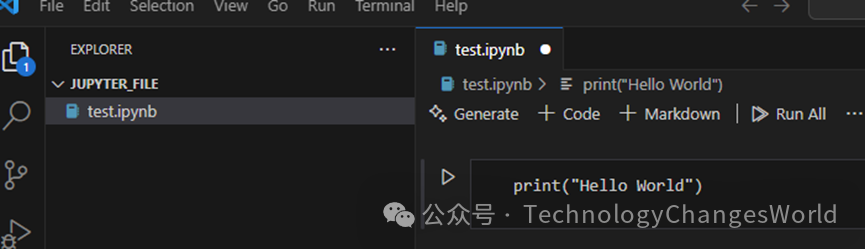
Click +code to write the first test code, print("Hello World")
Click select kernel to set the virtual environment to MeteoPy310
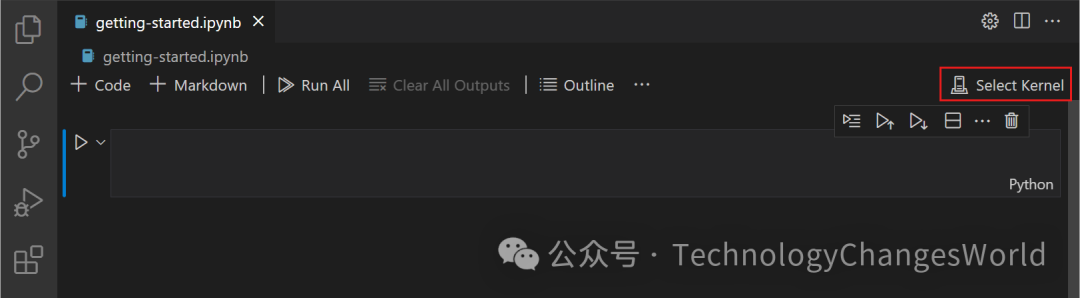
After selecting the Python environment (MeteoPy310), click the cell with print('Hello World'), then press shift+enter (enter key) to run the code block.
📌 Note
The MeteoPy310 Python environment has already installed various third-party libraries required for meteorology, such as: xarray, numpy, meteva, cartopy, matplotlib, etc., which can meet the needs of meteorological data processing and visualization work.
All installation package tools and plugins are ready; please provide feedback in the group if needed.
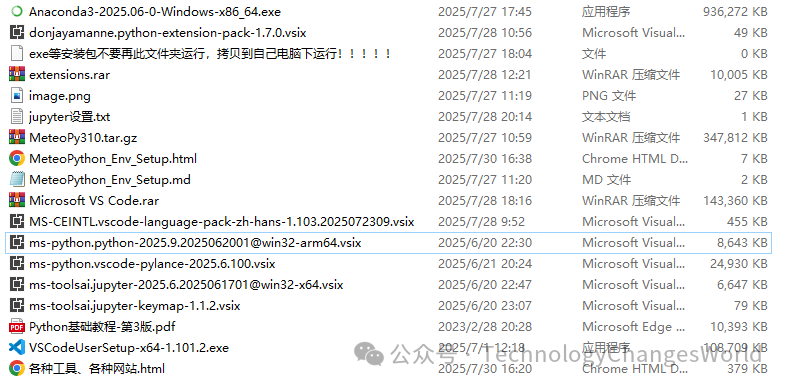
There is also a beginner’s book on Python.

Years of organized meteorological and programming-related websites, tools, bookmarks (journals, reanalysis data sources, programming resources, etc.)
