Getting Started with the Domestic STAR-MC1 Microcontroller in 5 Minutes

Recently, I received a development board based on the Cortex-M33 core from the Breadboard Community: FR3068D-C

The Breadboard Community is currently conducting a review activity, with 300 FR3068D-C boards available for free application. Everyone can scan the QR code below to claim one for free

Getting Started with the Domestic STAR-MC1 Microcontroller in 5 Minutes

The main control of this development board is the FR3068E-C from the domestic MCU manufacturer FreqChip, and it also comes with a display screen:

Getting Started with the Domestic STAR-MC1 Microcontroller in 5 Minutes

What amazed me about this board was not the development board itself, but the rich examples they provided (very abundant).

In addition to the conventional peripherals of microcontrollers such as GPIO, UART, SPI, and I2C, there are many protocol stacks used for learning microcontrollers (lwIP), file systems (fatfs/littlefs), logging libraries (EasyLogger), databases (FlashDB), GUI (lvgl), coremark scores, as well as many technologies used in microcontroller learning and development projects like USB, RTOS, etc.

Getting Started with the Domestic STAR-MC1 Microcontroller in 5 Minutes

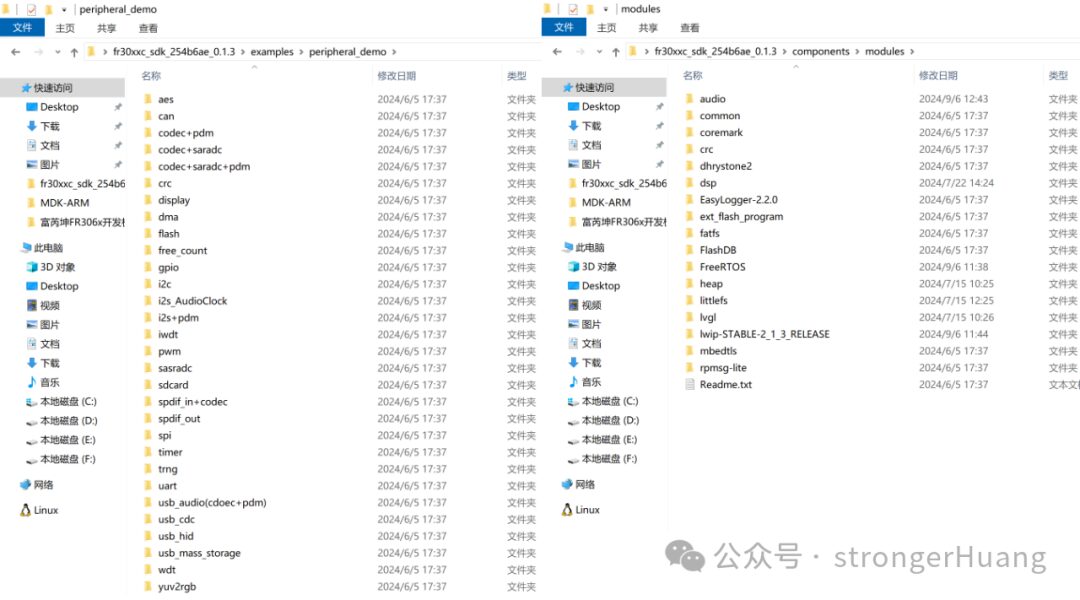
These examples are open-source and can be compiled and run directly, with the development environment mainly being Keil MDK.

Don’t underestimate these examples; I dare say that the vast majority of senior engineers with three to five years, or even ten years of experience, do not fully understand these technologies.

Here is a factory demo for everyone to see:

The following video is from strongerHuang

Next, I will teach you how to get started with this domestic Cortex-M33 core microcontroller in five minutes.

About the FR3068E Microcontroller

Before teaching you how to get started, let me briefly introduce this domestic Cortex-M33 core microcontroller.
The FR3068E microcontroller is not just a pure microcontroller; it is a dual-core chip with an integrated Bluetooth core.

Getting Started with the Domestic STAR-MC1 Microcontroller in 5 Minutes

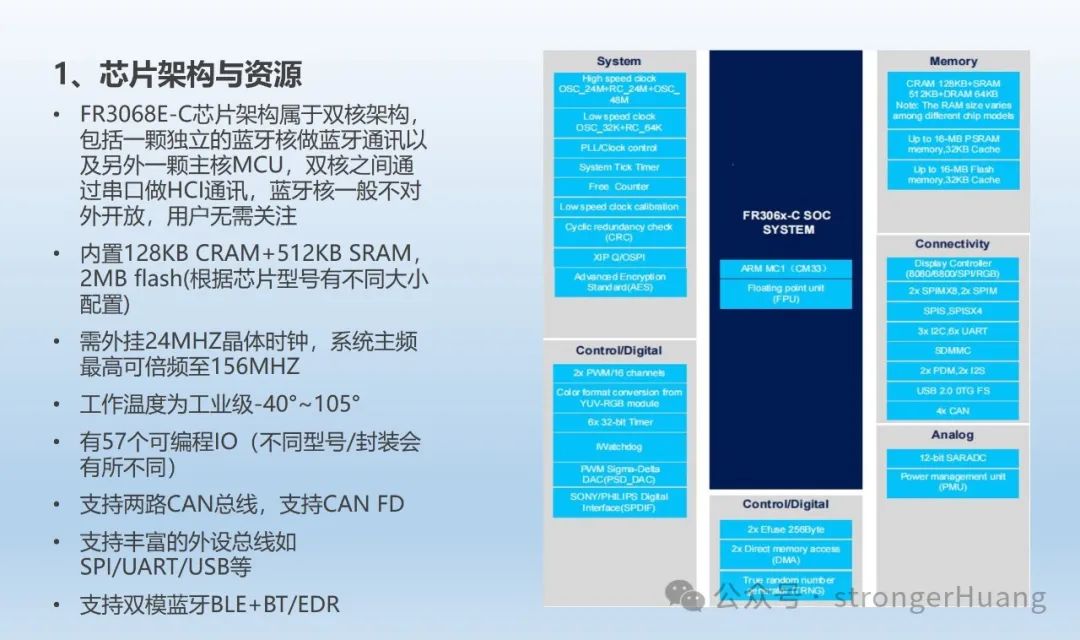
We will not describe the Bluetooth part here; we will mainly discuss the microcontroller part. From the block diagram, it can be seen that the microcontroller is a 32-bit CM33 core processor. The on-chip resources and peripherals are also very rich.

For more information about the microcontroller, you can visit the FreqChip official website:

https://www.freqchip.com/

Getting Started with the Domestic CM33 Microcontroller in 5 Minutes

The official website provides a wealth of development documents, materials, and examples. Here, I will outline the approach to getting started and the precautions to take.
1. Download Development Documents, Materials, and Examples from the Official Website
Download link:
https://www.freqchip.com/sjds

Getting Started with the Domestic STAR-MC1 Microcontroller in 5 Minutes

Before getting started, it is recommended to read these development documents to understand more information.
2. Set Up the Development Environment
There are mainly two environments: Keil MDK and Python, so development needs to be done in a Windows operating system environment.
Keil MDK download link:

https://www.keil.com/demo/eval/arm.htm

The specific installation process will not be described here; please refer to:Keil Series Tutorials
Python download link:

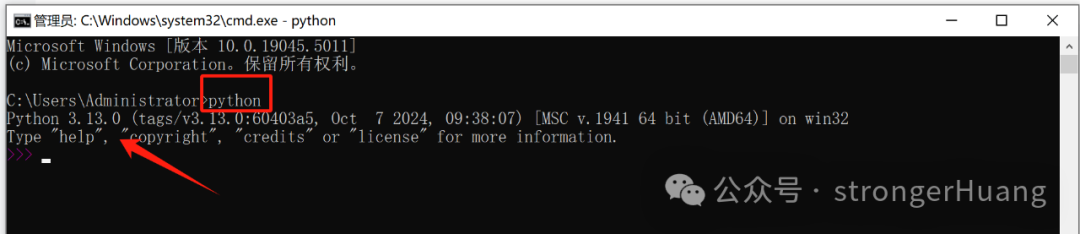
https://www.python.org/getit/

The latest version is python-3.13.0:

https://www.python.org/ftp/python/3.13.0/python-3.13.0-amd64.exe

Similarly, the specific installation process for Python will not be described here. The Windows installer can basically be nexted through, and you can refer to online installation tutorials.
Just a reminder:If the Python environment is not set up correctly, the final generated executable (download) file will throw an error.
You can check the Python installation by entering python in the cmd command prompt. If you see something similar to the situation below, it proves that the Python environment is set up correctly.

Getting Started with the Domestic STAR-MC1 Microcontroller in 5 Minutes

3. Open the Example, Compile

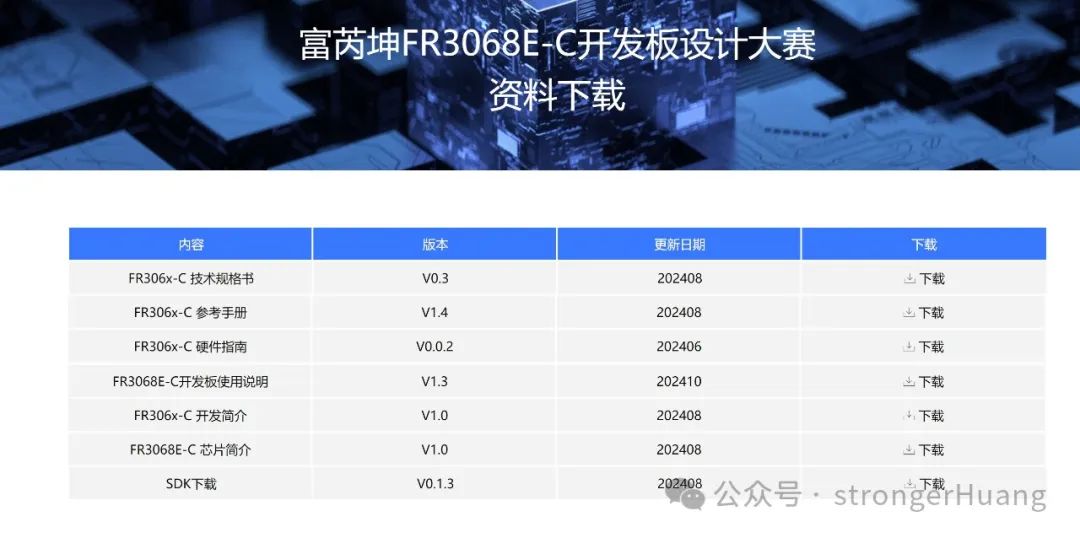
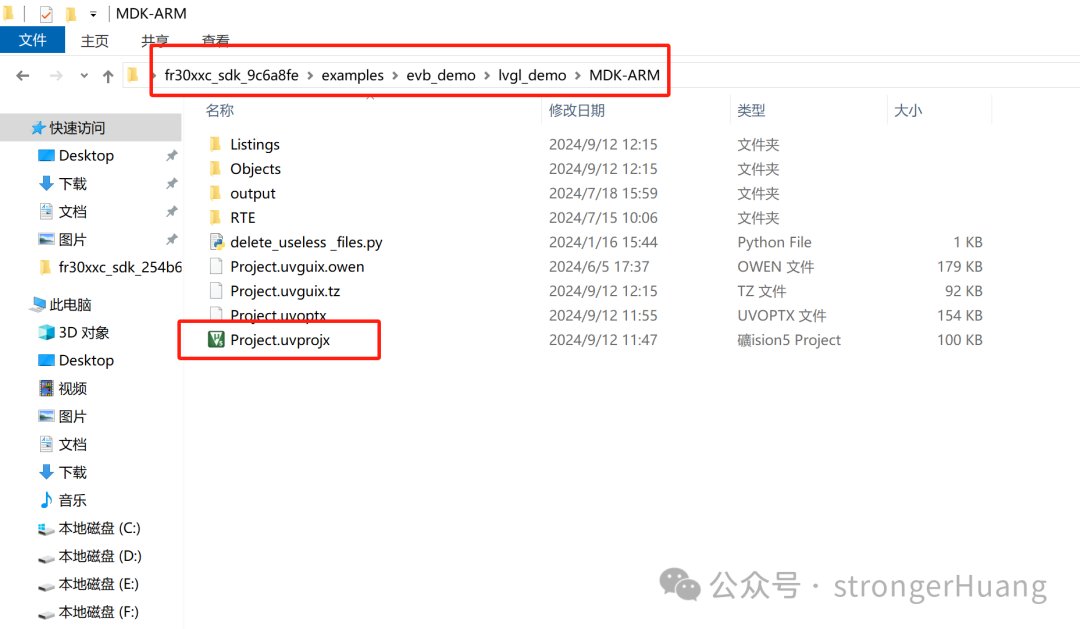
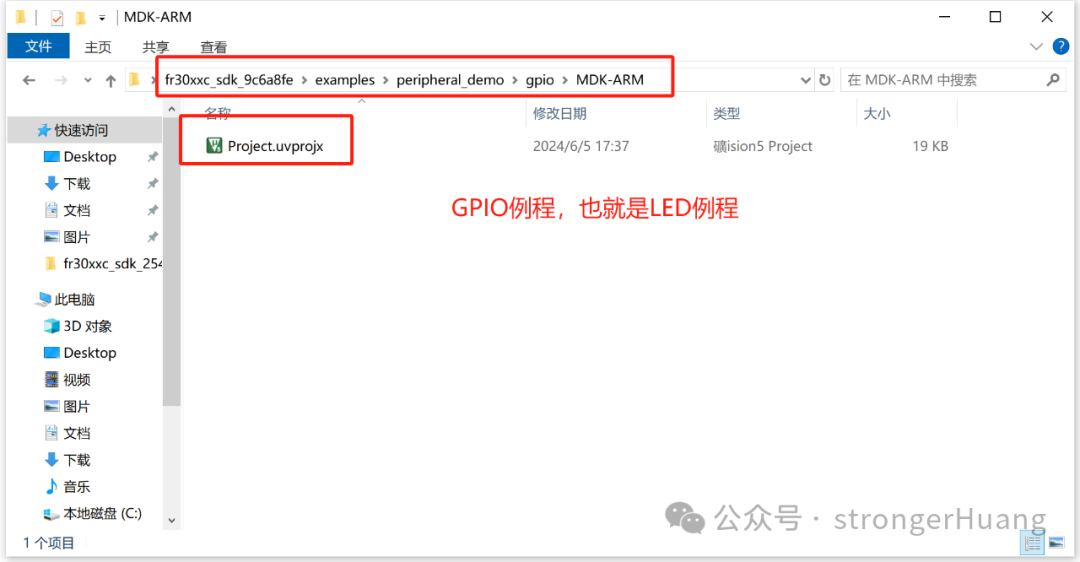
Here we will open the official example provided (downloaded previously), for example: lvgl_demo project

Getting Started with the Domestic STAR-MC1 Microcontroller in 5 Minutes

We will directly double-click to open the project with Keil MDK, then compile directly, and finally see the compilation information with 0 errors:

Getting Started with the Domestic STAR-MC1 Microcontroller in 5 Minutes

At this point, under the (output) output path, you will see several files generated, among which Project_burn.bin is the program file we will download to the microcontroller.

Getting Started with the Domestic STAR-MC1 Microcontroller in 5 Minutes

4. Download the Program

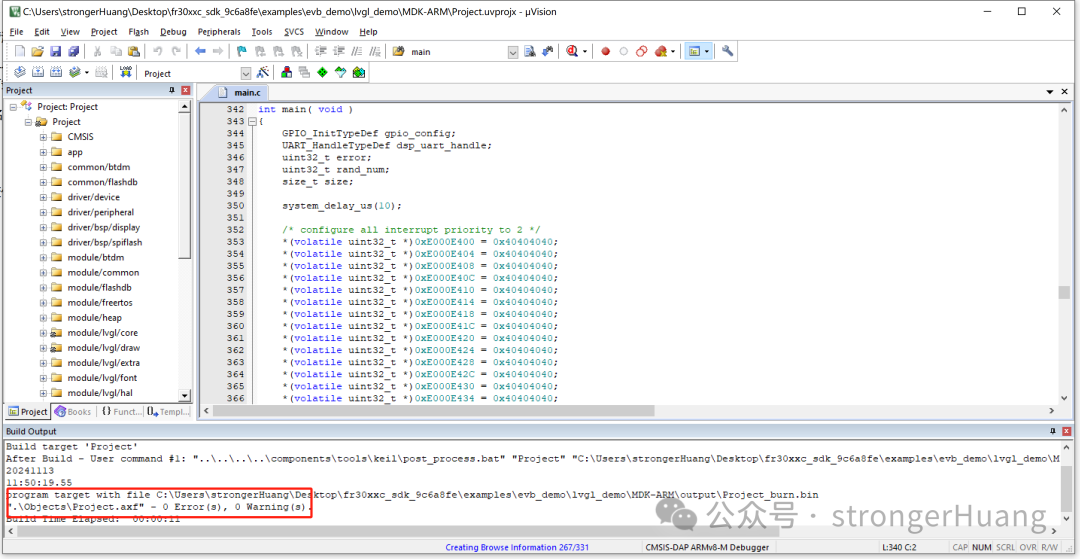
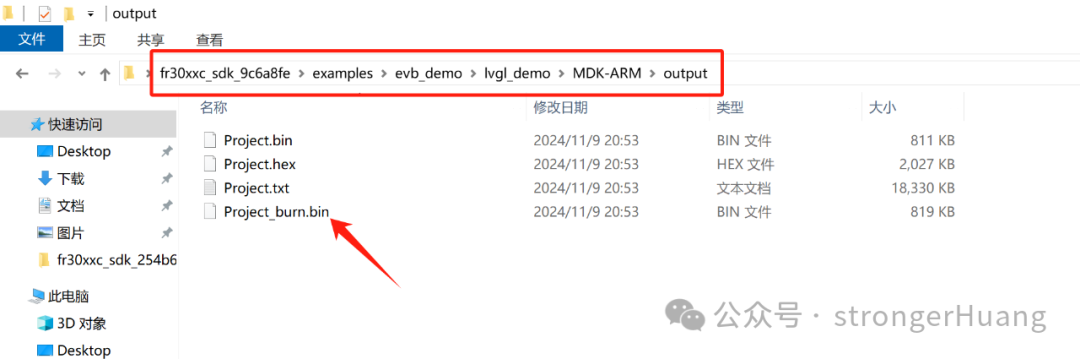
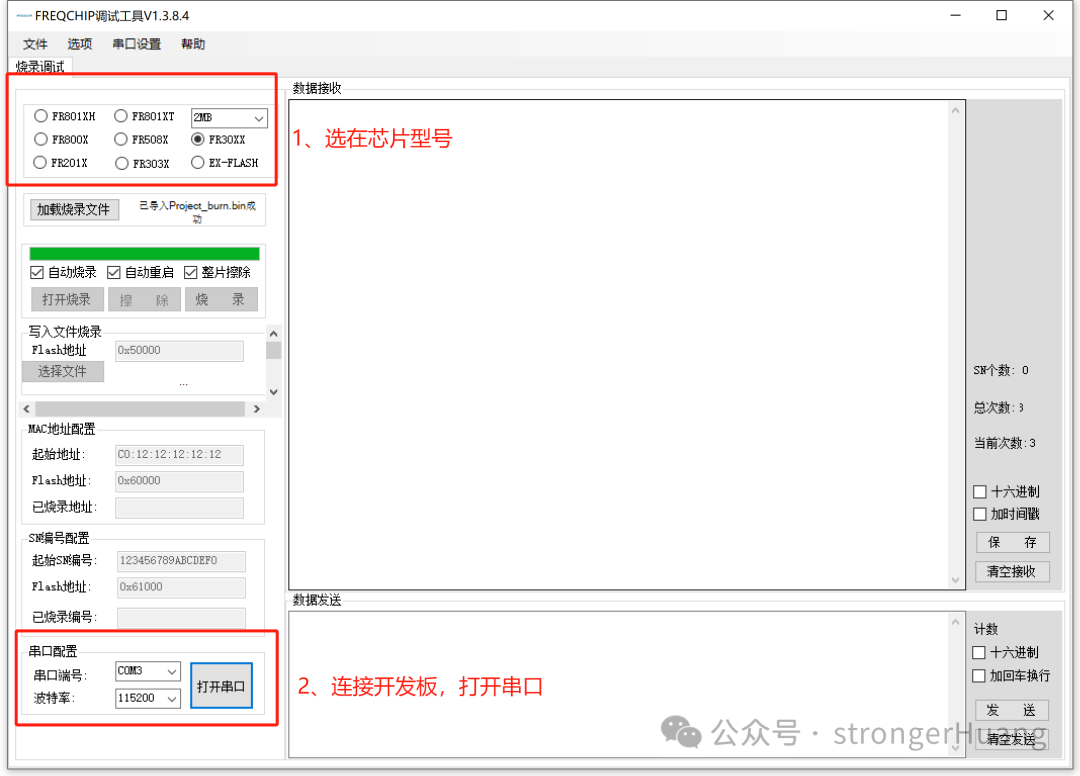
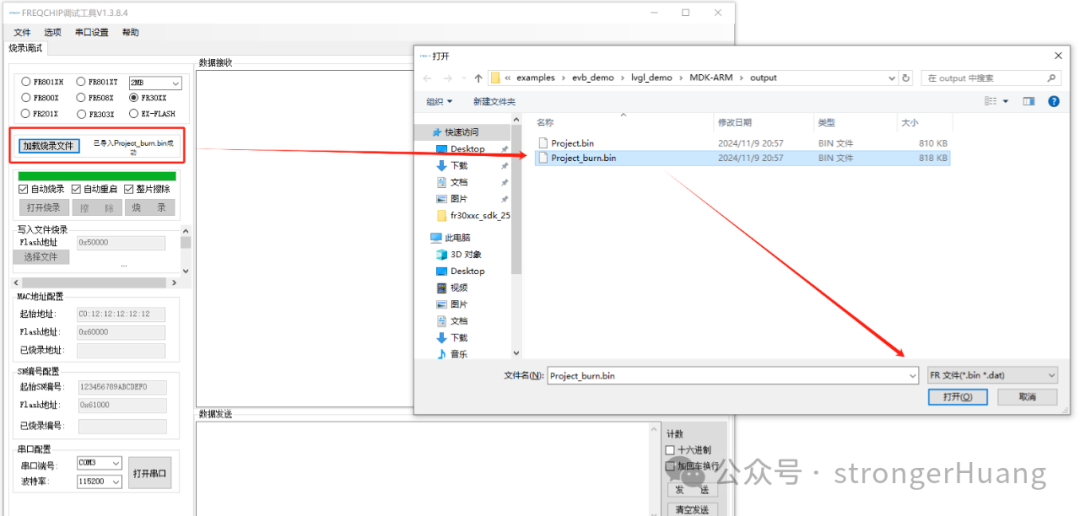
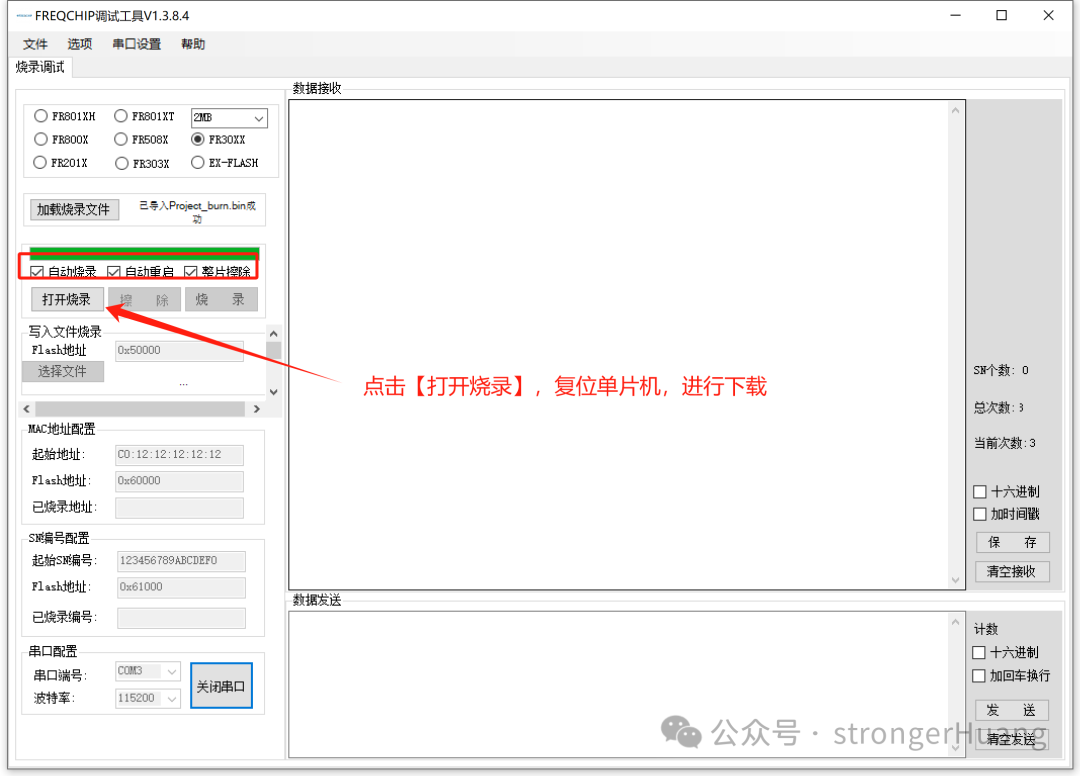
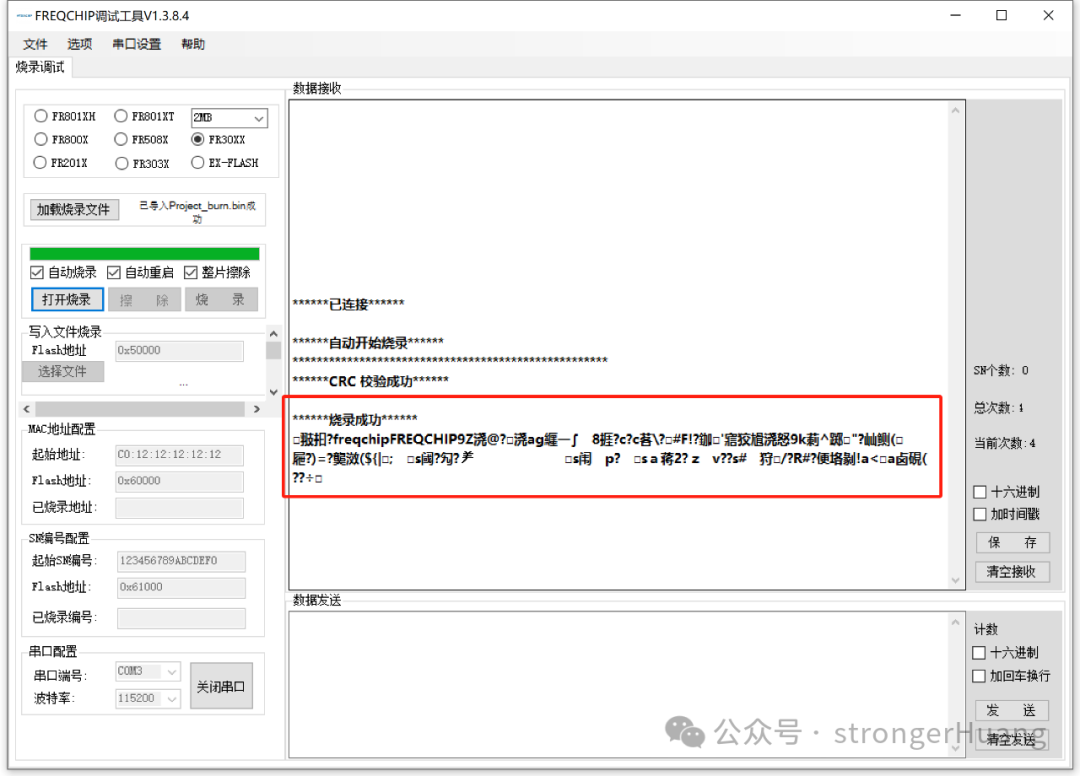
Here we use the download tool provided by the official website:

Getting Started with the Domestic STAR-MC1 Microcontroller in 5 Minutes

Then select the compiled file, click 【Open Burn】, and reset the microcontroller (press the reset button):

Getting Started with the Domestic STAR-MC1 Microcontroller in 5 Minutes

Getting Started with the Domestic STAR-MC1 Microcontroller in 5 Minutes

Finally, it will prompt 【Burn Successful】, and then there will be a segment of “garbled” text:

Getting Started with the Domestic STAR-MC1 Microcontroller in 5 Minutes

At this point, you will see images on the display screen:
The following video is from strongerHuang
Microcontroller On-Chip Peripheral Examples:
Let’s open another peripheral example, such as the GPIO example:

Getting Started with the Domestic STAR-MC1 Microcontroller in 5 Minutes

The example provided by the official website has some mismatches with the LED pins on our development board, so we will modify it:
void gpio_demo(enum_GPIO_Demo_t fe_Demo){    /* init GPIO CLOCK */      __SYSTEM_GPIOD_CLK_ENABLE();    __SYSTEM_GPIO_CLK_SELECT_COREH();
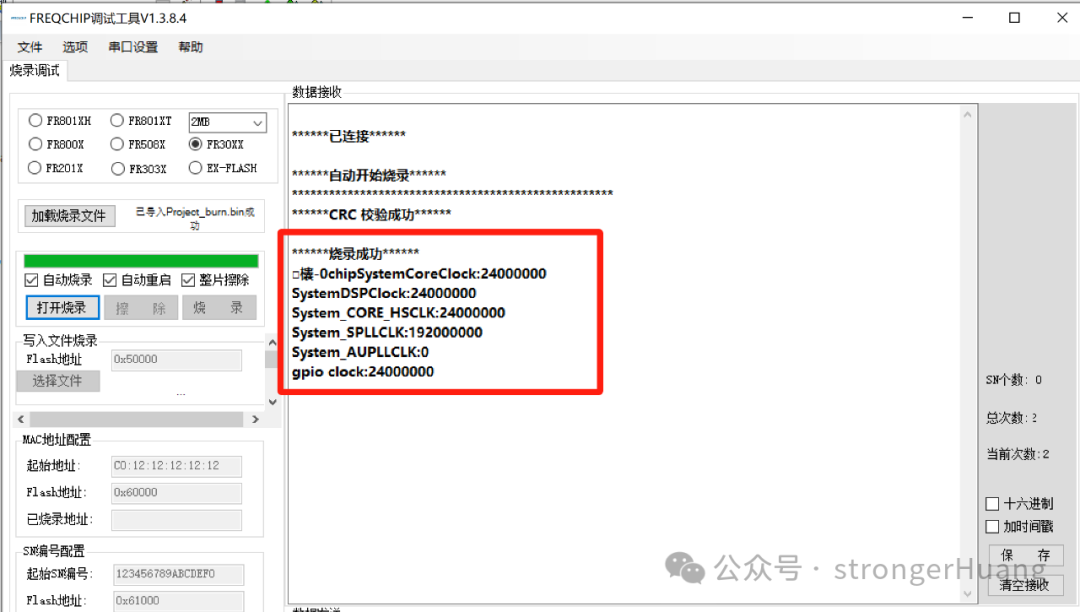
    printf("gpio clock:%d\r\n", system_get_peripheral_clock( PER_CLK_GPIOx));
    switch(fe_Demo)    {        case GOIO_OUTPUT:        {            GPIO_Handle.Pin  = GPIO_PIN_6|GPIO_PIN_7;            GPIO_Handle.Mode = GPIO_MODE_OUTPUT_PP;            GPIO_Handle.Pull = GPIO_PULLUP;            gpio_init(GPIOD, &GPIO_Handle);
            while(1)            {                //pin Output high Level                 gpio_write_pin(GPIOD, GPIO_PIN_6|GPIO_PIN_7, GPIO_PIN_SET);                system_delay_us(100000);
                //pin Output low Level                 gpio_write_pin(GPIOD, GPIO_PIN_6|GPIO_PIN_7, GPIO_PIN_CLEAR);                 system_delay_us(100000);                           }         }    }}

Getting Started with the Domestic STAR-MC1 Microcontroller in 5 Minutes

Getting Started with the Domestic STAR-MC1 Microcontroller in 5 Minutes

After compiling, use the above download method to download, and you will see:

Getting Started with the Domestic STAR-MC1 Microcontroller in 5 Minutes

At this point, on the development board, you will see:
Do you find it very simple at this point?
Yes, it is very simple. For students with a certain foundation, it can be done in five minutes.

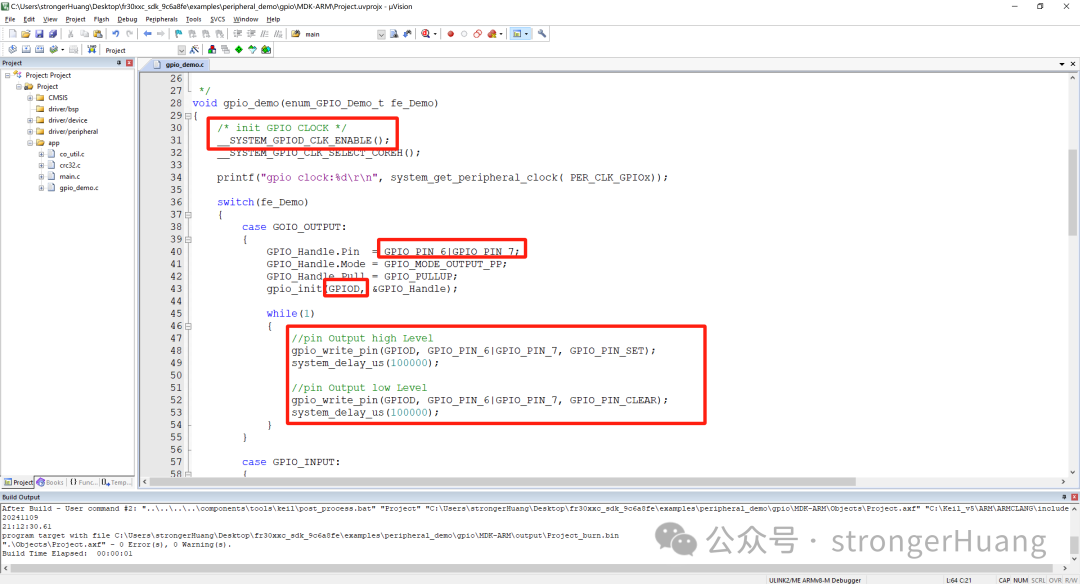
Author | strongerHuang

WeChat Official Account | strongerHuang

Getting Started with the Domestic STAR-MC1 Microcontroller in 5 Minutes

Leave a Comment