Let Arduino Say “Hello World”

First, let’s practice a simple experiment that requires no additional components, just an Arduino board and a download cable, to let our Arduino say “Hello World!” This is an experiment to communicate between Arduino and PC, and it’s also a beginner’s trial, hoping to lead everyone into the world of Arduino.
Electronic Components and Modules Used in the Experiment:
-
1 Arduino board: Any type of Arduino such as Uno/Mini/Nano, 2560 will work.
-
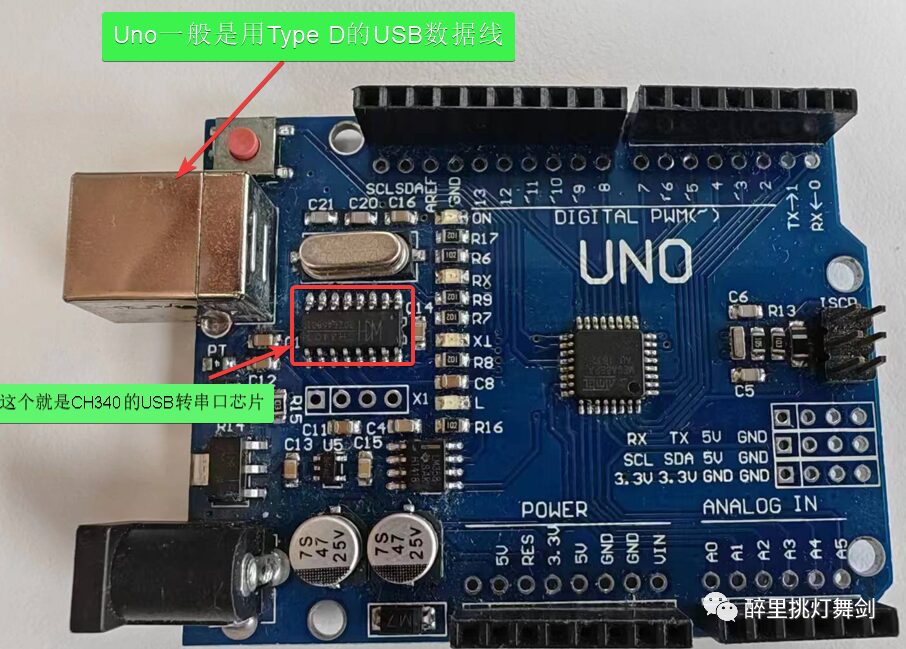
USB data cable: I am using an Uno board here, which generally requires a Type B USB data cable.
Here is a bit of knowledge about USB interfaces:
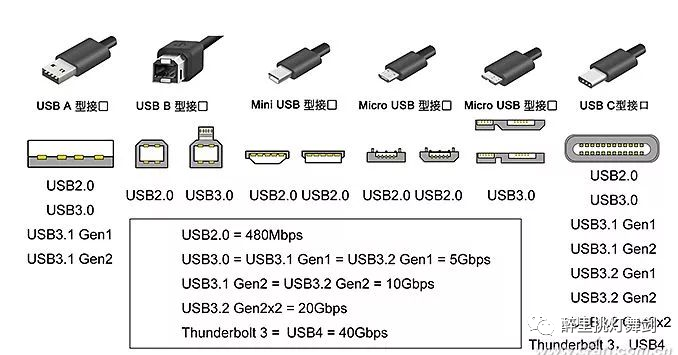
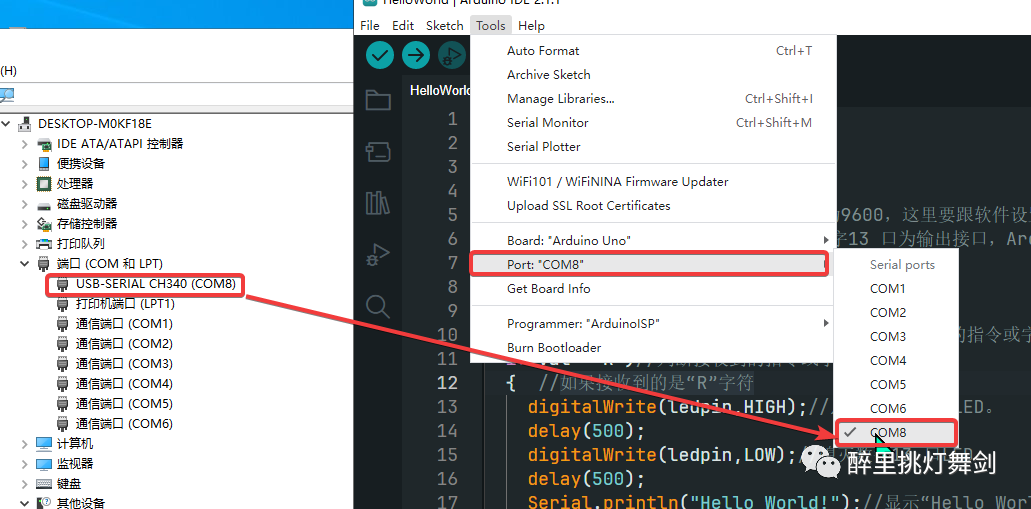
Additionally, the board’s driver must be correctly installed. Most domestic USB to serial converters use the CH340 chip, so the CH340 driver must be installed. After the driver installation is complete, you can see a serial port in the computer’s device manager.
The Arduino board is as follows:
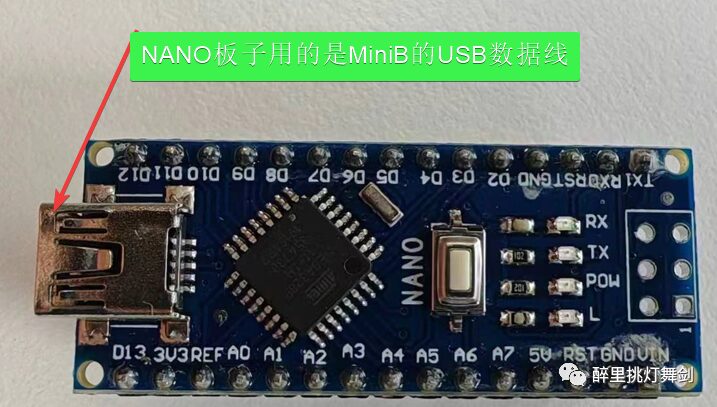
Nano board:
Objective
After installing the Arduino driver as previously mentioned, we open the Arduino software and write a program that allows Arduino to display the string “Hello World!” when it receives our command. Of course, you can also let Arduino continuously echo “Hello World!” without receiving any commands; it’s actually very simple, just an if() statement will make your Arduino obey your command. We will also use the built-in LED on digital pin 13 of Arduino to make it blink when receiving the command and then display “Hello World!”.
Steps
-
Open Arduino IDE. This time we will use Arduino’s built-in functions, no need to import external libraries.
-
Define the LED pin constant:
const int ledPin = 13;  // LED connected to Arduino pin
// The const keyword defines a constant. Defining a variable as a constant can change logic and prevent misoperation.-
setup() function:
void setup() {
  Serial.begin(9600);     // Set serial baud rate to 9600
  pinMode(ledPin, OUTPUT); // Set LED as output
}
Initialize the serial port and LED pin as output; this is only executed once in the setup() function.
-
loop() function:
void loop() {
  if (Serial.read() == 'R') { // Check if the command "R" is received
    digitalWrite(ledPin, HIGH);  // Turn on LED
    delay(500);                 // Delay 0.5 seconds
    digitalWrite(ledPin, LOW);   // Turn off LED
    Serial.println("Hello World!"); // Print "Hello World!" to serial
  }
}
The loop() function will be called repeatedly, commonly used for main loop logic. It reads data from the serial port to control the LED to blink as a prompt.
-
Upload (burn) to Arduino, open the serial monitor.
Here, you need to ensure that the board model matches the one you are using, and also ensure that the serial port number is correct.
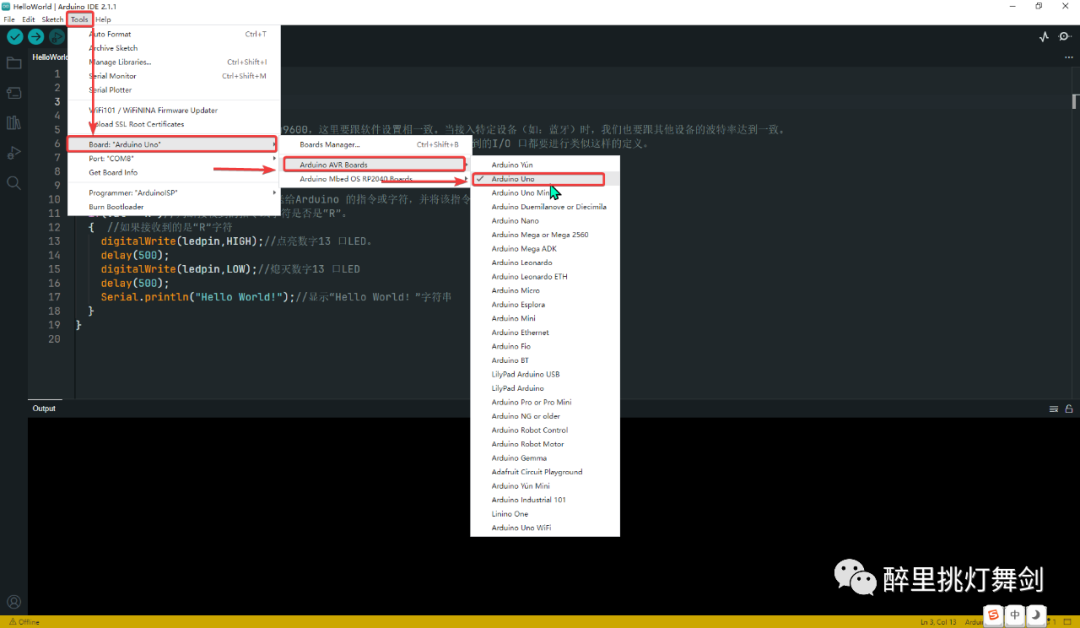
-
After entering the R command, the LED will blink and display the “Hello World!” prompt.
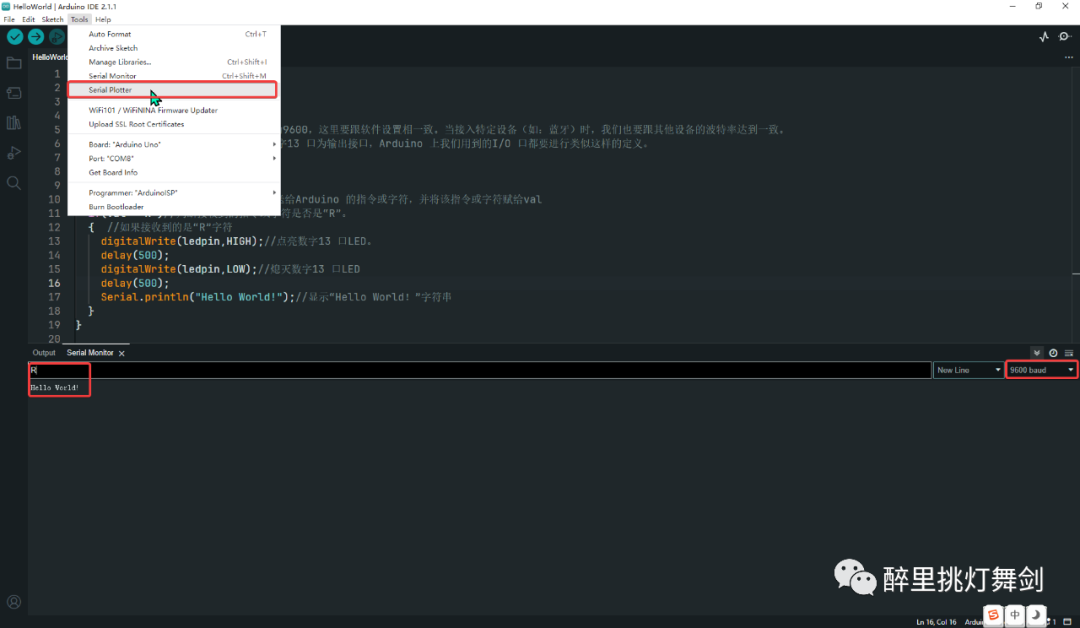
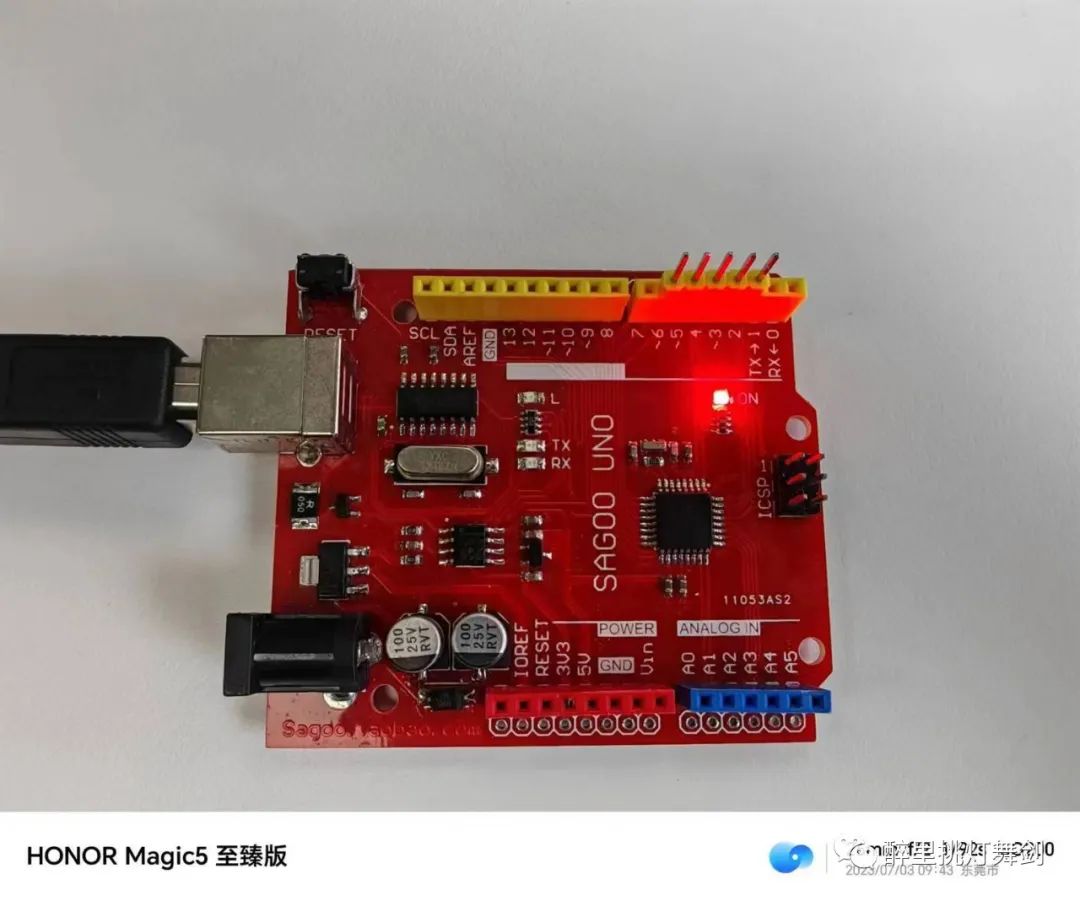
Enter R
The LED will blink;
You will receive a message from Arduino: Hello World
Experiment finished.
Note: Ensure the correct COM port is selected, and the baud rate matches the one defined in the program; otherwise, data cannot be received.
Reference Program
int val; // Define variable val
int ledpin=13; // Define digital interface 13
void setup()
{
  Serial.begin(9600); // Set baud rate to 9600, which must match the software settings. When connecting to specific devices (such as Bluetooth), we must also match the baud rate with other devices.
  pinMode(ledpin,OUTPUT); // Set digital pin 13 as output interface; all I/O ports used on Arduino must be defined similarly.
}
void loop()
{
  val=Serial.read(); // Read the command or character sent from the PC to Arduino, and assign it to val
  if(val=='R') // Check if the received command or character is "R".
  {  // If the received character is "R"
    digitalWrite(ledpin,HIGH); // Turn on the LED on digital pin 13.
    delay(500);
    digitalWrite(ledpin,LOW); // Turn off the LED on digital pin 13
    delay(500);
    Serial.println("Hello World!"); // Display the string "Hello World!"
  }
}
Code Explanation
-
Declaring constant
ledPinimproves code readability and safety. -
The
setup()function is executed only once for hardware initialization. -
The
loop()function is the main loop, continuously reading serial data and controlling the LED. -
Through interaction with hardware, verify the actual effect of Arduino programming.
By now, you have successfully written and run your first Arduino program! More smart hardware and code await your exploration.
If you like it, please give a thumbs up and watch in the bottom right corner, thank you!