
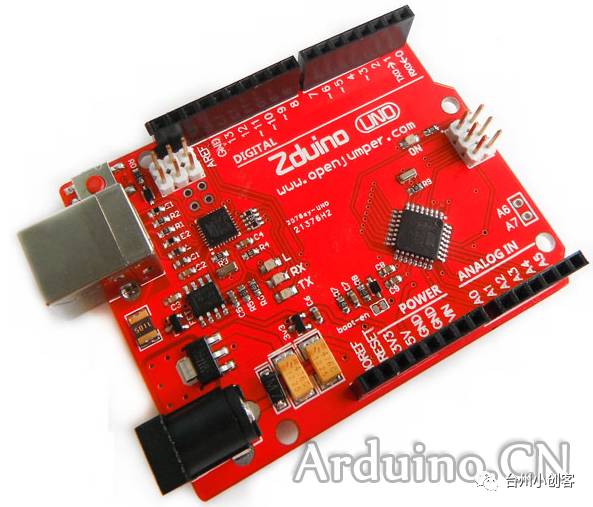
How to connect Arduino to your computer and download your first sketch.
Steps:
1. Obtain an Arduino mainboard and a USB data cable
2. Download the Arduino Integrated Development Environment
3. Connect the mainboard
4. Install the drivers
5. Launch the Arduino application
6. Open the Blink example sketch
7. Select the board
8. Select the COM port
9. Upload the sketch
1. Obtain an Arduino mainboard and a USB data cable
In this tutorial, we assume the use of Arduino Uno, Arduino Duemilanove, Nano, or Diecimila.
Also, you need a standard USB cable (one end A-type, one end B-type): for example, the type that connects to USB printers. If you are using Arduino Nano, you will need a mini USB cable (one end A-type and one end mini-B type).
2. Download the Arduino development environment
Get the latest version of the software from the download page.
Once the download is complete, extract the downloaded files, ensuring they are extracted to the correct directory, then double-click to open the folder, which contains some folders and subfolders.
3. Connect the mainboard
Arduino Uno, Mega, Duemilanove, and Arduino Nano can automatically power the main chip through a USB data cable or external power supply. When the Arduino mainboard is powered via USB cable connected to the computer, the LED indicator next to the PWR will light up.
4. Install the drivers
The latest Arduino UNO, Arduino MEGA, Arduino Leonardo, and other controllers from various manufacturers do not require drivers on MAC OS and Linux systems; you just need to plug them in to use them. However, on Windows systems, you need to install the driver configuration files for Arduino to function properly. The specific method is as follows:
1. Plug in your Arduino; at this point, the computer’s bottom right corner will display an error because it cannot find the driver.

After a while, it will prompt that the driver is not found.

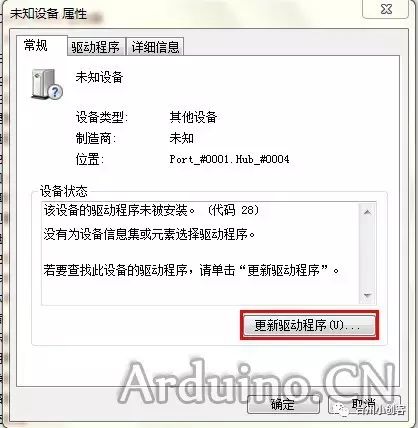
2. Right-click on “My Computer”, select Properties, and enter Device Manager, where you will see the following devices.

3. Double-click on the device and select “Update Driver”.
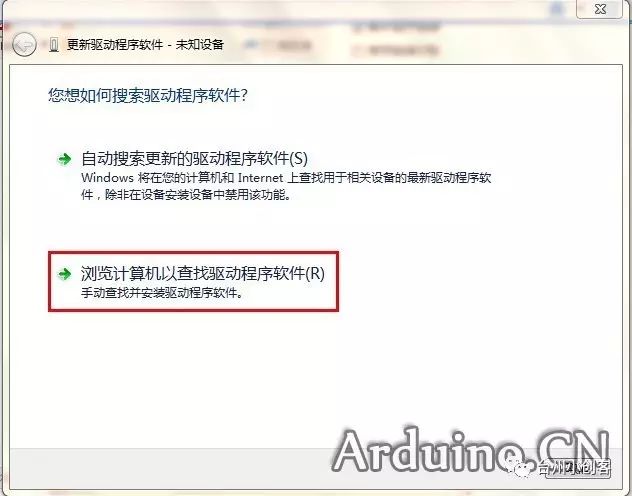
4. Select the second option.
5. Enter the path of your driver.
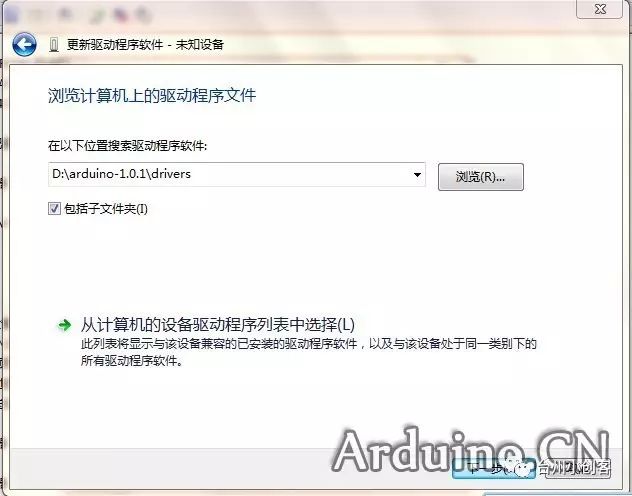
The drivers are located in your Arduino installation folder, as follows: Arduino UNO, Arduino 2560, ADK, Leonardo, etc. driver path: arduino\drivers\ Arduino Duemilanove driver path: driver path: arduino\drivers\FTDI USB Drivers.
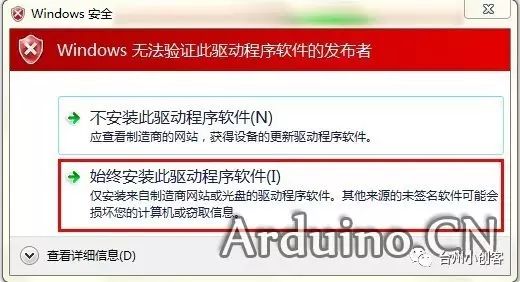
6. During the installation process, the following prompt will appear; select “Always install this driver”.
7. The system will prompt that you have successfully installed the driver.
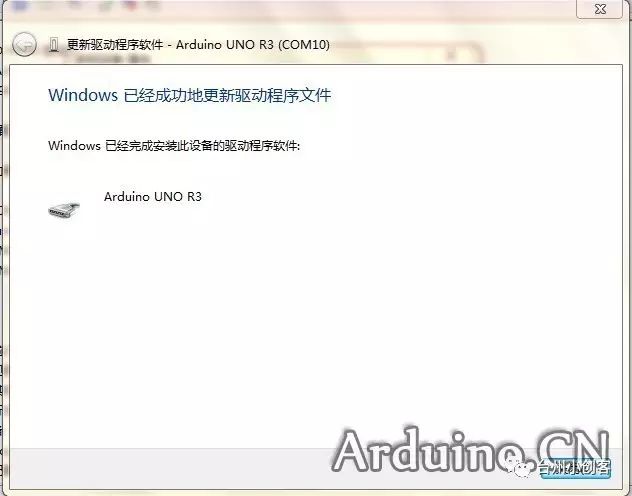
8. In Device Manager, you can see the Arduino’s COM port.

If you are unable to install the driver correctly, you can refer to: Windows 8 driver installation method:
http://www.arduino.cn/thread-2235-1-1.html Solutions for Arduino driver installation failures
http://www.arduino.cn/thread-2485-1-1.html 5. Launch the Arduino application
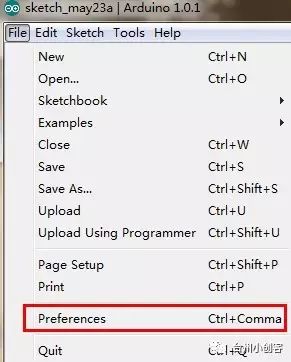
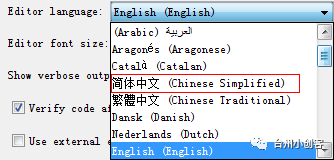
Double-click the Arduino application (if the loaded Arduino software is in a language you do not prefer, you can modify it in the “preferences” dialog).
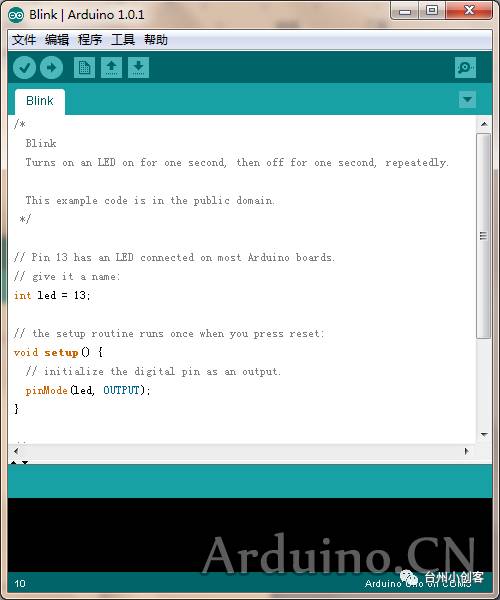
6. Open the Blink example sketch
Open the LED blink sketch: File > Examples > Basics > Blink
7. Select the board
You need to go to Tools > Board and select your corresponding Arduino board.
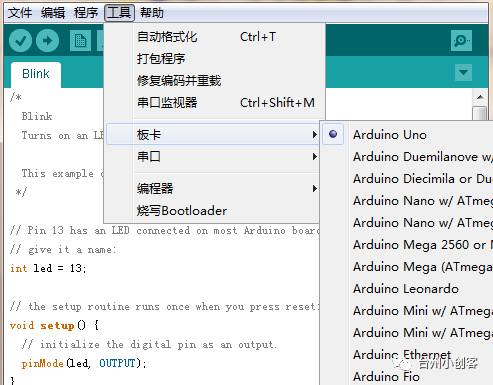
If it is an Arduino Duemilanove board (main chip is ATmega328), select Arduino Duemilanove w/ ATmega328.
8. Select the COM port number
From Tools > Port, select the COM port number for the Arduino mainboard, which may be COM3 or higher (COM1 and COM2 are usually assigned to hardware serial ports).
9. Upload the sketch
At this point, in the IDE, click the “Upload” button, wait a few seconds, and you will see the RX and TX indicators flashing. If the upload is successful, the status bar in the IDE will indicate “Done uploading”.

A few seconds after the upload is successful, you will see the LED indicator connected to pin 13 start to blink. At this point, congratulations, you have started your journey with Arduino.

You may want to browse Arduino files:
1. Various Arduino sensor and actuator sketcheshttp://arduino.cc/en/Tutorial/HomePage
2. Arduino language referencehttp://arduino.cc/en/Reference/HomePage
Maker Space
Overall plan for campus maker space construction
Overall plan for maker courses
Maker teacher training
Campus youth maker team construction
Strategic cooperation spaces:
Shenzhen Chaihuo Maker Space
Wutong Maker Space [Fangcheng Primary School Maker Education Practice Base]
Strategic cooperation courses:
Chaihuo Creation Course
Taizhou Young Maker Education Course
Home Creation Course
Cooperation contact: Zhang Danbin
Phone: 0576-8504227


