This article will guide you step by step in creating and running your first eBPF program on a Linux system, which outputs “Hello World!” when the execve system call occurs.
The following content includes environment setup (mainly for MacOS; for Windows, you can install a Linux virtual machine using VMware and skip the environment setup section), writing, loading, and running the eBPF program.
1. Prerequisites for Environment Setup
1.1 Create an Ubuntu Instance Using Lima
For information on installing Lima, please refer to the previous article; this article will not elaborate on that.
We will enter the Lima templates directory and modify the template.
cd /usr/local/Cellar/lima/1.1.1/share/lima/templates
cp ubuntu-22.04.yaml ubuntu-22.04.yaml-bak
sudo vim ubuntu-22.04.yaml
At the end of the original content, add the following:
mounts:
  - location: "~"
    writable: true
  - location: "/tmp/lima"
    writable: true

provision:
  - mode: system
    script: |
        apt-get update
        apt-get install -y apt-transport-https ca-certificates curl clang llvm jq
        apt-get install -y libelf-dev libpcap-dev libbfd-dev binutils-dev build-essential make
        apt-get install -y linux-tools-common linux-tools-5.15.0-41-generic bpfcc-tools
        apt-get install -y python3-pip
        apt-get install --yes bsdutils
        apt-get install --yes build-essential
        apt-get install --yes pkgconf
        apt-get install --yes llvm-12 clang-12
        apt-get install --yes clang-format-12
        apt-get install --yes zlib1g-dev libelf-dev
        apt-get install --yes protobuf-compiler
        apt-get install bpfcc-tools linux-headers-$(uname -r)

        sudo snap install --devmode bpftrace

        # it downloads binaries with version appended
        # like llvm-strip-12, clang-12 etc
        # bpf stuff uses plain names like llvm-strip, clang and fails
        # to make them use this creating soft links with plain names
        for tool in "clang" "llc" "llvm-strip"
        do
          path=$(which $tool-12)
          sudo ln -s $path ${path%-*}
        done

        # uname -r returns kernel version
        # need linux-tools for kernel specific
        apt-get install --yes linux-tools-$(uname -r)

        # keep gp off, self signed cert issue else it'll fail to download
        # or add --no-check-certificate
        wget --quiet https://golang.org/dl/go1.20.1.linux-arm64.tar.gz
        tar -C /usr/local -xzf go1.20.1.linux-arm64.tar.gz
        echo 'export PATH=$PATH:/usr/local/go/bin' >> ~/.profile
After modifying the template, save it and start the virtual machine using this template (you will need to wait for the packages to download) with the following command:
limactl start --name ebpf-dev /usr/local/Cellar/lima/1.1.1/share/lima/templates/ubuntu-22.04.yamlAfter the process is complete, we can use <span>limactl list</span> to see that the virtual machine named ebpf-dev is in a running state.

1.2 Modify Ubuntu Software Source (APT Source) Configuration
Why is this step necessary? Because I have encountered many issues where apt-get install always reports that it cannot find packages or times out during downloads.
The default source is located abroad, and the download speed is very slow; we will change all of them to Tsinghua’s source.
# Enter the shell command line of the virtual machine
limactl shell ebpf-dev
# Edit the software source file
sudo vim /etc/apt/sources.list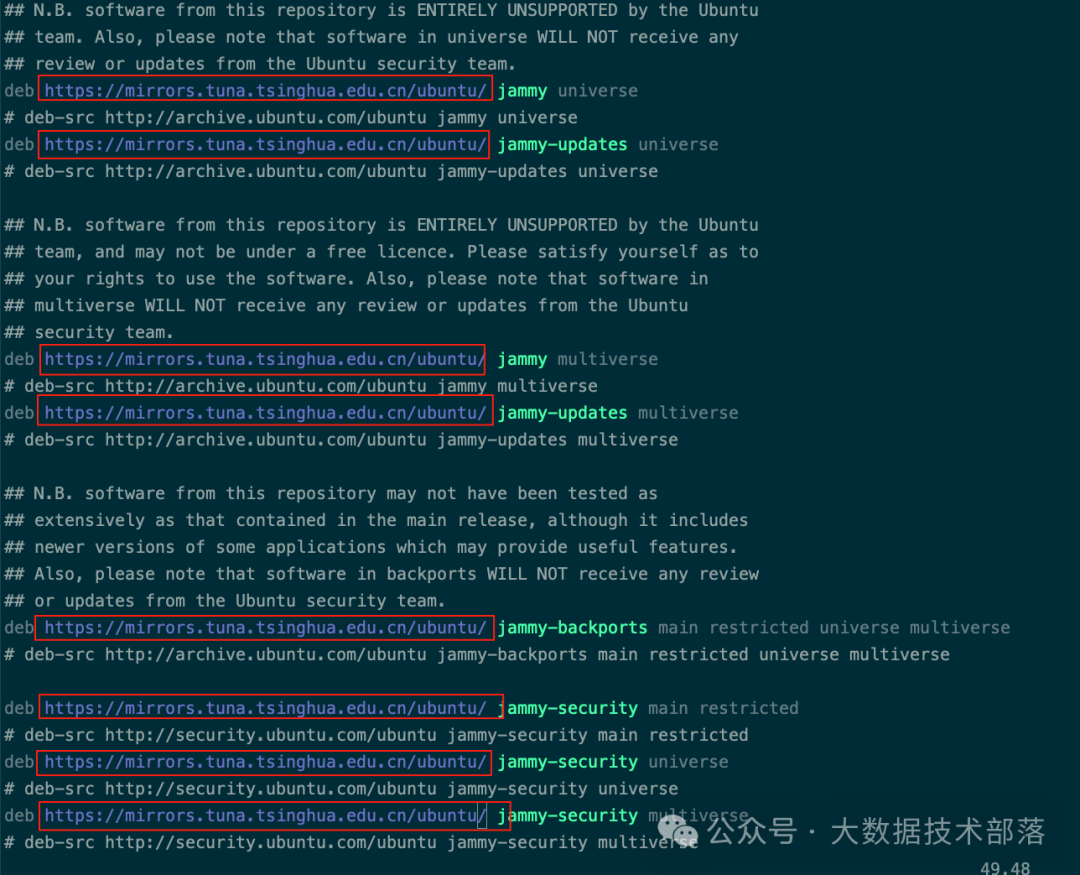
After modifying the file, remember to execute the update command to make it effective.
sudo apt-get updateNext, the execution of apt-get install will be very fast, and life becomes better!
1.3 Install bcc
apt-get install bpfcc-tools linux-headers-$(uname -r)2. eBPF Hello World Program
Create a hello_world.py file with the following code. This example code’s main function is to output “Hello World!” when the operating system executes the execve system call (new process execution).
#!/usr/bin/python3
from bcc import BPF
program = """
int hello(void *ctx) {
    bpf_trace_printk("Hello World!\n");
    return 0; }
"""
b = BPF(text=program)
syscall = b.get_syscall_fnname("execve")
b.attach_kprobe(event=syscall, fn_name="hello")
b.trace_print()
We execute
sudo python3 hello-world.pyThen open a new terminal, enter the virtual machine shell (
lima shell ebpf-dev). Execute some shell commands, such as ls, and when executing commands, you will find that the window running the hello-world.py program outputs the results, as shown in the following GIF.
At this point, we have completed our first eBPF program. We can further explore eBPF from here!