Abstract: The cross-development environment is the foundation of embedded Linux development. The subsequent development process is almost entirely based on this environment. ARM, as a high-performance, low-cost embedded RISC microprocessor, has become the most widely used embedded processor. This article includes the hardware structure of the 32-bit ARM920T core “GEC2410” development board and the concept and configuration of the embedded Linux cross-development environment. It covers the use of development tools and the method for creating a cross-debugger. A running platform for embedded Linux has been built for the “GEC2410” development board using a virtual machine on the Windows operating system.
Keywords: Cross-development environment; ARM; Linux
0 Introduction
Currently, with the increasing maturity and widespread application of ARM technology, microprocessors based on the ARM core have become mainstream in the embedded market. Establishing an embedded operating system targeting the ARM architecture has become a hot research topic. Among many embedded operating systems, many developers choose Linux mainly because it is open-source and free, allowing anyone to modify and port it to their target platform system. The system can dynamically load and unload kernel modules through kernel configuration, making it easy to add new components or unload unnecessary kernel components.
This article introduces how to use a Linux virtual machine under the Windows operating system to implement a cross-development environment for embedded Linux application software targeting the 32-bit ARM920T core $3C2410 microprocessor, proposing a relatively complete solution and successfully setting up an embedded application software development environment for the GEC2410 development board.
1 GEC2410 Development Board Hardware Composition
The ARM processor is a high-performance, low-cost, low-power RISC microprocessor that supports a 16/32-bit dual instruction set and has captured 75% of the 32-bit RISC embedded product market. The ARM920T microprocessor used in this article is a mid-range product with extensive applications. The $3C2410 is a 32-bit low-power RISC macro unit with a working frequency of 203 MHz and supports the Thumb 16-bit simplified instruction set, thereby achieving 32-bit system performance with relatively small storage space requirements. It has 64MB of SDRAM composed of two K4S561632 chips, operating in 32-bit mode; 64MB NAND Flash, using K9F1208, compatible with 16MB, 32MB, or 128MB; a 10M Ethernet interface using CS8900Q3, with transmission and connection indicator lights; two UART serial ports with a baud rate of up to 115200bps, featuring RS232 level conversion circuit, Embedded·ICE (20-pin standard JTAG) interface, and parallel JTAG interface, supporting the loading and debugging of ADS, SDT software, and FLASH burning.
2 Setting Up the Embedded Linux Development Environment and Using Development Tools
2.1 Host-Target Mode
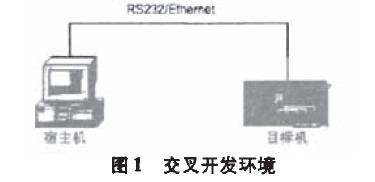
Before starting project development, the first step is to set up an application development environment based on the Linux operating system, typically consisting of the target board (GEC2410 development board) and the host machine (Linux virtual machine). As shown in Figure 1, embedded systems are usually resource-constrained systems, making it difficult to write software directly on the embedded system’s hardware platform, sometimes even impossible. The common solution is to first write the program on a general-purpose computer, then generate a binary code format that can run on the target platform through cross-compilation, and finally download it to a specific location on the target platform for execution. The compiler used to compile such programs is called a cross-compiler. To avoid confusion with local compilers, cross-compilers typically have a prefix. For example: arm.linux-gcc. The cross-development environment refers to the environment for compiling, linking, and debugging embedded application software, which differs from the environment for running embedded application software, usually adopting a host-target mode.
2.2 Establishing a Linux Server Cross-Compilation Environment
The Linux server is a common platform for compiling the embedded Linux kernel, developing applications, and compiling. Many tasks in the development of an embedded system need to be completed through it. The cross-compilation tools are used to compile the embedded Linux kernel and applications that run on the target system, including compilers, linkers, debuggers, and other utilities, usually provided to us in the form of compressed software packages, known as the development toolchain. Currently, the cross-compilation toolchain based on the ARM architecture is: all-linux.gcc-2.95.3.
1) Downloading the GNU Cross Toolchain
You can download the 2.95.3 toolchain from the ARM official website at arm.linux.org.uk:
ftp://tip.arm.linux.org.uk/pub/armlinux/toolchain/cross-2.95.3.tar.bz2
2) Installation Steps for cross-2.95.3.tar.bz2 Package
a. #mkdir /usr/local/arm;
b. #cp cross-2.95.3.tar.bz2 /usr/local/arm;
c. #tar jxvf cross-2.95.3.tar.bz2;
d. Add environment variable: at the end of /etc/bashrc file add:
export PATH=/usr/local/arm/2.95.3/bin:$PATH;
e. The toolchain installation is complete.
2.3 Steps to Configure NFS Service
NFS service allows a directory on the host machine to be mounted on other computers over the network, enabling file sharing between different machines and operating systems.
The use of NFS is divided into server-side and client-side, where the server-side provides the files to be shared, and the client-side accesses the shared files through the mount operation. The following mainly introduces the method and steps for sharing files between the GEC2410 development board’s Linux system and the virtual machine’s Linux via NFS:
1) Configure NFS service on the virtual machine Linux, edit the NFS configuration file /etc/exports, and set the shared directory as follows: vi /etc/exports, add: /root/nfs-share (rw,sync,no-root-squash). rw indicates that the lower machine is allowed to read and write this directory, and no_root_squash allows the lower machine to mount the root filesystem as the host root user.
2) Start the NFS service on the virtual machine Linux: (after modifying the configuration file, you need to restart the service) #/etc/init.d/nfs restart or use the command: #service nfs restart.
3) Disable the firewall. Choose System Settings > Security Level, and change the security level to “No Firewall”.
4) Connect the PC (virtual machine) to the development board with a crossover cable, ensuring both Linux systems are on the same network.
The IP address of the development board is: 192.168.2.223, so configure the virtual machine IP to be 192.168.2.x, such as using the following command to configure: #ifconfig eth0 192.168.2.23.
5) Mount the virtual machine’s NFS shared directory in the development board’s Linux system, execute the following command: #mkdir /tmp/nfs #mount -t nfs -o nolock 192.168.2.23:/root/nfs-share /tmp/nfs.
2.4 Creating a Cross-Debugger
2.4.1 Structure of the Cross-Debugger
Debugging programs is an important means to ensure the correctness, reliability, and stability of programs and is an essential part of application program development. The cross-debugging process in embedded software development differs from the debugging methods in local software development. In local software development, the debugger and the program being debugged often run on the same computer. In embedded software development, debugging is performed through cross-debugging between the host machine and the target machine. The debugger runs on the host machine, but the process being debugged runs on the target board. The debugger and the debugged process communicate via serial or network connections, allowing the debugger to control, access the debugged process, read its current state, and change its running state.
2.4.2 Method for Creating a Cross-Debugger
1) Unzip the source package: tar zxf gdb-6.0.tar.gz
2) Configure: cd gdb-6.0
mkdir build-arm-linux
cd build-arm-linux
../configure –target=arm-linux –prefix=/usr/local/arm/2.95.3/
3) Compile: make
4) Install: make install
Generate the arm-linux-gdb tool in /usr/local/arm/2.95.3/bin/ directory.
5) Compile and generate gdbserver for the target ARM processor.
a. Enter the gdbserver directory in the gdb source package.
cd gdb-6.0
cd gdb/gdbserver
b. Configure to generate gdbserver.
chmod +x configure
CC=arm-linux-gcc ./configure –host=arm-linux
c. Make, generate gdbserver and gdbreplay.
6) Transfer gdbserver/gdbreplay to the target board.
7) Start gdbserver on the target board with the command gdbserver 192.168.1.88:2345 cross-test where 192.168.1.88 is the target board’s IP address, and 2345 is an arbitrarily chosen port, which can also be another port.
8) Start the arm-linux-gdb debugger on the host machine in the working directory with the corresponding program and source files.
#arm-linux-gdb cross-test
(gdb) target remote 192.168.1.88:2345
Connect to the remote gdbserver.
(gdb) b main
Set a breakpoint.
(gdb) c
Run.
3 Conclusion
This article, based on an analysis of the characteristics of the GEC2410 development board and Linux, introduces the process of building an embedded Linux development platform, detailing the methods and steps for configuring NFS services and creating cross-debuggers. This lays a foundation for the development of various drivers and applications.