
Project Name: True Zigbee Door Sensor
Project Author: Falling Flowers, Clear Breeze
Introduction
I want to check the home’s environmental data, such as temperature, whether the door is closed…
Zigbee sensors can meet my needs!
However…the Zigbee sensors on the market are quite expensive! Their functions are also relatively simple!

So I immediately decided! To make one myself! I can add whatever I want to detect! How cool!

Full Navigation
Project Description, Hardware Specification, Design Diagram, Software Specification, Testing Specification, Attachment Download
Project Description
I spent just over 30 yuan to make a Zigbee door sensor.
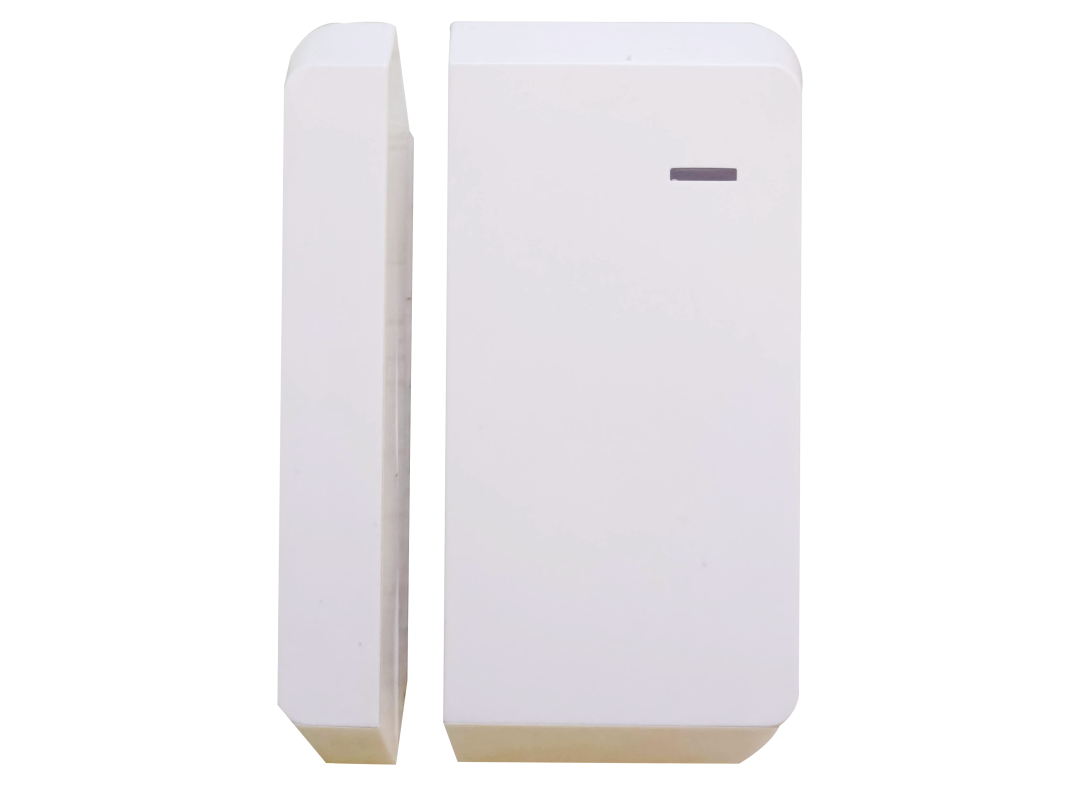
It can connect to a mobile phone, connect to third-party smart devices, detect door switches, and sample temperature and humidity.
Third-party smart devices include Wi-Fi, MQTT, Bluetooth Mesh, Zigbee, etc.
Hardware Specification
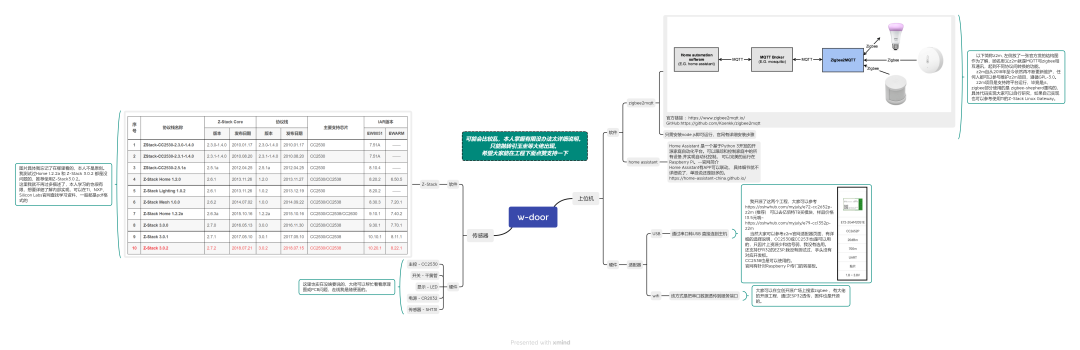
1
Using a reed switch with a magnet for door switch detection.
2
Temperature and humidity data sampling is done by reading the SHT31 sensor via I2C.
3
The power supply uses a CR2032 lithium manganese battery, which is fixed with a battery holder for easy replacement.
4
The microcontroller selected is the CC2530.
5
Using TI’s Z-stack protocol stack.
Design Diagram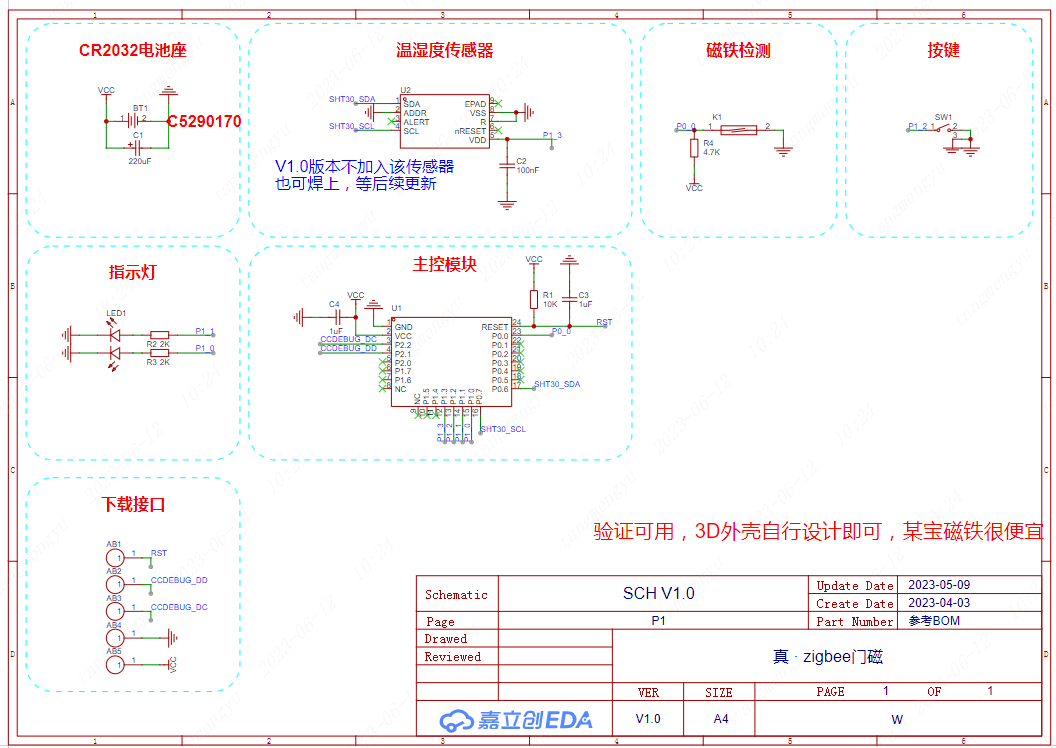 Schematic
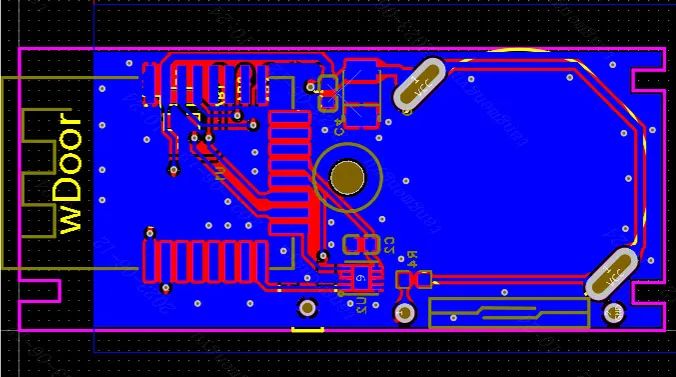 PCB DiagramSoftware Specification
This time, I used ESP8266 to flash firmware for CC2530, saving everyone from having to buy a CCDebugger emulator.
You can compile and download the ESP8266 program yourself.
If you don’t want to install a compiler to compile the ESP8266 code yourself, I have already compiled it, and you can directly use the Espressif flash_download_tool for downloading as shown in the image below.
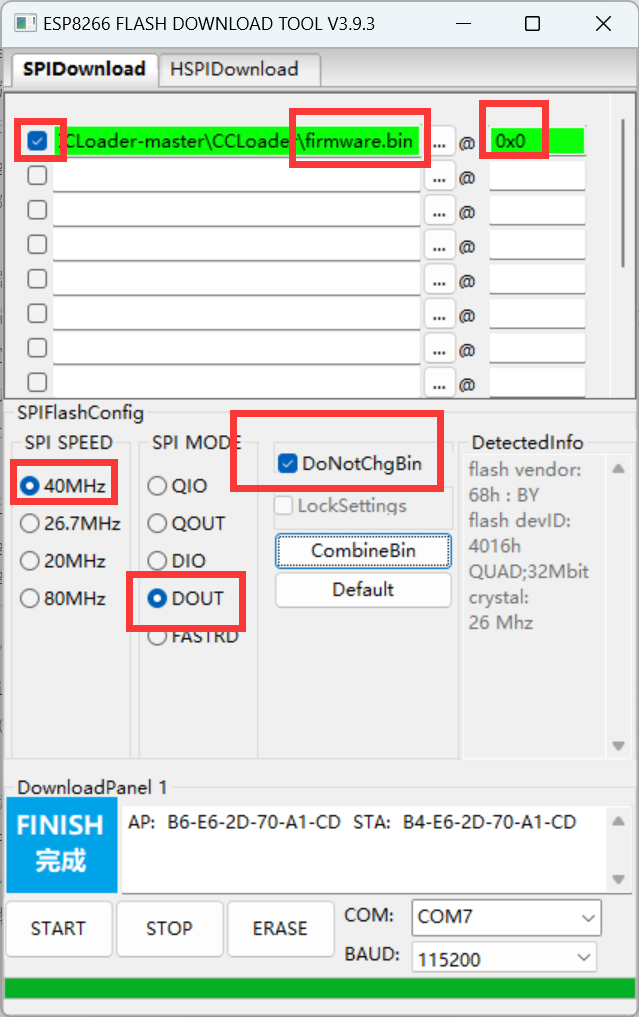 Firmware, bin files, and download tools are all included in the attachment ESP8266 toolkit.
Testing Specification
Actual current measurement data was taken using a 20KHz sampling rate, with a baseline noise of around 70nA.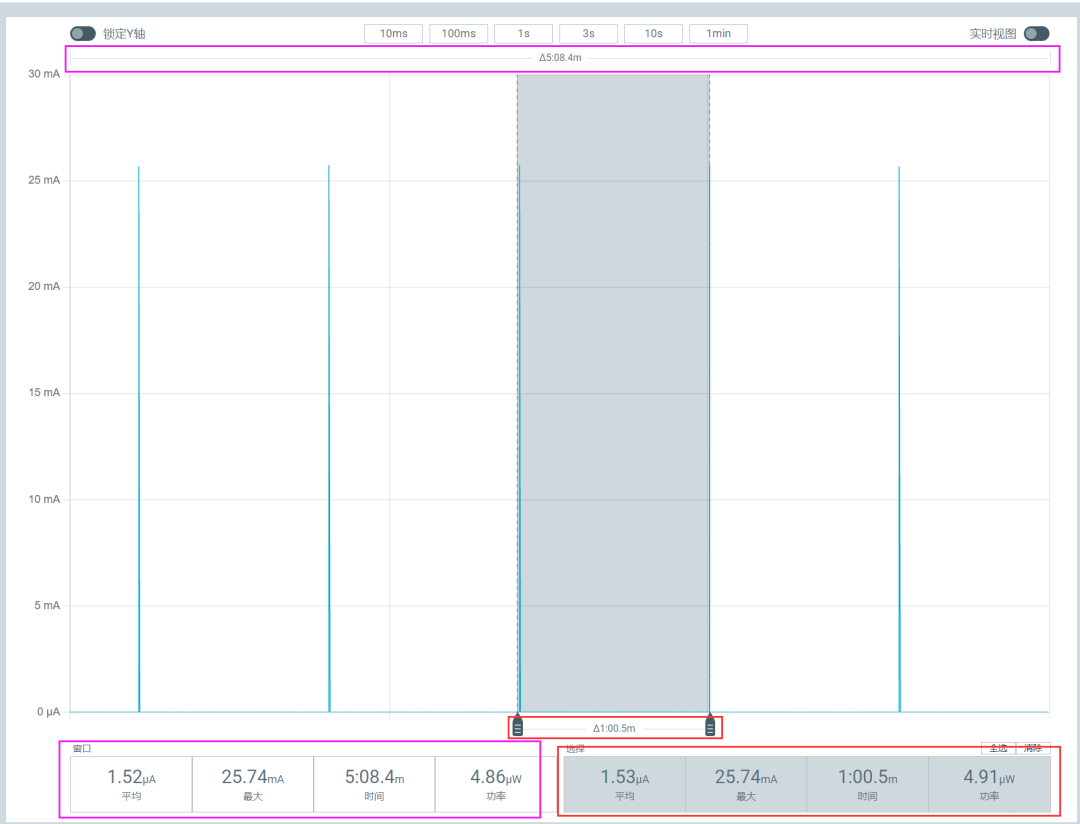
Just look at the boxes of the same color; the red one is the 1-minute interval.
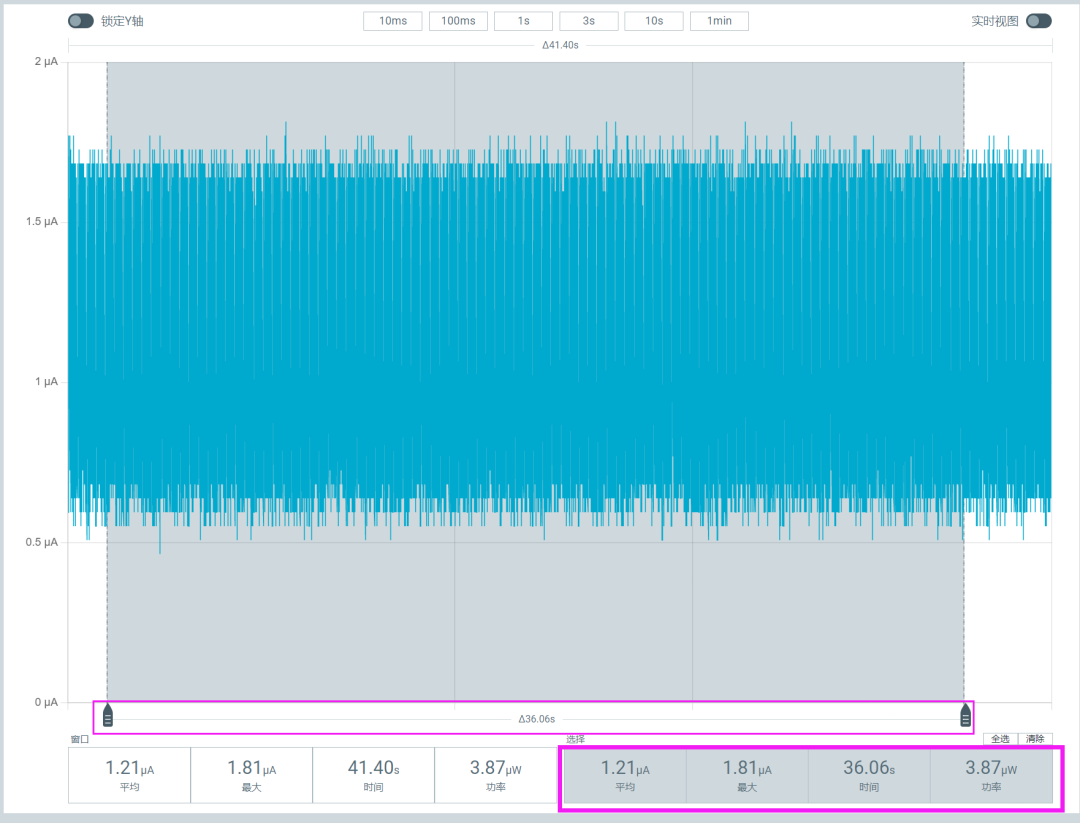
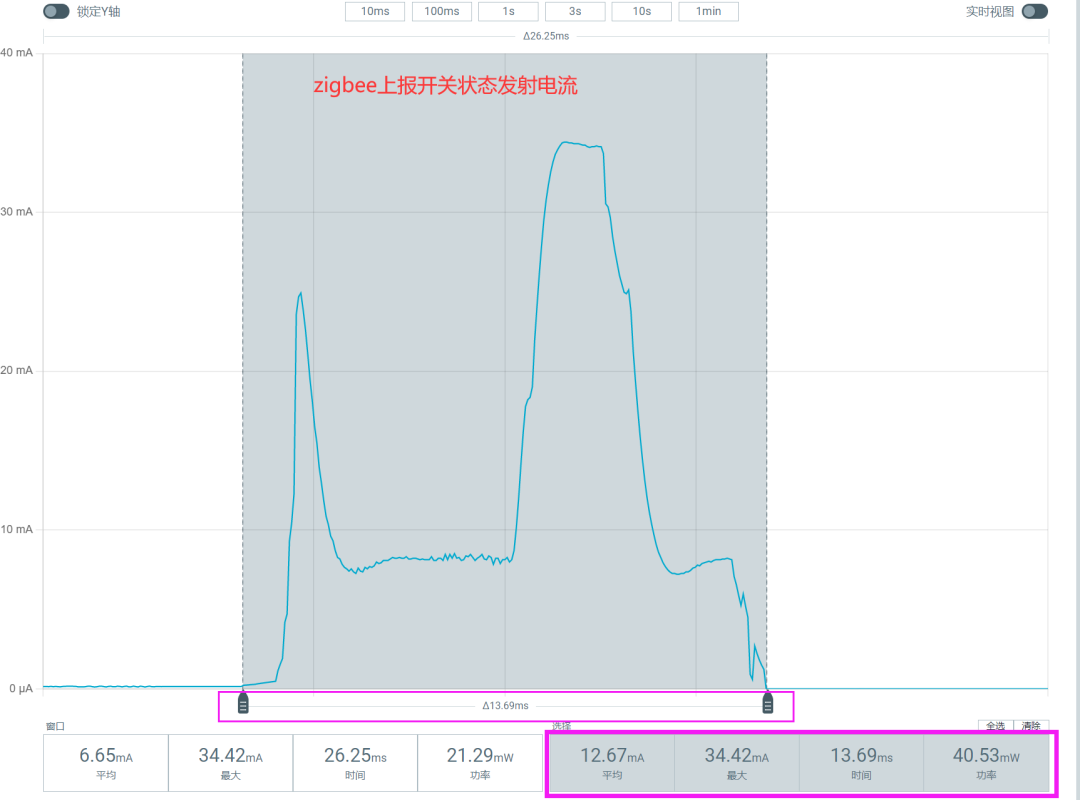 The Zigbee door sensor has been powered on and running for a day; the battery voltage is 3.3V, installed at the bedroom door, with the door sensor 3M away from the gateway.
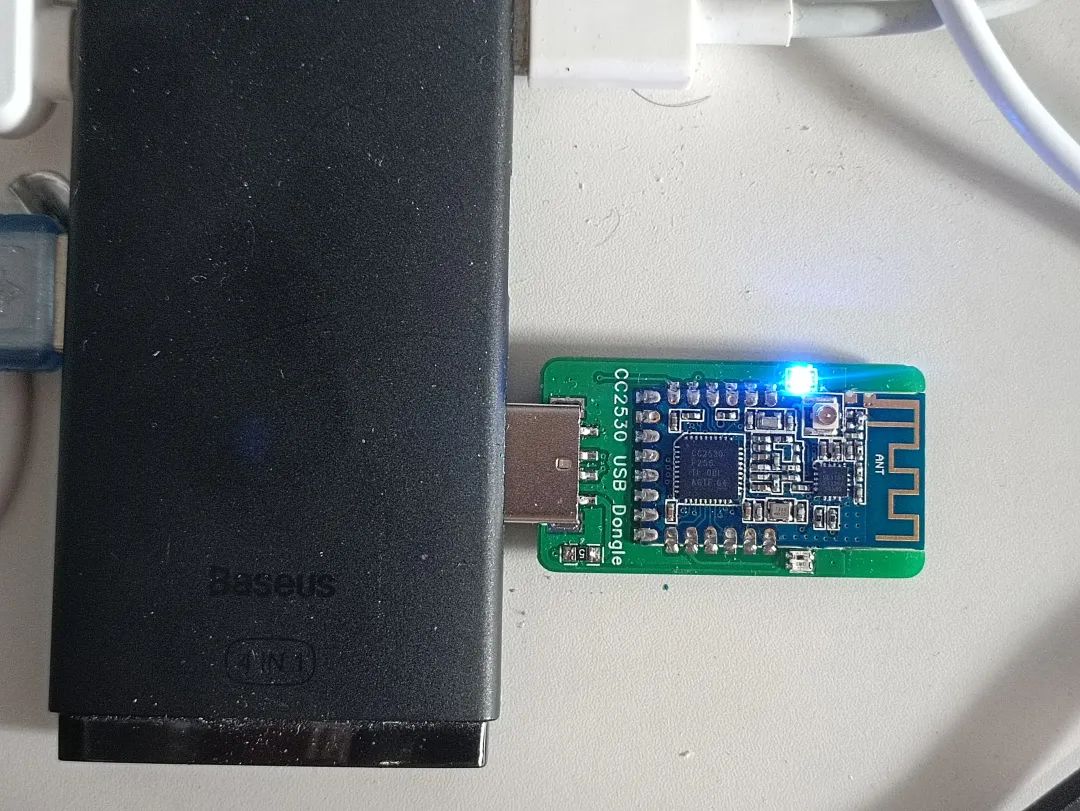
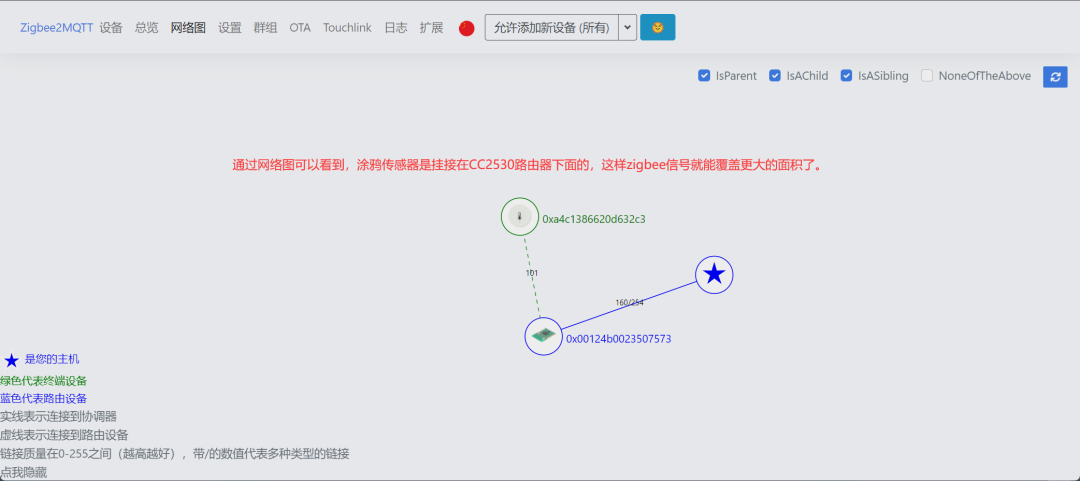
I found that Zigbee is quite seriously affected by 2.4G Wi-Fi interference, and after trying various setups, I chose the CC2530+PA method to make a Zigbee router.
The above solution has been successfully tested, and I will not display the packet capture data.
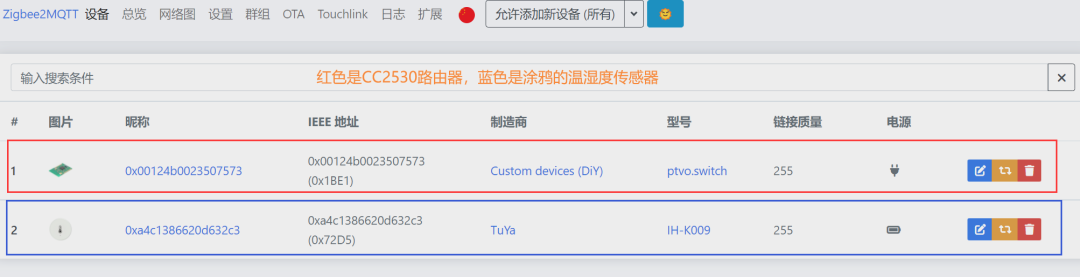
The first image shows the physical device powered on and operating normally, the second image shows successful network access to Z2M, and the third image is the network topology diagram.
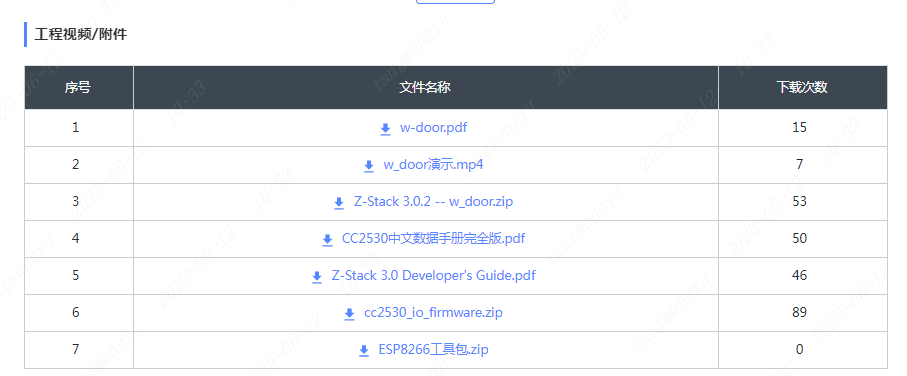
Attachment DownloadIf you need project attachments or circuit diagram source files, you can click on the end of the article“Read Original” to view the original project. The image demonstration is as follows: Download attachments here.
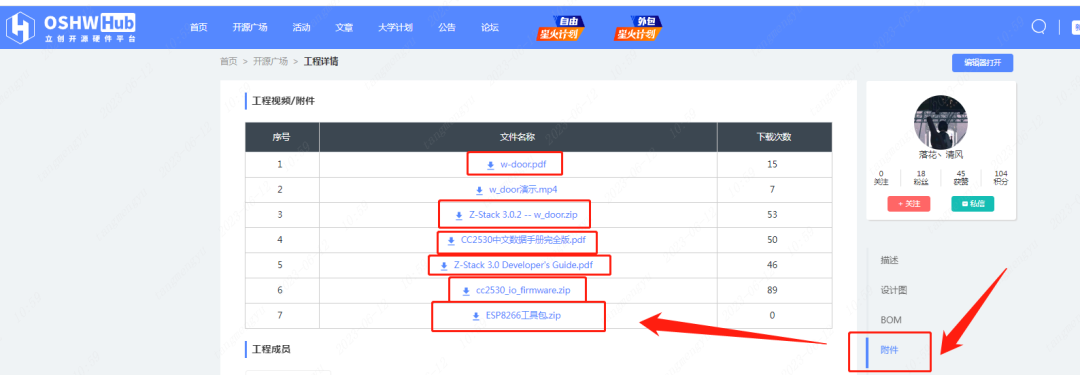
Click here to “open in editor”.

After clicking, you can view the circuit source files online.
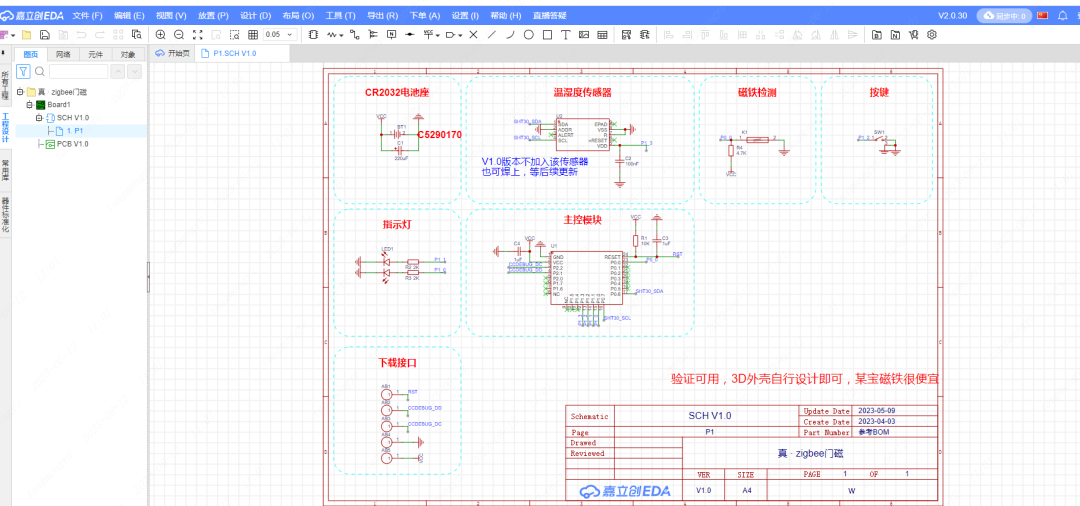
If you have any other questions, you can leave a message to the author at the bottom of the original project.Conclusion
Come on, creators!
This simple yet practical IoT project… is really awesome!

*This article is reprinted from the user creation of the “Lichuang Open Source Hardware Platform”. If there is any infringement, please contact for deletion.
Like if you are watching! Click here to view the original project