This article is about about 1826 words, recommended reading time is 4 minutes.
This article introduces how to DIY a multifunctional e-ink calendar.
How to make a DIY e-ink screen calendar?
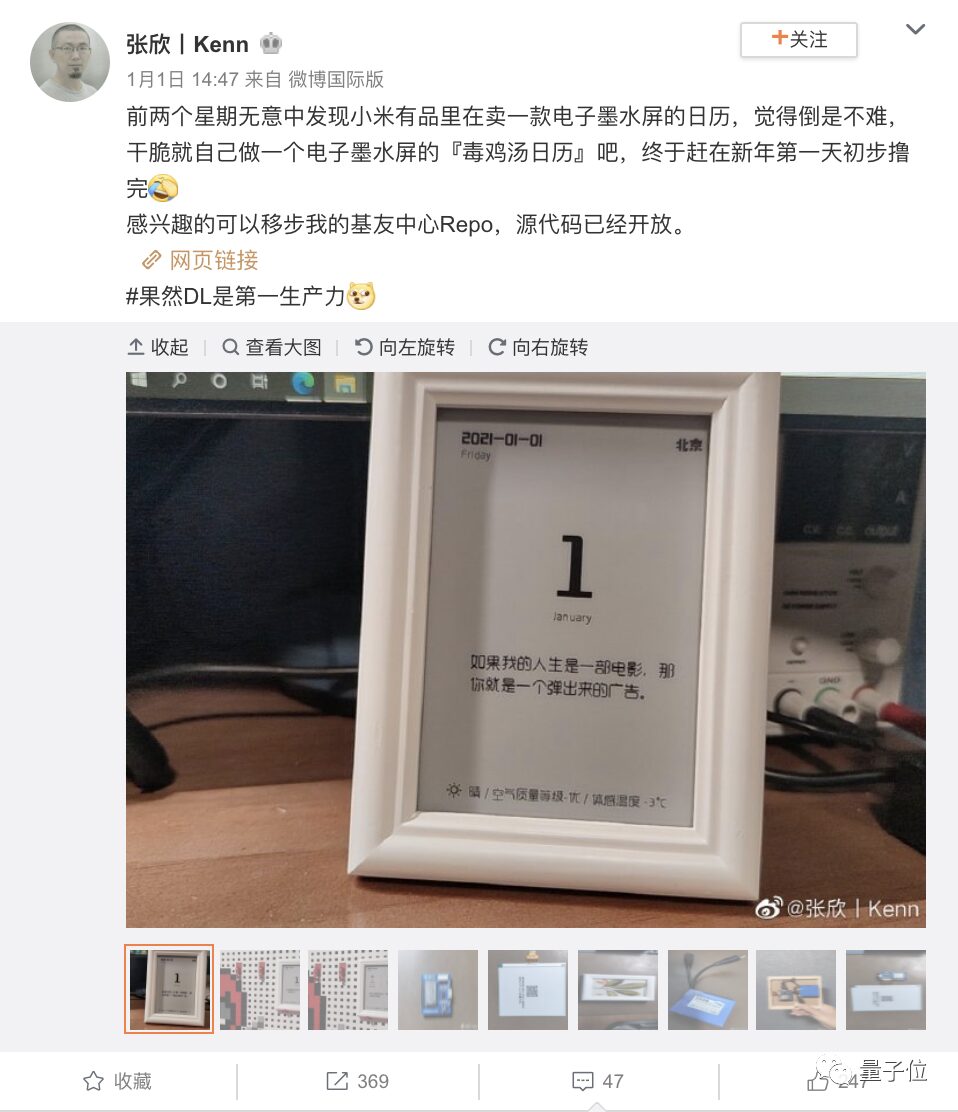
It can automatically refresh location and weather, and randomly display over 2000 toxic quotes.
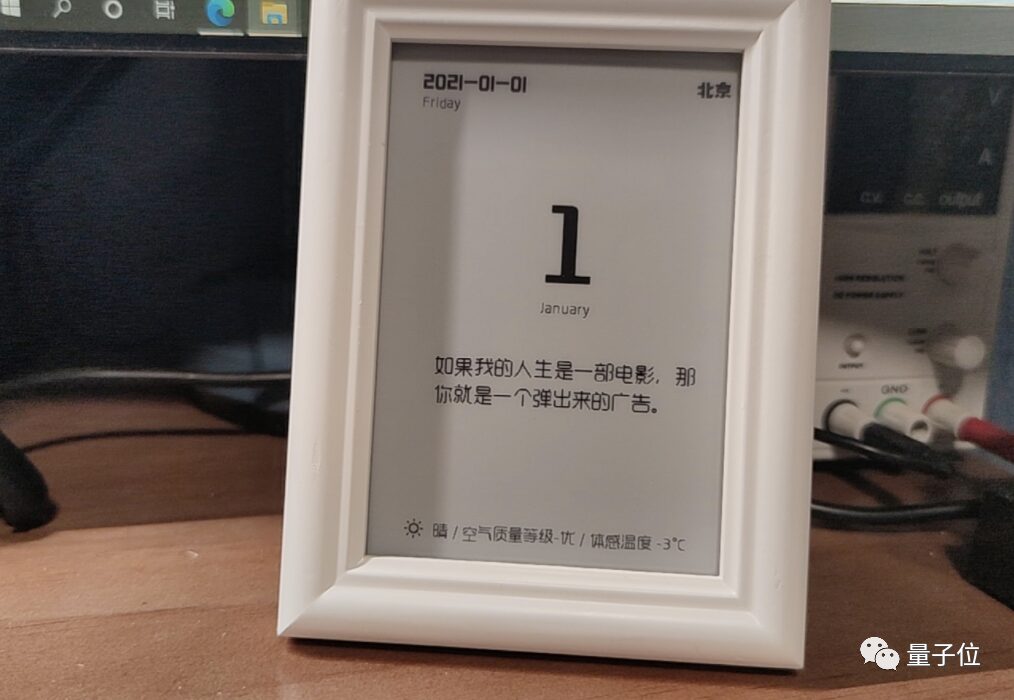
↑↑↑ Just like this: If my life were a movie, you would be a pop-up ad. A new quote refreshes every 10 minutes.
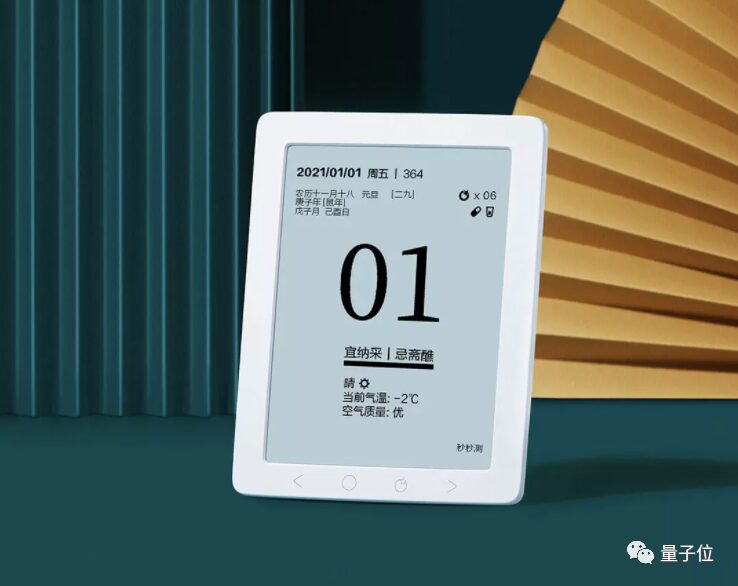
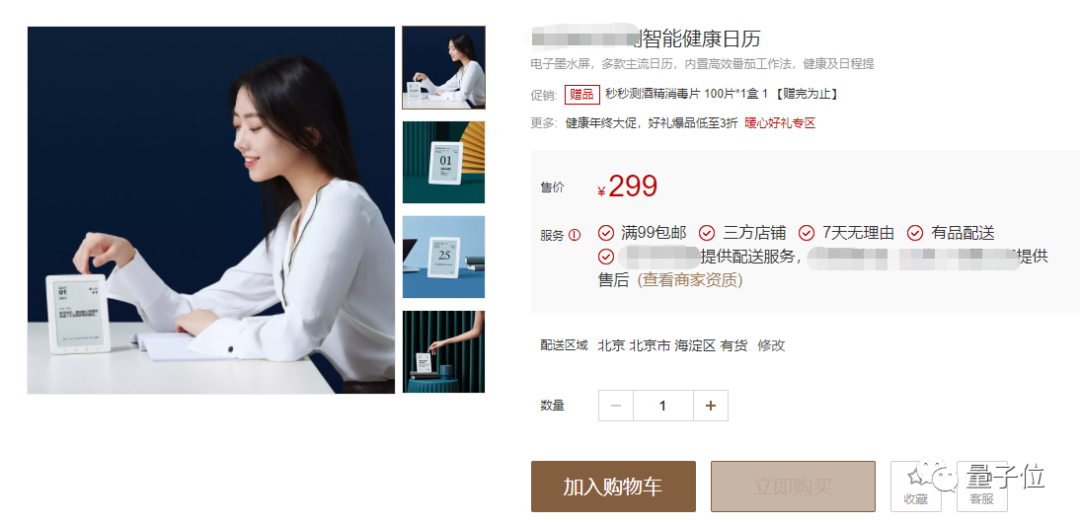
With a frame, how would you rate it compared to the one priced at 299 yuan on online shopping platforms?
This new “product” comes from Weibo blogger @Zhang Xin | Kenn.
And he has also made the production method open source.
Let’s take a look together~
@Zhang Xin | Kenn decided to create this e-ink screen after seeing similar products sold on online shopping platforms.
The product is quite interesting, but to get that toxic quote flavor, you still need to DIY it yourself.
Let’s look at the plan directly.
Screen, 231 yuan
First is the screen. Among hardware like smartphones and smart screens, the screen is usually the most expensive part.
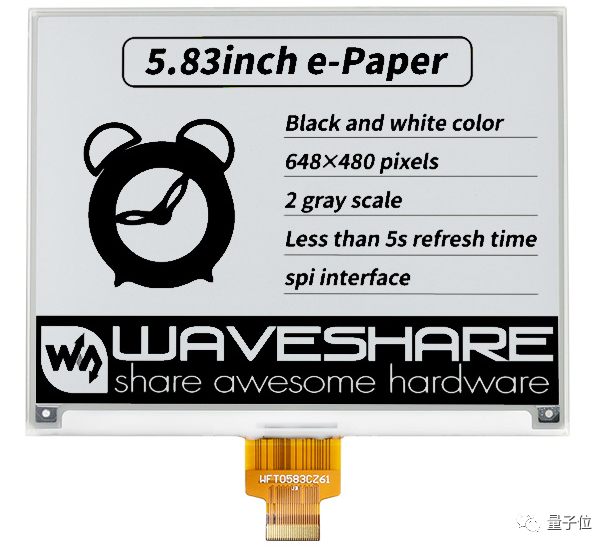
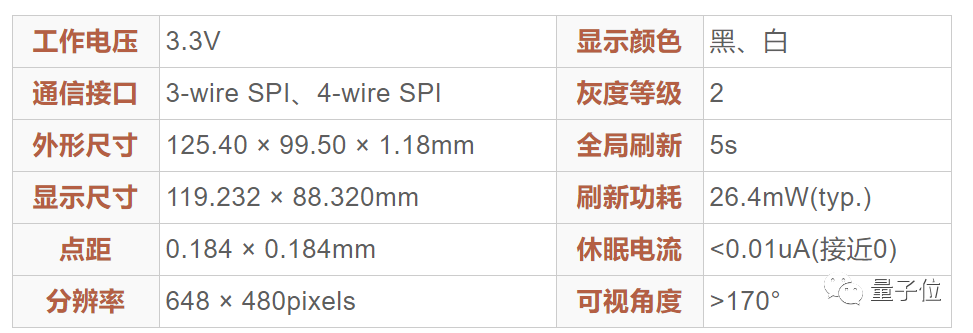
Zhang Xin referred to the online product plan and chose the Waveshare 5.38-inch black and white e-ink screen, which is not too expensive.
This screen model is called e-paper, with a resolution of 648×480, SPI interface, priced at 231 yuan.
At the same time, this screen also adopts the currently popular serial port format. Compared to parallel connection, serial port screens only require 2 wires for communication, and the control program is simple, reducing by 90% compared to parallel screens.
Some serial port screens even do not require an MCU and can be directly controlled.
For DIY electronic products, serial port screens are more suitable.
If you plan to use a Raspberry Pi or other Arduino devices to drive it, you can choose a set with an adapter board, priced at 283.5 yuan.
In addition, similar models of electronic screens also have color versions, but the cost is higher.
If you really use a color screen, you may need to modify the original author’s code to make it applicable.
Computing Unit, 78.75 yuan
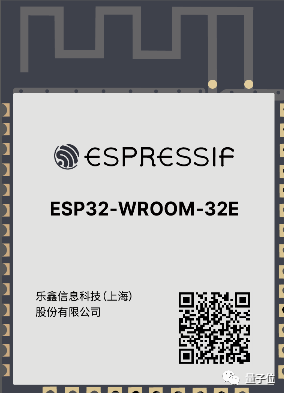
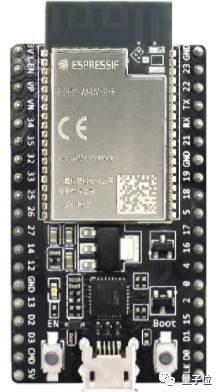
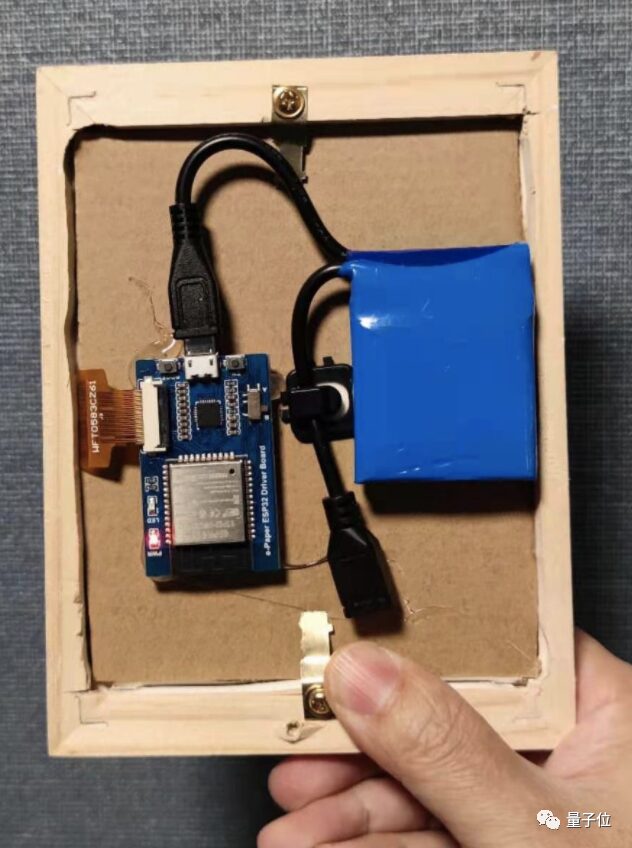
Zhang Xin used the Espressif ESP32 chip.
The ESP32 chip has built-in 2.4G wireless and Bluetooth, with plenty of pins.
Moreover, many mature ESP32 development boards are available on the market.
Of course, if you are hardcore enough, you can buy an ESP32-based module and integrate it into the board.
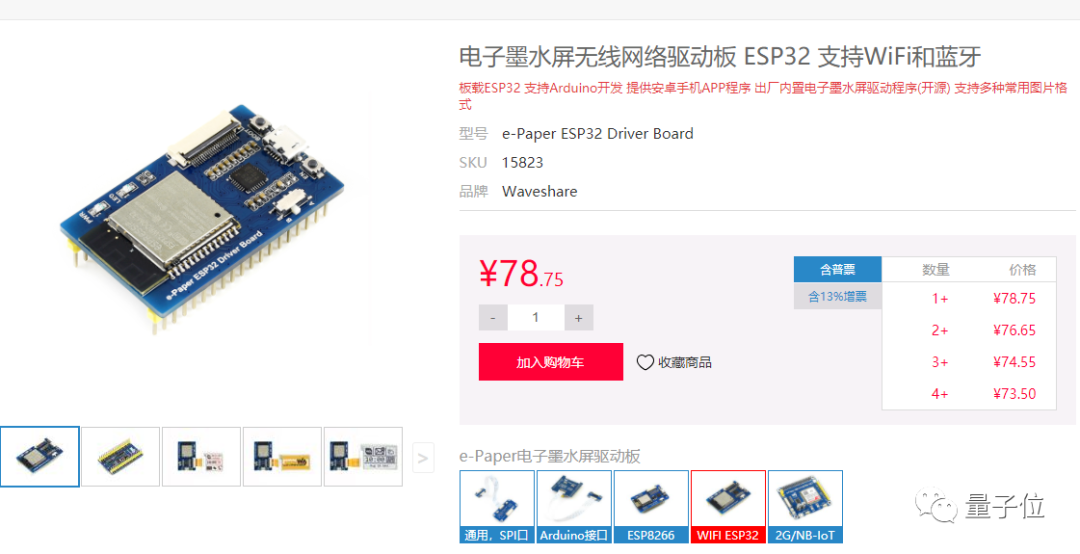
Note that both methods require buying an adapter board when purchasing the screen to convert the screen’s soft ribbon cable to SPI interface.
The author chose the Waveshare e-ink screen development board based on ESP32, which has a soft ribbon interface, priced at 78.75 yuan, to quickly produce the finished product.
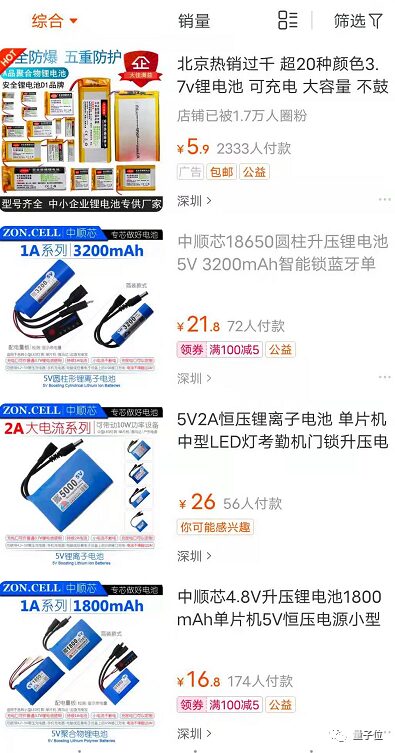
Power Supply, under 50 yuan
In fact, during development, you can power it directly through the USB port on your computer using a micro USB cable while debugging.
However, if you want to get rid of the power cord in actual use, you can directly buy a lithium battery with a built-in micro USB charge and discharge interface.
The price varies with battery capacity, but generally stays below 50 yuan.
Finally, the cost of DIYing the same e-ink screen is at most 231+78.75+50=359.75 yuan.
Why is it still more expensive than online shopping platforms? .
This is actually easy to understand; buying all components at retail prices is naturally more expensive than the manufacturer’s wholesale price.
But what tech enthusiasts enjoy is the fun of doing it themselves, right?
With the hardware ready, how to implement the software part?
Framework part, Zhang Xin chose Arduino because it has a wealth of ready-made third-party libraries available.
Development Tools aspect, he recommends using Visual Studio Code.
Specifically, the project’s code mainly implements the following functions.
.
This is actually easy to understand; buying all components at retail prices is naturally more expensive than the manufacturer’s wholesale price.
But what tech enthusiasts enjoy is the fun of doing it themselves, right?
With the hardware ready, how to implement the software part?
Framework part, Zhang Xin chose Arduino because it has a wealth of ready-made third-party libraries available.
Development Tools aspect, he recommends using Visual Studio Code.
Specifically, the project’s code mainly implements the following functions.
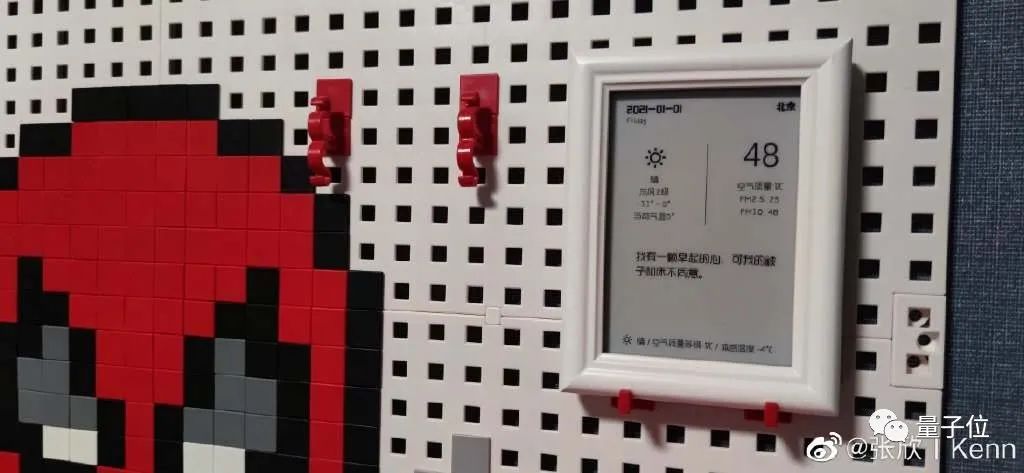
First, plan the screen layout and refresh the screen every 10 minutes, updating the flavor of the toxic quotes in real-time.
Image source: Weibo blogger @Zhang Xin | Kenn
There are over 2000 ready-made toxic quotes, such as:
Life is not only the present hardships but also the future hardships.
May you slim down into a lightning bolt, with a diameter of two meters.
The complete content can be found in the project’s toxicsoul.h file.
The date is obtained using the clock built into the ESP32 system.
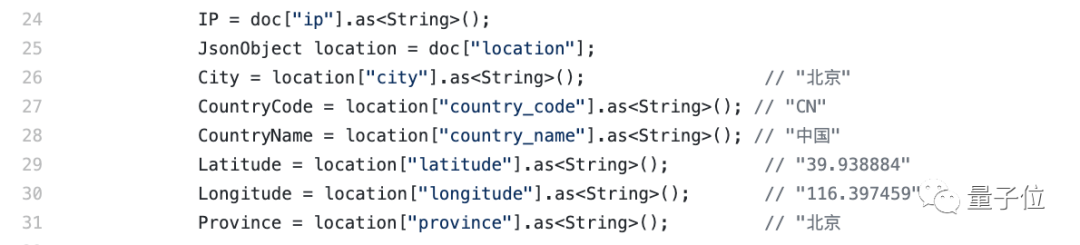
The location is obtained by checking the current device’s IP address.
Some code
Real-time weather information comes from the He Feng Weather Development Platform’s services. When implementing it, you need to register an account and obtain an application Key.
const String QWEATHER_API_KEY = “**“;
The third-party libraries involved mainly include:
-
Adafruit GFX: Graphics engine for image display output
-
GxEPD2: Drives various e-ink screens based on the Adafruit_GFX library
-
U8g2 for Adafruit GFX: Displays text
-
u8g2_fontmaker: A one-click lazy script tool for generating u8g2 font source code, also created by the project author
-
ArduinoJSON: Handles JSON strings
Once everything is ready, burn the program onto the development board, assemble it with hot glue and other DIY essentials, connect the power, and the toxic quote e-ink screen calendar is born.
This toxic quote e-ink screen calendar was initially completed on New Year’s Day and received enthusiastic likes from netizens.
Many netizens expressed on the spot, nice, let’s do it.
Some netizens even raised new demands (manual dog head):
Want to display yesterday’s daily report statistics.
Regarding battery life information, the author also responded in the comments:
There hasn’t been time or conditions to measure power consumption; in fact, optimizing the code, putting the screen and ESP32 to sleep after refreshing, and extending the refresh interval will lead to very low power consumption…
Zhang Xin, studied at the Computer Department of Beijing University of Chemical Technology for his undergraduate degree, and is currently pursuing a master’s degree at the University of Chinese Academy of Sciences.
Previously worked as a senior product consultant at Microsoft, engaged in project development under the Microsoft platform, with rich experience in .NET platform, databases, and multi-layer architecture design, participating in and leading several large application system architecture designs as well as research and implementation work.
He is also a Microsoft MVP (Most Valuable Professional).
Zhang Xin is now a partner and product manager at a startup focused on drones, Xinfeng Intelligent.
That’s all. After reading this, do you feel a bit excited?
So, shall we get started? After all—
As long as I am willing to put in the effort, there is nothing I can’t mess up.
Project address: https://github.com/breakstring/eInkCalendarOfToxicSoul