Introduction to Python GUI Development
Click the blue text above▲ to follow Ian’s channel~
Preface
Hello, I am Ian.
Welcome to Paiwu.
Have you ever wondered if Python can create a “visual and tangible” graphical interface?
The answer is yes, and it is very simple.
Python development of graphical interfaces does not require you to be a front-end expert or to get lost in complex algorithm architectures; you can achieve the desired functionality just by clicking and dragging with your mouse.
This article aims to introduce you to Python‘s GUI development in a concise and easy-to-understand manner, teaching you step by step how to create windows, add buttons, layout interfaces, and respond to actions, creating fun or efficiency-enhancing small tools~~
Whether you are a student, a professional IT engineer, a Python enthusiast, a teacher, or a beginner in programming, you can easily master it and enjoy the fun of developing GUIs with Python.
What is GUI
GUI is the abbreviation for Graphical User Interface (User Graphical Interface).
In simple terms, GUI is an interface that uses graphical elements (such as windows, buttons, icons, menus, input boxes, etc.) to interact with computer programs, rather than relying on command line inputs or code inputs.
For example, the Windows File Explorer is a typical GUI.
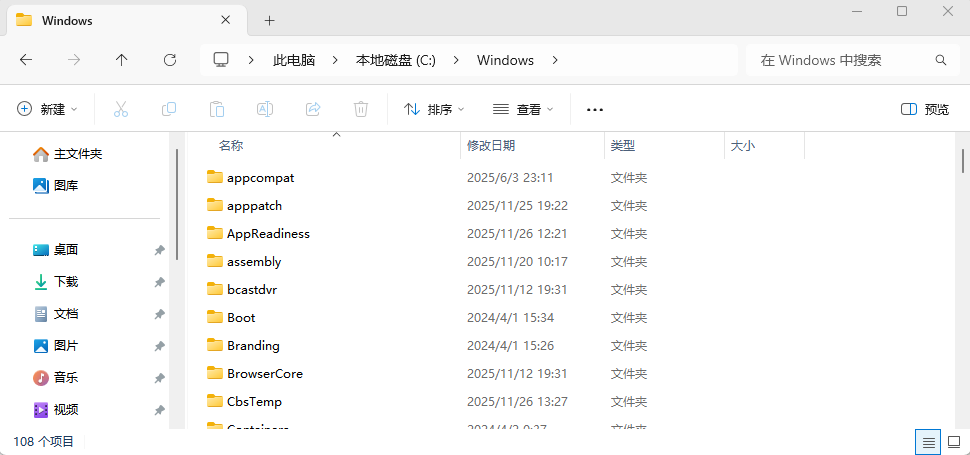
When you double-click a folder, drag files to the desktop, or right-click to select “New Text Document“, you are using a very mature and powerful GUI program.
GUI has many classifications, such as desktop GUIs for operating systems like Windows/MacOS/Linux, which can be developed using frameworks like WPF (C#), SwiftUI (Swift), or Qt (C++/Python).
There are also Web GUIs (browser interfaces) that can be developed based on HTML/CSS/JavaScript + React/Vue frameworks.
There are also mobile GUIs that run on phones and tablets, which can be developed using Swift (iOS), Kotlin (Android), or Flutter (Dart).
In the gaming field, you may have heard of Unity Engine and Unreal Engine, which can also be used to develop GUIs.


Qt and PySide6
Qt (pronounced like cute) is a cross-platform C++ application development framework developed by the Norwegian company Trolltech (Qt Company), which was later sold to Nokia and then to Digia, and is now specifically developed and maintained by The Qt Company, a subsidiary of Digia, headquartered in Helsinki, Finland.

Since Qt is a C++ library, the mainstream method in Python is to use the PyQt and PySide libraries to wrap C++ classes and functions into a format callable by Python.
| Library Type | PyQt | PySide |
|---|---|---|
| Development Company | Riverbank Computing (third-party) | The Qt Company (official) |
| License Type | GPLv3 (open source) + commercial license (paid) | LGPLv3 (open source, provided by Qt official) |
| Commercial Use Requires Payment | Open source free; closed source commercial must purchase a commercial license from Riverbank | Free |
| Documentation and Community Support | Large community, rich resources (especially PyQt5) | Complete official documentation, rapidly growing community |
| Common Versions | PyQt5, PyQt6 | PySide6 |
If you are a beginner or plan to use it commercially in the future, it is recommended to use PySide directly, as its official and open-source characteristics allow for more freedom in usage.
Official documentation: https://doc.qt.io/qtforpython-6/#
1. Introduction to PySide6
GUI‘s biggest feature is the user operation interface, which automatically triggers corresponding functions, a professional term known as event-driven programming.
Understanding the two main features of PySide6 will help you quickly grasp the core of programming:
1. Signal and Slot Mechanism
PySide6‘s signal and slot mechanism perfectly matches event-driven programming; user operations emit signals, and slots respond to signals and trigger corresponding functions.
2. Object-Oriented Programming
PySide6 treats almost all controls as objects (windows, buttons, sliders, layouts, etc.), and all objects can form an object tree, with parent objects automatically managing the lifecycle and memory.
2. Interface Display
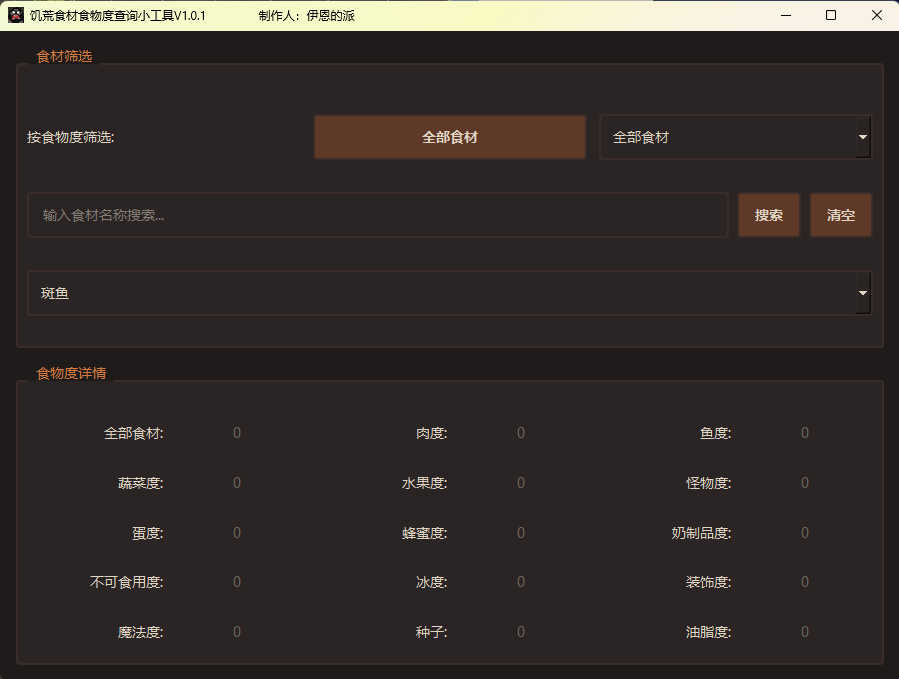
The following are interfaces developed using PySide6, ranging from simple to complex~
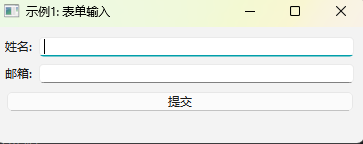
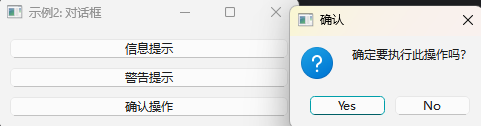
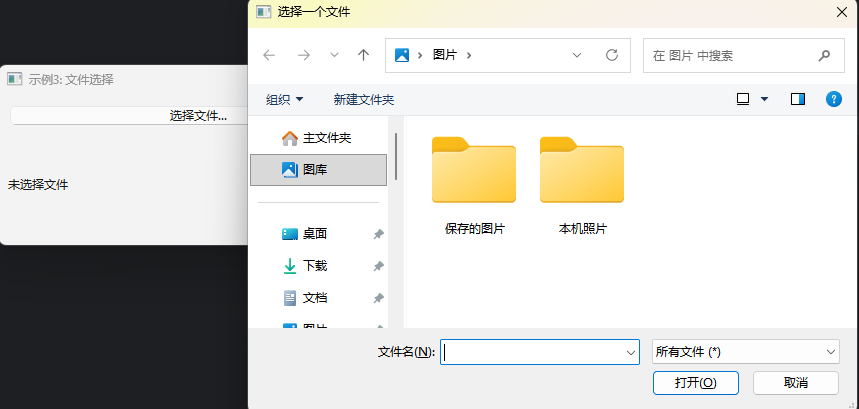
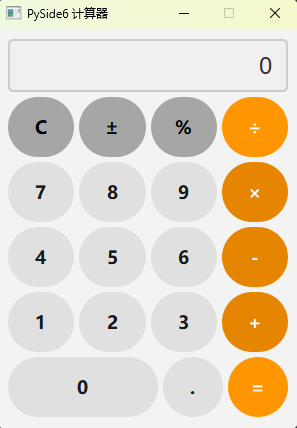
Additionally, I developed a fun little tool for checking the food value of ingredients in the game Don’t Starve~
3. Installing PySide6
Install PySide6 using pip
pip install pyside6Install PySide6 using conda
conda install pyside6Install PySide6 using uv
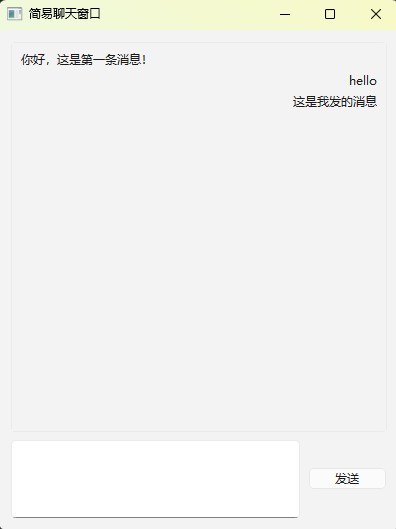
uv add pyside6Here is a simple chat window created with PySide6 for reference.
import sys
from PySide6.QtWidgets import (
    QApplication, QWidget, QVBoxLayout, QHBoxLayout,
    QTextEdit, QPushButton, QLabel, QScrollArea
)
from PySide6.QtCore import Qt

class ChatWindow(QWidget):
    def __init__(self):
        super().__init__()
        self.setWindowTitle("简易聊天窗口")
        self.resize(400, 500)

        # 消息显示区域(可滚动)
        self.scroll_area = QScrollArea()
        self.scroll_area.setWidgetResizable(True)
        self.messages_container = QWidget()
        self.messages_layout = QVBoxLayout(self.messages_container)
        self.messages_layout.setAlignment(Qt.AlignTop)
        self.scroll_area.setWidget(self.messages_container)

        # 输入区域
        self.input_box = QTextEdit()
        self.input_box.setMaximumHeight(80)
        self.send_button = QPushButton("发送")
        self.send_button.clicked.connect(self.send_message)

        input_layout = QHBoxLayout()
        input_layout.addWidget(self.input_box)
        input_layout.addWidget(self.send_button)

        # 主布局
        main_layout = QVBoxLayout()
        main_layout.addWidget(self.scroll_area)
        main_layout.addLayout(input_layout)
        self.setLayout(main_layout)

    def add_message(self, text, align_right=False):
        """添加消息到界面"""
        message_label = QLabel(text)
        message_label.setWordWrap(True)
        if align_right:
            message_label.setAlignment(Qt.AlignRight | Qt.AlignVCenter)
        else:
            message_label.setAlignment(Qt.AlignLeft | Qt.AlignVCenter)
        self.messages_layout.addWidget(message_label)
        # 自动滚动到底部
        self.scroll_area.verticalScrollBar().setValue(
            self.scroll_area.verticalScrollBar().maximum()
        )

    def send_message(self):
        """处理发送按钮点击事件"""
        text = self.input_box.toPlainText().strip()
        if text:
            # 显示自己发送的消息
            self.add_message(text, align_right=True)
            # 清空输入框
            self.input_box.clear()

if __name__ == "__main__":
    app = QApplication(sys.argv)
    window = ChatWindow()
    window.show()

    # 添加一条模拟的接收消息
    window.add_message("你好,这是第一条消息!")

    sys.exit(app.exec())
The page effect is as follows~
At this point, you have a basic understanding of what PySide6 is, what it looks like, how to install it, and the logic of programming.
Next, we will delve deeper into the core, understand the development process, and create more fun and practical small tools~
What other thoughts do you have about PySide6?
Feel free to share in the comments~
Conclusion
If you enjoyed reading, feel free to follow~
I am Ian, looking forward to meeting you again~
Feel free to message me for discussions~
-END-
Recommended Reading
- • No more crashes! Python exception handling made easy~
- • Elegant iteration with one line of enumerate~【Five-Minute Python Knowledge】
- • Is doing nothing okay? Three major uses to help you debug Python code!!【Five-Minute Python Knowledge】
- • f-string, the Python string formatting tool: let your code take off elegantly!!【Five-Minute Python Knowledge】
- • Master the concise lambda function to become a Python expert!!
Come join us~