Welcome to follow CSDN: Honglong Maker (formerly known as Capitalist)
Basic Steps:
Download and Install VSCode
VSCode download link: https://code.visualstudio.com
If you don’t know how to install VSCode, check the blog below:
Detailed VSCode Installation Guide (Windows) – Suoerya’s Blog – CSDN Blog: https://blog.csdn.net/Zhangguohao666/article/details/105665412
Install C++ Extension
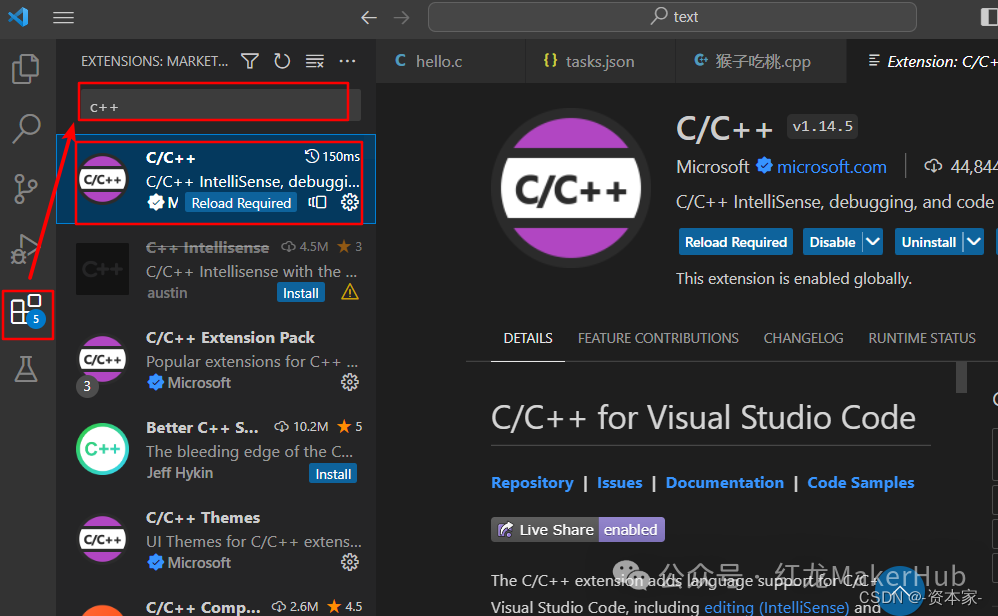
Install Compiler (MinGW-W64 GCC)
C Compiler (MinGW-W64 GCC) download link: https://sourceforge.net/projects/mingw-w64/files/mingw-w64/
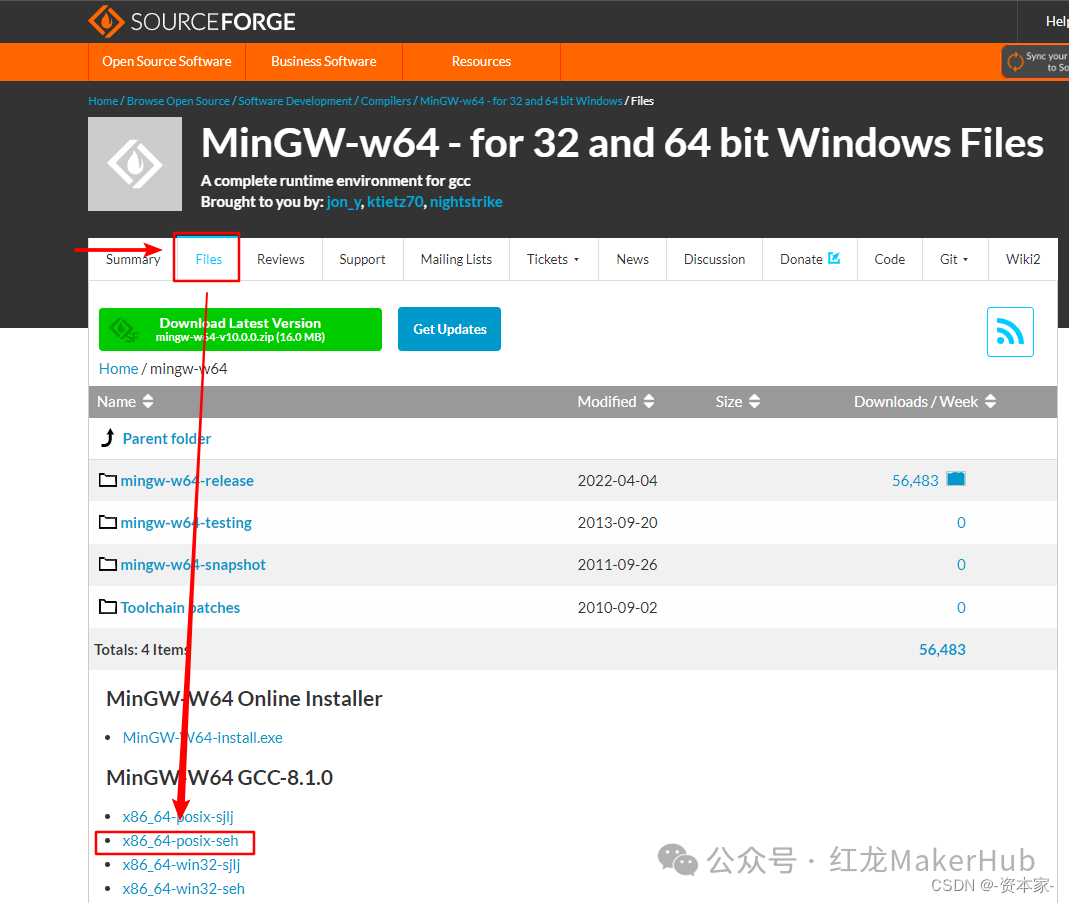
The exe file downloaded online may have network issues, leading to download failures. It is recommended to directly download version 8.1.0 of x86_64-win32-seh or x86_64-posix-seh for Windows 64-bit. There are slight differences in multithreading, but generally, this feature is not used, so either can be chosen. After downloading, extract it using decompression software.
Configure Environment Variables
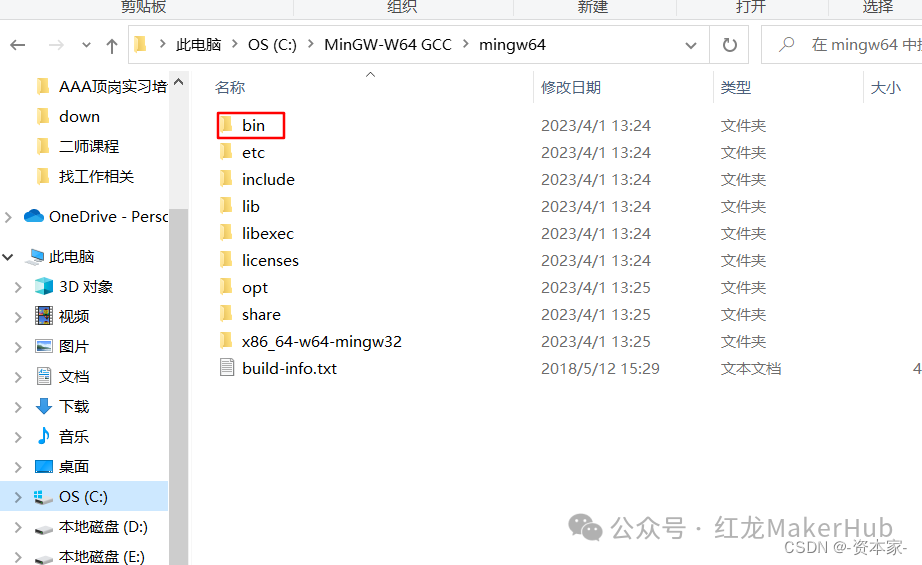
Find a folder named ‘bin’ within this directory and copy its address:
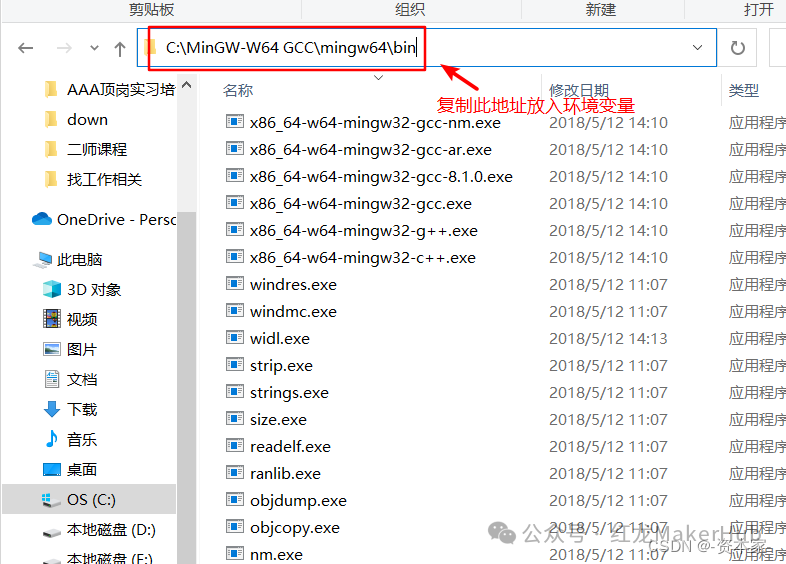
After opening, add the copied address:
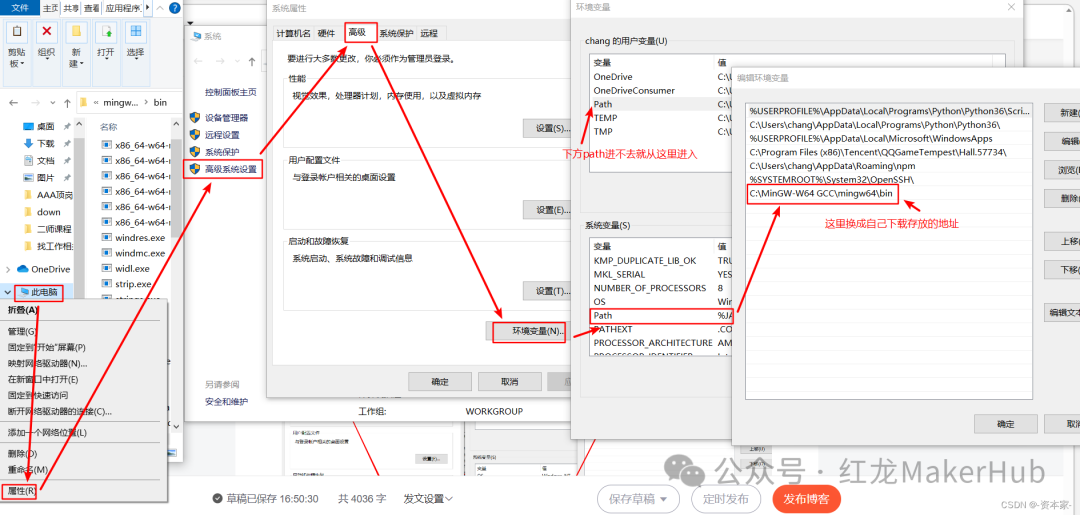
Then click OK, and confirm all previously popped-up pages. Then test if the environment configuration is successful:Open the run window with the Win+R shortcut, type cmd, and press Enter to open cmd.exe
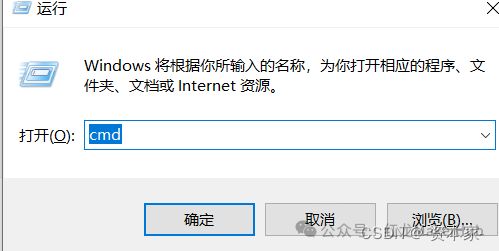
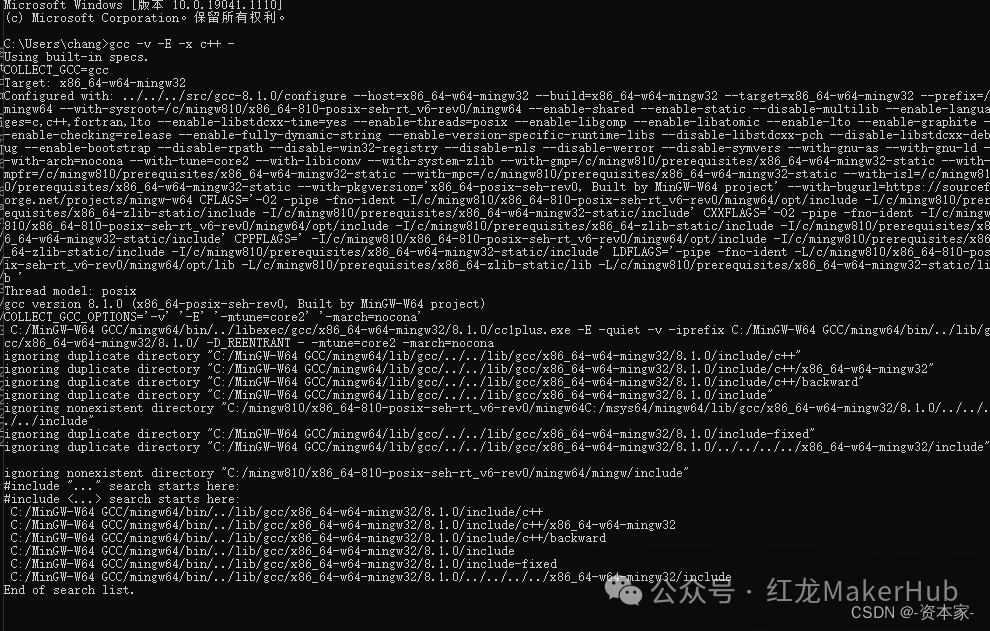
In cmd.exe, enter the following command:gcc -v -E -x c++ –If the output looks like the image below, the configuration is successful.
Configuration
Finally, perform the relevant configuration in VSCode:First, create a folder as the C language project file, then click on the menu bar File -> Open Folder, find the newly created folder, and select it to open this project file.Then create a hello.c file inside (you can name it anything, just ensure it ends with .c)
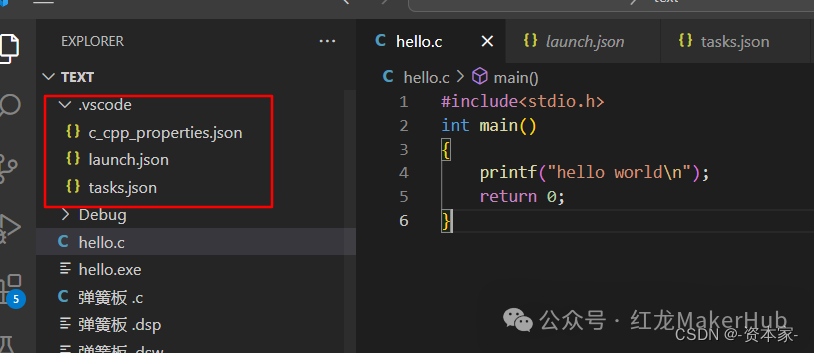
Then create a .vscode folder (note the dot at the front), and inside create three files,c_cpp_properties.json, launch.json, tasks.json
- • c_cpp_properties.json: Copy this code into it
{
    "configurations": [
        {
            "name": "Win32",
            "includePath": [
                "${workspaceRoot}",
                "C:/MinGW-W64 GCC/mingw64/include/**",
                "C:/MinGW-W64 GCC/mingw64/bin/../lib/gcc/x86_64-w64-mingw32/8.1.0/include/c++",
                "C:/MinGW-W64 GCC/mingw64/bin/../lib/gcc/x86_64-w64-mingw32/8.1.0/include/c++/x86_64-w64-mingw32",
                "C:/MinGW-W64 GCC/mingw64/bin/../lib/gcc/x86_64-w64-mingw32/8.1.0/include/c++/backward",
                "C:/MinGW-W64 GCC/mingw64/bin/../lib/gcc/x86_64-w64-mingw32/8.1.0/include",
                "C:/MinGW-W64 GCC/mingw64/bin/../lib/gcc/x86_64-w64-mingw32/8.1.0/include-fixed",
                "C:/MinGW-W64 GCC/mingw64/bin/../lib/gcc/x86_64-w64-mingw32/8.1.0/../../../../x86_64-w64-mingw32/include"
            ],
            "defines": [
                "_DEBUG",
                "UNICODE",
                "__GNUC__=6",
                "__cdecl=__attribute__((__cdecl__))"
            ],
            "intelliSenseMode": "msvc-x64",
            "browse": {
                "limitSymbolsToIncludedHeaders": true,
                "databaseFilename": "",
                "path": [
                    "${workspaceRoot}",
                    "C:/MinGW-W64 GCC/mingw64/include/**",
                    "C:/MinGW-W64 GCC/mingw64/bin/../lib/gcc/x86_64-w64-mingw32/8.1.0/include/c++",
                    "C:/MinGW-W64 GCC/mingw64/bin/../lib/gcc/x86_64-w64-mingw32/8.1.0/include/c++/x86_64-w64-mingw32",
                    "C:/MinGW-W64 GCC/mingw64/bin/../lib/gcc/x86_64-w64-mingw32/8.1.0/include/c++/backward",
                    "C:/MinGW-W64 GCC/mingw64/bin/../lib/gcc/x86_64-w64-mingw32/8.1.0/include",
                    "C:/MinGW-W64 GCC/mingw64/bin/../lib/gcc/x86_64-w64-mingw32/8.1.0/include-fixed",
                    "C:/MinGW-W64 GCC/mingw64/bin/../lib/gcc/x86_64-w64-mingw32/8.1.0/../../../../x86_64-w64-mingw32/include"
                ]
            }
        }
    ],
    "version": 4
}Then, modify the content in the red box below, changing all paths to your own installation path:
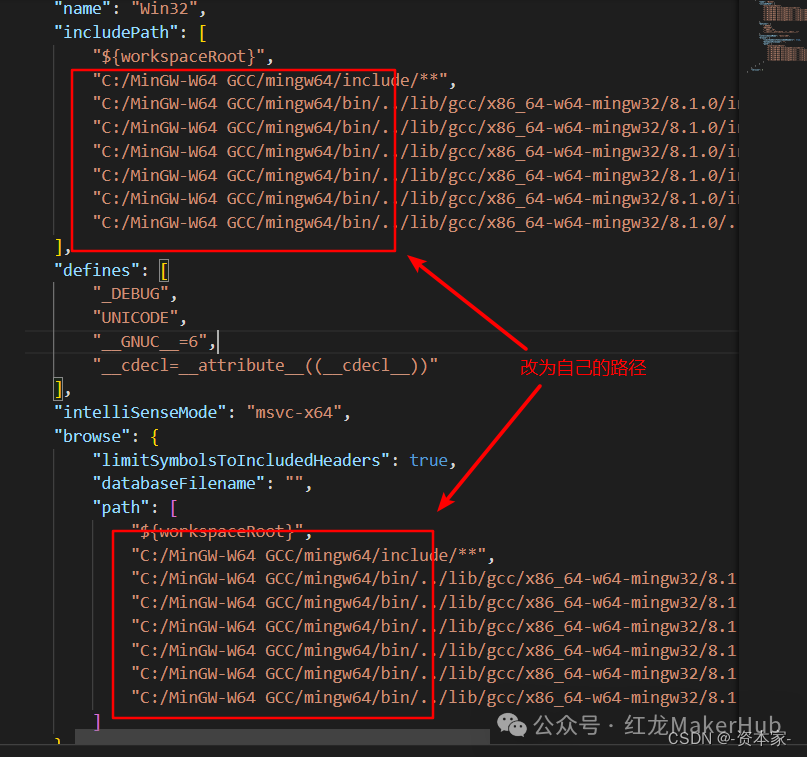
- • launch.json: Copy and paste, and also change the content in the miDebuggerPath attribute to your own path
{
    "version": "0.2.0",
    "configurations": [
        {
            "name": "(Windows) Launch",
            "type": "cppvsdbg",
            "request": "launch",
            "program": "cmd",
            "preLaunchTask": "echo",
            "args": [
                "/C",
                "${fileDirname}\${fileBasenameNoExtension}.exe",
                "&",
                "echo.",
                "&",
                "pause"
            ],
            "stopAtEntry": false,
            "cwd": "${workspaceFolder}",
            "environment": [],
            "console":"externalTerminal"
        },
        {
            "name": "(gdb) Launch",
            "type": "cppdbg",
            "request": "launch",
            "program": "${workspaceFolder}/${fileBasenameNoExtension}.exe",
            "args": [],
            "stopAtEntry": false,
            "cwd": "${workspaceFolder}",
            "environment": [],
            "externalConsole": true,
            "MIMode": "gdb",
            "miDebuggerPath": "C:\MinGW-W64 GCC\mingw64\bin\gdb.exe",// Your computer's gdb
            "preLaunchTask": "echo",// This corresponds to the label in tasks.json
            "setupCommands": [
                {
                    "description": "Enable pretty-printing for gdb",
                    "text": "-enable-pretty-printing",
                    "ignoreFailures": true
                }
            ]

        }
    ]
}- • tasks.json: Copy and paste
{
    // See https://go.microsoft.com/fwlink/?LinkId=733558
    // for the documentation about the tasks.json format
    "version": "2.0.0",
    "tasks": [
        {
            "label": "echo",
            "type": "shell",
            "command": "gcc",
            "args": [
                "-g",
                "${file}",
                "-o",
                "${fileBasenameNoExtension}.exe",
                "-fexec-charset=GBK",// Solve Chinese garbled characters
                "-lstdc++"// Solve the issue of only running C and not C++
            ]
        }
    ],
    "presentation": {
        "echo": true,
        "reveal": "always",
        "focus": false,
        "panel": "shared",
        "showReuseMessage": true,
        "clear": false
    }
}Then you can write programs in the previously created hello.c file, such as the familiar hello world:
#include<stdio.h>
main()
{
    printf("hello world\n");

    //system("pause");
}Program Crash Issue
As long as the three files above are copied correctly and the paths are changed to your own, the crash issue will be resolved
If it still doesn’t work, just add the input
system(“pause”);
F5 run result:
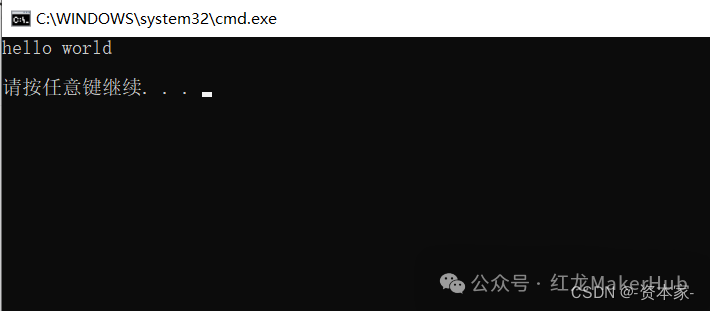
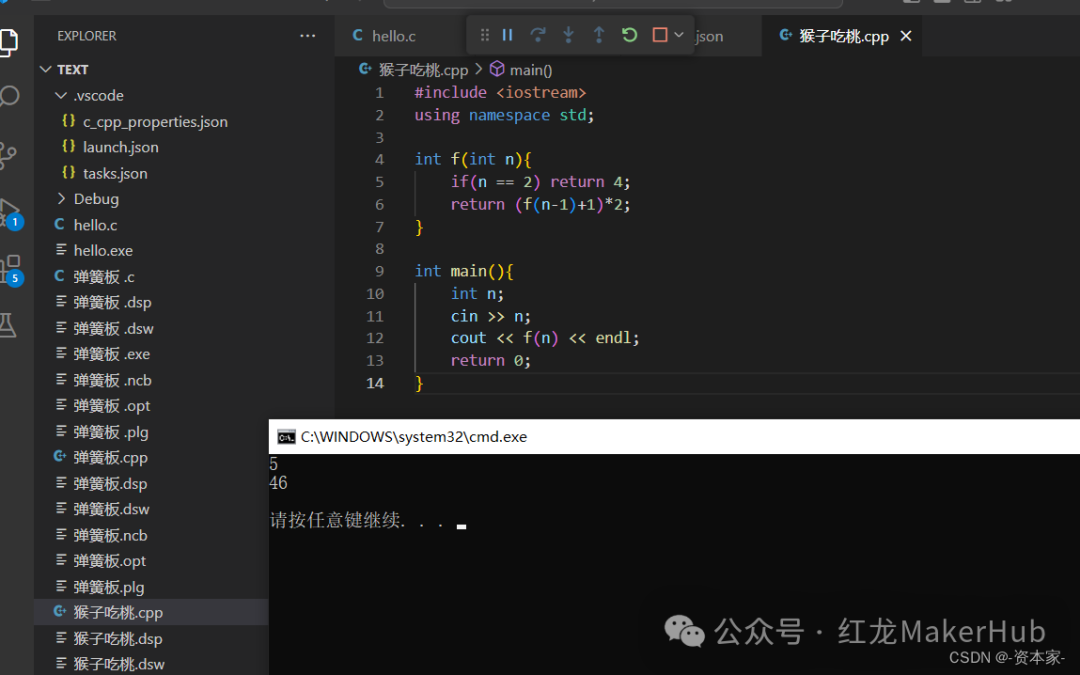
The VSCode configuration for C/C++ environment is complete.