After watching Xunwei’s 2020, what are everyone’s thoughts? The magician was shocked by everyone’s enthusiasm. Those coming for interviews should contact the magician for contact details; those urging the magician to share photos are making it tough for him~ Haha, but back to the point, technical blog posts need to be updated, and the driver topic needs to be written~~
This time we will introduce how to use Buildroot to build an OpenCV development environment. Buildroot is a framework for building embedded Linux systems on the Linux platform. The entire Buildroot consists of Makefile scripts and Kconfig configuration files. It can compile a complete Linux system that can be directly flashed onto a machine using Buildroot configuration and menuconfig modification, just like compiling the Linux kernel.
1. Source Code Download:
Get the source package from the official Buildroot website
http://buildroot.uclibc.org/download.htmlAfter downloading, we place it on Ubuntu and unzip it. The magician is using Ubuntu 12.04.

2. Configuration:
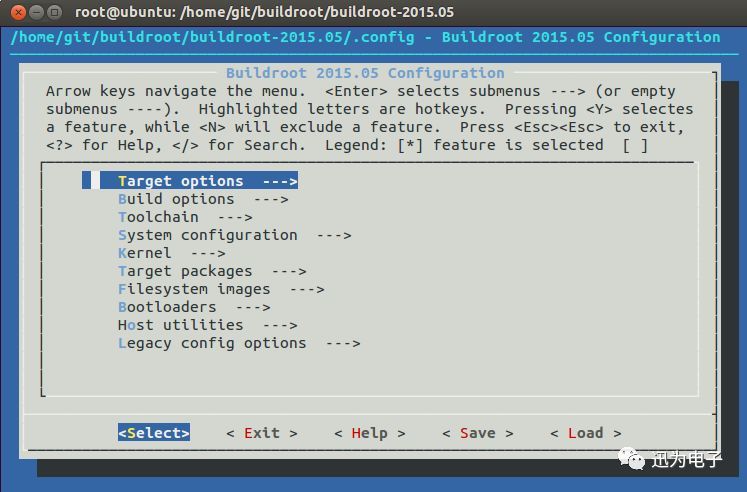
In the Buildroot source package path, execute the command “make menuconfig” to enter the configuration interface, as shown below:
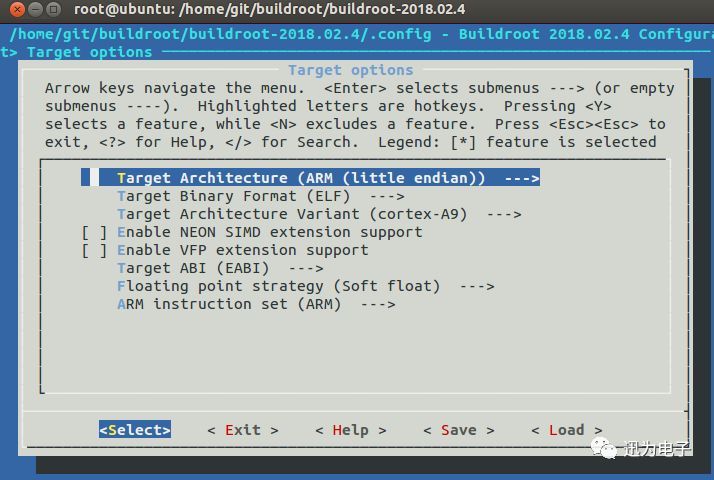
Enter the “Target options” directory, set the Target Architecture to ARM (little endian), the Target Architecture Variant to cortex-A9, the Target ABI to EABI, and the ARM instruction set to ARM. As shown below:
 Go back to the previous interface and enter the Toolchain directory: set the Toolchain type to Buildroot toolchain, then select the version of Linux in Kernel Headers, here select Manually specified Linux version, choose 3.0.x in Custom kernel headers series, and fill in the Linux version in the linux version field. The author uses version 3.0, during compilation, Buildroot will automatically download and install the corresponding toolchain and set the C library to glibc. Enable MMU support and Enable C++ support. As shown below:

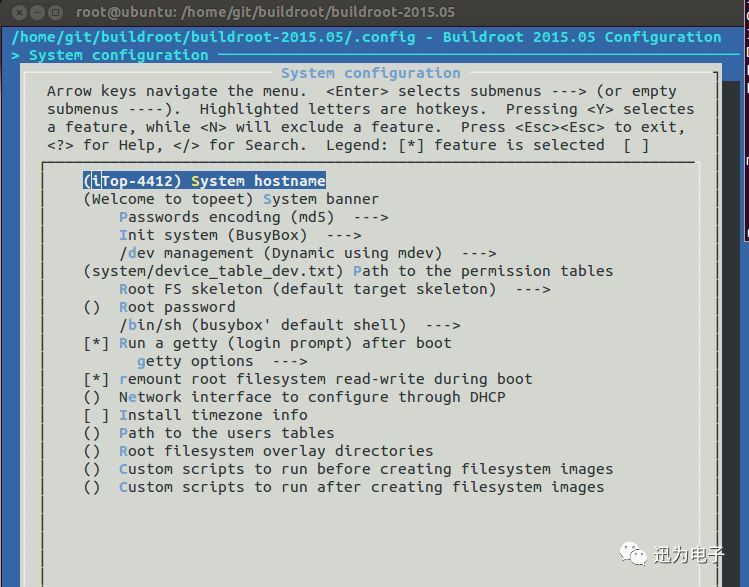
Return to the previous interface, enter the System configuration interface, and in the System hostname field, input the name of the development board, such as iTop-4412. In the Init system, select BusyBox, in /dev management select Dynamic using mdev, which dynamically loads device nodes using mdev, and then in Path to the permission tables select the configuration table for device nodes; here we must select system/device_table_dev.txt, otherwise various device nodes will not be generated in the dev directory later. Of course, we can also manually configure this file, adding necessary nodes or deleting unnecessary ones. The Root password is the password for entering the Linux console terminal; if left empty, no password is required to log in. Here we set it to topeet, and the default login username is root. As shown below:
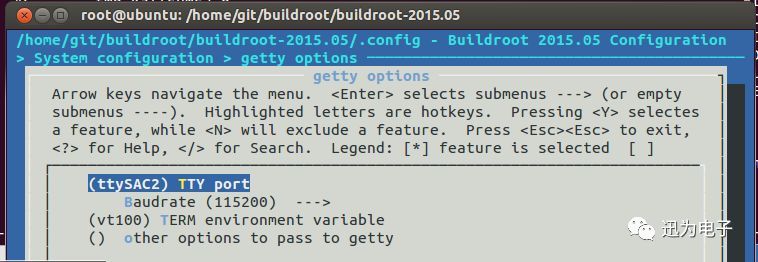
Select Run a getty (login prompt) after boot, then enter the getty options: set the TTY port to ttySAC2 and the baud rate to 115200, corresponding to the console print serial port of the iTop4412 development board.
Other development board console serial ports are:
4418-ttyAMA0
6818-ttySAC0
iMX6Q & iMX6UL-ttymxc0
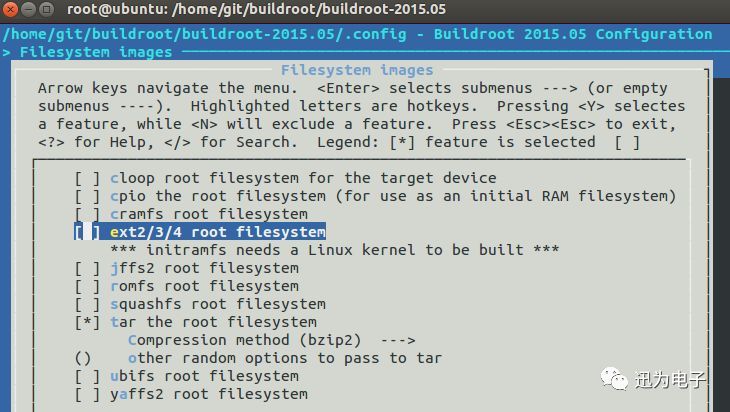
Return to the previous layer, then continue to return to the previous interface, enter the Filesystem images directory, and select tar the root filesystem, as shown below:
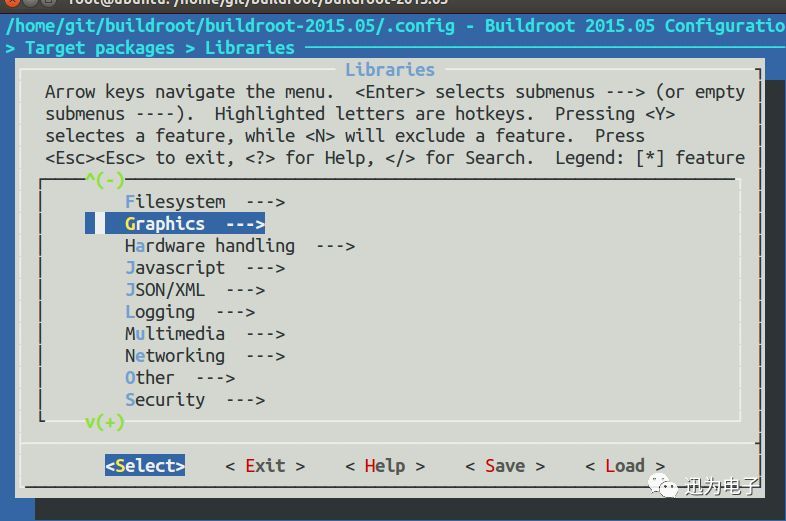
Return to the previous layer, enter the “Target packages” directory, as shown below:

Enter “Libraries”, as shown below:
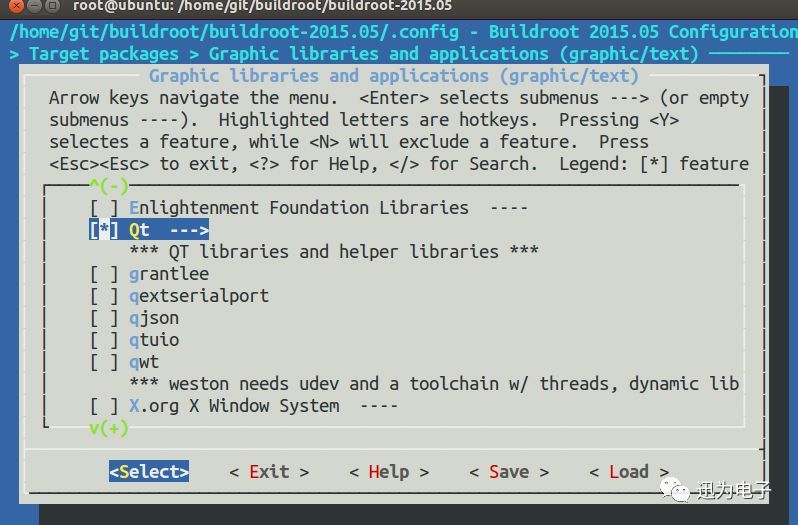
Enter “Graphics” and select “opencv”, as shown below:

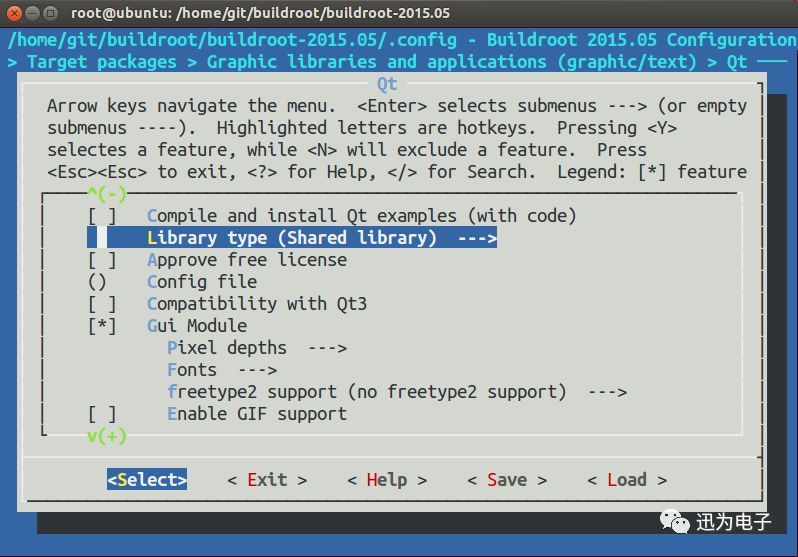
Then return to “Target packages”, enter the path shown in the image, and select “Qt”, as shown below:
Enter “Qt” and select “Gui Module”, as shown below:
3. Compile and Generate File System Image
Compile Buildroot by directly executing make in the Buildroot root directory. The first compilation process requires automatic downloading of some tools, so keep the Ubuntu system connected to the internet; it will take some time.
After compilation, enter the output directory; target is the file system generated by our compilation. Of course, Buildroot will package it into related images, but the format types (configured in the “Filesystem images” directory under “menuconfig”) are limited. The images will be placed in the image directory; we will return to the output directory.
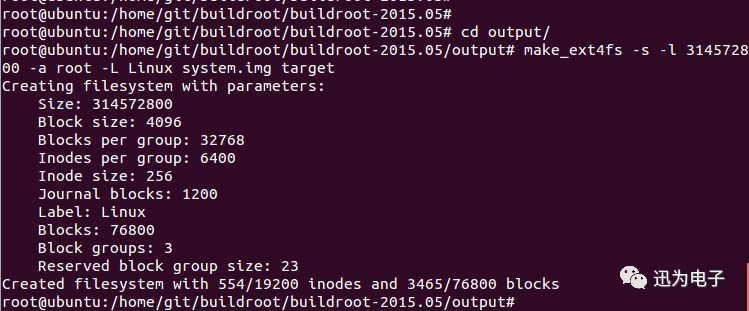
The iTop-4412 uses the command “make_ext4fs -s -l 314572800 -a root -L Linuxsystem.img target/” to generate the file system image. Other development boards can use compression commands to package into the corresponding format.
4. Kernel Configuration
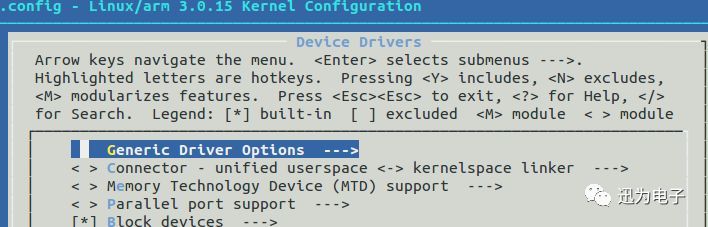
This part can be skipped for 4418, 6818, and imx6ul default configurations (4412 and imx6q default configurations are not available). Taking 4412 as an example, we enter the kernel directory, go to the 4412 kernel directory, and use make menuconfig to configure the kernel. Enter Device Drivers, then enter Generic Driver Options, as shown below:
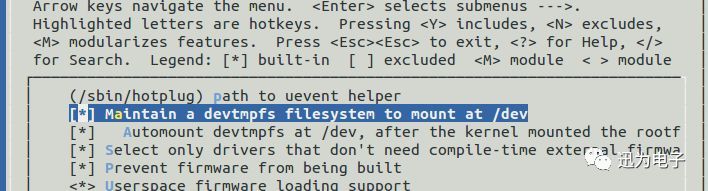
Then select Maintain a devtmpfs filesystem to mount at /dev, and then select Automount devtmpfs at /dev, after the kernel mounted the root, as shown below:
5. Testing
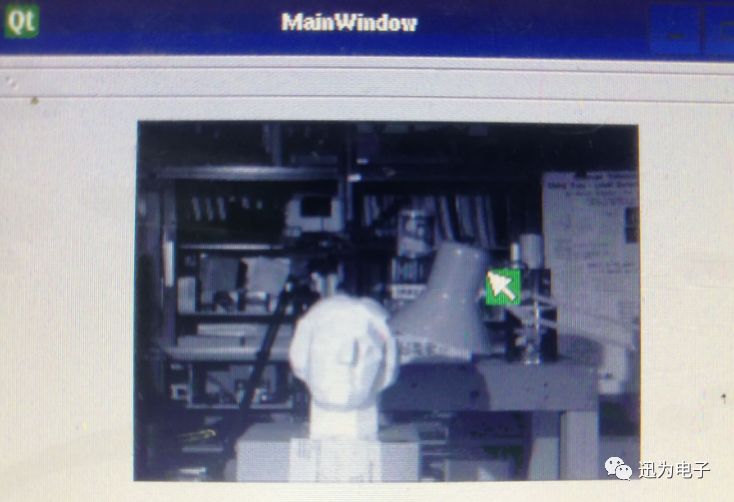
We flash the compiled file system into the development board, then copy the QT test program and test images into the development board. Running the program, we can see that it has executed successfully, as shown below:
6. Obtaining Information
Reply with the keyword “opencv” in the backend to obtain the Baidu Netdisk download link. Those in need can download it themselves:


■ Follow the “Xunwei Electronics” WeChat public account for periodic sharing of tutorials, materials, industry insights, and frontline product information.
■ For more information about Xunwei, feel free to contact us:
Sales Engineer: 0312-6796610 ext. 8001
Technical Support: 0312-6796610 ext. 8003, 8004
Custom Solutions: 0312-6796610 ext. 8003
■ Real-time Technical Support:
AM 9:00—12:00, PM 13:30—17:30 (Monday to Saturday)
END
Long press to recognize the QR code to follow

Xunwei Electronics
Making Learning Easier, Making Development Simpler
