/ Basics of Arduino Programming /
Using C++ programming, basic reference to C++ syntax.
Each statement ends with a semicolon, comments use //, uppercase words are special characters and should not be misused. Functions are enclosed in {}.
void setup() {  // put your setup code here, to run once:    // This code runs once at the start    code doing something;  // Each line of code ends with a semicolon
}
void loop() {  // put your main code here, to run repeatedly:    // This code runs in a loop
}
Online learning resources for C++
https://www.bilibili.com/video/BV1et411b73Z
Arduino statement function library reference
http://www.taichi-maker.com/homepage/reference-index/arduino-code-reference/
https://docs.arduino.cc/language-reference/
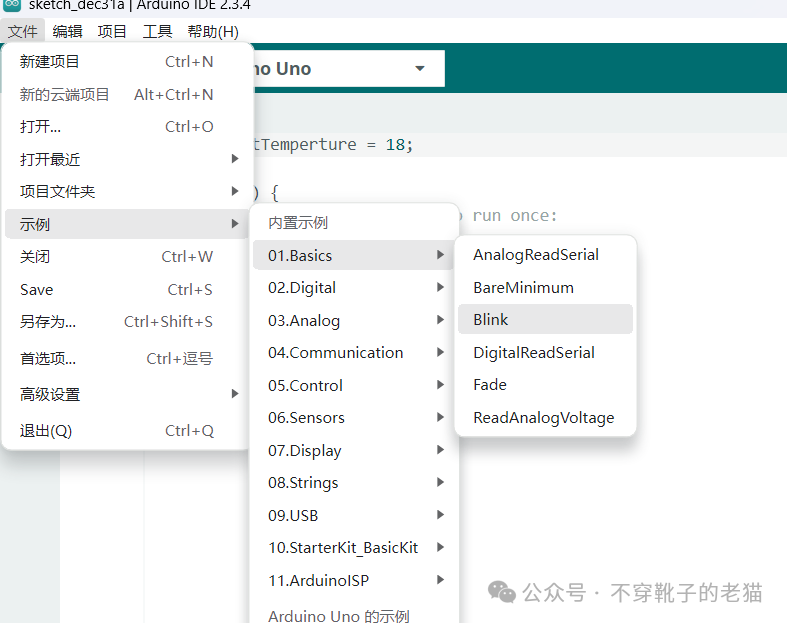
1
Example Program Blink
1.1
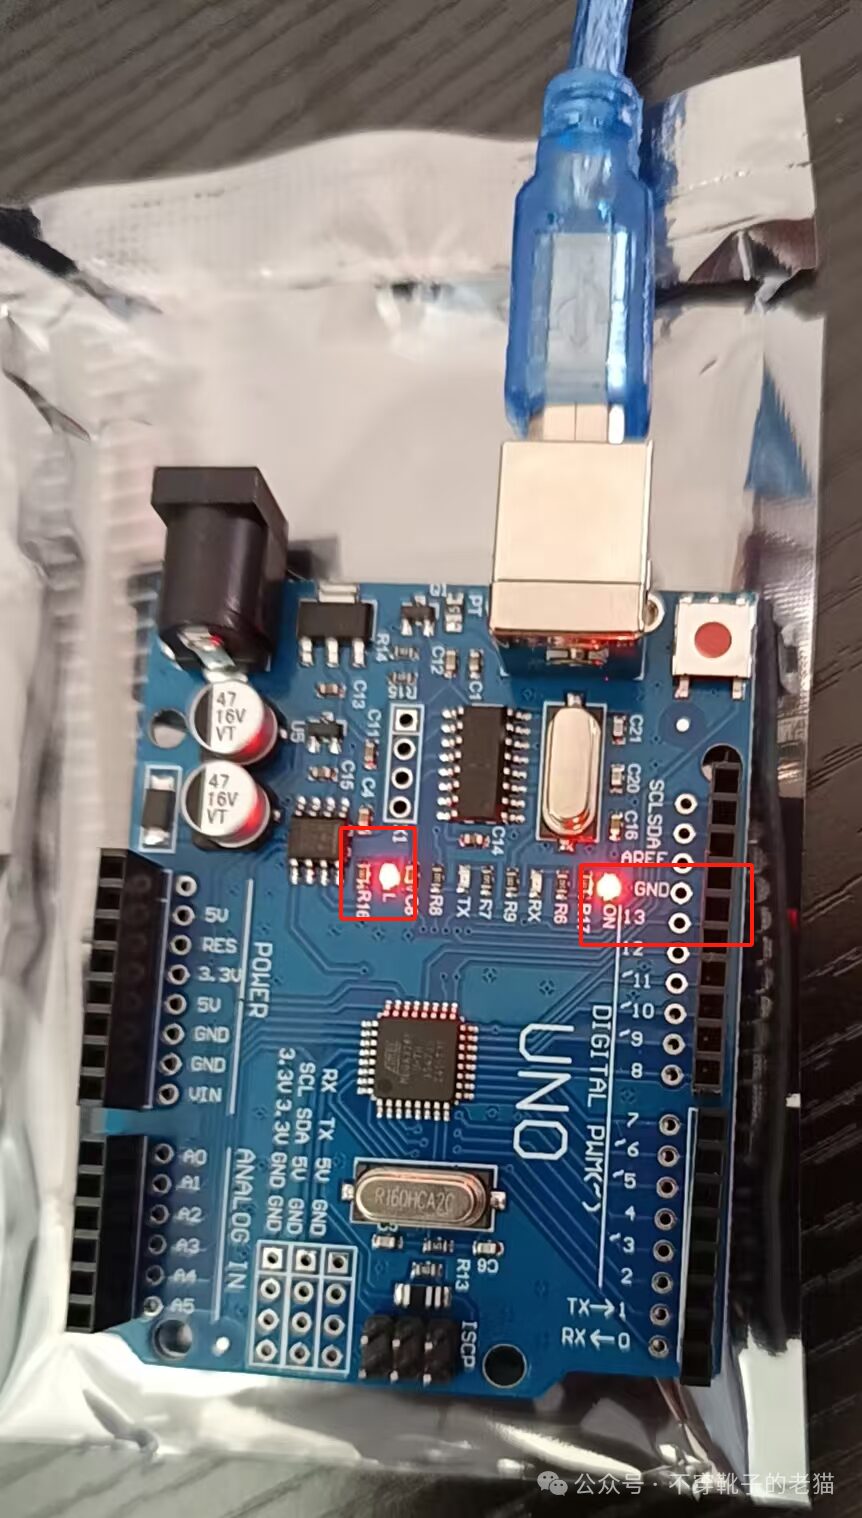
Turn on the LED
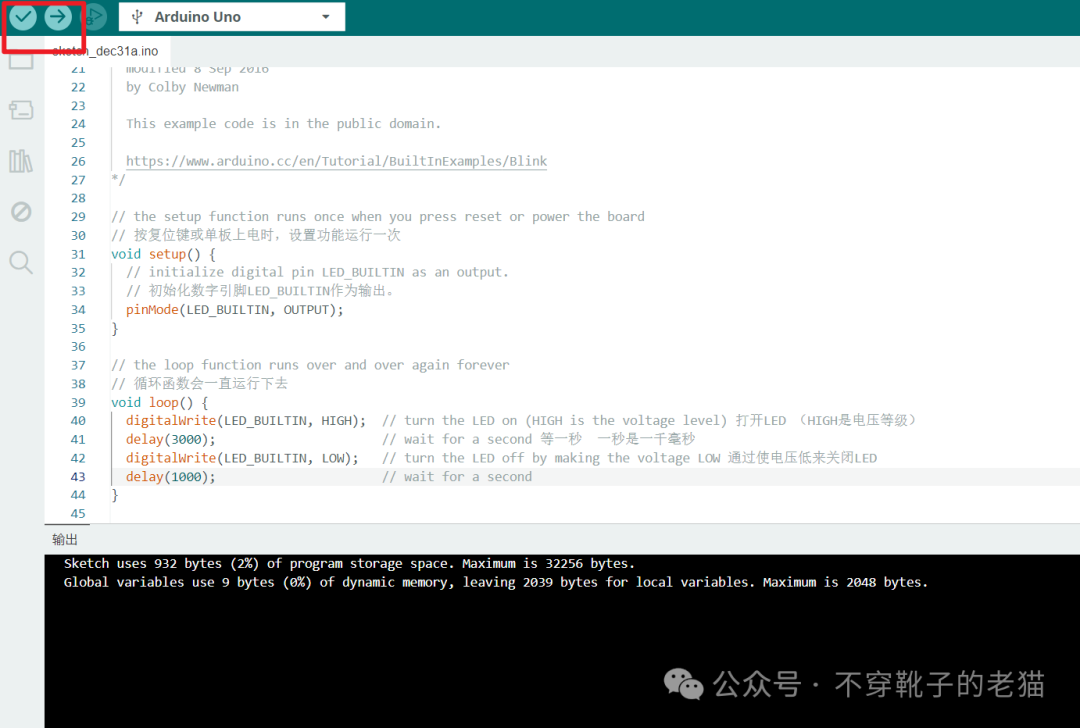
/*  Blink
  Turns an LED on for one second, then off for one second, repeatedly.  Most Arduinos have an on-board LED you can control. On the UNO, MEGA and ZERO it is attached to digital pin 13, on MKR1000 on pin 6. LED_BUILTIN is set to the correct LED pin independent of which board is used.  If you want to know what pin the on-board LED is connected to on your Arduino model, check the Technical Specs of your board at:  https://www.arduino.cc/en/Main/Products
  modified 8 May 2014  by Scott Fitzgerald  modified 2 Sep 2016  by Arturo Guadalupi  modified 8 Sep 2016  by Colby Newman
  This example code is in the public domain.
  https://www.arduino.cc/en/Tutorial/BuiltInExamples/Blink*/
// the setup function runs once when you press reset or power the board
void setup() {  // initialize digital pin LED_BUILTIN as an output.  pinMode(LED_BUILTIN, OUTPUT);}
// the loop function runs over and over again forever
void loop() {  digitalWrite(LED_BUILTIN, HIGH);  // turn the LED on (HIGH is the voltage level)  delay(1000);  // wait for a second  digitalWrite(LED_BUILTIN, LOW);   // turn the LED off by making the voltage LOW  delay(1000);  // wait for a second}
Click upload after compiling
1.2
Try modifying variables
int delaytime = 3000;
void setup() {  // initialize digital pin LED_BUILTIN as an output.  pinMode(LED_BUILTIN, OUTPUT);}
// the loop function runs over and over again forever
void loop() {  delaytime = delaytime + 1000;  digitalWrite(LED_BUILTIN, HIGH);  delay(3000);  digitalWrite(LED_BUILTIN, LOW);  delay(delaytime);}
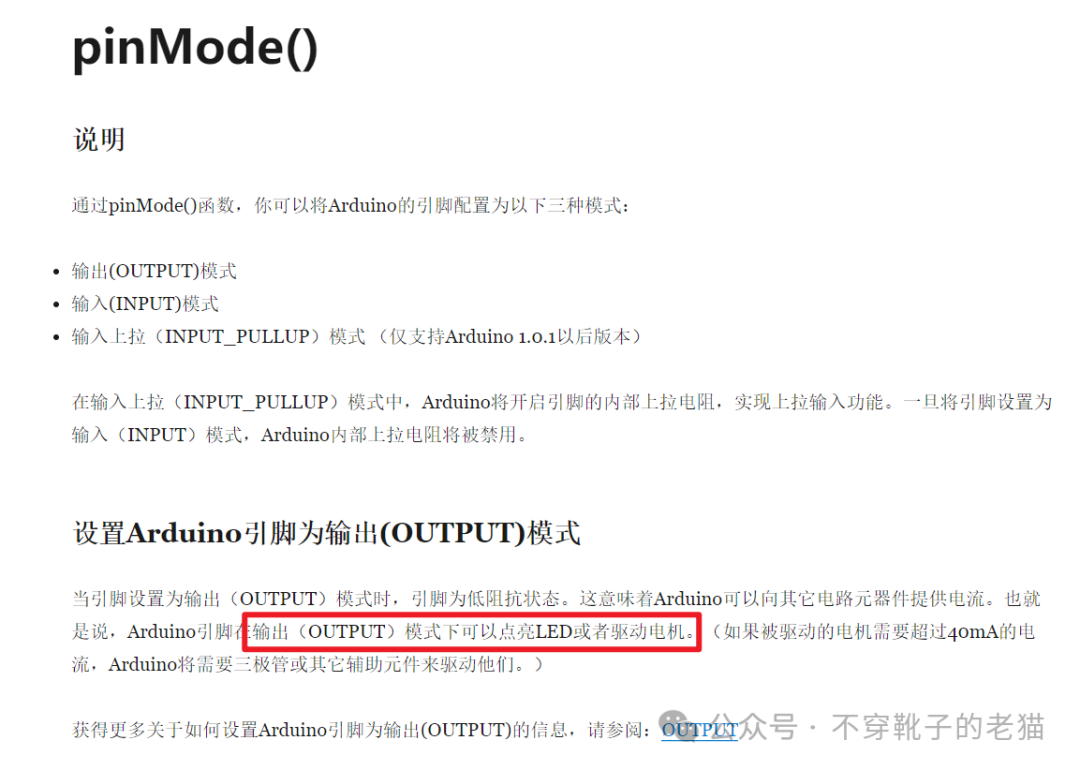
1.3
pinMode function and digitalWrite function
So the original code can also be written as
int delaytime = 100;
int LED_pin = 13; // On the UNO, MEGA and ZERO it is attached to digital pin 13
void setup() {  // initialize digital pin LED_BUILTIN as an output.  pinMode(LED_pin, OUTPUT);}
// the loop function runs over and over again forever
void loop() {  digitalWrite(LED_pin, HIGH);  delay(delaytime);  digitalWrite(LED_pin, LOW);  delay(delaytime);}