Click on the blue text above to follow us.

1. Check if virtualization is enabled for the virtual machine
Reference: VBoxManage error: VT-x is not available (VERR_VMX_NO_VMX)
First, install cpu-check and obtain the kvm-ok command:
sudo apt-get install cpu-checkerRun the following command to check if KVM is supported:
sudo kvm-ok(1) If not enabled, it will display (continue to the second step):

(2) If already enabled, it will display (end):

2. Enable the virtualization engine
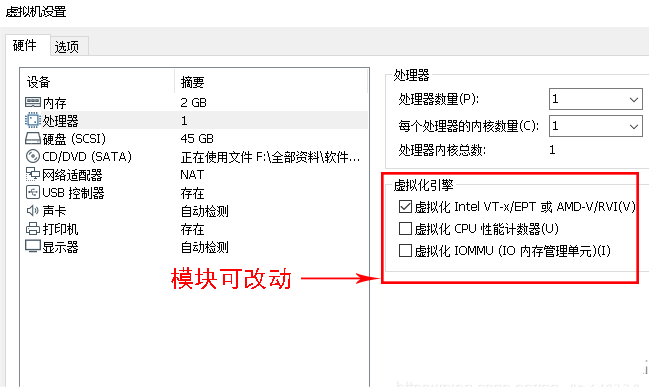
(2) If it fails to start, reporting that this platform does not support virtualization Intel VT-x/EPT (continue to the third step): check if the host CPU has virtualization enabled.
3. Check if the host CPU has virtualization enabled
Press win+r to search for taskmgr to enter the task manager, as shown in the image below, to check if the CPU has virtualization enabled:
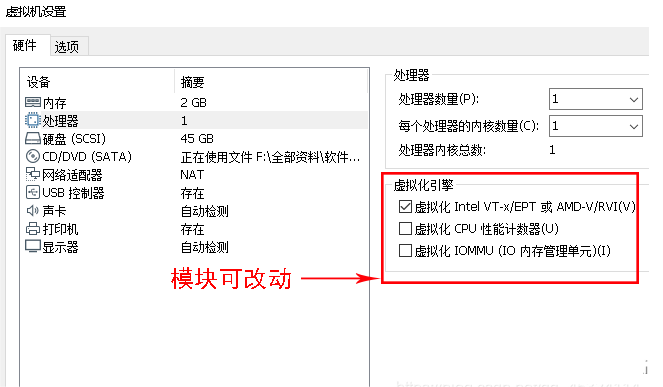
(1) If not enabled, please refer to this blog to enable CPU virtualization in BIOS: Resolving the VM-Enable Virtualization Intel-VT-x/EPT or AMD-V/RVI issue (V) after which the computer blue screens and restarts or shows this platform does not support virtualization issues (Win10).
(2) If enabled, continue to step four.
4. Disable Windows kernel isolation
Reference: Summary answers to issues regarding “VMware Workstation 16 This platform does not support Intel VT-x/EPT virtualization. Do you want to continue without Intel VT-x/EPT virtualization?”.
This blogger has explained why kernel isolation is necessary.
Search for “kernel isolation” using win+s and turn off kernel isolation, as shown in the image below:
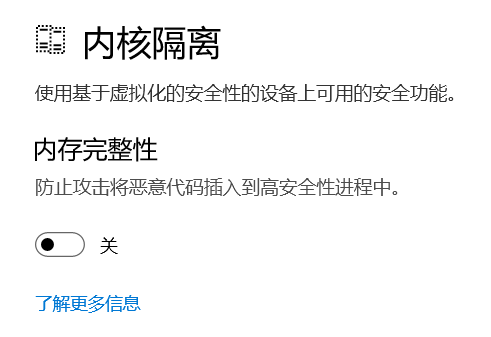
Then restart the computer.
Then start the virtual machine again:
(1) If it starts successfully (go back to step one): check if kvm-ok;
(2) If it fails to start (continue to step five): disable all Windows features that conflict with VMware virtualization.
5. Disable conflicting Windows virtualization features
Search for “Turn Windows features on or off” and disable all related features:
Including Hyper-V, Windows Hypervisor Platform, Windows Subsystem for Linux, Virtual Machine Platform, etc.
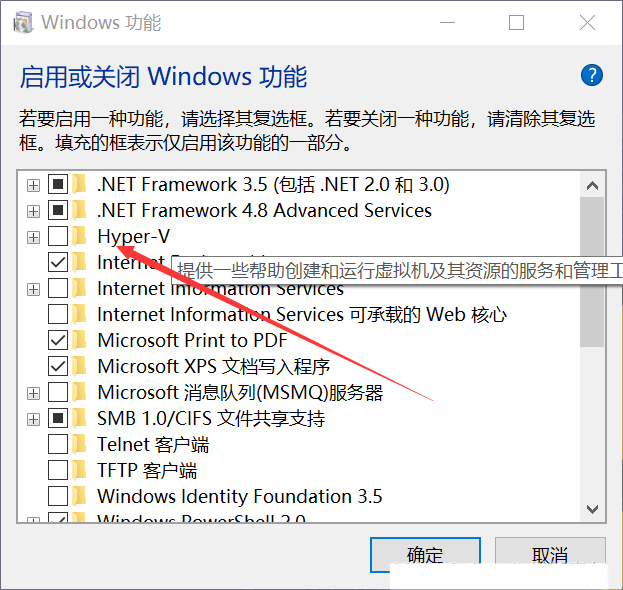
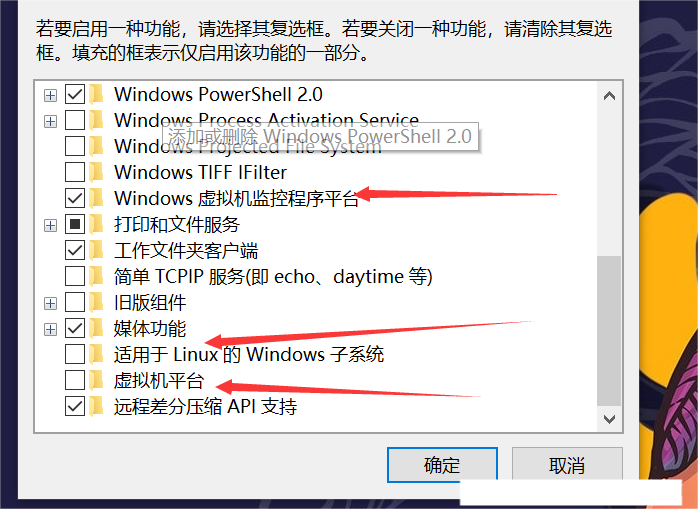
After disabling the features, you will be prompted to restart the system, choose to restart.
Then start the virtual machine again:
(1) If it starts successfully (go back to step one): check if kvm-ok;
(2) If it fails to start (continue to step six): disable Device Guard.
6. Disable Device Guard
This step is rarely mentioned in online tutorials, but the effect is immediate.
Sometimes if the virtual machine cannot be opened, disabling Device Guard is necessary.
1. If during the previous steps, a page as shown in the image below appears upon restart, press the win key or Fn+F3 key to disable Device Guard.
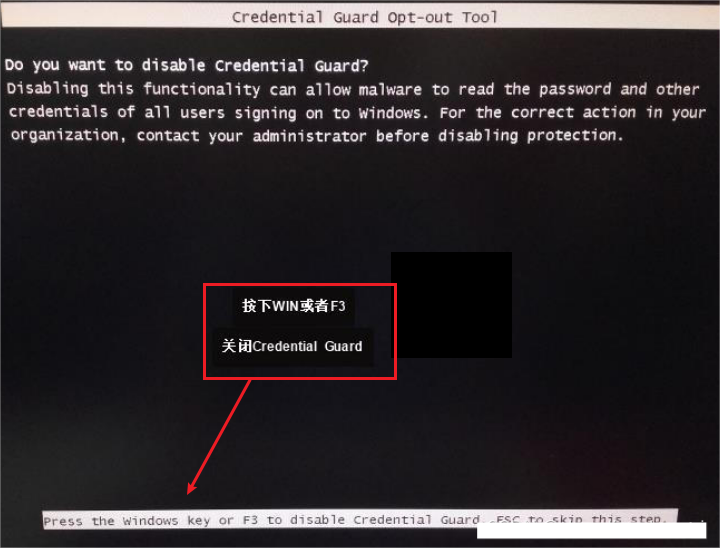
2. If the above image does not appear during the restart in the previous steps, refer to this article to actively disable Device Guard and bring up the above image: 【Experience】Windows Update 20H2|VMware cannot be used|Disable Device Guard.
The disabling method in this blog refers to Microsoft’s official steps for disabling Device Guard: MSDN – “Manage Windows Defender Credential Guard”, so generally you can use it with confidence.
Then start the virtual machine again:
1. If it starts successfully (go back to step one): check if kvm-ok;
2. If it fails to start, I have no more solutions. For me, disabling Device Guard allowed it to work.


Disclaimer: Content sourced from the internet, thanks for the contributions. Please contact us for any copyright issues.